Asian Chicken Lettuce Cups Flavorful Weeknight Meal

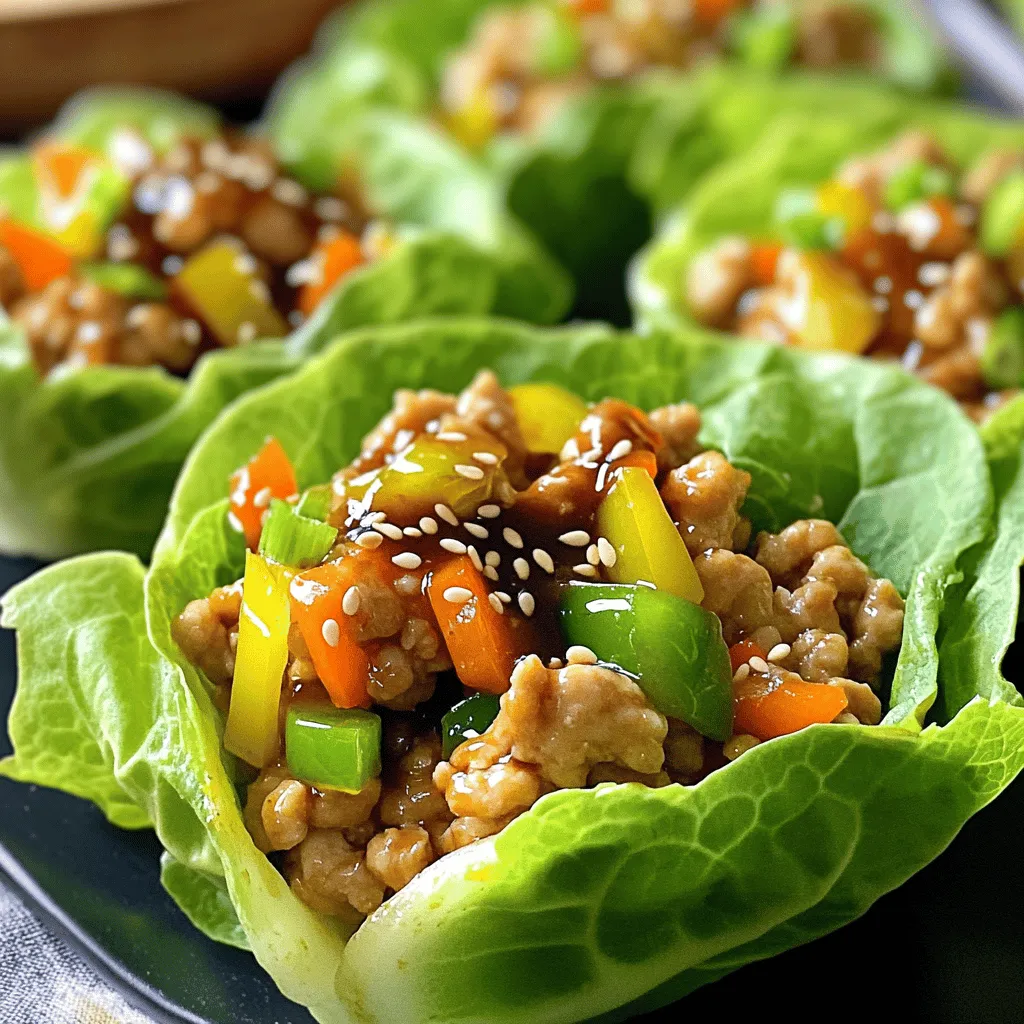
Looking for a quick and tasty dinner idea? Asian Chicken Lettuce Cups are your answer! This dish bursts with flavor and takes just minutes to prepare. With ground chicken, fresh veggies, and savory sauces, you can create a healthy meal that the whole family will love. Let me guide you step-by-step through this delightful recipe that transforms your weeknight dinners into something special. Get ready to impress!
Ingredients
Main Ingredients
- 1 pound ground chicken
- 1 tablespoon sesame oil
- 2 cloves garlic, minced
- 1 inch fresh ginger, finely grated
Vegetables
- 1 small bell pepper, finely diced (any color)
- 1 medium carrot, grated
- 3 green onions, sliced (reserve half for garnishing)
Sauces and Seasonings
- 1/4 cup soy sauce (low-sodium if preferred)
- 2 tablespoons hoisin sauce
- 1 tablespoon rice vinegar
- 1 teaspoon sriracha (adjust to suit your spice preference)
When making Asian Chicken Lettuce Cups, the ingredients are key. Each one adds its own flavor. Ground chicken serves as the main protein. It cooks quickly and absorbs flavors well. The sesame oil adds a nice touch of nuttiness. Garlic and ginger provide a fresh, zesty kick.
For the vegetables, bell pepper, carrot, and green onions brighten the dish. They give it color and crunch. You can choose any bell pepper color you like. The grated carrot adds sweetness. Green onions bring a mild onion flavor.
The sauces and seasonings are where the magic happens. Soy sauce gives a savory base. Hoisin sauce adds sweetness and depth. Rice vinegar brings acidity, balancing the flavors. Sriracha adds heat, which you can adjust to your taste.
This mix of ingredients makes for a tasty and fun meal.
Step-by-Step Instructions
Cooking the Chicken
To start, heat sesame oil in a large skillet over medium-high heat. Wait until the oil shimmers. Then, add minced garlic and grated ginger. Sauté this mix for about 30 seconds. When it smells great and turns light gold, it’s ready.
Next, add the ground chicken to the skillet. Break it into smaller pieces with a spatula. Cook this for about 5-7 minutes. You want the chicken to brown and be fully cooked.
Combining Ingredients
Once the chicken is cooked, it’s time to add some color. Toss in the finely diced bell pepper, grated carrot, and half of the sliced green onions. Cook this mix for another 3-4 minutes. The veggies should be tender and bright.
Now, let’s make it saucy! In a separate bowl, mix soy sauce, hoisin sauce, rice vinegar, and sriracha. Stir until smooth, then pour this sauce over the chicken and veggies in the skillet. Toss everything together well. Heat it for 2-3 more minutes until everything is warm.
Assembling Lettuce Cups
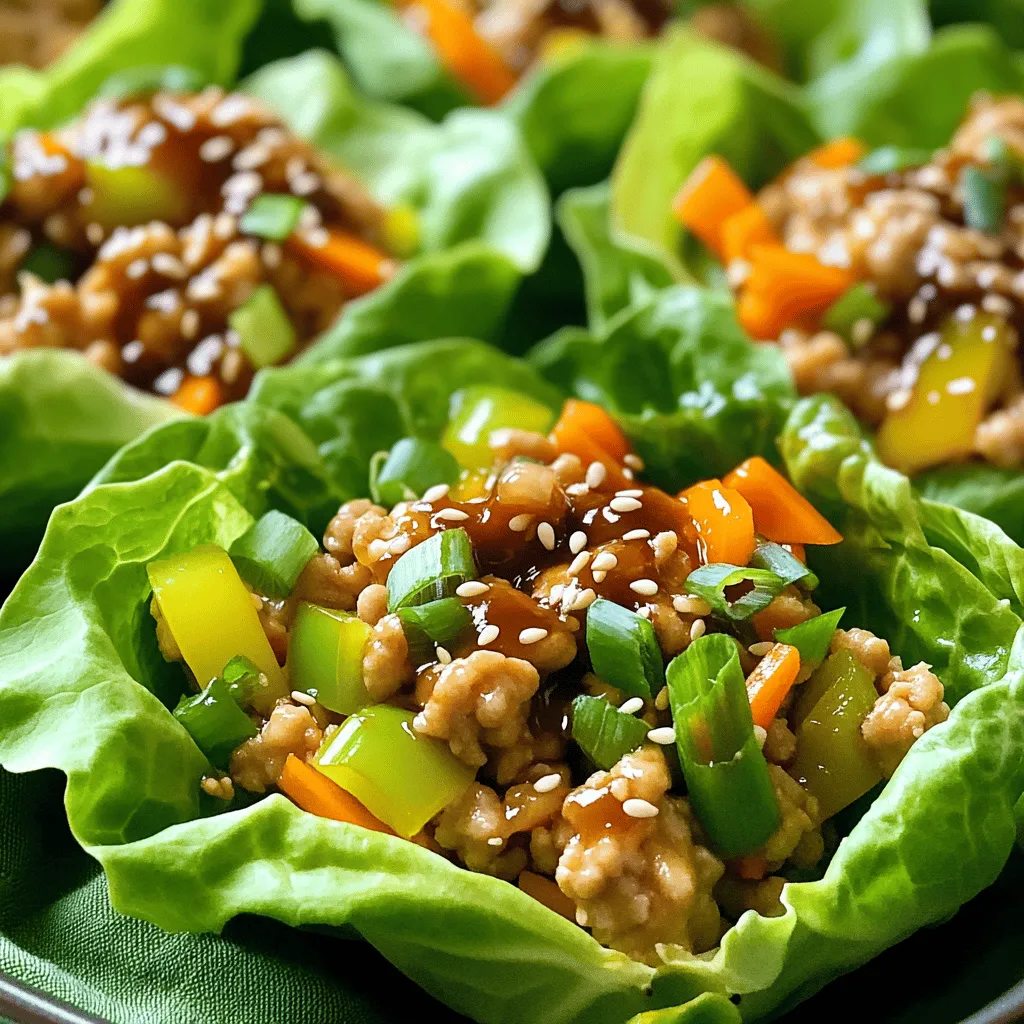
After cooking, remove the skillet from heat and let it cool a bit. It’s time to assemble your cups! Take a piece of lettuce and spoon a generous amount of the chicken mixture into the center. The edges of the lettuce will fold up to hold your filling.
Last, sprinkle sesame seeds and the remaining sliced green onions on top of each cup. These small touches add flavor and make them look great.Enjoy your cooking!
Tips & Tricks
Cooking Tips
To achieve the perfect sauté, heat your skillet first. Use medium-high heat and add sesame oil. Wait for it to shimmer before adding garlic and ginger. This helps release their flavors. Sauté them for about 30 seconds. You want them fragrant and lightly golden.
Ensuring chicken is cooked thoroughly is key. When you add the ground chicken, break it up with a spatula. Stir and cook for about 5-7 minutes. The chicken should be browned with no pink spots. This ensures it’s safe to eat.
Customization Options
You can adjust spice levels with sriracha. If you like it hot, add more sriracha. For less heat, just use a little. You can also serve it on the side. This way, each person can add their preferred amount.
For vegetarian alternatives, try using tofu or mushrooms. Crumble firm tofu into the skillet as you would with chicken. Or, chop mushrooms finely and sauté them until soft. Both options offer great texture and flavor.
Serving Suggestions
Pairing with rice or noodles makes this meal heartier. Serve the chicken mixture on a bed of fluffy rice. You can also use rice noodles for a fun twist.
Best side dishes to complement include a simple cucumber salad or steamed broccoli. Both add freshness and crunch. They balance the rich flavors of the lettuce cups.

Variations
Different Proteins
You can easily switch up the protein in this dish. Ground turkey or beef works well. These meats bring their own flavors and texture. If you prefer seafood, diced shrimp is a tasty option too. Simply cook it until it’s pink and firm, then mix it with the veggies and sauce.
Flavor Enhancements
Want to add more crunch? Toss in some chopped nuts like cashews or peanuts. They give a nice texture contrast. You can also try different sauces. Peanut sauce adds a rich, nutty flavor. Teriyaki sauce brings a sweet and savory twist. Experiment to find your perfect flavor combo!
Dietary Adaptations
If you need gluten-free options, choose tamari instead of soy sauce. This keeps the dish tasty without gluten. You can also make it low-carb. Use sturdy lettuce like romaine or even cabbage. These options hold the filling well and add a nice crunch.
Storage Info
Refrigeration Guidelines
To store leftover filling, place it in an airtight container. Make sure it cools down first. This filling stays fresh in the fridge for about three days. For lettuce cups, keep the filling separate from the lettuce. Wrap the lettuce leaves in a damp paper towel. This keeps them crisp and fresh longer.
Freezing Instructions
You can freeze the filling, but do not freeze the completed cups. Place the cooled filling in a freezer-safe bag. Remove as much air as possible before sealing. The filling can last up to three months in the freezer. When ready to use, thaw it in the fridge overnight.
Reheating Tips
To reheat, place the filling in a skillet over medium heat. Stir until it’s hot throughout. Avoid using the microwave, as it can make the filling soggy. To keep the lettuce fresh, reheat only what you need. Prepare fresh lettuce cups for every meal to enjoy their crunch.
FAQs
How long do Asian Chicken Lettuce Cups last in the fridge?
Asian Chicken Lettuce Cups can last up to three days in the fridge. Store the chicken mixture in a sealed container. Keep the lettuce leaves separate to stay crisp.
Can I make the chicken mixture ahead of time?
Yes, you can make the chicken mixture ahead of time. Prepare it the night before, cool it, and store it in the fridge. This saves time during busy weeknights.
What type of lettuce is best for lettuce cups?
Butter lettuce or iceberg lettuce works best. Both have a nice shape and a crisp texture. They hold the filling well and add a fresh crunch.
How many servings does this recipe yield?
This recipe yields four servings. You can easily adjust the recipe to serve more people. Just double the ingredients for larger gatherings or family meals.
Can I substitute ground chicken with something else?
Absolutely! You can use ground turkey, beef, or even diced tofu. Each option offers a unique flavor and texture. Feel free to experiment with what you have on hand.Enjoy cooking!
This blog post guides you through making Asian Chicken Lettuce Cups. You learned about the key ingredients like ground chicken, sesame oil, and fresh veggies. I provided a clear step-by-step method to cook and assemble the cups. You also gained tips for cooking and customizing your dish.
In the end, making these cups is fun and flexible. You can adapt the recipe to suit your taste. Enjoy creating a meal that is both delicious and healthy!


![To make this dish, you will need: - 1 lb Brussels sprouts, trimmed and halved - 3 tablespoons extra virgin olive oil - 1/4 cup pure maple syrup - 1 tablespoon balsamic vinegar - 1 teaspoon garlic powder - Salt and freshly ground black pepper to taste These ingredients come together to create a sweet and savory glaze. The maple syrup adds sweetness, while the balsamic vinegar gives tanginess. The olive oil helps with roasting, making the sprouts tender and tasty. You can add these optional ingredients for extra flavor and texture: - 1/4 cup chopped walnuts - Fresh thyme leaves for garnish Walnuts add a nice crunch, while thyme gives a fresh aroma. Both options enhance the dish without overpowering it. This dish is not just tasty; it’s also good for you. Here’s a quick look at the nutrition per serving: - Calories: About 180 - Protein: 3g - Carbohydrates: 25g - Fat: 8g - Fiber: 4g Brussels sprouts are rich in vitamins C and K. The maple syrup provides natural sugars, making this dish a healthy choice. You get great flavors and health benefits in one meal. For the complete recipe, check the Full Recipe section above! First, we need to preheat the oven to 400°F (200°C). This heat is perfect for roasting. A hot oven ensures crispy edges and tender centers for your Brussels sprouts. Next, gather your ingredients. You will need: - 1 lb Brussels sprouts, trimmed and halved - 3 tablespoons extra virgin olive oil - 1/4 cup pure maple syrup - 1 tablespoon balsamic vinegar - 1 teaspoon garlic powder - Salt and freshly ground black pepper to taste - 1/4 cup chopped walnuts (optional for crunch) - Fresh thyme leaves for garnish (optional for aroma and color) In a large bowl, mix the halved Brussels sprouts with olive oil, maple syrup, balsamic vinegar, garlic powder, salt, and pepper. Toss everything well. Make sure every sprout gets coated in the sweet and savory sauce. This step is key for flavor. Prepare your baking sheet by lining it with parchment paper. This makes cleaning easy and helps prevent sticking. Spread the Brussels sprouts in a single layer on the sheet. Give them space to roast well. Now, place the baking sheet in the hot oven. Roast the sprouts for 25 minutes. Halfway through, stir them to promote even cooking. You want them to get tender and brown. If you add walnuts, toss them on the sheet during the last 5 minutes. This will give them a nice toast and extra crunch. Once done, take the Brussels sprouts out and let them cool for a minute. Transfer them to a serving dish. For a finishing touch, sprinkle fresh thyme leaves on top. This adds a nice pop of color and aroma to your dish. Enjoy this full recipe for a delicious treat! To get that perfect glaze, start with good maple syrup. Use pure maple syrup for the best flavor. Mix it well with olive oil and balsamic vinegar; this combo really shines. Make sure to coat the Brussels sprouts evenly. This helps each piece get that sweet, sticky glaze. Toss them well in the bowl before roasting. Roasting Brussels sprouts needs some care. First, preheat your oven to 400°F (200°C). This hot oven helps them caramelize. Spread the sprouts on a baking sheet in a single layer. If they are crowded, they won't brown well. Stir them halfway through cooking to ensure even roasting. You want them golden brown and tender, about 25 minutes in the oven. When ready to serve, think about how to make them look nice. Place the roasted sprouts on a large platter. You can arrange them in a circle for a pretty look. If you added walnuts, sprinkle them on top for crunch. Fresh thyme leaves also add color and smell great. This makes the dish not just tasty but beautiful too. For the full recipe, check out the details above. {{image_4}} You can switch up the sweetener for a twist. Try honey or agave syrup. These will add their own unique flavors. You can also use coconut sugar for a richer taste. If you like a kick, add some chili flakes for heat. A dash of orange juice can also brighten up the sweetness. This recipe is already vegetarian. To make it vegan, ensure the maple syrup is pure. You can also use almond oil instead of olive oil for a different flavor. For creaminess, add a dollop of vegan sour cream on top before serving. This adds a lovely tang that pairs well with the sweetness. Seasonal swaps can make this dish even better. In spring, add fresh peas for color and sweetness. During fall, toss in some diced apples for a sweet crunch. In winter, try adding roasted chestnuts for a nutty flavor. These changes keep the dish fresh and exciting every time you make it. For the full recipe, you can refer back to the detailed instructions provided. After enjoying your maple glazed Brussels sprouts, store any leftovers in an airtight container. This keeps them fresh and prevents odors. Let them cool first before sealing. Place the container in the fridge. They stay good for about 3 to 5 days. If you want to keep them longer, consider freezing. Reheating your Brussels sprouts can be quick and easy. You can use the oven or stovetop. If you use the oven, preheat it to 350°F (175°C). Spread the sprouts on a baking sheet and heat for about 10-15 minutes. Stir halfway through to ensure even warming. If you prefer the stovetop, heat a pan over medium heat. Add a bit of olive oil and toss the sprouts until warmed through. Freezing Brussels sprouts is a smart way to save them for later. First, blanch them in boiling water for 3 minutes. Then, cool them in ice water. This keeps their bright color and flavor. Drain and dry the sprouts, then place them in a freezer bag. Remove as much air as you can before sealing. They can last up to 6 months in the freezer. When you're ready to use them, just thaw and reheat! Enjoy your deliciously roasted maple glazed Brussels sprouts from [Full Recipe] and savor every bite! Yes, you can prep Brussels sprouts in advance. Trim and halve them a day before. Store them in an airtight container in the fridge. When you're ready, mix them with the other ingredients from the Full Recipe. This helps save time and makes cooking easier. Maple glazed Brussels sprouts pair well with many dishes. Here are some great options: - Roast chicken for a savory touch. - Grilled salmon for a healthy protein. - Quinoa salad for a hearty side. - Mashed potatoes for comfort food lovers. These options balance the sweet and savory flavors of the sprouts. To make this dish vegan, swap out the maple syrup for agave nectar. This keeps the sweetness intact. You can also use vegetable oil instead of olive oil if you prefer. Follow the Full Recipe as is, making those simple swaps. Enjoy the same great taste with a vegan twist! In this blog post, we covered how to make maple glazed Brussels sprouts. We discussed the key ingredients and provided step-by-step instructions. Tips helped you achieve the perfect glaze and roasting method. You also learned about variations, storage, and common questions. Now, you have all the tools to enjoy this dish. Experiment with flavors and enjoy your cooking!](https://dishtreats.com/wp-content/uploads/2025/06/8ccc11bb-56ad-4722-8e0d-cbebb28a9ca5-768x768.webp)
![- Rice paper wrappers - 1 ripe mango, peeled and cut into thin julienne strips - 2 ripe avocados, halved, pitted, and sliced into thin wedges - 1/2 cucumber, peeled and julienned - 1 cup shredded carrots - 1/4 cup fresh mint leaves, torn if large - 1/4 cup fresh cilantro leaves - 1 tablespoon sesame seeds (optional) - 3 tablespoons soy sauce - 1 tablespoon freshly squeezed lime juice - 1 teaspoon honey or agave syrup - 1/2 teaspoon freshly grated ginger Mango avocado summer rolls shine with fresh ingredients. You need rice paper wrappers to hold all this goodness. The key fresh items are ripe mango and creamy avocado. Their flavors blend perfectly. Crunchy cucumber and colorful carrots add texture and fun. Fresh herbs like mint and cilantro brighten the rolls. For a twist, sprinkle sesame seeds for extra crunch. Now, let's talk about the dipping sauce. It's easy to make and enhances the taste. Just mix soy sauce, lime juice, honey, and ginger. This sauce adds a tangy, sweet kick that pairs well with the rolls. You can find the full recipe with all these details. Enjoy creating your mango avocado summer rolls today! To start, you need to make the dipping sauce. In a small mixing bowl, add the soy sauce, lime juice, honey or agave syrup, and grated ginger. Whisk these ingredients together well. This sauce adds a bright, tangy flavor that pairs nicely with the fresh summer rolls. Set it aside for the flavors to blend. Next, grab a shallow dish or a large plate. Fill it with warm water. Take one rice paper wrapper and dip it in the warm water for about 10 seconds. You want it to be soft but not too mushy. Carefully lift it out and lay it flat on a damp kitchen towel or a clean surface. This makes it easier to work with. Now it’s time to layer your ingredients. In the center of the rice paper wrapper, place a few strips of mango, a couple of avocado slices, sticks of cucumber, and a handful of shredded carrots. Don’t forget the fresh mint and cilantro leaves! They add a burst of flavor. You can also sprinkle sesame seeds on top for extra crunch if you like. To roll up the summer rolls, fold the sides of the wrapper over the filling. Then, gently roll the wrapper away from you while tucking in the filling tightly. This helps keep everything secure inside. Repeat this for the rest of the wrappers and filling. You’ll soon have a beautiful platter of summer rolls! After rolling, place the summer rolls on a serving plate. Cover them with a damp cloth. This keeps them fresh and prevents them from drying out while you finish the rest. Make sure they stay moist for the best taste. When you are ready to serve, present the summer rolls with the dipping sauce on the side. This makes it fun for everyone to dip their rolls as they wish. Enjoy the fresh flavors and the crisp textures of your homemade Mango Avocado Summer Rolls! For the full recipe, check out the complete instructions above. To avoid tearing the rice paper wrappers, keep these tips in mind: - Soak each wrapper just until soft, about 10 seconds in warm water. - Work on a damp surface to prevent sticking. - Don't overfill the wrapper; less is more! - When rolling, tuck in the sides gently, but firmly. Choosing ripe ingredients makes a big difference. Here are my best practices: - Look for mangoes that yield slightly to gentle pressure. - Choose avocados that are firm but not hard. - Select cucumbers that are crisp and have a smooth skin. - Fresh herbs should be vibrant and fragrant; avoid wilting. Want to make your rolls even better? Try these ideas: - Add cooked shrimp or chicken for extra protein. - Include bell peppers or radishes for a crunchier bite. - Swap in different herbs like basil or parsley for a unique flavor. - Use quinoa or rice noodles for a heartier filling. For the complete recipe, check out the [Full Recipe]. Enjoy making your summer rolls! {{image_4}} If you want a fully plant-based dish, there are many fun swaps. You can use tofu instead of fish or shrimp. Try adding bean sprouts for a nice crunch. You can also toss in sliced bell peppers for a splash of color. These swaps keep the rolls fresh and tasty. To give your summer rolls an Asian twist, add fresh herbs like basil or dill. You can also use hoisin sauce or peanut sauce instead of the soy sauce. A drizzle of sriracha can bring some heat. These changes will make your rolls pop with flavor. For easy assembly, prep your ingredients ahead of time. Cut your mango, avocado, and cucumber in advance. Store them in airtight containers in the fridge. This way, you can whip up these rolls in just a few minutes. It makes summer roll night so much easier! For the full recipe, check out the detailed instructions provided. To keep your summer rolls fresh, wrap them in a damp cloth. Place them on a plate and cover with plastic wrap. This method helps prevent the rice paper from drying out. Store the rolls in the fridge if you plan to eat them later. Try to consume them within 24 hours for the best taste and texture. If you want to freeze unassembled summer rolls, first prepare the ingredients. Gather your mango, avocados, and veggies. Then, make the rolls but do not roll them up yet. Lay each rice paper wrapper flat on a parchment-lined tray. Fill the wrappers but leave them open. Freeze the tray for about one hour. Once frozen, place the rolls in a freezer bag. This helps you save space and keeps them fresh. When you’re ready to enjoy your summer rolls, take them out of the freezer. Place them in the fridge for a few hours or overnight to thaw. For a faster option, you can run them under warm water for a few seconds. Never use a microwave, as it can make the rice paper tough. After thawing, assemble the rolls with your favorite sauce, and enjoy a fresh and tasty meal! To make Mango Avocado Summer Rolls, follow these steps: 1. First, prepare the dipping sauce by mixing soy sauce, lime juice, honey, and ginger. 2. Next, soak rice paper wrappers in warm water for about 10 seconds. 3. Lay the softened wrapper on a damp surface. 4. Place mango strips, avocado slices, cucumber sticks, shredded carrots, and herbs in the center. 5. Optionally, add sesame seeds for crunch. 6. Fold the sides over the filling and roll tightly. 7. Repeat until all ingredients are used. Serve with dipping sauce. This process is easy and fun, perfect for summer gatherings. Yes, you can add meat or seafood to your summer rolls. Here are some great options: - Grilled chicken or shrimp adds protein and flavor. - Thinly sliced beef or pork works well too. - For a tasty twist, try crab or lobster. These additions make your rolls even more filling and delicious. You can try different dipping sauces beyond the suggested one. Here are some ideas: - Peanut sauce for a creamy texture and nutty flavor. - Sweet chili sauce adds a spicy kick. - A simple vinegar and soy sauce mix is also tasty. Feel free to experiment with flavors you love! You now know how to make delicious summer rolls with fresh ingredients and tasty dipping sauce. We covered the necessary components, step-by-step instructions, and tips for success. Remember, you can customize these rolls to fit your tastes. With the right care, you can store or even freeze them for later. Enjoy the fun of making and sharing these tasty treats. Trust me, they’re worth the effort!](https://dishtreats.com/wp-content/uploads/2025/07/e9c41e61-bd63-46cf-9640-b605cd161798-768x768.webp)