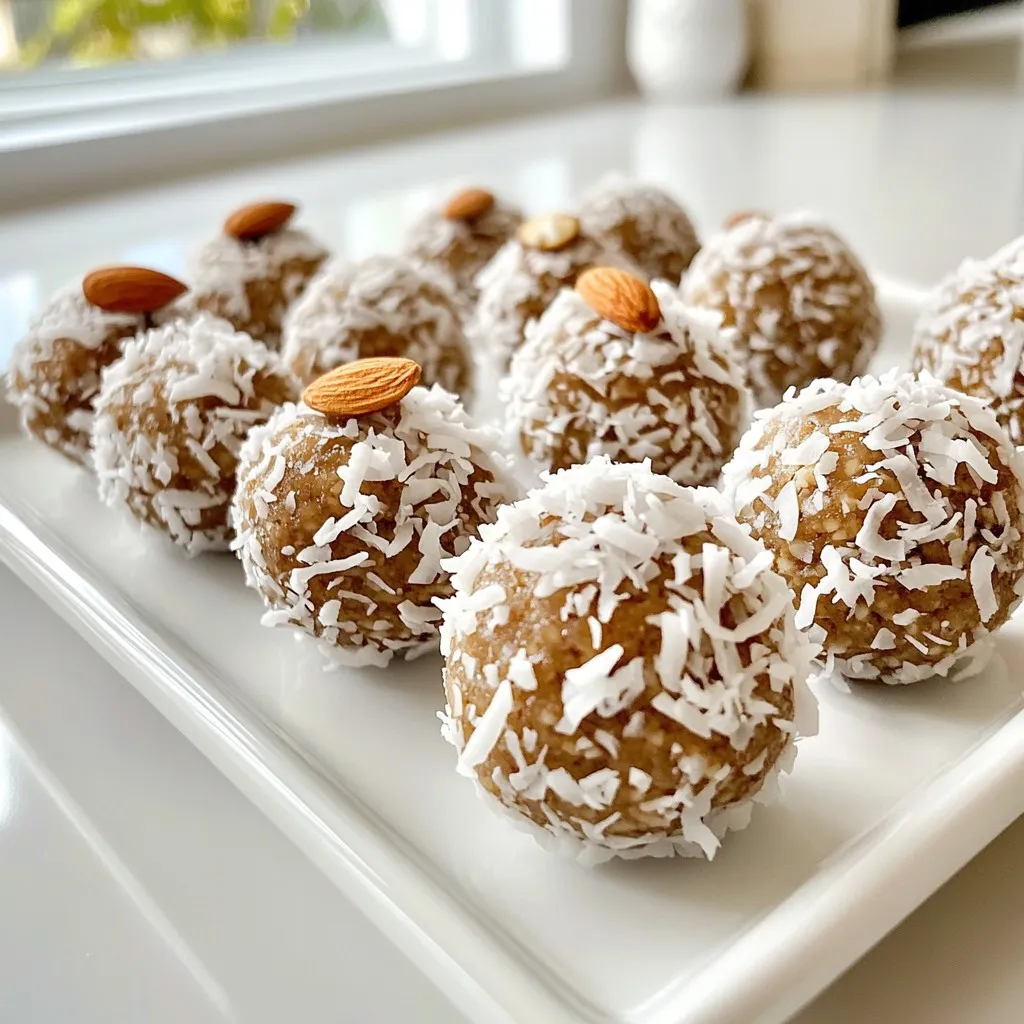
If you love the sweet taste of Almond Joy candy bars, you’ll adore these Almond Joy Protein Balls! They’re easy to make and packed with flavor, satisfying both your sweet tooth and your health goals. In this post, I’ll guide you through simple ingredients and steps to create this perfect snack. Whether you’re a busy parent or a fitness enthusiast, these tasty treats make a great, nutritious option. Let’s get started!
Why I Love This Recipe
- Nutritious Snack: These protein balls are packed with wholesome ingredients, making them a perfect energy-boosting snack for any time of day.
- Simple to Make: With just a few easy steps, you can prepare these delicious treats in no time, perfect for busy lifestyles.
- Customizable: Feel free to add your favorite mix-ins like nuts or seeds, allowing you to tailor the recipe to your preferences.
- Indulgent Flavor: With the combination of chocolate and coconut, these protein balls taste like a treat while still being healthy!
Ingredients
List of Ingredients
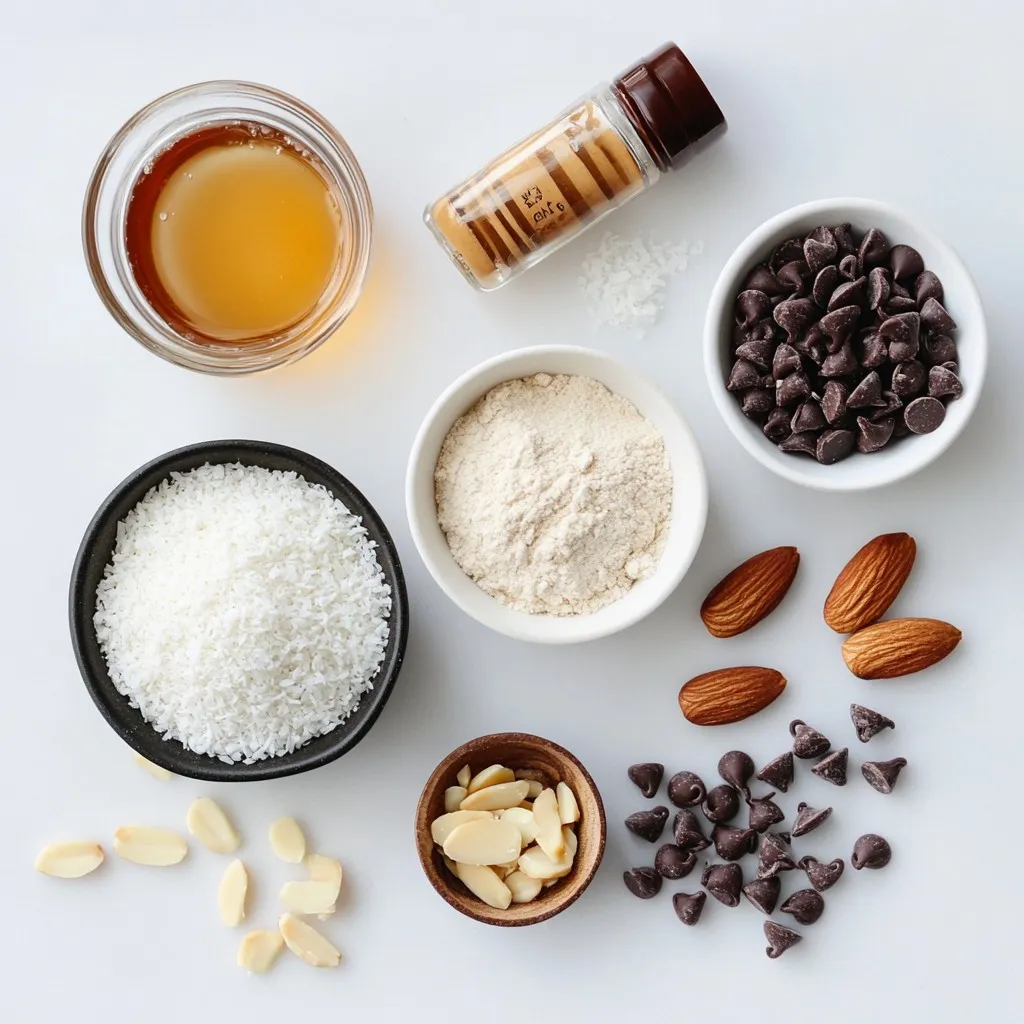
– 1 cup almond flour
– 1/2 cup unsweetened shredded coconut
– 1/4 cup raw honey or maple syrup
– 1/4 cup almond butter
– 1/2 teaspoon vanilla extract
– 1/4 teaspoon fine sea salt
– 1/3 cup dark chocolate chips (preferably dairy-free)
– 1/4 cup whole almonds (for garnish)
Measurement Conversions
– 1 cup = 240 ml
– 1/2 cup = 120 ml
– 1/4 cup = 60 ml
– 1/3 cup = 80 ml
These conversions help you switch between cups and milliliters. They make measuring easy, no matter your tools!
Alternative Ingredients
You can swap almond flour for oat flour if you like. For a nut-free option, use sunflower seed butter instead of almond butter. If you want a sweeter taste, try agave syrup in place of honey. You can also use semi-sweet chocolate chips if you prefer. These swaps keep the treat fun and tasty!
Step-by-Step Instructions
Preparing the Dry Ingredients
Start by gathering your dry ingredients. In a large mixing bowl, add 1 cup of almond flour and 1/2 cup of unsweetened shredded coconut. Use a whisk or spoon to mix until they blend well. This step sets a solid base for your protein balls.
Creating the Wet Mixture
Now, it’s time to make the wet mixture. To the dry mix, add 1/4 cup of raw honey or maple syrup, depending on your taste. Then, include 1/4 cup of almond butter, 1/2 teaspoon of vanilla extract, and 1/4 teaspoon of fine sea salt. Stir everything together with a spatula. You want a sticky, cohesive dough, so mix well until it all comes together.
Forming and Garnishing the Balls
Once your dough is ready, take about 1 tablespoon of it and roll it into a ball using your hands. Place each ball on a parchment-lined baking sheet. For a touch of crunch and flair, press a whole almond into the top of each ball. This not only adds flavor but also makes them look great!
Chilling for Best Results
After forming all the balls, transfer the baking sheet to the fridge. Let them chill for at least 30 minutes. Chilling them helps the flavors meld and makes the balls firmer. You’ll love how they taste once they’re set!
Tips & Tricks
Common Mistakes to Avoid
When making Almond Joy Protein Balls, be careful with the measurements. Too much almond flour can make them dry. Use a kitchen scale for accuracy. Also, avoid overmixing; this can lead to tough balls. Make sure to chill them long enough. This helps them firm up and enhances the taste. If they are too sticky, your hands might need a light dusting of almond flour.
Enhancing Flavor Profiles
You can boost the flavors in your protein balls easily. Try adding a pinch of cinnamon or a dash of sea salt. Both can enhance the sweetness. If you like more chocolate, increase the dark chocolate chips. For a coconut twist, add a bit more shredded coconut. You can also use roasted almonds for more depth.
Recommended Tools and Equipment
Having the right tools makes the process smooth. Use a large mixing bowl for easy stirring. A spatula helps combine the ingredients well. A tablespoon scoop makes rolling the balls quick and uniform. Don’t forget parchment paper for easy cleanup! Lastly, a good fridge is key for chilling. This helps set the texture just right.
Pro Tips
- Chill for Better Texture: Allowing the protein balls to chill for at least 30 minutes not only helps them firm up but also enhances the blending of flavors, resulting in a more delicious treat.
- Customize Your Sweetness: Adjust the sweetness to your liking by varying the amount of honey or maple syrup. You can also experiment with flavored nut butters for added taste.
- Mix-In Variations: Feel free to add your favorite mix-ins such as chopped dried fruits, seeds, or protein powder to create unique flavor combinations and boost nutritional value.
- Perfect Portioning: Use a cookie scoop or tablespoon for consistent sizing of your protein balls. This ensures even cooking and makes it easier to track serving sizes.
Variations
Different Sweeteners: Honey vs. Maple Syrup
You can use honey or maple syrup in this recipe. Honey gives a richer taste. It adds a lovely sweetness. Maple syrup is a great vegan option. It has a different flavor and is still sweet. Try both to see which you like best!
Customizing with Add-ins (e.g., nuts, seeds)
You can add fun mix-ins to your protein balls. Chopped nuts can boost the crunch. Try walnuts, pecans, or hazelnuts. Seeds like chia or flax can add nutrients. You can even add dried fruit for extra flavor. Just be sure not to overdo it, or the balls might not stick together.
Vegan Options and Substitutions
Want to make these protein balls vegan? Easy! Just swap honey for maple syrup. Use a nut butter without added sugars. Check the chocolate chips too; use dairy-free ones. This way, everyone can enjoy a tasty treat!
Storage Info
How to Store Protein Balls
To keep your Almond Joy Protein Balls fresh, place them in an airtight container. You can stack them in one layer or separate them with parchment paper. This helps prevent them from sticking together. Store the container in the fridge for best results.
Freezing Instructions
If you wish to store them for a longer time, freezing works great. Place the protein balls in a single layer on a baking sheet. Freeze them for about an hour. Then, transfer the balls to a freezer-safe bag or container. Don’t forget to label the bag with the date. They will last for up to three months in the freezer.
Shelf Life and Freshness Tips
When stored correctly in the fridge, protein balls can last for up to one week. Keep an eye on them for any signs of spoilage. If they start to look or smell off, it’s best to toss them. For the best taste and texture, enjoy them fresh or within a few days.
FAQs
Can I use a different nut butter?
Yes, you can use other nut butters. Peanut butter, cashew butter, or sunflower seed butter work well. Each will give a unique taste. The key is to keep the same amount. Using a different nut butter can change the flavor but still keep it tasty.
How can I make these protein balls gluten-free?
To make Almond Joy Protein Balls gluten-free, use almond flour. It is naturally gluten-free and perfect for this recipe. Make sure any added ingredients, like chocolate chips, are also gluten-free. Always check labels to ensure no hidden gluten.
What are the nutritional benefits of Almond Joy Protein Balls?
Almond Joy Protein Balls have many benefits. They are rich in protein from almond flour and nut butter. The dark chocolate chips add antioxidants. Shredded coconut provides healthy fats and fiber. They are a balanced snack that fuels your body. Plus, they are low in refined sugars, making them a smart choice!
In this post, we explored key ingredients and how to measure them. We walked through each step, from mixing dry and wet ingredients to creating and chilling your protein balls. I shared tips to avoid common mistakes and ways to enhance flavor. We also discussed ingredient variations and storage tips.
Protein balls are fun to make and easy to enjoy. Tailor recipes to fit your taste and needs. With these tips, you can create delicious snacks that are healthy and satisfying. Enjoy making your ow


