Air Fryer Teriyaki Chicken Strips Flavorful and Easy

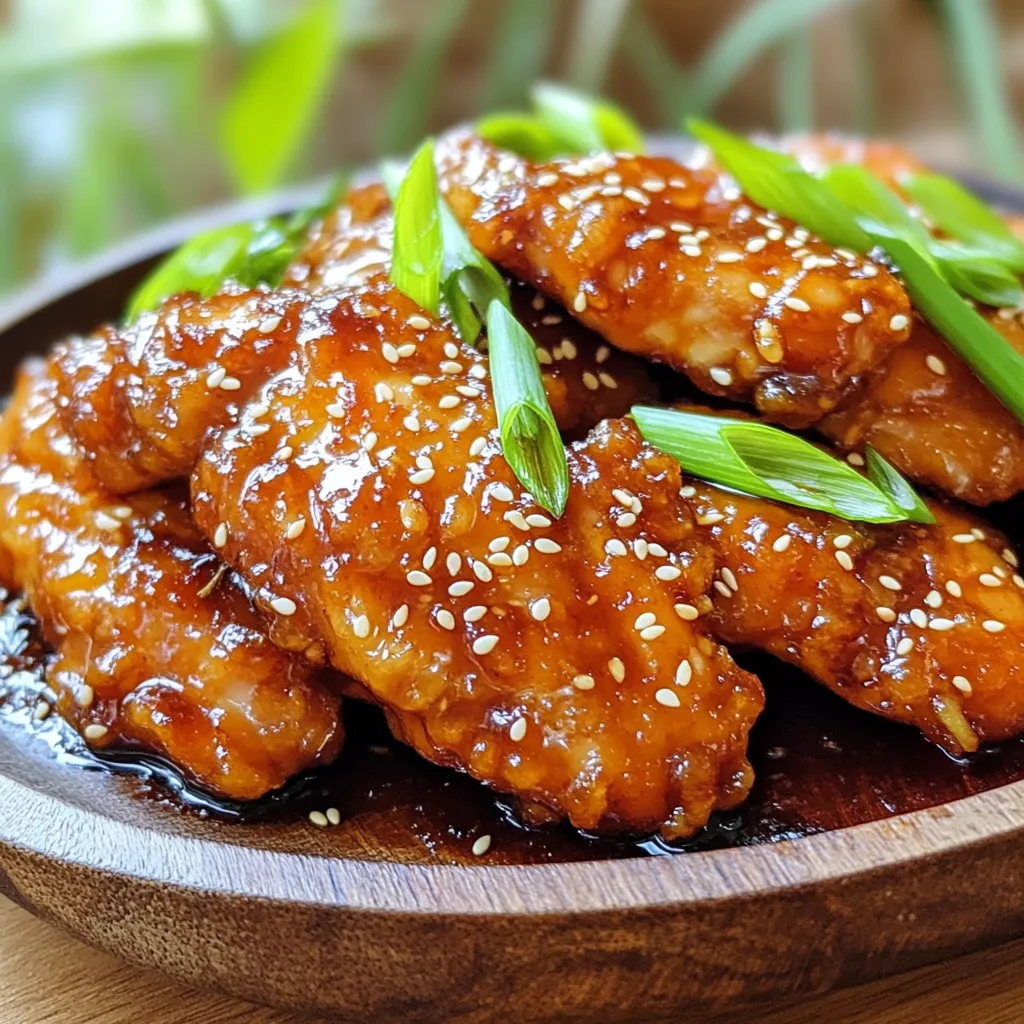
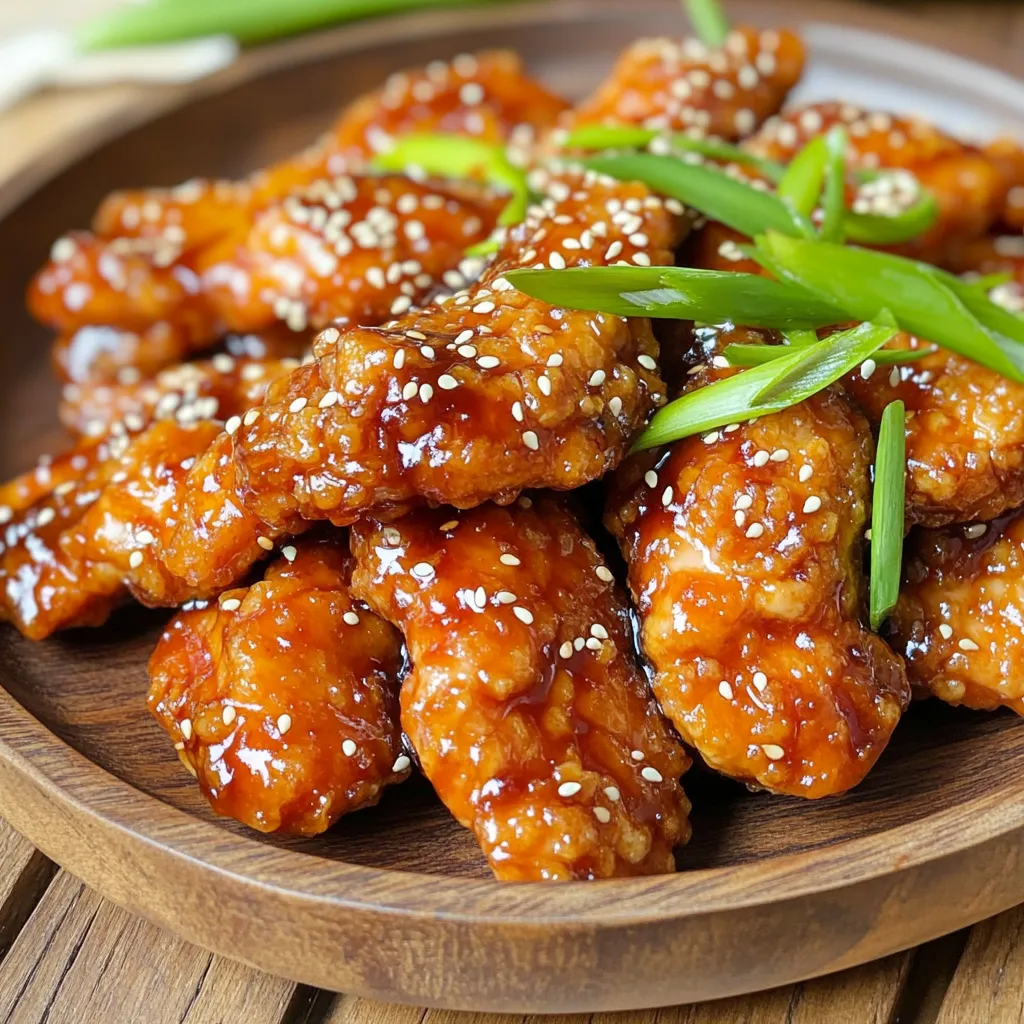
Ready to transform your weeknight dinners into something special? My Air Fryer Teriyaki Chicken Strips are both flavorful and easy to make! With just a few ingredients, you can whip up a dish that’s juicy, tender, and full of savory goodness. Whether you’re a busy parent or just love tasty meals, this recipe covers all bases. Dive in to discover the secrets to making perfect teriyaki chicken strips at home!
Ingredients
Main Ingredients
- 1 pound chicken breast, sliced into strips
- 1/4 cup soy sauce
- 2 tablespoons honey
Additional Ingredients
- 1 tablespoon rice vinegar
- 1 tablespoon sesame oil
- 2 cloves garlic, finely minced
- 1 teaspoon fresh ginger, grated
Garnishes
- 1 tablespoon cornstarch
- 1 tablespoon cold water
- 1 teaspoon sesame seeds
- 2 green onions, thinly sliced
You need fresh chicken breast for this dish. Slice it into strips. Using chicken breast gives a nice texture. The soy sauce adds saltiness and umami. Honey brings sweetness to balance the salt. For a twist, use low-sodium soy sauce.
Next, rice vinegar adds a little tang. Sesame oil gives a lovely nutty flavor. Garlic and ginger bring a strong taste. Minced garlic adds depth, while fresh ginger adds zest.
You will also need cornstarch. It helps thicken the sauce. Mixing it with cold water makes a slurry. This adds a nice glossy finish.
For garnishes, sesame seeds add crunch. Green onions give freshness and color. They elevate the dish. If you want to impress, use them generously.
Step-by-Step Instructions
Preparation of Marinade
To start, gather your ingredients. You will need soy sauce, honey, rice vinegar, sesame oil, minced garlic, and fresh ginger. In a medium bowl, combine these ingredients. Whisk them together until the mixture is smooth and the honey dissolves. This marinade will give your chicken a tasty flavor.
Marinating the Chicken
Next, place your chicken strips in the bowl with the marinade. Make sure each piece is fully coated. Cover the bowl and refrigerate for at least 30 minutes. For the best taste, try to marinate for up to 2 hours. This time allows the chicken to soak up all the yummy flavors.
Air Frying Process
When your chicken is ready, take it out of the marinade. Preheat your air fryer to 400°F (200°C). This takes about five minutes. Then, arrange the chicken strips in a single layer in the basket. Avoid overcrowding them for even cooking. Air fry the chicken for 10-12 minutes. Flip the strips halfway through to ensure they cook evenly. You want them golden and fully cooked for the best taste!
Tips & Tricks
Perfecting the Flavor
I love using low-sodium soy sauce for this dish. It gives the chicken a great taste without being too salty. You can also add extra ginger for a nice kick. Just grate a bit more fresh ginger and mix it into the marinade. This adds zest and enhances the flavor profile.
Ensuring Optimal Cooking
Do not overcrowd the air fryer basket. This step is key. If you pile the chicken, it won’t cook evenly. Instead, place the strips in a single layer. For a crispy texture, flip the chicken halfway through cooking. This ensures all sides get that golden crunch we love.
Serving Suggestions
Pair your teriyaki chicken with steamed rice or fresh veggies. These sides complement the dish well and add balance. For presentation, serve the chicken strips on a decorative plate. Add extra green onion slices on top for color and crunch. This makes the dish look as good as it tastes!

Variations
Alternative Protein Options
You can swap out chicken for tofu or shrimp. Both add unique flavors. If you choose shrimp, keep the cooking time short. They cook fast, only needing about 6-8 minutes. For tofu, cut it into strips and press it to remove extra water. Marinate it just like chicken.
Flavor Enhancements
To add some heat, try mixing in chili flakes. A pinch goes a long way! You can also play with herbs, like adding fresh basil or cilantro. These herbs brighten the dish. If you want more depth, add a splash of orange juice. It gives a zesty twist to the teriyaki sauce.
Serving on Different Bases
Serve your teriyaki chicken strips over fluffy rice or noodles. Rice absorbs the sauce well, making each bite tasty. For a lighter option, wrap the strips in lettuce. This adds crunch and freshness. Pair your meal with steamed veggies for balanced nutrition. You can even create a fun rice bowl with all your favorite toppings!
Storage Info
Storing Leftovers
After enjoying your air fryer teriyaki chicken strips, store leftovers properly. First, let the chicken cool down. Then, place the strips in an airtight container. You can use glass or plastic containers. For longer storage, you can freeze the chicken. Wrap it tightly in foil or freezer bags. This helps keep the chicken fresh.
Reheating Tips
To reheat your chicken strips, the air fryer works best. Set it to 375°F (190°C). Heat for about 5-7 minutes. This keeps the chicken crispy. You can also use an oven. Preheat to 350°F (175°C) and heat for 10-15 minutes. Avoid using a microwave, as it makes the chicken soggy.
Shelf Life
In the fridge, leftover chicken lasts about 3-4 days. If you freeze it, the chicken can last up to 3 months. Always check for signs of spoilage. Look for any off smells, discoloration, or slimy texture. If you see any of these, it’s best to throw it away.
FAQs
Can I make this recipe without an air fryer?
Yes, you can! If you don’t have an air fryer, you can use a regular oven. Preheat your oven to 400°F (200°C). Place the marinated chicken strips on a baking sheet lined with parchment paper. Bake for about 15-20 minutes, flipping halfway through. You want the chicken to be golden and cooked through. Another option is to pan-fry the strips in a skillet over medium heat. Cook for about 5-7 minutes on each side until they’re crispy and cooked well.
How long should I marinate the chicken?
Marinate the chicken for at least 30 minutes. This helps the chicken soak up all the yummy flavors. For the best taste, try marinating for up to 2 hours. If you have time, it makes a real difference. Just remember not to marinate for too long, as the soy sauce can make the chicken too salty.
What can I substitute for honey in the marinade?
If you want to swap out honey, you have a few good options. You can use maple syrup or agave nectar. Both options add sweetness, but the flavor will change a bit. Maple syrup gives a richer taste, while agave is milder. You can also use brown sugar mixed with a bit of water if you’re in a pinch. Each choice will give you a tasty chicken, so feel free to experiment!
This blog post shared a tasty teriyaki chicken recipe. Start with simple ingredients like chicken, soy sauce, and honey. We walked through marinating, air frying, and serving tips. You can change the recipe by using tofu or shrimp instead. Remember, proper storage keeps leftovers fresh, and reheating tips help maintain texture. I hope you feel confident to try this dish. Enjoy your cooking and get creative with it!


![To make Parmesan roasted cauliflower, gather these simple ingredients: - 1 large head of cauliflower, cut into bite-sized florets - 3 tablespoons extra virgin olive oil - 1 cup freshly grated Parmesan cheese - 2 teaspoons garlic powder - 1 teaspoon onion powder - 1 teaspoon smoked paprika - Salt and freshly ground black pepper, to taste - Fresh parsley, finely chopped (for garnish) Using fresh ingredients makes a big difference in taste. Look for a cauliflower head that is firm and free of blemishes. The olive oil should be extra virgin for the best flavor. Freshly grated Parmesan cheese melts better than pre-grated. It has a richer taste and adds a creamy texture. Spices should be fresh too. This helps ensure you get the best flavor in every bite. If you want to change things up, try these add-ins: - Red pepper flakes for heat - Lemon zest for a fresh twist - Balsamic glaze drizzled on top for sweetness - Other cheeses like mozzarella or cheddar for different flavors These options let you customize the dish to fit your taste. Feel free to mix and match! For the full recipe, check out the details above. Start with a large head of cauliflower. Cut it into small, bite-sized florets. This size helps them cook evenly. Rinse the florets under cold water. Then, dry them well with a towel. Removing excess moisture helps them roast better. In a large mixing bowl, add the dried cauliflower florets. Pour in three tablespoons of extra virgin olive oil. Toss the florets until they are well-coated. In another bowl, mix one cup of freshly grated Parmesan cheese, two teaspoons of garlic powder, one teaspoon of onion powder, and one teaspoon of smoked paprika. Add salt and freshly ground black pepper to taste. Combine these dry ingredients well. Spread the coated cauliflower onto a lined baking sheet. Make sure they are in a single layer. This step helps them roast evenly. Preheat your oven to 425°F (220°C). Place the baking sheet in the oven and roast for 25 to 30 minutes. Flip the florets halfway through for even cooking. Look for a golden brown color and a tender texture. Once done, take the cauliflower out of the oven. Let it cool for a few minutes. Garnish with fresh parsley for a pop of color. Serve it on a bright platter for a beautiful display. You can also drizzle a little olive oil on top for extra flavor. This dish pairs well with grilled meats or as part of a veggie spread. Enjoy your delicious Parmesan roasted cauliflower! For more detailed guidance, check out the Full Recipe. To get that perfect roast, you need the right oven temperature. Preheat your oven to 425°F (220°C). This high heat crisps the edges and makes the cauliflower tender. Spread the florets in a single layer on the baking sheet. If they are too crowded, they will steam instead of roast. Flip them halfway through cooking for even browning. Aim for a golden color; that's when they taste the best. One common mistake is not drying the cauliflower. After washing, make sure it's dry. Excess water can lead to soggy florets. Another mistake is using old Parmesan cheese. Fresh cheese melts better and has more flavor. Lastly, don't skip the seasoning. A light touch of salt and pepper really makes a difference. You can easily make this dish even tastier. Try adding a squeeze of lemon juice before serving for a zesty kick. Fresh herbs like thyme or rosemary also add depth. For spice lovers, sprinkle some red pepper flakes for heat. You can find all these flavor ideas in the [Full Recipe]. {{image_4}} You can switch up the cheese for more flavor. Try pecorino Romano for a saltier bite. Goat cheese adds creaminess and tang. For a milder taste, use mozzarella or cheddar. Each cheese brings a unique twist to the dish. So, feel free to experiment with what you have on hand. If you like heat, add some cayenne pepper or crushed red pepper flakes. Start with a pinch and taste as you go. For a milder flavor, skip the smoked paprika. You can also use Italian seasoning for a different herb mix. Adjusting spices lets you make the dish your own. You can mix in other veggies for fun. Try bell peppers, carrots, or zucchini. Cut them into similar sizes as the cauliflower. This way, everything cooks evenly. Roasting a mix adds color and taste. You get a delightful medley on your plate. Check out the Full Recipe for more ideas on making this dish stand out! To keep your Parmesan roasted cauliflower fresh, place it in an airtight container. Make sure it cools to room temperature first. This helps prevent moisture buildup. Store it in the fridge for up to four days. If you want to enjoy it later, make sure to check the smell and texture before eating. When it's time to enjoy your leftovers, reheating is key. I recommend using the oven for the best results. Preheat your oven to 350°F (175°C). Spread the cauliflower on a baking sheet. Heat for about 10 to 15 minutes. This will crisp it up again and keep the cheese flavor strong. You can also use a microwave for quick reheating. Just heat for one to two minutes. But keep in mind, it won’t be as crispy. If you want to store the cauliflower for longer, freezing is a great option. Start by letting it cool completely. Then, place it in a freezer-safe bag. Squeeze out as much air as possible before sealing it. You can freeze it for up to three months. When ready to eat, thaw it overnight in the fridge. Then, reheat in the oven for the best taste. For more details, check out the full recipe. Roasting cauliflower takes about 25 to 30 minutes. Preheat your oven to 425°F (220°C). Place the cauliflower on a baking sheet in a single layer. Halfway through, flip the florets for even cooking. You want them to be golden brown and fork-tender. Yes, you can make this dish ahead of time. Roast the cauliflower and let it cool. Store it in an airtight container in the fridge for up to three days. When you’re ready to serve, just reheat it in the oven. This keeps it crisp and tasty. Parmesan roasted cauliflower pairs well with many dishes. Serve it alongside grilled chicken or fish for a balanced meal. It also complements pasta or a fresh salad. You can even use it as a topping for grain bowls. This dish adds a flavorful crunch to your plate. For the full recipe, check out the details above! In this blog post, we explored how to make delicious Parmesan Roasted Cauliflower. We outlined the key ingredients and shared tips for picking top-quality ones. I provided step-by-step instructions, covering preparation, mixing, roasting, and serving. You learned tips to ensure perfect roasting and avoid common mistakes. We discussed variations like different cheeses and spices, along with storage and reheating advice. With these insights, you can enjoy this tasty dish in many ways. Take your time and have fun creating your own version!](https://dishtreats.com/wp-content/uploads/2025/06/1026dd12-7014-4148-8186-1edda0f6a7e3-768x768.webp)

![To make roasted garlic hummus, gather these essential ingredients: - 1 cup canned chickpeas, rinsed and drained - 1/4 cup tahini - 1/4 cup extra virgin olive oil - 1 whole head of garlic - 2 tablespoons freshly squeezed lemon juice - 1/2 teaspoon ground cumin - Sea salt, to taste - Water, as needed These ingredients work together to create a creamy and delicious hummus. The chickpeas provide a smooth base, while tahini adds richness. Roasted garlic brings a sweet, mellow flavor that transforms the dish. To elevate your hummus, consider these optional garnishes: - Chopped fresh parsley - Smoked paprika Adding these garnishes gives your hummus a pop of color. Fresh parsley adds a touch of brightness, while smoked paprika contributes a subtle warmth. You will need a few key tools to prepare your hummus: - Food processor - Aluminum foil - Baking sheet A food processor is essential for achieving a smooth texture. Aluminum foil helps roast the garlic evenly, while a baking sheet supports the garlic in the oven. For the full recipe, check out the complete guide to making roasted garlic hummus. Enjoy the process and get ready for a tasty treat! To start, I preheat my oven to 400°F (200°C). This heat helps the garlic roast well. Next, I take a whole head of garlic and cut off the top. I make sure to expose the tops of the cloves. Then, I drizzle a little olive oil over the cloves. This step helps the garlic stay moist. I wrap the garlic in aluminum foil tightly and place it in the oven. I roast it for about 30-35 minutes. The cloves should turn soft and golden brown. After roasting, I let it cool for a few minutes. In my food processor, I add 1 cup of rinsed chickpeas and 1/4 cup of tahini. Then, I squeeze in 2 tablespoons of lemon juice and add 1/2 teaspoon of ground cumin. I also sprinkle in some sea salt. Next, I squeeze the roasted garlic cloves from their skins into the bowl. I usually use three to four cloves for a great flavor. I blend everything until it becomes smooth and creamy. While blending, I slowly drizzle in 1/4 cup of extra virgin olive oil. If the hummus feels too thick, I add water by the tablespoon until I like the texture. Once my hummus is smooth, I taste it to check if it needs more salt or lemon juice. This step is key for flavor balance. I then transfer the hummus to a serving bowl. I drizzle a bit of olive oil on top to add richness. For a pop of color, I garnish it with chopped parsley and a sprinkle of smoked paprika. To serve, I love pairing the hummus with fresh pita bread or sliced veggies. This makes for a great snack or appetizer. You can find the Full Recipe [here]. To get the right texture, start with good chickpeas. Use canned chickpeas for ease. Rinse and drain them well to remove excess salt. When blending, add olive oil slowly. If your hummus is too thick, add water a bit at a time. This makes it smooth and creamy. Roasted garlic is the star here, but you can add more flavor. Try adding herbs like fresh parsley or basil. A pinch of smoked paprika gives a nice kick. For a zestier taste, add more lemon juice. Taste as you go—this is key! One big mistake is not roasting the garlic enough. Soft, golden cloves bring the best flavor. Another common error is adding too much water at once. This can make your hummus runny. Lastly, don’t forget to taste your blend. Adjusting salt and lemon juice helps create a balanced dip. For the full recipe, refer to the main article. {{image_4}} You can change the flavor of your hummus easily. Adding herbs like basil or cilantro gives a fresh taste. For a warm twist, try adding spices like smoked paprika or chili powder. Just a pinch can turn your dip into a flavor explosion. Mix in fresh herbs or spices after blending for the best taste. While chickpeas are classic, other beans work well too. White beans, like cannellini, add creaminess. Black beans offer a rich, earthy flavor. You can even use lentils for a different texture. Each bean brings its own taste. Feel free to swap them out and explore new flavors. If you love heat, this spicy hummus is for you. Start with the full recipe and add heat! After blending, mix in chopped jalapeños or a splash of hot sauce. You can also use crushed red pepper for a milder kick. This spicy version pairs well with crunchy veggies or pita chips, making your snack time exciting. To keep your roasted garlic hummus fresh, store it in an airtight container. This helps prevent exposure to air, which can lead to spoilage. Always let the hummus cool completely if you just made it. Once cooled, cover it tightly and place it in the fridge. You can freeze hummus for later use. Portion it into smaller containers. This makes it easy to thaw only what you need. Leave a little space at the top of the container. Hummus expands when frozen. When you’re ready to eat it, thaw it in the fridge overnight. Stir well before serving. Homemade roasted garlic hummus lasts about five to seven days in the fridge. Check for any off smells or changes in color. If you see any mold, it’s best to throw it away. Fresh hummus should have a smooth texture and rich aroma. Keeping these tips in mind helps you enjoy your hummus at its best. Don't forget to check the [Full Recipe] for the perfect hummus experience! Roasted garlic can last about one week in the fridge. Store it in a sealed container. If you want to keep it longer, you can freeze it. Roasted garlic freezes well and can last up to three months. Yes, you can use fresh garlic, but the flavor will be different. Fresh garlic is sharp and strong, while roasted garlic is sweet and mild. If you want a more intense garlic taste, add a small amount of fresh garlic to your hummus. Start with one clove and adjust to your taste. Roasted garlic offers many health benefits. It can help boost your immune system. It also may lower blood pressure and improve heart health. Roasted garlic is rich in antioxidants, which fight free radicals. Plus, it can aid digestion and add flavor to meals without extra fat or salt. Enjoying roasted garlic in hummus gives you these benefits in a tasty way. This blog covered all you need for tasty roasted garlic hummus. We explored key ingredients, helpful tools, and the easy steps for making hummus. You learned tips to get the right texture and boost flavor. We shared fun variations to try, plus essential storage advice. Roasted garlic hummus is simple and fun to make. Enjoy the process and don't hesitate to get creative with your flavors! Remember, practice makes perfect.](https://dishtreats.com/wp-content/uploads/2025/06/4ccbc263-5457-4179-8ada-bd86b908b6b9-768x768.webp)
