Air Fryer Everything Bagel Chicken Tenders Recipe

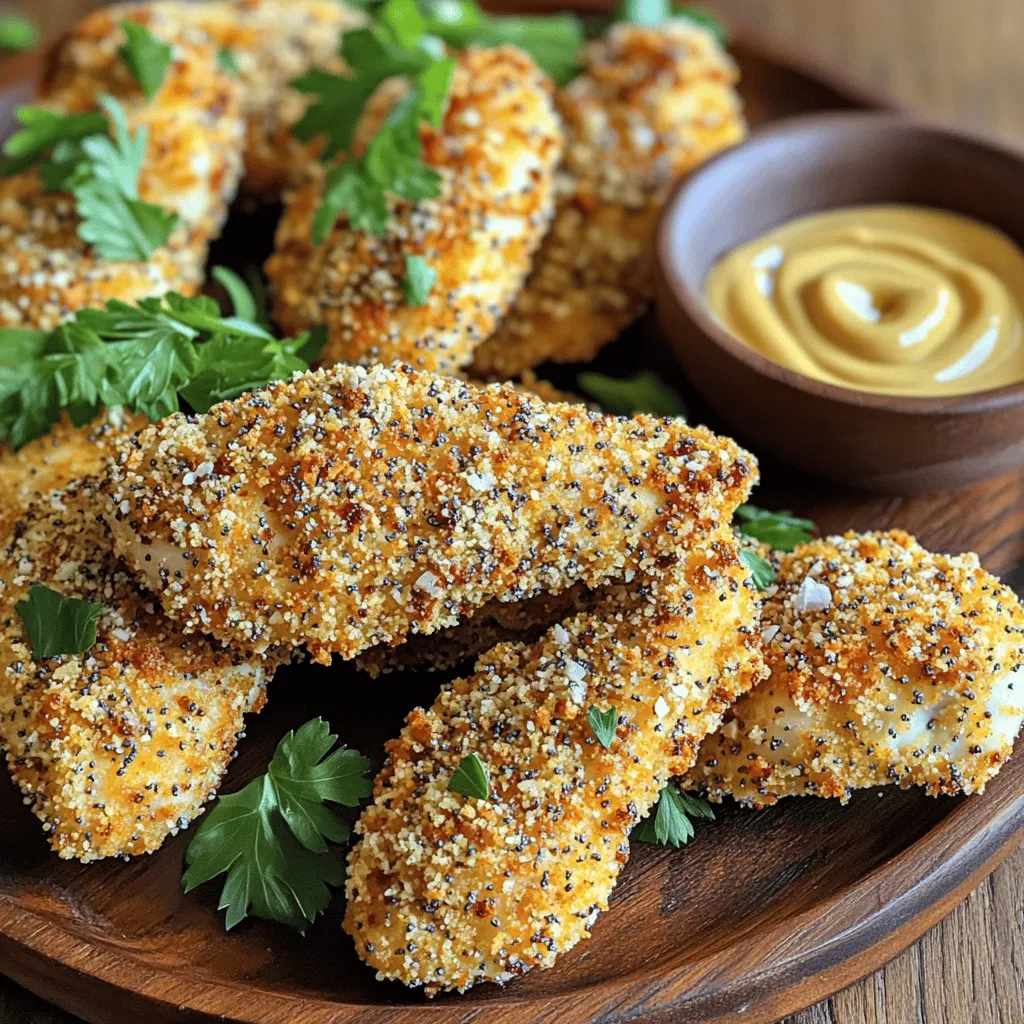
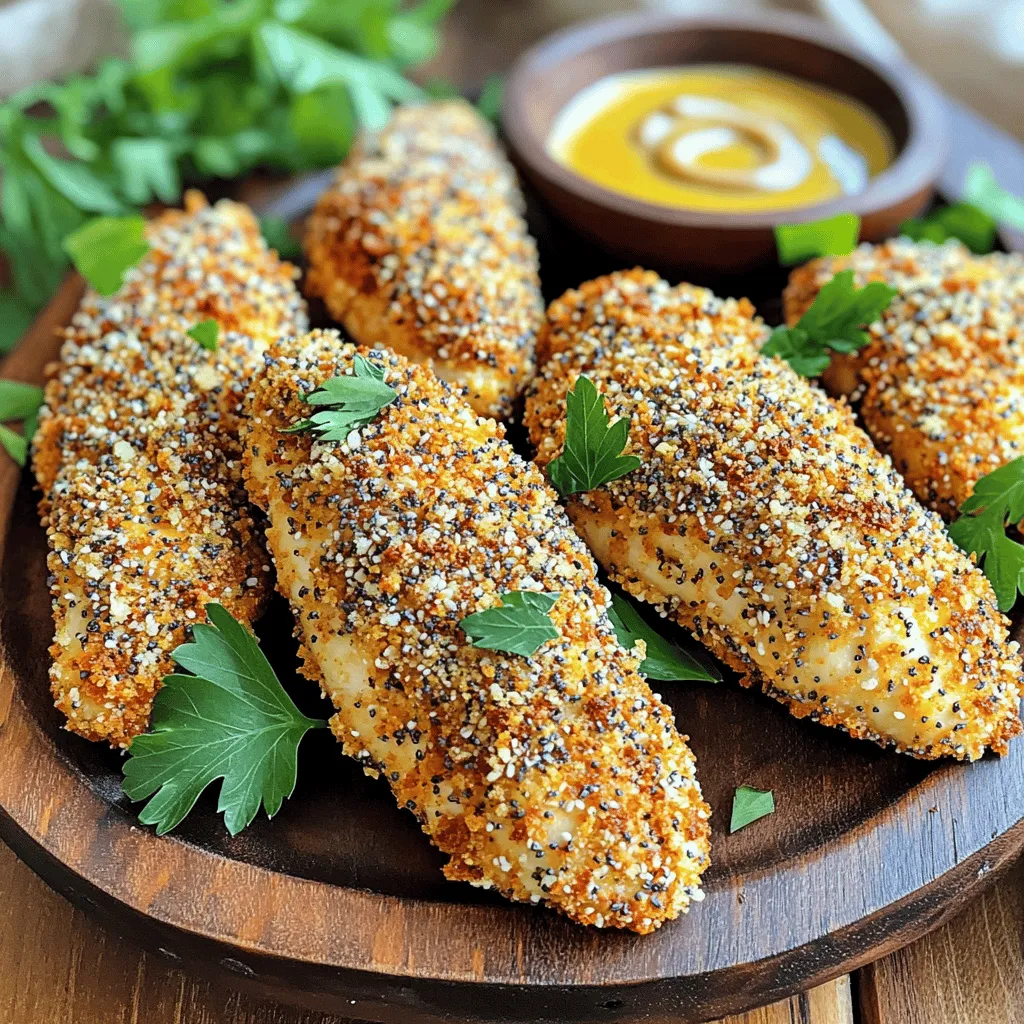
Craving a tasty twist on chicken tenders? You’re in the right place! In this easy recipe, I’ll show you how to make Air Fryer Everything Bagel Chicken Tenders. They’re crispy, flavorful, and fun to eat. With just a few ingredients and simple steps, you’ll have a meal that’s sure to impress. Let’s dive into making these delicious tenders together!
Ingredients
Main Ingredients
- 1 pound boneless, skinless chicken tenders
- 1 cup all-purpose flour, seasoned with salt and pepper
Breading Mixture
- 2 large eggs, beaten until frothy
- 1 cup breadcrumbs
- 3 tablespoons everything bagel seasoning
- 1 teaspoon garlic powder
- 1 teaspoon onion powder
Cooking Essentials
- Cooking spray
When making Air Fryer Everything Bagel Chicken Tenders, you need fresh, quality ingredients. Start with one pound of boneless, skinless chicken tenders. They cook evenly and stay juicy. Next, prepare one cup of all-purpose flour. Season it with salt and pepper for flavor. This will be your first step in the breading.
For the breading mixture, you will need two large eggs. Beat them until they are frothy. This egg wash helps the breadcrumbs stick. Next, grab one cup of breadcrumbs. These give the tenders a nice crunch. Then, add three tablespoons of everything bagel seasoning. This mix brings bold flavor to the dish. Don’t forget one teaspoon of garlic powder and one teaspoon of onion powder. These flavors enhance the chicken.
Finally, have cooking spray ready. It keeps the chicken from sticking to the air fryer. With these ingredients, you can create a tasty meal that is both crunchy and flavorful.
Step-by-Step Instructions
Preparation Process
- First, preheat your air fryer to 400°F (200°C). This takes about 5 minutes.
- Next, set up a three-station breading area. You will need three shallow bowls.
Breading the Chicken
- In the first bowl, add 1 cup of all-purpose flour. Season it with salt and pepper.
- In the second bowl, whisk 2 large eggs until they are frothy.
- In the third bowl, mix 1 cup of breadcrumbs with 3 tablespoons of everything bagel seasoning, 1 teaspoon of garlic powder, and 1 teaspoon of onion powder. Make sure it’s well mixed.
- Take a chicken tender and dredge it in the seasoned flour. Coat it fully and shake off any extra.
- Next, dip the floured chicken tender into the beaten eggs. Ensure every part is covered.
- Finally, roll the chicken tender in the breadcrumb mixture. Press gently to make sure it sticks. Repeat this for all chicken tenders.
Air Frying
- Lightly spray the air fryer basket with cooking spray to keep the chicken from sticking.
- Place the breaded chicken tenders in a single layer in the air fryer basket. Make sure they do not touch each other.
- Cook the chicken tenders at 400°F (200°C) for 10-12 minutes. Flip them halfway through to get even browning. They are done when golden brown and reach an internal temperature of 165°F (74°C).
- After cooking, take the chicken tenders out of the air fryer and let them rest for a couple of minutes before serving.
Tips & Tricks
Breading Tips
To get a nice, even coat on your chicken tenders, follow these steps:
- Use three shallow bowls for your breading.
- First, coat the chicken in the seasoned flour.
- Shake off any extra flour before moving on.
- Dip the chicken in the beaten eggs next.
- Make sure every inch is covered in egg wash.
- Finally, roll the chicken in the breadcrumb mix. Press gently to help it stick.
Breading in batches works best. Do a few at a time to keep things neat. This helps each piece cook evenly and makes clean-up easier.
Cooking Tips
Flipping your chicken tenders halfway through cooking is key. This ensures a golden-brown crust on both sides. Use tongs to flip them safely.
Keep an eye on your air fryer temperature. Cooking at 400°F (200°C) is perfect for crispy results. If you notice uneven browning, adjust the placement of tenders in the basket.
Serving Suggestions
For a great presentation, serve your chicken tenders on a rustic platter. You can also use a bright plate to make them pop. Garnish with fresh herbs like parsley or chives for color.
Dipping sauces make this dish even better. Honey mustard or ranch are great choices. You can also try spicy sauce for a kick!

Variations
Flavor Variations
You can spice up your chicken tenders by using spicy everything bagel seasoning. This adds a nice kick. Mix cayenne pepper with regular everything bagel seasoning for a tasty twist. You can also try herb-infused variations. Adding dried herbs like thyme or rosemary brings fresh flavors to the tenders. Just mix these herbs into your breadcrumb mixture for a new taste.
Healthier Options
For a healthier choice, you can make an oven-baked version. Coat the chicken tenders the same way, then bake them on a lined sheet at 400°F (200°C) for about 15-20 minutes. This method is lower in fat but still tasty. If you need gluten-free options, use almond flour and gluten-free breadcrumbs. This way, everyone can enjoy these chicken tenders.
Side Dish Pairings
Serve your chicken tenders with some great sides. I love pairing them with crispy sweet potato fries or a fresh garden salad. You can also add dipping sauces like honey mustard or ranch. These pair nicely and add extra flavor. For a fun touch, try a yogurt-based sauce with herbs to cool down the spice.
Storage Info
Cooling and Storing
To cool chicken tenders, place them on a wire rack. This keeps air flowing around them. It helps prevent steam from making them soggy. Let them cool for about 10 minutes. Store them in airtight containers. Glass or plastic containers work well for storage. Make sure they are fully cooled before sealing to avoid moisture buildup.
Reheating Instructions
Reheat chicken tenders in the air fryer for the best results. Set the air fryer to 375°F (190°C). Heat for about 5-7 minutes. This keeps them crispy. You can also use an oven. Preheat to 350°F (175°C) and heat for about 10 minutes. Watch closely to avoid drying them out.
Freezing Tips
To freeze leftovers, let them cool completely first. Place chicken tenders in a single layer on a baking sheet. Freeze them for about 1-2 hours. Once frozen, transfer them to a freezer-safe bag. Remove as much air as possible before sealing. This helps prevent freezer burn.
For thawing, place the bag in the fridge overnight. If you need them faster, use the microwave’s defrost setting. After thawing, reheat them in the air fryer or oven for best texture.
FAQs
Common Questions
Can I use chicken breasts instead of tenders?
Yes, you can use chicken breasts. Just cut them into strips. This helps them cook evenly. Chicken breasts may take a minute longer than tenders.
How can I make the chicken tenders more flavorful?
To boost flavor, try adding herbs or spices to the breading. You can mix in paprika, cayenne, or even some grated cheese. Marinating the chicken in buttermilk adds great taste too.
Cooking Times
How long do I cook chicken tenders in an air fryer?
Cook the chicken tenders for 10-12 minutes. Flip them halfway through for even browning. Check they reach 165°F (74°C) inside.
What is the best temperature for air frying chicken tenders?
The best temperature is 400°F (200°C). This gives them a nice, crispy texture while keeping the inside juicy.
Serving Ideas
What do I serve with everything bagel chicken tenders?
These tenders go well with a salad or veggies. Try serving with honey mustard or ranch dressing for dipping. You can also add a side of fries for a fun meal.
Can I make these chicken tenders ahead of time?
Yes, you can prepare them ahead. Bread the chicken and store it in the fridge. Cook them right before serving for the best taste.
You’ve now learned how to make delicious everything bagel chicken tenders. We discussed ingredients, detailed step-by-step instructions, and shared tips for the best results. Remember to experiment with flavors and side dishes to find what you love. Proper storage and reheating will keep your tenders tasty. Follow these steps, and you’ll impress everyone at your next meal. Enjoy your cooking adventure!


![To make yummy buffalo chicken sliders, you need a few key items: - 1 pound of cooked chicken, shredded - 1/2 cup of buffalo sauce - 1/4 cup of ranch dressing - 12 slider rolls (mini burger buns) - 1 cup of shredded lettuce - 1/2 cup of diced tomatoes - 1/2 cup of shredded cheddar cheese - 1 tablespoon of olive oil - Salt and pepper to taste These main ingredients create a great base for your sliders. The combination of chicken, buffalo sauce, and ranch dressing gives them a nice kick. When serving your sliders, consider adding these extras: - A small bowl of ranch dressing for dipping - Fresh parsley for garnish - Crisp celery sticks for crunch These items enhance the experience. They add freshness and flavor. Plus, they look nice on the plate. If you want to boost the flavor, try these optional ingredients: - Crumbled blue cheese for a tangy taste - Sliced jalapeños for heat - Pickles for a crunchy contrast These additions can make your sliders even more exciting. Feel free to mix and match based on your taste. For the full recipe to create your buffalo chicken sliders, check the Full Recipe. First, grab a medium bowl. In this bowl, mix the shredded chicken with buffalo sauce and ranch dressing. Use a spoon to coat every piece of chicken well. This step is key; it gives the chicken great flavor. Next, heat a skillet over medium heat. Add the olive oil and let it shimmer. Carefully pour in your buffalo chicken mixture. Cook it for about 5 to 7 minutes. Stir it often to warm it evenly and make it thicker. Taste your mixture and add salt or pepper if needed. While the chicken cooks, take the slider rolls. Slice each roll in half. You will use the bottom half first. Spoon a nice portion of the buffalo chicken mixture onto each bottom half. Make it nice and high for a hearty bite! Then, add shredded lettuce, diced tomatoes, and a sprinkle of cheddar cheese. Finally, place the top half of the bun on each slider. If you want a crispy touch, broil the sliders. Place them on a baking sheet. Broil for 1 to 2 minutes until the tops are golden brown. Keep an eye on them to prevent burning. This step adds a nice crunch and makes the sliders even better. Enjoy your tasty creations using the Full Recipe! To keep your chicken tender, use cooked chicken. Shredded rotisserie chicken works great. If you cook it yourself, avoid overcooking. Always add buffalo sauce while the chicken is warm. This helps the flavors blend well. Choose soft, small slider rolls for the best taste. Hawaiian rolls add a sweet touch. You can also use potato rolls for a fluffy texture. Ensure they are fresh for a perfect bite. Buffalo chicken sliders shine with extra toppings. Serve them with ranch or blue cheese dressing for dipping. Fresh veggies, like celery sticks or carrot sticks, add crunch. Pair sliders with crispy fries or a light salad. Don’t forget to check the [Full Recipe] for all the steps! {{image_4}} You can make your buffalo chicken sliders even spicier. Add more hot sauce to your chicken mixture. You can also mix in diced jalapeños for extra heat. If you love bold flavors, try adding a dash of smoked paprika. This spice gives a nice twist to the flavor. If you want a vegetarian option, use cauliflower instead of chicken. Start by roasting cauliflower florets until they are tender. Then, toss them in buffalo sauce just like you would with chicken. This method gives you that spicy flavor while keeping it meat-free. It’s a great way to enjoy sliders without the meat. Switching up the sauce can change the whole dish. Instead of traditional buffalo sauce, experiment with teriyaki or garlic parmesan sauces. These sauces add different tastes to your sliders. You can mix and match different toppings, like blue cheese or avocado, to create your own flavor profile. This makes your sliders unique and fun. For more ideas, you can check the Full Recipe. After a fun meal, you may have some sliders left. Store them in an airtight container. Keep them in the fridge for up to three days. If you want to keep them longer, consider freezing. Place the sliders in freezer-safe bags, removing as much air as possible. To reheat your sliders, use an oven. Preheat it to 350°F (175°C). Wrap the sliders in foil to keep them moist. Heat for about 10-15 minutes. You can also use a microwave. Just heat each slider for 30 seconds to 1 minute. Be careful not to overheat, as that can dry them out. If you want to enjoy these sliders later, freezing is a great option. After cooking, let them cool completely. Place them in freezer-safe containers or bags. They can last in the freezer for up to three months. When ready to eat, thaw them in the fridge overnight before reheating. For the best taste, follow the reheating tips mentioned earlier. Enjoy your Buffalo Chicken Sliders anytime! For the full recipe, check out the [Full Recipe]. The best buffalo sauce balances heat and flavor. Look for sauces that blend cayenne pepper, vinegar, and butter. Brands like Frank’s RedHot or Crystal Hot Sauce work well. You can also make your own by mixing hot sauce with melted butter. This gives you control over the heat level and taste. To add spice, try these tips: - Use a hotter buffalo sauce. - Mix in diced jalapeños or chili flakes. - Add hot sauce directly to the chicken mix. - Serve with spicy pickles or a jalapeño slice on top. Experiment to find the right heat for your taste! Yes, you can prepare buffalo chicken sliders in advance. Cook the chicken and store it in the fridge for up to three days. Assemble the sliders just before serving. This keeps the rolls fresh and the flavors bright. You can also freeze the chicken mixture for up to three months. Buffalo chicken sliders pair well with many sides. Here are some great options: - Celery sticks and carrot sticks with ranch dressing. - Crispy potato wedges or French fries. - A fresh green salad with a light vinaigrette. - Coleslaw for a crunchy contrast. These sides will enhance your meal and keep it fun! In this blog post, we explored how to make delicious buffalo chicken sliders. We covered key ingredients, step-by-step cooking instructions, and helpful tips to ensure great taste. You learned about variations, storage options, and answered common questions. Buffalo chicken sliders are easy to prepare and fun to customize. Enjoying these sliders with friends or family brings joy to any gathering. Try your favorite pairing and savor the rich flavors. Keep experimenting with new ideas for even more tasty sliders!](https://dishtreats.com/wp-content/uploads/2025/05/2a959048-bde5-4e87-837c-50029693f266-768x768.webp)


. - Ensure even space on the baking sheet for optimal roasting. - Toss halfway through cooking for uniform caramelization. Roasting carrots and chickpeas makes them sweet and crunchy. When you spread them out, they cook evenly. If they touch, they steam instead of roast. This can make them soggy and less tasty. Tossing the mixture halfway is key. It helps to brown all sides well. This step adds more flavor and a lovely texture. - Experiment with different citrus juices like lime or orange. - Substitute tahini with Greek yogurt for a creamy dressing. The dressing can change the whole dish. Use lime juice for a zesty twist. Orange juice gives a sweet touch. Both add freshness and brightness. If you want a creamy option, use Greek yogurt instead of tahini. It makes the dressing rich and smooth. This swap gives a fun flavor change too. - Serve in individual bowls for a refined presentation. - Add a lemon wedge for guests to use. Presenting this salad in bowls looks nice. It makes each serving feel special. Guests can enjoy their own portion. Adding a lemon wedge on the side is a great idea. It lets everyone add a splash of fresh juice. This brightens the salad even more. For the full recipe, check the details above. Enjoy your cooking! {{image_4}} You can make this salad even better. Try adding other roasted veggies. Bell peppers bring sweetness. Sweet potatoes add creaminess. Both enhance flavor and texture. You can also toss in nuts or seeds. Almonds or sunflower seeds add a nice crunch. They make the salad more filling and fun. If you want more protein, try grilled chicken or tofu. Both options work well with roasted carrots and chickpeas. Grilled chicken adds a savory touch, while tofu keeps it plant-based. You can also use canned tuna. It gives the salad a different flavor and makes it heartier. Want to boost flavor? Experiment with fresh herbs. Cilantro or mint can brighten the taste. They add freshness that complements the roasted veggies. You can also spice it up with hot sauce. Just a dash gives the salad a nice kick. It’s a fun way to change the flavor profile. For the complete recipe, check out the Full Recipe section above. Store leftovers in an airtight container in the fridge. They are best consumed within 2-3 days. After that, the carrots may lose their crunch, and the flavors fade. Freezing this salad is not recommended. The dressing may separate when frozen. This can change the texture and taste of your salad. You can enjoy this salad cold or at room temperature. If you prefer, reheat in the oven. This helps retain the texture of the roasted carrots and chickpeas. Yes, use maple syrup instead of honey and omit the feta cheese. This keeps the flavors rich and plant-based. You won’t miss the cheese, trust me. The roasted carrots and chickpeas bring enough taste and texture to satisfy everyone. You can use black beans or white beans as alternatives. Both options provide protein and fiber. They also add a nice twist to the taste. Black beans bring a bit of earthiness, while white beans offer a creamier texture. Serve the dressing on the side to keep the greens crisp until serving. This way, they stay fresh and crunchy. Drizzle the dressing just before you eat for the best taste and texture. Spinach, arugula, or chopped kale work well for base greens. Each option adds a different flavor. Spinach is mild, arugula is peppery, and kale adds a hearty bite. Choose what you like best! This blog post shares a tasty recipe featuring roasted carrots and chickpeas on fresh greens. It walks through each step, from prep to assembly, and includes tips for perfect results. You can even tweak the dressing and add your favorite proteins. Don’t hesitate to make this salad your own. Experimenting with flavors makes cooking fun! Enjoy your healthy, vibrant salad that brings flavor and nutrition to your table.](https://dishtreats.com/wp-content/uploads/2025/07/15b40619-46f3-4baf-96e6-94c974b2a42a-768x768.webp)

![To make Parmesan roasted cauliflower, gather these simple ingredients: - 1 large head of cauliflower, cut into bite-sized florets - 3 tablespoons extra virgin olive oil - 1 cup freshly grated Parmesan cheese - 2 teaspoons garlic powder - 1 teaspoon onion powder - 1 teaspoon smoked paprika - Salt and freshly ground black pepper, to taste - Fresh parsley, finely chopped (for garnish) Using fresh ingredients makes a big difference in taste. Look for a cauliflower head that is firm and free of blemishes. The olive oil should be extra virgin for the best flavor. Freshly grated Parmesan cheese melts better than pre-grated. It has a richer taste and adds a creamy texture. Spices should be fresh too. This helps ensure you get the best flavor in every bite. If you want to change things up, try these add-ins: - Red pepper flakes for heat - Lemon zest for a fresh twist - Balsamic glaze drizzled on top for sweetness - Other cheeses like mozzarella or cheddar for different flavors These options let you customize the dish to fit your taste. Feel free to mix and match! For the full recipe, check out the details above. Start with a large head of cauliflower. Cut it into small, bite-sized florets. This size helps them cook evenly. Rinse the florets under cold water. Then, dry them well with a towel. Removing excess moisture helps them roast better. In a large mixing bowl, add the dried cauliflower florets. Pour in three tablespoons of extra virgin olive oil. Toss the florets until they are well-coated. In another bowl, mix one cup of freshly grated Parmesan cheese, two teaspoons of garlic powder, one teaspoon of onion powder, and one teaspoon of smoked paprika. Add salt and freshly ground black pepper to taste. Combine these dry ingredients well. Spread the coated cauliflower onto a lined baking sheet. Make sure they are in a single layer. This step helps them roast evenly. Preheat your oven to 425°F (220°C). Place the baking sheet in the oven and roast for 25 to 30 minutes. Flip the florets halfway through for even cooking. Look for a golden brown color and a tender texture. Once done, take the cauliflower out of the oven. Let it cool for a few minutes. Garnish with fresh parsley for a pop of color. Serve it on a bright platter for a beautiful display. You can also drizzle a little olive oil on top for extra flavor. This dish pairs well with grilled meats or as part of a veggie spread. Enjoy your delicious Parmesan roasted cauliflower! For more detailed guidance, check out the Full Recipe. To get that perfect roast, you need the right oven temperature. Preheat your oven to 425°F (220°C). This high heat crisps the edges and makes the cauliflower tender. Spread the florets in a single layer on the baking sheet. If they are too crowded, they will steam instead of roast. Flip them halfway through cooking for even browning. Aim for a golden color; that's when they taste the best. One common mistake is not drying the cauliflower. After washing, make sure it's dry. Excess water can lead to soggy florets. Another mistake is using old Parmesan cheese. Fresh cheese melts better and has more flavor. Lastly, don't skip the seasoning. A light touch of salt and pepper really makes a difference. You can easily make this dish even tastier. Try adding a squeeze of lemon juice before serving for a zesty kick. Fresh herbs like thyme or rosemary also add depth. For spice lovers, sprinkle some red pepper flakes for heat. You can find all these flavor ideas in the [Full Recipe]. {{image_4}} You can switch up the cheese for more flavor. Try pecorino Romano for a saltier bite. Goat cheese adds creaminess and tang. For a milder taste, use mozzarella or cheddar. Each cheese brings a unique twist to the dish. So, feel free to experiment with what you have on hand. If you like heat, add some cayenne pepper or crushed red pepper flakes. Start with a pinch and taste as you go. For a milder flavor, skip the smoked paprika. You can also use Italian seasoning for a different herb mix. Adjusting spices lets you make the dish your own. You can mix in other veggies for fun. Try bell peppers, carrots, or zucchini. Cut them into similar sizes as the cauliflower. This way, everything cooks evenly. Roasting a mix adds color and taste. You get a delightful medley on your plate. Check out the Full Recipe for more ideas on making this dish stand out! To keep your Parmesan roasted cauliflower fresh, place it in an airtight container. Make sure it cools to room temperature first. This helps prevent moisture buildup. Store it in the fridge for up to four days. If you want to enjoy it later, make sure to check the smell and texture before eating. When it's time to enjoy your leftovers, reheating is key. I recommend using the oven for the best results. Preheat your oven to 350°F (175°C). Spread the cauliflower on a baking sheet. Heat for about 10 to 15 minutes. This will crisp it up again and keep the cheese flavor strong. You can also use a microwave for quick reheating. Just heat for one to two minutes. But keep in mind, it won’t be as crispy. If you want to store the cauliflower for longer, freezing is a great option. Start by letting it cool completely. Then, place it in a freezer-safe bag. Squeeze out as much air as possible before sealing it. You can freeze it for up to three months. When ready to eat, thaw it overnight in the fridge. Then, reheat in the oven for the best taste. For more details, check out the full recipe. Roasting cauliflower takes about 25 to 30 minutes. Preheat your oven to 425°F (220°C). Place the cauliflower on a baking sheet in a single layer. Halfway through, flip the florets for even cooking. You want them to be golden brown and fork-tender. Yes, you can make this dish ahead of time. Roast the cauliflower and let it cool. Store it in an airtight container in the fridge for up to three days. When you’re ready to serve, just reheat it in the oven. This keeps it crisp and tasty. Parmesan roasted cauliflower pairs well with many dishes. Serve it alongside grilled chicken or fish for a balanced meal. It also complements pasta or a fresh salad. You can even use it as a topping for grain bowls. This dish adds a flavorful crunch to your plate. For the full recipe, check out the details above! In this blog post, we explored how to make delicious Parmesan Roasted Cauliflower. We outlined the key ingredients and shared tips for picking top-quality ones. I provided step-by-step instructions, covering preparation, mixing, roasting, and serving. You learned tips to ensure perfect roasting and avoid common mistakes. We discussed variations like different cheeses and spices, along with storage and reheating advice. With these insights, you can enjoy this tasty dish in many ways. Take your time and have fun creating your own version!](https://dishtreats.com/wp-content/uploads/2025/06/1026dd12-7014-4148-8186-1edda0f6a7e3-768x768.webp)