Air Fryer Coconut Shrimp Crispy and Flavorful Delight

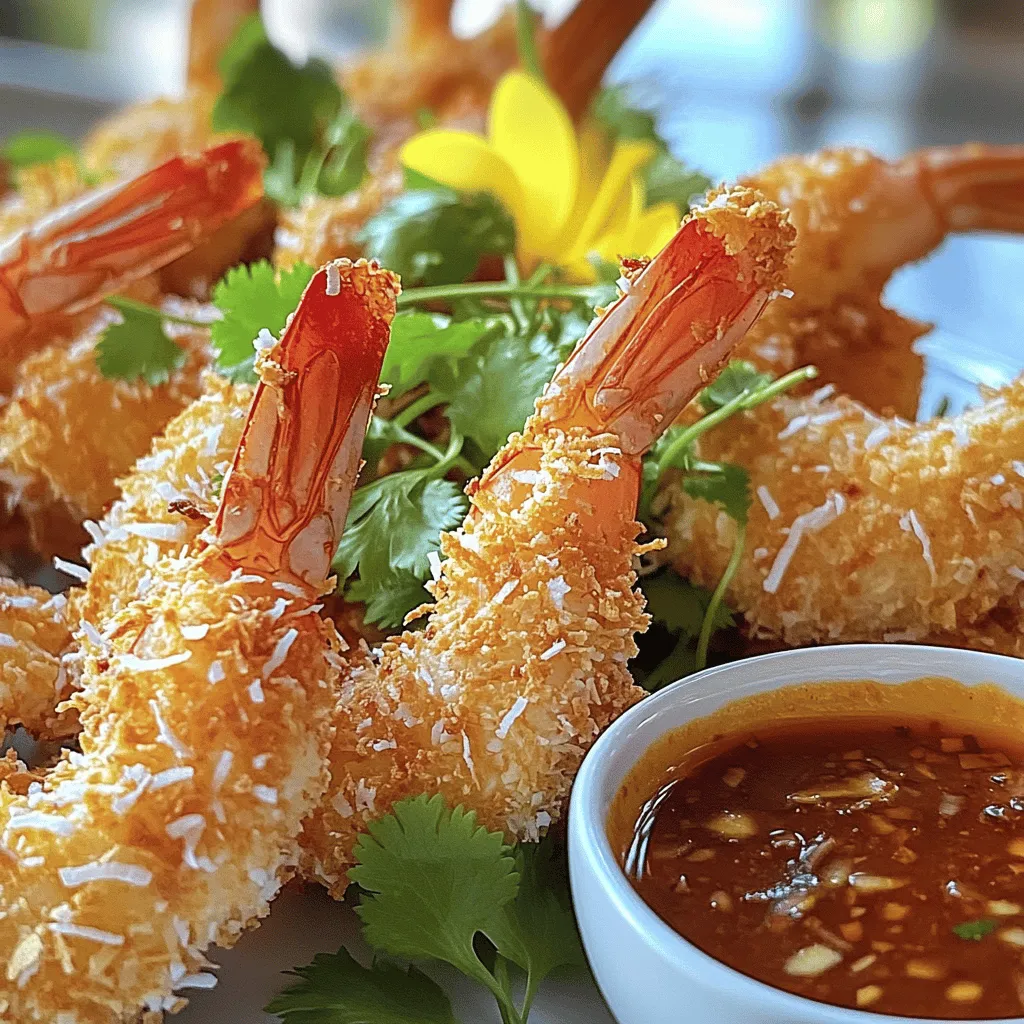
Do you crave a crispy, flavorful snack that’s both easy to make and delicious? Let me introduce you to Air Fryer Coconut Shrimp! This dish is my go-to for quick meals or as a fun appetizer. With simple ingredients and an easy step-by-step guide, you’ll impress your friends and family. Dive into this tasty recipe and discover tips for the perfect crunch every time!
Ingredients
List of Ingredients
- 1 pound large shrimp, peeled and deveined
- 1/2 cup all-purpose flour
- 2 large eggs, beaten
- 1 cup shredded unsweetened coconut
- 1/2 cup panko breadcrumbs
- 1 teaspoon paprika
- 1/2 teaspoon garlic powder
- Salt and pepper to taste
- Cooking spray or oil for greasing
Ingredient Substitutions
What can I use instead of shrimp?
You can use chicken breast or tofu as a substitute for shrimp. Both options work well with the same seasoning and coating method.
What if I need gluten-free options?
For a gluten-free version, use rice flour instead of all-purpose flour. Substitute panko breadcrumbs with gluten-free breadcrumbs. These swaps will keep the recipe tasty and safe for those with gluten sensitivities.
Step-by-Step Instructions
Preheat the Air Fryer
Start by setting your air fryer to 400°F (200°C). Preheating takes about 5 minutes. This step is key for even cooking. A hot air fryer ensures the shrimp cook perfectly.
Season the Shrimp
Take 1 pound of peeled and deveined shrimp. Place them in a bowl. Add salt, pepper, paprika, and garlic powder. Mix gently until each shrimp has a nice coating. This seasoning adds great flavor. It makes the shrimp taste amazing!
Breading Process
Now, let’s set up your breading station. You will need three shallow dishes. Fill the first dish with 1/2 cup of flour. In the second dish, pour in 2 large beaten eggs. In your third dish, mix 1 cup of shredded unsweetened coconut with 1/2 cup of panko breadcrumbs. This mix adds crunch!
To bread the shrimp, take one shrimp. Dip it in the flour, shaking off the excess. Next, dip it in the egg, letting any extra egg drip off. Finally, press it into the coconut and panko mix. Make sure it sticks well. Repeat this for all the shrimp.
Air Frying Instructions
Before cooking, spray the air fryer basket lightly with cooking spray. Place the breaded shrimp in a single layer. Do not overcrowd them; they need space to cook. You might have to cook in batches.
Cook the shrimp for 8-10 minutes. Flip them halfway through cooking. They should turn a lovely golden brown. Crispy and delicious, they will be ready to serve. Enjoy your air-fried coconut shrimp with your favorite dipping sauce!
Tips & Tricks
Achieving Perfect Crispiness
To get that perfect crunch, start with your air fryer basket. Always spray it with cooking spray. This step helps prevent the shrimp from sticking. It also promotes even cooking. I recommend a light coat on the shrimp as well. This will make them golden and crispy.
Avoiding Common Mistakes
One big mistake is overcrowding the basket. If you pack in too many shrimp, they won’t cook well. They need space for hot air to flow. Another issue is not preheating your air fryer. If it’s not hot enough, your shrimp may turn out soggy. Always preheat to 400°F (200°C) for the best results.
Flavor Enhancements
You can boost the flavor with a few extra spices. I like to add a pinch of cayenne pepper for heat. You could also try adding lime zest for a fresh twist. For a tropical kick, mix in some crushed pineapple with the coconut. These small changes can elevate your dish and impress your guests.

Variations
Spicy Coconut Shrimp
You can make your coconut shrimp spicy with just a few tweaks. Add red pepper flakes or cayenne pepper to the seasoning mix. This will give your shrimp a nice kick. You can also try a spicy sauce for dipping. A sriracha mayo or hot chili sauce can enhance the flavor. These changes will make your dish stand out and excite your taste buds.
Tropical Variations
Want to add a tropical twist? Think about using fresh fruits in your dish. Pineapples or mangoes can add sweetness. You can serve the shrimp with a tropical salsa. Mix diced mango, red onion, and cilantro for a fresh topping. You can also drizzle a coconut curry sauce over the shrimp for added flavor. These fruity options bring a bright and fresh taste to your meal.
Healthier Options
If you want a lighter dish, you can bake the shrimp instead of frying them. Preheat your oven to 400°F (200°C) and place the breaded shrimp on a baking sheet. Spray them lightly with oil to keep them crispy. Bake for about 12-15 minutes, flipping halfway through. This method cuts down on oil while still giving you a crunchy bite. Enjoy the same great taste with fewer calories!
Storage Info
How to Store Leftovers
After enjoying your air fryer coconut shrimp, store any leftovers properly. First, let the shrimp cool down to room temperature. This cooling step helps prevent sogginess. Place the shrimp in an airtight container. Make sure to layer them with parchment paper to keep them crispy. Store them in the fridge for up to three days.
Reheating Instructions
To reheat your coconut shrimp, use the air fryer again. Preheat it to 350°F (175°C). Place the shrimp in the basket in a single layer. Heat for about 4-5 minutes, flipping them halfway through. This method keeps the shrimp crispy and delicious. Avoid using the microwave, as it can make the shrimp soft and chewy.
Freezing Tips
You can also freeze both uncooked and cooked shrimp. For uncooked shrimp, bread them as you normally would, then place them on a baking sheet in a single layer. Freeze until solid, then transfer them to a freezer bag. They can last for up to three months. For cooked shrimp, let them cool, then store them in an airtight container. They can also last up to three months in the freezer.
FAQs
How long does it take to cook coconut shrimp in an air fryer?
It takes about 8 to 10 minutes to cook coconut shrimp in an air fryer. I recommend flipping the shrimp halfway through to ensure even cooking. When they turn golden brown, they are ready to eat. This quick cooking time makes air frying easy and fun.
Can I use frozen shrimp for this recipe?
Yes, you can use frozen shrimp! Just make sure to thaw them first. Place the shrimp in cold water for about 15-20 minutes. After thawing, dry them well with paper towels. This helps the coating stick better. Using frozen shrimp is a great option if fresh shrimp is hard to find.
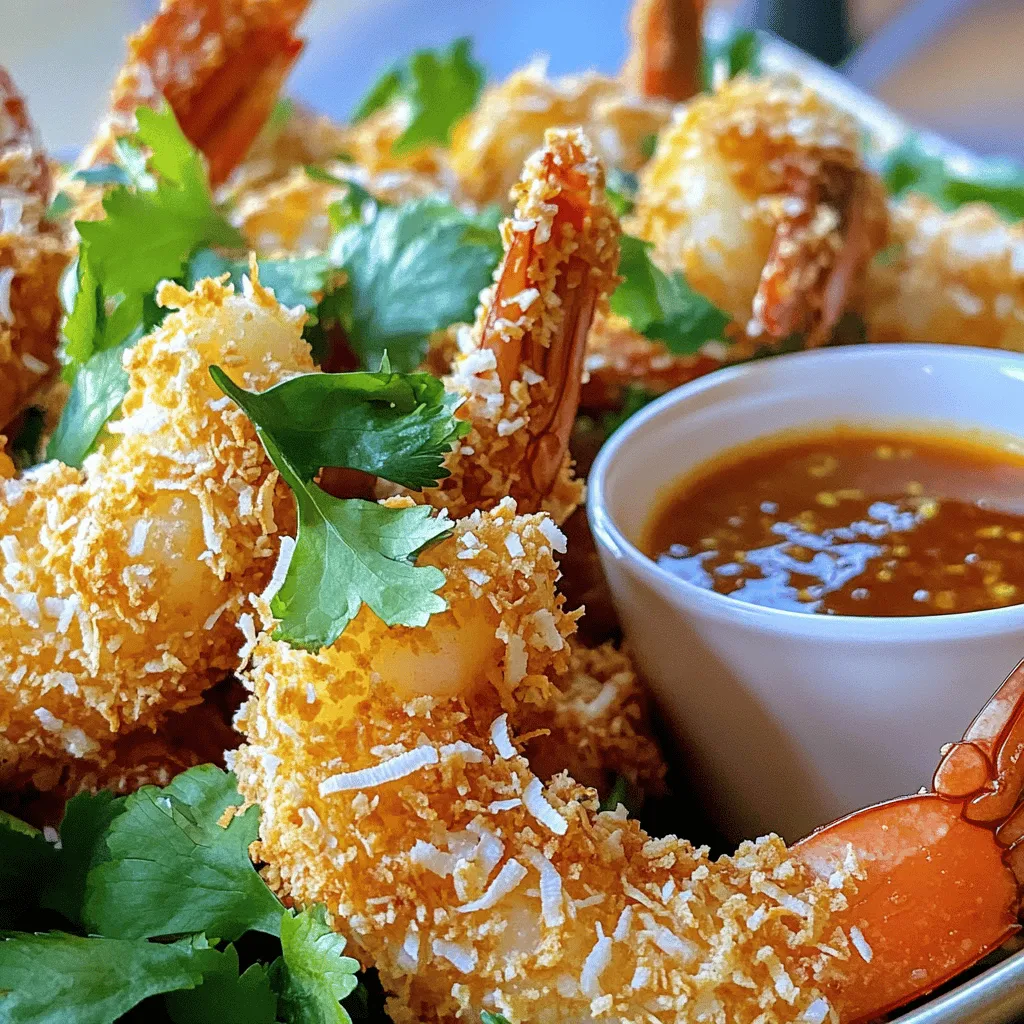
What dipping sauces pair well with coconut shrimp?
Several sauces go great with coconut shrimp. Here are a few favorites you can try:
- Sweet chili sauce
- Pineapple salsa
- Mango chutney
- Spicy aioli
These sauces add a nice twist to the crunchy shrimp. Choose one or mix and match for extra fun!
This blog post covered how to make delicious coconut shrimp in an air fryer. We discussed the ingredients, cooking steps, and tips for great results. I shared ways to customize your dish with flavors or healthy options. Remember to store leftovers properly and reheat them to keep them crispy. Whether you want a spicy twist or a tropical touch, this recipe is versatile. Enjoy creating your own tasty version of coconut shrimp!


![- 1 can (15 oz) of chickpeas - 2 tablespoons extra virgin olive oil - Spice seasoning options: smoked paprika, garlic powder, ground cumin Crispy air fryer chickpeas need just a few simple ingredients. First, grab a can of chickpeas. They provide protein and fiber. Next, use extra virgin olive oil for richness. This oil helps the spices stick and adds flavor. For seasoning, I love smoked paprika, garlic powder, and ground cumin. These spices add depth and warmth to the dish. - Chopped fresh parsley or cilantro for garnishing - Alternative spices for flavor enhancement You can add fresh herbs like parsley or cilantro to make it pop. They add a burst of color and freshness. Feel free to play with spices. Try cayenne for heat or even cinnamon for a sweet twist. The options are endless! If you want to see the full recipe, check it out [Full Recipe]. - Preheat air fryer to 400°F (200°C). - Rinse and dry chickpeas thoroughly. Start by preheating your air fryer. Set it to 400°F (200°C) and let it heat for about five minutes. While it warms up, rinse the chickpeas well. It’s key to remove all the canning liquid. After rinsing, spread the chickpeas on a kitchen towel. Pat them dry gently. This step helps them get that perfect crisp. - Mix chickpeas with olive oil and spices. - Transfer to air fryer basket. In a large bowl, add the dried chickpeas. Pour in two tablespoons of olive oil. Sprinkle in smoked paprika, garlic powder, ground cumin, sea salt, and black pepper. Mix well so every chickpea gets coated. Next, transfer the seasoned chickpeas to the air fryer basket. Make sure they are in a single layer. Crowding the basket can lead to uneven cooking. - Set cooking time for 15–20 minutes. - Shake basket every 7 minutes for even cooking. Set the timer for 15 to 20 minutes. It’s important to shake the basket every seven minutes. This ensures all sides get crispy. Look for a nice golden-brown color and a satisfying crunch. When they’re done, let them cool for a few minutes. They will crisp up even more as they cool. If you like, garnish with chopped parsley or cilantro for a fresh touch before serving. To get the best crunch, drying chickpeas is key. Start by rinsing them well. Then, spread them on a clean kitchen towel and gently pat them dry. This step removes excess moisture, which helps them crisp up nicely in the air fryer. Next, set your air fryer to 400°F (200°C). Preheat it for about 5 minutes. This heat is crucial for achieving that perfect texture. When you place the chickpeas in the basket, make sure they are in a single layer. Overcrowding can lead to soggy chickpeas. Crispy chickpeas pair well with many dips. Hummus and tzatziki are two of my favorites. They add creaminess that balances the crunch. You can also toss them into salads for an extra crunch or use them to top soups. If you want to get creative, try using crispy chickpeas as a snack on their own. They make a great addition to trail mixes or can be sprinkled on popcorn for a fun twist. Chickpeas are not just tasty; they're nutritious too. They are high in protein and fiber. This makes them a filling snack that can help you feel satisfied. Air frying reduces the amount of oil needed, so you get a low-calorie snack option without sacrificing flavor. These crispy chickpeas are a great way to enjoy a healthy snack without the guilt. You can feel good about munching on them anytime! For the full recipe, check the section above. {{image_4}} You can change the flavor of your crispy air fryer chickpeas. One fun option is to add spice. Try cayenne or chili powder for a spicy kick. Just mix in a little with your other spices before cooking. If you prefer sweet snacks, go for cinnamon and sugar. This will give your chickpeas a unique twist that's fun and tasty. These chickpeas are healthy and fit many diets. They are naturally gluten-free and vegan-friendly. This means everyone can enjoy them! For those watching their salt intake, you can lower the sodium. Simply reduce or skip the sea salt in the recipe for a low-sodium version. If you're hosting a party, you might want more chickpeas. To increase the batch size, just double or triple the ingredients. The cooking time may stay the same, but keep an eye on them. You can also swap chickpeas for other legumes like black beans or lentils. They will work well in the air fryer and offer different flavors. Each option can give you a fun new snack! Check out the [Full Recipe](#) for detailed steps on making these crispy delights! To store your crispy chickpeas, use an airtight container. This will help them stay crunchy. A glass jar or a plastic container with a tight lid works well. Make sure to let them cool completely before sealing. This step prevents moisture buildup. You can easily reheat chickpeas in an air fryer. Set it to 350°F (175°C) and heat for about 5 minutes. This method keeps them crispy. If you prefer the oven, place them on a baking sheet at the same temperature. Check often to avoid sogginess. Crispy chickpeas last for about 3 days at room temperature. If you store them in the fridge, they may last a bit longer, but they can lose some crispiness. For best results, enjoy them fresh! To make air fryer chickpeas crispy, first dry them well. After rinsing, spread them on a clean towel and pat them dry. Removing moisture is key for that perfect crunch. Next, toss the chickpeas with olive oil and spices. The oil helps them crisp up in the air fryer. Set your air fryer to 400°F (200°C). Cook them for 15 to 20 minutes, shaking the basket every 7 minutes. This ensures even cooking and a nice, golden-brown color. Keep an ear out for a satisfying crunch as they cook. Let them cool for a few minutes after frying. They will get even crunchier as they cool. Yes, you can use dried chickpeas, but they require more prep. Start by soaking the dried chickpeas overnight. This softens them and reduces cooking time. After soaking, rinse and boil them until tender, about 1 to 2 hours. Once cooked, follow the same steps to dry and season them. Air frying time may be longer, as dried chickpeas need to lose more moisture. Pay close attention to their texture for that perfect crunch. Crispy chickpeas pair well with many dips. Try hummus for a classic touch. Tzatziki offers a cool contrast. You can also serve them with guacamole for a creamy twist. For a spicy kick, mix them with a sriracha mayo. These dips enhance the flavors of the chickpeas. They make for a fun and tasty snack or appetizer. Enjoy exploring different combinations to find your favorite! For the full recipe, check out the [Full Recipe]. Crispy air fryer chickpeas are easy and fun to make. We covered the main ingredients, like chickpeas and olive oil, and talked about spices for extra flavor. You learned preparation steps, tips for crispiness, and fun ways to enjoy this snack. Try different spices or dips to keep it exciting. Crispy chickpeas are a tasty, healthy option for any event. Enjoy your cooking and happy snacking!](https://dishtreats.com/wp-content/uploads/2025/07/61bc6060-fad3-40a7-be2f-ccc6788a1d37-768x768.webp)


![- 2 cups canned chickpeas - Fresh herbs: parsley and cilantro - Key spices: cumin and coriander To make crispy baked falafel, start with the main ingredients. The base is 2 cups of canned chickpeas. They give falafel a wonderful texture. Fresh herbs like parsley and cilantro add bright flavors. Using both gives a fresh taste. Spices are key too. Ground cumin and coriander bring warmth and depth. They create a balance that makes falafel special. - Aromatics: onion and garlic - Binding ingredients: tahini and breadcrumbs - Optional: olive oil for drizzling Next, we have additional ingredients. Aromatics like onion and garlic make the falafel smell great. They add a savory note that enhances the dish. Binding ingredients are also important. Tahini helps hold everything together. Breadcrumbs add crunch and structure. If you want a golden and crispy finish, drizzle olive oil on top. It helps the falafel bake evenly and get that perfect crunch. For the full recipe, check out the detailed instructions provided. 1. Preheat your oven to 400°F (200°C). 2. Line a baking sheet with parchment paper. This helps prevent sticking and ensures even cooking. 3. In a food processor, add the drained chickpeas, chopped onion, minced garlic, parsley, cilantro, cumin, coriander, baking powder, salt, black pepper, lemon juice, and tahini. 4. Pulse the mixture. You want it well combined but still chunky, like a paste. 1. Transfer the mixture to a mixing bowl. 2. Fold in the breadcrumbs. If it feels wet, add more breadcrumbs until it holds together. 3. Use your hands to shape the mixture into small balls or patties, about the size of golf balls. 4. Place them evenly on the prepared baking sheet. 1. Drizzle a good amount of olive oil over the falafel balls. This helps them get crispy. 2. Bake in the oven for about 20 minutes. Flip them halfway through for even browning. 3. Look for a golden brown color and a crispy outside. 4. Let the falafel cool for a few minutes before serving. This enhances their flavor and texture. For the full recipe, check the detailed instructions provided earlier. To make your falafel crispy, olive oil plays a key role. It adds flavor and helps create a golden crust. I suggest drizzling olive oil on top of your falafel before baking. This not only enhances the taste but also promotes even cooking. Baking techniques matter too. Preheat your oven to 400°F (200°C) for the best results. Use parchment paper on your baking sheet to prevent sticking. This will help the falafel stay intact and crisp up nicely. Adjusting the breadcrumbs is also important. If your mixture feels too wet, add more breadcrumbs until it holds together. If you want extra crunch, consider using panko breadcrumbs. They give a delightful texture that enhances the overall experience. For a beautiful presentation, arrange your crispy baked falafel on a colorful platter. Pair it with a creamy tahini sauce and a fresh cucumber-tomato salad. This adds both flavor and visual appeal. You might also want to serve it with warm pita bread. Add a side of hummus or tzatziki for a fun dip. These flavors complement the falafel well and make for a tasty meal. One common mistake is not achieving the right consistency. If your falafel falls apart during baking, it may be too wet. Always ensure your mixture holds together well. Adjust breadcrumbs as needed to fix this. Another mistake is overcrowding the baking sheet. Give each falafel space to bake evenly. This helps them crisp up nicely. Flip them halfway through baking for even browning. Finally, don’t skip the cooling step. Let the falafel cool for a few minutes after baking. This enhances their flavor and texture, making your dish even more delightful. For the full recipe, you can refer to the detailed guide above. {{image_4}} You can make falafel even more exciting by adding spices. Try mixing in smoked paprika for a warm, smoky flavor. If you want a brighter taste, add some zest from a lemon. You might also enjoy using fresh herbs like mint or dill for a fresh twist. Each region has its own spin, so feel free to experiment! For those who need gluten-free options, you can swap breadcrumbs with ground oats or almond flour. Both work well and keep the falafel together. If you want to make it vegan, just skip the tahini or use sunflower seed butter instead. This way, everyone can enjoy these tasty bites! While baking gives falafel a nice crunch, you can try air frying them for a quicker option. Air-frying uses less oil and cooks them evenly. You can also pan-fry them in a little oil for golden-brown goodness. Just make sure to keep an eye on them so they don’t burn. For the full recipe, check out the detailed steps above to make your crispy baked falafel! To store leftover falafel, place them in an airtight container. This helps keep them fresh. If you have sauce, store it separately. Leftover falafel stays tasty for about three to four days in the fridge. For freezing, let the falafel cool completely first. Then, space them on a baking sheet and freeze until solid. Once frozen, transfer them to a freezer bag. This way, they won’t stick together. To reheat, bake them directly from the freezer. Heat at 375°F (190°C) for about 15-20 minutes until warm and crispy. In the fridge, your leftover falafel will last about three to four days. If frozen, they can last up to three months. Just remember to seal them well to avoid freezer burn. Enjoy your crispy baked falafel whenever you want with these easy storage tips. For the full recipe, check back to create these delicious bites! Crispy baked falafel pairs well with many sides. You can serve it with: - Hummus for a creamy dip - Tahini sauce for added flavor - Tzatziki sauce for a cool touch - Fresh salads like cucumber-tomato salad - Pita bread for a classic wrap These options enhance the meal and add fresh tastes. To achieve extra crispy falafel, follow these tips: - Use panko breadcrumbs instead of regular ones. They add more crunch. - Drizzle olive oil generously over the falafel before baking. This helps with browning. - Bake at 400°F (200°C) for the best crispiness. Flip them halfway for even cooking. These small changes can make a big difference in texture. Yes, you can use dried chickpeas! Here’s how: - Soak 1 cup of dried chickpeas overnight in water. This softens them. - Drain and rinse the chickpeas before using them in the recipe. - Cook them in boiling water for about 1 hour until tender. Using dried chickpeas gives a fresher taste but takes more time. For the complete details on making crispy baked falafel, check out the [Full Recipe]. Baked falafel is easy and fun to make. By using canned chickpeas, fresh herbs, and key spices like cumin, you create a tasty dish. Follow the steps for perfect shapes, timing, and crunch. Remember to use olive oil and adjust breadcrumbs for crispiness. Play with flavors and storage tips to maximize your enjoyment. With this guide, you can make falafel that delights and satisfies. Now, you're ready to impress friends and family with your delicious creation!](https://dishtreats.com/wp-content/uploads/2025/06/049364cc-9d10-4f08-b8d2-88a9c6614eda-768x768.webp)

