Air Fryer Cinnamon Apple Chips Crunchy and Sweet Snack

Looking for a tasty and healthy snack? Let me introduce you to Air Fryer Cinnamon Apple Chips! These crunchy, sweet bites are perfect for satisfying your cravings without the guilt. With just a few simple ingredients, like fresh apples and aromatic cinnamon, you can whip up a delicious treat in no time. Get ready to impress your taste buds with this easy recipe that’s both fun to make and even better to eat!
Ingredients
List of Ingredients
- 2 large apples (e.g., Fuji or Honeycrisp)
- 1 teaspoon ground cinnamon
- 1 tablespoon granulated sugar (or coconut sugar)
- Pinch of sea salt
Quality Tips for Ingredients
Choosing the right apple is key. I recommend sweet varieties like Fuji or Honeycrisp. These apples add great flavor and sweetness. Fresh spices make a big difference too. Always use good quality ground cinnamon for the best taste. Avoid old spices that lose their kick. When you use fresh ingredients, your chips will taste amazing. Enjoying this snack is all about the right flavors!
Step-by-Step Instructions
Preheating the Air Fryer
Start by preheating your air fryer to 300°F (150°C). This takes about 3-5 minutes. Preheating helps the apple chips get crispy.
Preparing the Apples
Wash the apples under running water. Use a knife to core them. Slice the apples into rounds, about 1/8 inch thick. A mandoline slicer works best for even slices. Thin slices cook better and get crispier.
Coating the Apple Slices
In a medium bowl, mix 1 teaspoon of ground cinnamon, 1 tablespoon of sugar, and a pinch of sea salt. Stir well to blend the flavors. Then, arrange the apple slices on a clean surface. Sprinkle the cinnamon sugar mix evenly over the apples. Toss them gently to coat all sides.
Air Frying Process
Place the coated apple slices in a single layer in the air fryer basket. Do not overcrowd the basket; this helps them cook evenly. Air fry for 15-18 minutes. Shake the basket halfway through to ensure even crisping. Keep an eye on them, as air fryer times can vary. When they turn golden brown and crispy, take them out. Let them cool on a wire rack. They will become crunchier as they cool.
Tips & Tricks
Best Serving Suggestions
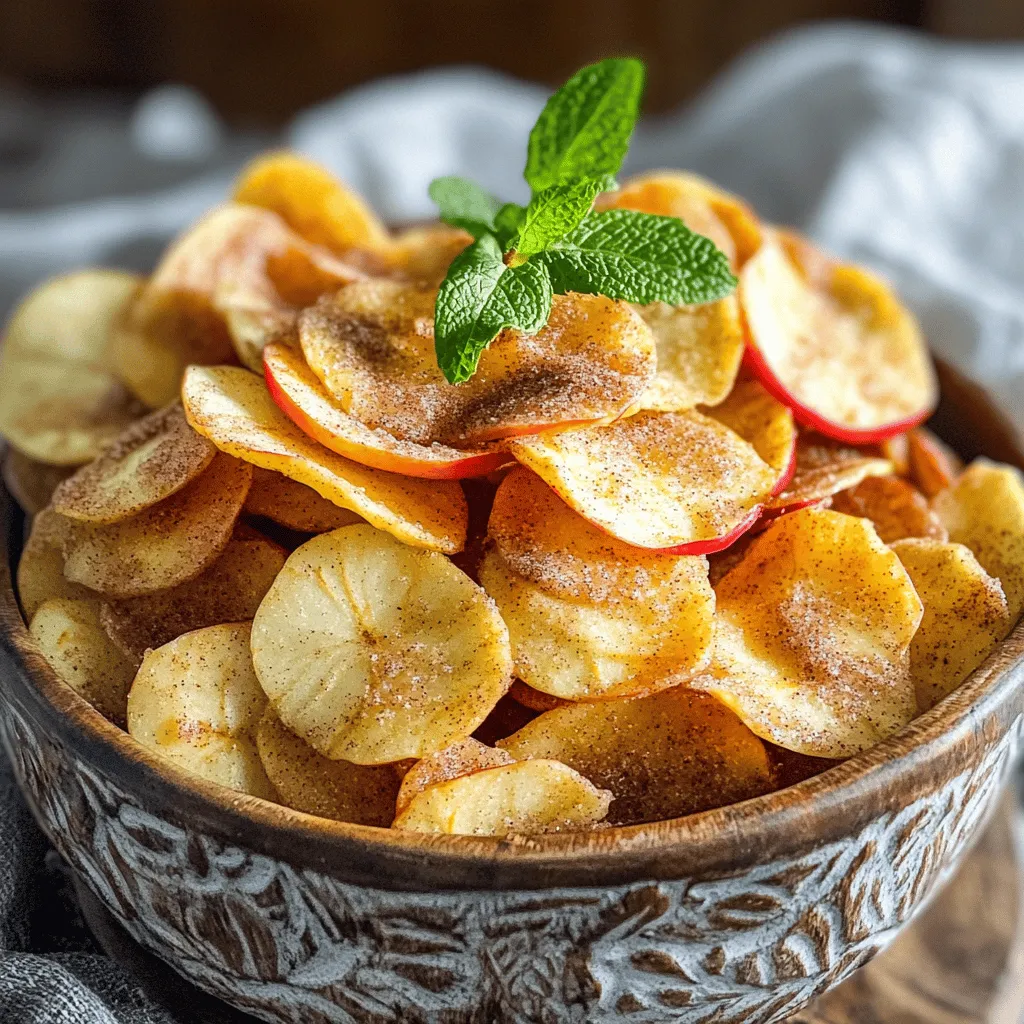
For serving, think about how you want to impress. You can use a nice bowl or a clean platter. A sprinkle of cinnamon on top adds a nice touch. For added color, place a sprig of fresh mint alongside the chips. You can also serve them with a dip. Try yogurt or a nut butter for a creamy twist. These pair well with the sweet chips.
Common Mistakes to Avoid
One common mistake is overcrowding the air fryer. If you pack too many apple slices, they won’t cook evenly. Make sure to spread them out in a single layer. Another mistake is not keeping an eye on the cooking time. Every air fryer is different. Check your chips often to avoid burning. You want them golden brown, not dark.
Enhancing Flavor
Want to mix it up? Add nuts for a crunchy twist. Almonds or walnuts work great. You can also try other spices to change the taste. A dash of nutmeg or a hint of vanilla can take these chips to another level. Experiment with flavored sugars too, like brown sugar or coconut sugar, to find your favorite blend.

Variations
Alternative Seasonings
You can change the flavor of your apple chips easily. Try adding nutmeg for a warm spice. Just use a pinch to keep the taste balanced. Vanilla extract is another fun choice. A few drops will make your chips sweet and fragrant. You can also play with flavored sugars. Look for options like cinnamon sugar or even caramel sugar. These will add extra sweetness with a twist.
Using Different Fruits
Don’t stop at apples! You can air-fry many fruits into chips. Pears are a great choice for a softer bite. Bananas turn crispy and sweet, but slice them thicker. Pineapple chips pack a tropical punch. Adjust cooking times for softer fruits like bananas or pears. They may need less time, around 10-15 minutes. For firmer fruits, like apples and pineapple, stick to 15-18 minutes. Always check for that golden-brown color for perfect crispiness.
Storage Info
How to Store Apple Chips
To keep your apple chips fresh, use an airtight container. Glass jars or plastic bags work well. Store them in a cool, dry place. Avoid moisture, as it makes them soggy. If you have leftover apple chips, try to eat them within a week for the best taste.
To maintain crispiness, add a small packet of silica gel to the container. This helps absorb moisture. You can also layer the chips between paper towels. This adds a barrier that keeps them crunchy. Keep them away from sunlight and heat sources.
Reheating Tips
To re-crisp apple chips, heat your air fryer to 300°F (150°C). Place the chips in for about 2-3 minutes. This will help restore their crunch. Avoid reheating them in the microwave, as it makes them chewy.
If you have leftovers, you can store them in the fridge for a few days. Just remember, the fridge can make them less crispy. If you prefer, you can store them at room temperature. Just ensure they are in an airtight container. This method keeps them crunchy longer.
FAQs
How long do Air Fryer Cinnamon Apple Chips last?
Air fryer cinnamon apple chips can last about 1 week. Store them in an airtight container. Keep them in a cool, dry place. If you want them to stay fresh longer, avoid moisture. You can also freeze them, but that may change their crunch.
Can I make these cinnamon apple chips without an air fryer?
Yes, you can! Use the oven to make these chips. Set your oven to 200°F (93°C). Spread the apple slices on a baking sheet. Bake for 2-3 hours until they’re dry and crunchy. Flip the slices halfway through for even cooking.
Are these chips healthy?
Yes, they can be healthy! Air frying uses less oil than deep frying. This method keeps the apples’ nutrients intact. Apples are full of fiber and vitamins. Plus, you control the sugar added. Enjoy a tasty snack without the guilt!
What is the best way to slice apples for chips?
For the best chips, slice apples thinly. Aim for about 1/8 inch thick. A mandoline slicer works great for this. It gives you even slices which cook better. If you don’t have a mandoline, use a sharp knife and aim for uniform thickness.
Can I use frozen apples for this recipe?
Using frozen apples is not ideal. They lose their crispness when thawed. The texture may turn mushy, and the flavor might fade. For the best results, use fresh apples. They will give you that perfect crunch and sweetness.
Making Air Fryer Cinnamon Apple Chips is simple and fun. You learned how to pick the best apples and spices, prepare them right, and air fry them to perfection. I shared tips on serving, common mistakes, and ways to boost flavor. For a twist, you can try other fruits or seasonings. Remember to store your chips properly to keep them crispy. Enjoy your crunchy snack knowing you made it yourself! These apple chips are a tasty treat you can feel good about eating.


![To make a true classic key lime pie, you need these key items: - 1 ½ cups graham cracker crumbs - ½ cup unsweetened coconut flakes - ⅓ cup granulated sugar - ½ cup unsalted butter, melted - 4 large egg yolks - 1 (14 oz) can sweetened condensed milk - ½ cup freshly squeezed key lime juice (approx. 12 key limes) - Zest of 2 key limes - 1 cup heavy whipping cream - 2 tablespoons powdered sugar - Lime slices and extra zest for garnish These ingredients work together to create a sweet, tangy pie that sings of sunshine. You can add some optional ingredients to enhance your pie: - Toasted coconut flakes for extra crunch - A pinch of salt to balance sweetness - Lime zest for a stronger lime flavor These add-ons can make your pie even more delightful. If you're missing an ingredient, here are some easy swaps: - Use regular lime juice instead of key lime juice. It will taste different but still good. - Swap graham cracker crumbs with crushed vanilla wafers for a unique flavor. - Replace heavy cream with whipped topping for a lighter version. These substitutions can help you prepare the pie with what you have. For the exact steps, check out the Full Recipe. First, preheat your oven to 350°F (175°C). This step is key for a great crust. In a medium bowl, mix the graham cracker crumbs, coconut flakes, and granulated sugar. Pour in the melted butter and stir until it feels like moist sand. Next, grab a 9-inch pie pan. Press the crumb mixture into the bottom and up the sides of the pan. Make sure it’s firm and even. Bake this crust for 8-10 minutes until the edges are golden. After baking, let it cool completely. Now, let’s make the filling. In a large bowl, whisk the egg yolks until they are pale yellow. Then, add the sweetened condensed milk, key lime juice, and lime zest. Whisk until everything is smooth. You want to have no lumps here! Carefully pour this lime mixture into your cooled crust. Spread it out evenly. Bake the pie for 15 minutes. The filling should be set but still a bit jiggly in the center. After baking, take it out and let it cool at room temperature. Once it’s cool, put the pie in the fridge for at least 2 hours. This chilling time makes it even tastier! For the full recipe, check out the details above! To get the best texture and flavor in your Key Lime Pie, follow a few simple tips: - Use Fresh Key Limes: Fresh key limes give a bright taste. They also add a nice zing. - Whisk Egg Yolks Well: Whisk the yolks until they are pale. This helps create a smooth filling. - Don’t Overbake: Bake the filling until it is just set. It should still jiggle a bit in the middle. - Chill Properly: Let the pie cool at room temp before refrigerating. This step enhances the flavor. Some mistakes can ruin your pie. Here are a few to watch out for: - Skipping the Zest: The zest adds flavor and aroma. Don’t skip it! - Using Cold Ingredients: Let your ingredients reach room temperature. This helps them mix better. - Overmixing the Filling: Whisk just until combined. Overmixing can create bubbles in the filling. - Not Cooling the Crust: Always cool the crust completely before adding the filling. A warm crust can make the filling runny. Having the right tools makes cooking easier and more fun: - 9-inch Pie Pan: This is the perfect size for your Key Lime Pie. - Mixing Bowls: Use medium and large bowls for mixing your crust and filling. - Electric Mixer: This helps you whip the cream to stiff peaks easily. - Zester or Grater: A good zester is key for getting the lime zest just right. These tips and tools will help you create a perfect Key Lime Pie every time. For the full recipe, check out the [Full Recipe]. {{image_4}} You can change up the crust for your Key Lime Pie. Here are some fun ideas: - Graham Cracker Crust: This is the classic choice. It’s sweet and crunchy. - Oreo Crust: Use crushed Oreos instead of graham crackers for a chocolate twist. - Nut Crust: Ground almonds or pecans add a nice nutty flavor. Mix them with butter and a bit of sugar. - Coconut Crust: Use shredded coconut for a tropical feel. It pairs well with the lime. Want to try something different? Here are some tasty twists: - Mango Key Lime Pie: Add pureed mango to the filling for a fruity kick. - Berry Key Lime Pie: Mix in fresh berries like strawberries or blueberries for color and flavor. - Coconut Key Lime Pie: Stir in coconut milk for a creamier texture and tropical taste. - Chocolate Key Lime Pie: Add melted chocolate to the filling for a rich, sweet layer. Making your pie look great can be fun. Here are some ideas: - Whipped Cream Topping: Spread whipped cream on top. Use a spatula to make swirls. - Garnish with Lime: Add lime slices or zest for a pop of color. - Serve in Mason Jars: For a fun twist, serve individual portions in jars. - Add Fresh Berries: Place berries around the pie for extra flair. For the full recipe, check out the Zesty Classic Key Lime Pie . To keep your key lime pie fresh, cover it tightly with plastic wrap or aluminum foil. This prevents the pie from absorbing fridge odors. Store it in the fridge for up to three days. Make sure to slice the pie before storing to make it easier to serve later. You can freeze key lime pie if you want to save some for later. First, let the pie cool completely after baking. Wrap the pie tightly in plastic wrap and then in aluminum foil. This double wrapping helps prevent freezer burn. You can freeze it for up to three months. Just remember to label it with the date. To enjoy your frozen key lime pie, move it from the freezer to the fridge. Let it thaw overnight. If you're in a hurry, you can leave it at room temperature for about two hours. Do not microwave it, as this can change the texture. Once thawed, you can add fresh whipped cream or lime zest for extra flavor before serving. Yes, you can use regular limes. Key limes are smaller and more fragrant. They have a tart flavor that makes the pie special. If you use regular limes, the pie will taste a bit different but still good. You might want to adjust the sugar to balance the flavor. You can keep key lime pie in the fridge for up to three days. Cover it well to prevent it from drying out. If the pie has whipped cream on top, eat it within two days. The cream can lose its texture after that. You can use coconut cream or a dairy-free option. If you need a lighter option, try using yogurt. For a richer flavor, you can also use mascarpone cheese. Each choice will change the taste and texture a bit, but they all work well in this recipe. Check the [Full Recipe] for more details. In this post, we explored the key ingredients for classic Key Lime Pie, from crust to filling. I shared step-by-step instructions for baking. We discussed tips to avoid common mistakes and explored variations for flavor and presentation. Additionally, we covered how to store and reheat leftovers effectively. Key Lime Pie is simple to make and delightful to share. Enjoy creating your version and savor each bite. When you follow these tips, your pie will shine!](https://dishtreats.com/wp-content/uploads/2025/07/bf504450-0d09-4d53-b035-55d87c168019-768x768.webp)
![To make classic chocolate brownies, you need the following ingredients: - 1 cup (2 sticks) unsalted butter - 2 cups granulated sugar - 4 large eggs, at room temperature - 1 teaspoon pure vanilla extract - 1 cup all-purpose flour - 1 cup unsweetened cocoa powder - ½ teaspoon baking powder - ½ teaspoon sea salt - 1 cup semi-sweet chocolate chips - Optional: ½ cup chopped walnuts or pecans for added crunch You can use margarine if you need a butter alternative. For a deeper flavor, try using dark cocoa powder instead of regular cocoa. If you want to make this recipe gluten-free, swap the all-purpose flour with a gluten-free blend. Feel free to customize your brownies with these fun ideas: - Nuts: Consider using walnuts or pecans for extra texture. Almonds also work great. - Chocolate types: Mix semi-sweet and dark chocolate chips for rich flavor. - Flavor variations: Add a teaspoon of mint extract or some orange zest for a twist. These add-ins can enhance the taste and make your brownies unique. Mixing flavors can lead to exciting new experiences in every bite. To make the brownie batter, follow these steps: 1. Melt the butter: Start by melting 1 cup of unsalted butter in a medium saucepan over low heat. Stir often until it’s fully melted. 2. Add sugar: Once the butter is melted, remove it from the heat. Stir in 2 cups of granulated sugar until it looks smooth. 3. Add eggs: Crack 4 large eggs into the butter-sugar mix. Add them one at a time. Mix well after each egg, so the batter combines nicely. 4. Mix in vanilla: Add 1 teaspoon of pure vanilla extract. This gives the brownies a nice flavor. 5. Combine dry ingredients: In another bowl, sift together 1 cup of all-purpose flour, 1 cup of unsweetened cocoa powder, ½ teaspoon of baking powder, and ½ teaspoon of sea salt. This helps mix the dry ingredients well. 6. Fold dry into wet: Gently fold the dry mix into the wet mix. Use a spatula to combine until just mixed. Do not overmix, or the brownies won’t be fudgy. 7. Add chocolate chips: Toss in 1 cup of semi-sweet chocolate chips. If you like, add ½ cup of chopped walnuts or pecans for crunch. Mix until they are spread evenly in the batter. 8. Prepare the pan: Grease a 9x13-inch baking pan or line it with parchment paper. This makes it easy to remove the brownies later. 9. Pour batter: Pour the brownie batter into the pan. Use a spatula to spread it evenly. Now, it’s time to bake! 1. Preheat oven: Set your oven to 350°F (175°C). This ensures even baking. 2. Bake brownies: Place the pan in the oven. Bake for 30 to 35 minutes. 3. Check for doneness: To check, insert a toothpick into the center. It should come out with a few moist crumbs. If it’s wet, bake a little longer. Avoid overbaking for that perfect fudgy texture. After baking, let’s cool and cut the brownies. 1. Cool in the pan: Allow the brownies to cool in the pan for at least 15 minutes. This helps them firm up. 2. Transfer to wire rack: After 15 minutes, move the brownies to a wire rack. Let them cool completely before cutting. 3. Cutting tips: Use a sharp knife for clean cuts. Wipe the knife after each cut for neat squares. 4. Serving size: Cut into generous squares. Each piece should be a lovely bite of fudgy goodness. For a special touch, dust the brownies with powdered sugar before serving. Enjoy these delightful treats with a scoop of vanilla ice cream for extra indulgence. For the complete recipe, refer to the Full Recipe. To make the best fudgy brownies, focus on mixing. After melting the butter, stir in the sugar until smooth. Add eggs one at a time. Mix well after each egg. This helps create a rich texture. Don't overmix the dry and wet ingredients. Fold them gently just until combined. Common mistakes include overbaking and using too much flour. Overbaking leads to dry brownies. Aim for a toothpick with few moist crumbs. If you use too much flour, your brownies will be cake-like. Measure carefully for the best results. Brownies keep well at room temperature. Store them in an airtight container for up to five days. If you want to keep them longer, the fridge is a good option. Just remember, cold brownies can lose some flavor. To revive leftovers, warm them in the microwave for 10-15 seconds. This restores their fudgy goodness. You can also serve them with a scoop of ice cream for a tasty treat. For the full recipe, check out the [Full Recipe]. {{image_4}} For a gluten-free treat, try flourless brownies. You can use almond flour or ground oats instead of regular flour. These options add a nice texture and flavor. You should also reduce baking time. Check them after 25 minutes to avoid dryness. If you want a lighter version, use less sugar. You can swap half of the sugar with unsweetened applesauce. This keeps the brownies moist. For fats, use avocado or coconut oil. These substitutes make the brownies healthier but still tasty. To spice things up, add a dash of coffee or a pinch of sea salt. These flavors enhance the chocolate taste. You can also use extracts like almond or orange for a lovely twist. Just a little goes a long way in changing the flavor profile. Serving classic chocolate brownies is easy and fun. You can serve them warm with a scoop of ice cream. Vanilla ice cream works great, but try mint or coffee flavors for a twist. You can also top brownies with whipped cream. A sprinkle of chocolate shavings adds a nice touch. For a beautiful presentation, cut the brownies into squares. Place them on a decorative plate. Dust with powdered sugar for a fancy look. Add fresh berries or a sprig of mint beside each brownie. These details make the dish more appealing. Brownies are versatile and can be served in many ways. One fun idea is a brownie sundae. Start with a warm brownie, add a scoop of ice cream, and drizzle chocolate sauce on top. Finish with whipped cream and a cherry for a delightful treat. You can pair brownies with drinks too. A strong cup of coffee complements the rich chocolate flavor. Hot cocoa or milk also works well. For a unique twist, serve brownies with a side of fresh fruit. The sweetness of the fruit balances the rich brownies. For more ideas, check out the Full Recipe to explore all the delicious details! To check if your brownies are done, look for a few signs. The top should look set and slightly shiny. When you insert a toothpick in the center, it should come out with a few moist crumbs. This means your brownies are fudgy and perfect. If the toothpick comes out with wet batter, they need more time. Keep a close watch in the last few minutes of baking to avoid overbaking. Yes, you can freeze brownies! To freeze them, let them cool completely first. Cut your brownies into squares, then wrap each piece in plastic wrap. Place them in a freezer bag or container. They can last up to three months in the freezer. When you're ready to eat them, thaw them in the fridge overnight or at room temperature for a few hours. For neat cuts, use a sharp knife. First, let the brownies cool completely in the pan. For even cleaner cuts, wipe the knife with a damp cloth after each cut. This way, you have smooth edges. You can also use a pizza cutter for quick slicing. If you want, line your baking pan with parchment paper. This makes it easy to lift out the brownies for cutting. You’ve learned how to make classic chocolate brownies, from ingredients to serving tips. Whether you prefer fudgy or flourless, options abound to suit your taste. Remember, small changes can create big flavors. Experiment with add-ins or healthier swaps to make them your own. With these steps, you can enjoy delicious brownies any time. Happy baking!](https://dishtreats.com/wp-content/uploads/2025/07/8475203d-ada8-4920-a61c-065e4c50bd3f-768x768.webp)
