Air Fryer Avocado Fries with Chipotle Dip Delight

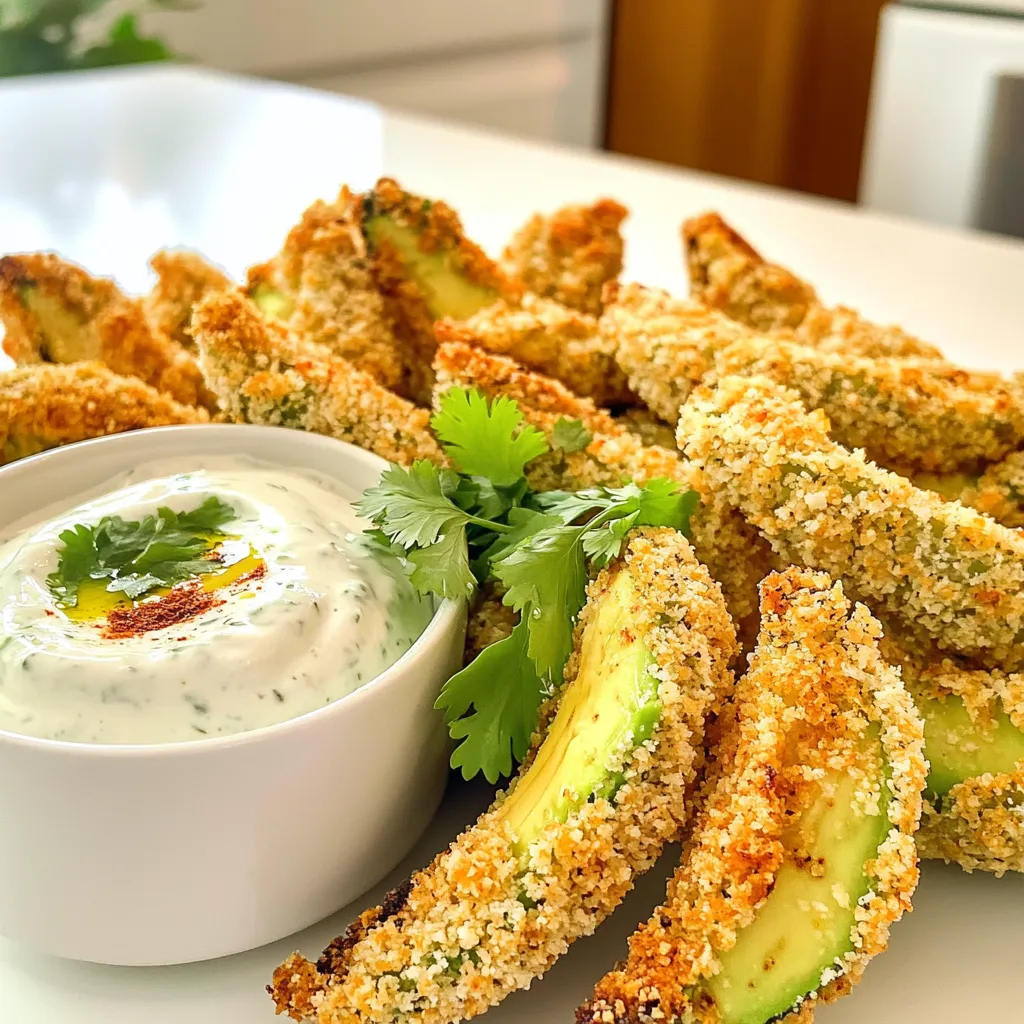
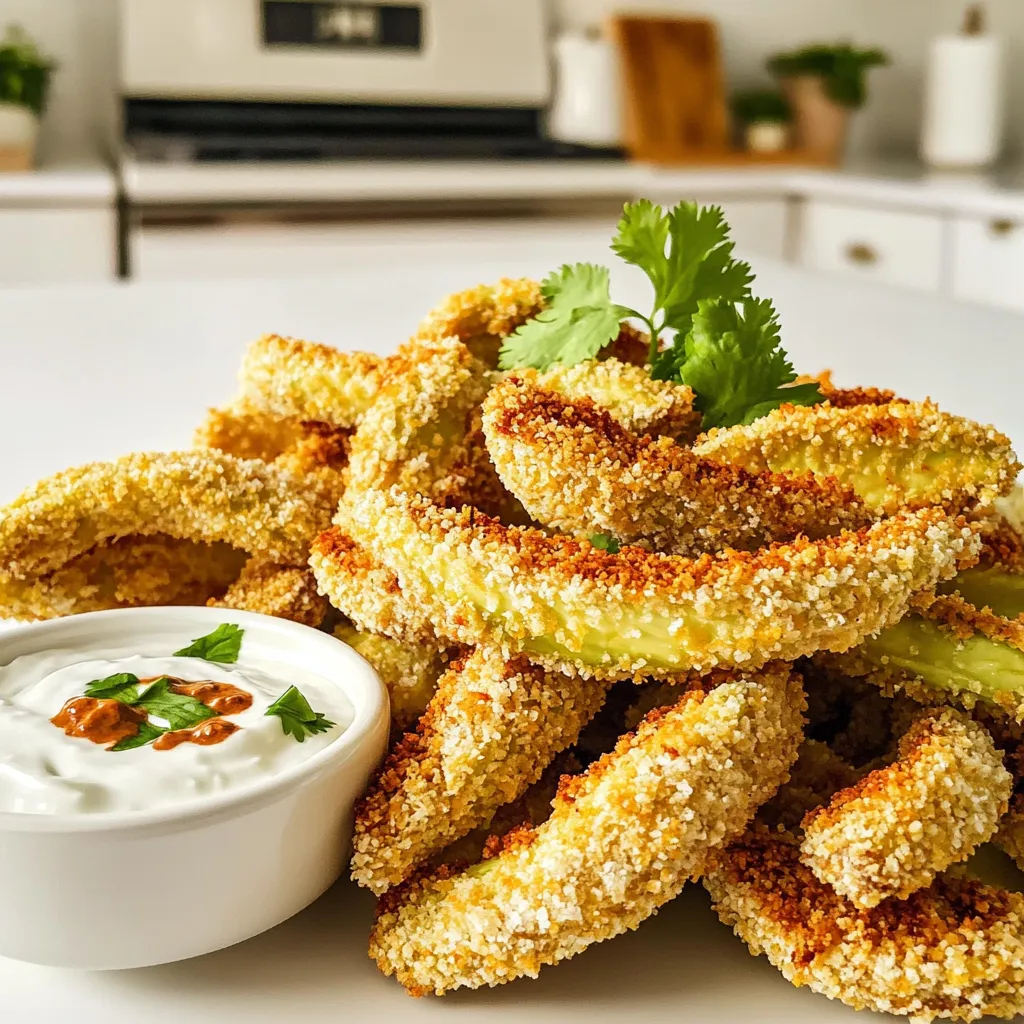
If you love tasty snacks, you’re in for a treat! Air Fryer Avocado Fries with Chipotle Dip Delight is a game-changer. Imagine crispy avocado wedges, teamed with a creamy, spicy dip that’s easy to whip up. This dish packs flavor without the guilt, making it perfect for any occasion. Whether you’re snacking or entertaining, these fries will impress. Ready to munch? Let’s dive into this fun and simple recipe!
Ingredients
Avocado Fries Ingredients
- 2 ripe avocados, sliced into wedges
- 1 cup panko breadcrumbs
- 1/2 cup all-purpose flour
- 2 large eggs, beaten
- 1 teaspoon garlic powder
- 1 teaspoon smoked paprika
- 1/2 teaspoon cayenne pepper (optional)
- Salt and pepper, to taste
- Cooking spray
Chipotle Dip Ingredients
- 1/2 cup Greek yogurt
- 1 tablespoon chipotle in adobo sauce, minced
- 1 tablespoon lime juice
- Pinch of salt, to taste
Making air fryer avocado fries is simple and fun. You start with ripe avocados. They should be firm but give slightly when you press them. This means they are ready to eat.
Next, you need to prepare the coating. I use panko breadcrumbs for a nice crunch. The breadcrumbs work best when mixed with spices like garlic powder, smoked paprika, and cayenne. The cayenne adds a kick, but you can skip it if you want less heat.
For the dip, Greek yogurt gives a creamy base. I mix it with chipotle and lime juice. This dip is zesty and perfect with the fries. Adjust the chipotle to make it spicier or milder based on your taste.
Gather all these ingredients, and you’re ready to create a tasty snack.
Step-by-Step Instructions
Preparing the Air Fryer
- Preheat the air fryer to 375°F (190°C). This step is key for crispy fries.
Breading the Avocado Wedges
- Set up the breading station. Use three shallow bowls.
- In the first bowl, mix flour with salt, pepper, garlic powder, and smoked paprika.
- Coat the avocado wedges with flour. Make sure each piece is covered well.
- Dip the floured wedges into the beaten eggs. Let the extra egg drip off.
- Finally, roll the wedges in panko breadcrumbs. Press gently to make them stick.
Cooking the Avocado Fries
- Arrange the coated avocado fries in the air fryer basket. Don’t overcrowd them.
- Lightly spray the fries with cooking spray. This helps them become crispy.
- Cook for 10-12 minutes. Flip them halfway through for even cooking.
Making the Chipotle Dip
- Mix Greek yogurt, minced chipotle, lime juice, and a pinch of salt in a bowl.
- Taste the dip and adjust the spice level. Add more chipotle for extra heat.
Tips & Tricks
Achieving the Perfect Crispiness
To make your avocado fries nice and crispy, use panko breadcrumbs. They give a great crunch. Before air frying, lightly spray the fries with cooking oil. This step boosts crispiness and helps the breadcrumbs stick.
Selecting Avocados
Choose ripe avocados for the best fries. They should yield a bit when you press them. Avoid avocados that feel too soft or have brown spots. These signs mean they may not taste good.
Flavor Enhancements
You can make the fries even tastier by adding spices to the breadcrumb mix. Try garlic powder, smoked paprika, or even some Italian herbs. For the chipotle dip, change the amount of chipotle depending on how spicy you like it. Adjusting spice levels helps fit your taste perfectly.

Variations
Gluten-Free Option
For those who need a gluten-free choice, you can easily adapt this recipe. Just swap the all-purpose flour for gluten-free flour. This keeps the texture right without any gluten. You should also use gluten-free breadcrumbs instead of panko. This way, you can still enjoy crispy avocado fries without worry.
Vegan Alternative
If you want a vegan version, that’s simple too. Instead of using beaten eggs, use flax eggs. To make a flax egg, mix 1 tablespoon of ground flaxseed with 2.5 tablespoons of water. Let it sit for a few minutes to thicken. You can also replace Greek yogurt in the dip with vegan yogurt. This keeps the dip creamy while making it plant-based.
Additional Flavor Pairings
Want to kick up the flavor? Try adding lime zest to your chipotle dip. This adds a fresh, zesty twist that pairs well with the creamy base. You can also serve the fries with salsa or guacamole. These extras will bring new tastes and make your plate even more exciting.
Storage Info
Storing Leftovers
To keep your cooked avocado fries fresh, store them in an airtight container. This helps them stay crispy. You can keep them in the refrigerator for up to 2 days. Remember, they taste best when eaten fresh, but they still hold some flavor after a day or two.
Reheating Instructions
For the best results, reheat the avocado fries in the air fryer. Set it to 375°F (190°C) and cook for about 5 minutes. This method keeps them crispy. Avoid using the microwave, as it can make them soggy and soft.
Freezing Options
If you want to make these fries later, freeze the uncooked, breaded avocado wedges. Lay them in a single layer on a baking sheet. Once frozen, transfer them to a freezer bag. They are easy to cook straight from the freezer whenever you crave a snack!
FAQs
Can I make avocado fries ahead of time?
Yes, you can prepare them and refrigerate before cooking. Slice the avocados and coat them. Place them in the fridge for up to an hour. When you are ready, just pop them in the air fryer. This makes meal prep easy and quick.
What can I use instead of panko breadcrumbs?
Regular breadcrumbs can be used, but the texture may vary. Panko gives a light and crispy bite. If you use regular breadcrumbs, the fries might not be as crunchy. You may also try crushed cornflakes for a fun twist.
How do I know when the avocado is ripe?
It should yield gently to pressure when squeezed. A ripe avocado feels soft, but not mushy. If it feels hard, it is not ready. If it feels very soft, it may be overripe. Choose firm avocados for the best results.
Is chipotle dip spicy?
The heat level can be adjusted by varying the amount of chipotle used. Start with a small amount and taste it. You can always add more if you like. If you prefer a milder dip, use less chipotle and add more yogurt.
You have learned how to make crunchy avocado fries with a tasty chipotle dip. Remember to pick ripe avocados for the best flavor. Use panko breadcrumbs for extra crunch and try new spices for fun. You can also switch ingredients to make it vegan or gluten-free. Store any leftovers in the fridge or freeze them for later. These tasty treats are perfect for sharing or enjoying solo. Give them a try and enjoy a delicious snack that is both easy and healthy!


![To make Parmesan roasted cauliflower, gather these simple ingredients: - 1 large head of cauliflower, cut into bite-sized florets - 3 tablespoons extra virgin olive oil - 1 cup freshly grated Parmesan cheese - 2 teaspoons garlic powder - 1 teaspoon onion powder - 1 teaspoon smoked paprika - Salt and freshly ground black pepper, to taste - Fresh parsley, finely chopped (for garnish) Using fresh ingredients makes a big difference in taste. Look for a cauliflower head that is firm and free of blemishes. The olive oil should be extra virgin for the best flavor. Freshly grated Parmesan cheese melts better than pre-grated. It has a richer taste and adds a creamy texture. Spices should be fresh too. This helps ensure you get the best flavor in every bite. If you want to change things up, try these add-ins: - Red pepper flakes for heat - Lemon zest for a fresh twist - Balsamic glaze drizzled on top for sweetness - Other cheeses like mozzarella or cheddar for different flavors These options let you customize the dish to fit your taste. Feel free to mix and match! For the full recipe, check out the details above. Start with a large head of cauliflower. Cut it into small, bite-sized florets. This size helps them cook evenly. Rinse the florets under cold water. Then, dry them well with a towel. Removing excess moisture helps them roast better. In a large mixing bowl, add the dried cauliflower florets. Pour in three tablespoons of extra virgin olive oil. Toss the florets until they are well-coated. In another bowl, mix one cup of freshly grated Parmesan cheese, two teaspoons of garlic powder, one teaspoon of onion powder, and one teaspoon of smoked paprika. Add salt and freshly ground black pepper to taste. Combine these dry ingredients well. Spread the coated cauliflower onto a lined baking sheet. Make sure they are in a single layer. This step helps them roast evenly. Preheat your oven to 425°F (220°C). Place the baking sheet in the oven and roast for 25 to 30 minutes. Flip the florets halfway through for even cooking. Look for a golden brown color and a tender texture. Once done, take the cauliflower out of the oven. Let it cool for a few minutes. Garnish with fresh parsley for a pop of color. Serve it on a bright platter for a beautiful display. You can also drizzle a little olive oil on top for extra flavor. This dish pairs well with grilled meats or as part of a veggie spread. Enjoy your delicious Parmesan roasted cauliflower! For more detailed guidance, check out the Full Recipe. To get that perfect roast, you need the right oven temperature. Preheat your oven to 425°F (220°C). This high heat crisps the edges and makes the cauliflower tender. Spread the florets in a single layer on the baking sheet. If they are too crowded, they will steam instead of roast. Flip them halfway through cooking for even browning. Aim for a golden color; that's when they taste the best. One common mistake is not drying the cauliflower. After washing, make sure it's dry. Excess water can lead to soggy florets. Another mistake is using old Parmesan cheese. Fresh cheese melts better and has more flavor. Lastly, don't skip the seasoning. A light touch of salt and pepper really makes a difference. You can easily make this dish even tastier. Try adding a squeeze of lemon juice before serving for a zesty kick. Fresh herbs like thyme or rosemary also add depth. For spice lovers, sprinkle some red pepper flakes for heat. You can find all these flavor ideas in the [Full Recipe]. {{image_4}} You can switch up the cheese for more flavor. Try pecorino Romano for a saltier bite. Goat cheese adds creaminess and tang. For a milder taste, use mozzarella or cheddar. Each cheese brings a unique twist to the dish. So, feel free to experiment with what you have on hand. If you like heat, add some cayenne pepper or crushed red pepper flakes. Start with a pinch and taste as you go. For a milder flavor, skip the smoked paprika. You can also use Italian seasoning for a different herb mix. Adjusting spices lets you make the dish your own. You can mix in other veggies for fun. Try bell peppers, carrots, or zucchini. Cut them into similar sizes as the cauliflower. This way, everything cooks evenly. Roasting a mix adds color and taste. You get a delightful medley on your plate. Check out the Full Recipe for more ideas on making this dish stand out! To keep your Parmesan roasted cauliflower fresh, place it in an airtight container. Make sure it cools to room temperature first. This helps prevent moisture buildup. Store it in the fridge for up to four days. If you want to enjoy it later, make sure to check the smell and texture before eating. When it's time to enjoy your leftovers, reheating is key. I recommend using the oven for the best results. Preheat your oven to 350°F (175°C). Spread the cauliflower on a baking sheet. Heat for about 10 to 15 minutes. This will crisp it up again and keep the cheese flavor strong. You can also use a microwave for quick reheating. Just heat for one to two minutes. But keep in mind, it won’t be as crispy. If you want to store the cauliflower for longer, freezing is a great option. Start by letting it cool completely. Then, place it in a freezer-safe bag. Squeeze out as much air as possible before sealing it. You can freeze it for up to three months. When ready to eat, thaw it overnight in the fridge. Then, reheat in the oven for the best taste. For more details, check out the full recipe. Roasting cauliflower takes about 25 to 30 minutes. Preheat your oven to 425°F (220°C). Place the cauliflower on a baking sheet in a single layer. Halfway through, flip the florets for even cooking. You want them to be golden brown and fork-tender. Yes, you can make this dish ahead of time. Roast the cauliflower and let it cool. Store it in an airtight container in the fridge for up to three days. When you’re ready to serve, just reheat it in the oven. This keeps it crisp and tasty. Parmesan roasted cauliflower pairs well with many dishes. Serve it alongside grilled chicken or fish for a balanced meal. It also complements pasta or a fresh salad. You can even use it as a topping for grain bowls. This dish adds a flavorful crunch to your plate. For the full recipe, check out the details above! In this blog post, we explored how to make delicious Parmesan Roasted Cauliflower. We outlined the key ingredients and shared tips for picking top-quality ones. I provided step-by-step instructions, covering preparation, mixing, roasting, and serving. You learned tips to ensure perfect roasting and avoid common mistakes. We discussed variations like different cheeses and spices, along with storage and reheating advice. With these insights, you can enjoy this tasty dish in many ways. Take your time and have fun creating your own version!](https://dishtreats.com/wp-content/uploads/2025/06/1026dd12-7014-4148-8186-1edda0f6a7e3-768x768.webp)


![To create the Roasted Beet and Goat Cheese Salad, you will need the following ingredients: - 4 medium beets, scrubbed and trimmed - 2 tablespoons extra virgin olive oil, divided - Sea salt and freshly ground black pepper to taste - 4 cups mixed greens (arugula, spinach, and kale) - 1/2 cup creamy goat cheese, crumbled - 1/4 cup walnuts, toasted and roughly chopped - 1/4 cup dried cranberries - 2 tablespoons balsamic vinegar - 1 tablespoon pure honey - Fresh herbs (basil or parsley) for garnish Each ingredient adds not just flavor, but also nutrition. Beets are rich in vitamins and minerals. They help boost your energy levels. Goat cheese brings a creamy texture and a tangy taste. It pairs well with the sweetness of beets and cranberries. Walnuts add crunch and healthy fats, while mixed greens provide fiber. The dressing of balsamic vinegar and honey ties all the flavors together. You can find the Full Recipe for step-by-step instructions to make this delightful salad. 1. Preheat the oven: Set your oven to 400°F (200°C). This makes sure the beets roast well. 2. Wrap the beets: Take each beet and wrap it in foil. Drizzle 1 tablespoon of olive oil on them. Add sea salt and black pepper for flavor. Seal the foil tightly. 3. Roast the beets: Place the wrapped beets on a baking sheet. Roast them in the oven for 45-60 minutes. They are done when a fork easily pierces them. 1. Peel and slice the beets: Let the beets cool a bit. Then, peel off the skin. I recommend wearing gloves to avoid stains. Cut the beets into wedges for a nice look. 2. Combine salad ingredients: In a large mixing bowl, add the mixed greens, sliced roasted beets, crumbled goat cheese, toasted walnuts, and dried cranberries. Gently mix everything together. 1. Prepare the dressing: In a small bowl, whisk together the balsamic vinegar, the last tablespoon of olive oil, and honey. Stir well until combined. Taste it and add salt and pepper as needed. 2. Dress the salad: Drizzle the dressing over the salad. Toss everything gently to coat the greens and other ingredients. 3. Serve the salad: Plate the salad right away. Garnish with fresh herbs for a pop of color and extra flavor. For the full recipe, check out the Beet the Ordinary: Roasted Beet and Goat Cheese Salad. - Choosing the right beet size for even cooking: I recommend using medium beets. They cook evenly and are easy to handle. If you use larger beets, they may take longer to roast, leading to uneven texture. Smaller beets cook too quickly and may dry out. - How to properly season the beets: Before wrapping the beets in foil, drizzle them with olive oil. Add a generous pinch of sea salt and freshly ground black pepper. This simple seasoning enhances their natural sweetness and flavor during roasting. - Creative ways to plate the salad: For a stunning presentation, use a large, flat platter. Layer mixed greens as a base. Fan out the roasted beet wedges on top and sprinkle crumbled goat cheese and walnuts over the salad. This method creates a colorful and inviting look. - Garnishing tips to elevate the dish: Fresh herbs can add color and flavor. A sprinkle of chopped basil or parsley brightens the dish. You can also use edible flowers for a special touch, making it perfect for gatherings or celebrations. - Best practices for prepping ingredients in advance: You can roast the beets a day ahead. Once cooled, wrap them in plastic to keep fresh. Store the mixed greens and other ingredients separately. This way, you can quickly assemble your salad just before serving, keeping everything crisp and tasty. For the complete recipe, see [Full Recipe]. {{image_4}} You can switch up the greens in your salad to make it special. Try using arugula for a peppery kick or romaine for a crisp bite. Each green offers a different taste and texture, giving your salad a new vibe. If you want to change the cheese, feta or blue cheese can work wonders. Feta adds a salty flavor, while blue cheese brings a bold touch. Both complement the sweetness of the beets nicely. The right dressing can elevate your salad. A citrus vinaigrette adds a bright and zesty flavor. Mix fresh lemon juice with olive oil for a quick option. If you want something creamy, a yogurt dressing is perfect. It pairs well with the tang of goat cheese and makes the salad feel lush. Don’t hesitate to experiment with different dressings to find your favorite. Add protein to make your salad more filling. Grilled chicken is a great choice, giving the salad a hearty feel. For a plant-based option, chickpeas work well. They add protein and texture. You can also sprinkle seeds, like pumpkin or sunflower seeds, for some crunch. Fresh fruit, such as sliced pears or apples, can add a sweet note. Each add-in brings its own charm to the dish, making it unique every time. Don’t forget to check out the Full Recipe for more inspiration! To keep your roasted beet and goat cheese salad fresh, store it in an airtight container. Place any leftovers in the fridge. The salad will stay good for about three days. Make sure to keep the dressing separate until you are ready to eat. This helps keep the greens crisp and fresh. If you want to store beets for longer, you can freeze them. First, roast the beets as in the Full Recipe. Let them cool, then peel and slice them. Place the slices in a freezer-safe bag, removing as much air as possible. Beets can last up to six months in the freezer. However, I do not recommend freezing the prepared salad. The greens won't hold up well after thawing. When it's time to eat your stored salad, you can reheat the beets if you like. Just warm them in the microwave for about 30 seconds. Toss the salad again after reheating. This helps mix the flavors back together. If you stored the salad dressed, consider adding a bit more dressing before serving. This keeps everything tasty and vibrant. How long do roasted beets last in the fridge? Roasted beets can last up to five days in your fridge. Store them in an airtight container. This way, they stay fresh and tasty for your salads. Can I use pre-cooked beets for this recipe? Yes, you can use pre-cooked beets. They are a great time-saver. Just cut them into wedges and add them to your salad. They will still taste delicious! What type of goat cheese is best for salads? A creamy goat cheese works best for this salad. It adds a nice richness and tang. Look for soft, crumbled varieties for easy mixing. Can I substitute goat cheese with a dairy-free option? Absolutely! You can use a dairy-free cheese made from nuts. Look for a creamy cashew cheese or tofu-based option. Both will provide a nice flavor. What are the health benefits of beet and goat cheese salad? This salad is packed with nutrients. Beets are high in fiber and antioxidants. Goat cheese adds protein and calcium. Together, they support heart health and digestion. How many calories are in a serving of this salad? One serving of this salad has about 300 calories. This includes the beets, goat cheese, nuts, and dressing. It’s a great balance of flavors and nutrients without too many calories. For the complete recipe, check out the Full Recipe. This salad combines roasted beets, fresh greens, and tangy goat cheese. You learned how to roast beets and mix vibrant ingredients for a delicious dish. Remember to choose the right beet size and season well for great texture. Don't hesitate to try different greens or dressings to make it your own. Salad prep can be easy, helping you save time. Enjoy this healthy meal that packs flavor and nutrients. Make it today and impress yourself with your cooking skills!](https://dishtreats.com/wp-content/uploads/2025/06/a3a0567a-1f00-4857-8ef4-d1e9b38b024f-768x768.webp)

