Air Fryer Apple Hand Pies Tasty and Simple Treat

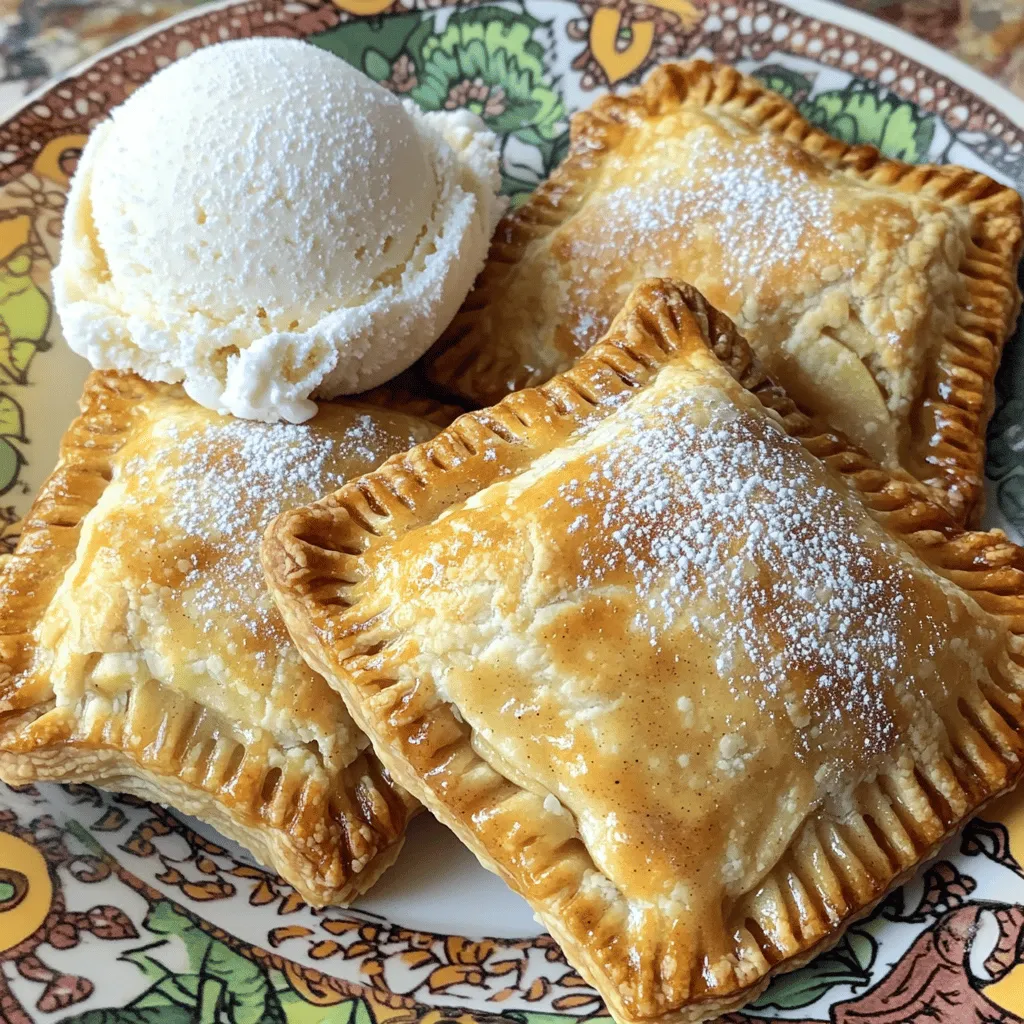
Craving a sweet, crispy treat? Let’s make Air Fryer Apple Hand Pies together! These mini desserts are quick, simple, and perfect for any occasion. You only need a few basic ingredients and your air fryer to create these tasty delights. In this post, I’ll guide you step-by-step, sharing tips to perfection and fun variations. Get ready to impress your friends and family with this delicious snack!
Ingredients
List of Ingredients
To make these apple hand pies, gather the following items:
- 2 large apples (recommended: Granny Smith or Honeycrisp), peeled and finely diced
- 1/4 cup packed brown sugar
- 1 teaspoon ground cinnamon
- 1/4 teaspoon ground nutmeg
- 1 tablespoon fresh lemon juice
- 1 tablespoon cornstarch
- 1 package of refrigerated pie crusts (store-bought or homemade)
- 1 egg, beaten (for egg wash)
- Powdered sugar (for optional dusting)
Recommended Apple Varieties
Choosing the right apples is key. I love using Granny Smith apples. They add a nice tartness. Honeycrisp apples are also great. They are sweet and juicy. You can mix these varieties for more flavor. This mix makes the filling bright and tasty.
Optional Ingredients for Variation
You can add more flavors if you like. Try adding a handful of raisins for sweetness. Chopped walnuts or pecans can add crunch. You could also use a pinch of ginger for spice. Each option brings a new twist to the pies. Feel free to get creative!
Step-by-Step Instructions
Preparation of Apple Filling
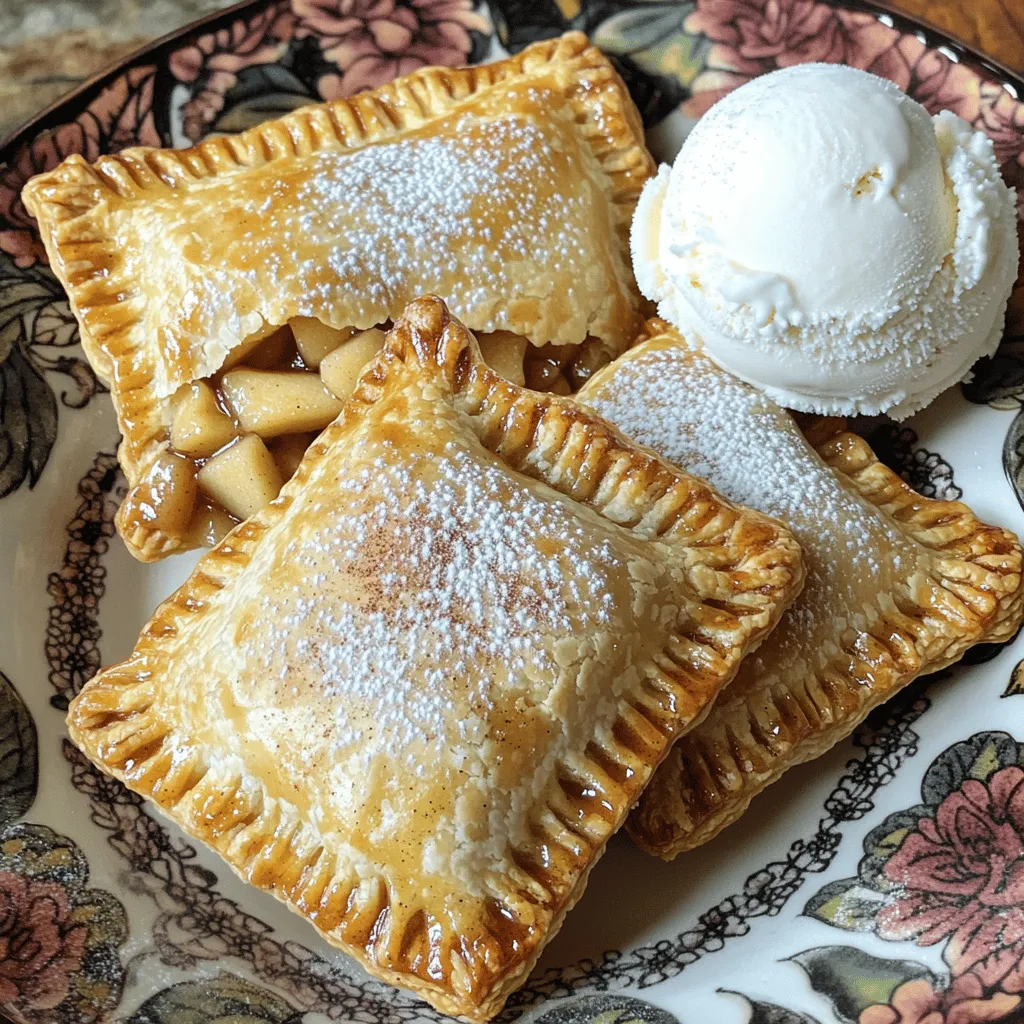
To start, gather your apples. I prefer Granny Smith or Honeycrisp for their tartness. Peel and finely dice two large apples. Place the diced apples in a medium bowl. Add 1/4 cup of packed brown sugar. Sprinkle in 1 teaspoon of ground cinnamon and 1/4 teaspoon of ground nutmeg. Pour in 1 tablespoon of fresh lemon juice. Finally, add 1 tablespoon of cornstarch. Stir gently until all apples are coated. Allow the mixture to sit for 10-15 minutes. This step lets the flavors blend and enhances the taste.
Preparing the Pie Crust
Next, prepare your pie crust. You can use store-bought or homemade crusts. Roll out the dough on a lightly floured surface until smooth. Use a round cookie cutter or a glass to cut circles. Aim for 4-5 inches in diameter. You should get about 8-10 circles. If you have extra dough, you can reroll and cut more.
Air Fryer Cooking Instructions
Now, it’s time to cook the hand pies. Preheat your air fryer to 350°F (175°C). This ensures even cooking. Take a tablespoon of your apple filling and place it in the center of each dough circle. Be careful not to overfill; otherwise, they might burst. Gently fold the dough over to create a half-moon shape. Use a fork to crimp the edges and seal the filling inside. Brush the tops with beaten egg wash for a golden color. Arrange the hand pies in a single layer in the air fryer basket. Cook for 10-12 minutes or until they are crispy and golden brown. Once done, carefully remove them and let cool for a few minutes. If you like, dust with powdered sugar for added sweetness. Enjoy your tasty treat!
Tips & Tricks
How to Achieve Perfectly Crispy Hand Pies
To get crispy hand pies, you need to follow some steps. First, use a good egg wash. This helps the crust shine and get golden. Brush the tops evenly with the beaten egg. Next, do not overcrowd your air fryer basket. Give each pie space to cook well. Lastly, check for doneness. Look for a nice, golden color. If they look pale, they need more time.
Common Mistakes to Avoid
Avoid these common mistakes to ensure success. First, do not overfill the pies. If you add too much filling, they may burst open. Second, do not skip the resting time for the filling. Allowing the mix to sit helps flavors blend. Lastly, remember to seal the edges well. If they are not crimped tightly, filling can leak during cooking.
Ways to Enhance Flavor
You can make these hand pies even better with a few tweaks. Add a pinch of salt to the filling. This boosts the sweetness of the apples. Try mixing in some raisins or chopped nuts for extra texture. For a fun twist, add a splash of vanilla extract. This adds warmth and depth to the flavor.

Variations
Different Fruit Fillings
You can switch up the filling for your hand pies. Try using pears for a sweet twist. Berries like blueberries or raspberries also work well. They add bright colors and flavors. You can even mix fruits for a fun blend. Just keep the sugar and spices similar to what you use for apples.
Gluten-Free Options
If you prefer gluten-free, you can use gluten-free pie crusts. Many stores sell these. You can also make your own with gluten-free flour. The filling stays the same, so enjoy the same great taste!
Spice Variations
Spices can really change the flavor of your hand pies. If you want a warm taste, add ginger or allspice. For a fresh kick, try adding a pinch of cardamom. Just be careful not to use too much. A little spice can go a long way!
Storage Info
How to Store Leftover Hand Pies
Store any leftover hand pies in an airtight container. This keeps them fresh and tasty. You can also wrap them in plastic wrap for extra protection. Keep them at room temperature for up to 2 days. If you want to keep them longer, move to the fridge. They will stay good for about a week in the fridge.
Reheating Instructions
To reheat, use the air fryer for the best results. Set it at 350°F (175°C) for about 5 minutes. This will make them crispy again. You can also use a microwave, but this may make them soft. Heat for about 15-20 seconds, just enough to warm them up.
Freezing Options
You can freeze these hand pies for later. Place them on a tray first, without touching. Freeze them for 1-2 hours until solid. Then, transfer them to a freezer bag. They can last up to 3 months in the freezer. To cook from frozen, just add a few extra minutes to the air fryer time. Enjoy your tasty treat anytime!
FAQs
Can I use frozen pie crusts?
Yes, you can use frozen pie crusts. They save time and work well. Just thaw them first. Follow the package instructions for best results. I like using these crusts for quick treats. They make the process easier and still taste great.
How do I prevent the filling from leaking?
To stop the filling from leaking, be careful with the amount you add. Use about one tablespoon of filling per pie. Seal the edges well with a fork. You can also chill the filled pies for a few minutes before cooking. This helps the dough firm up.
What can I serve with apple hand pies?
Apple hand pies go well with many sides. A scoop of vanilla ice cream makes a delicious pair. You can also serve them with whipped cream for extra sweetness. Drizzling caramel sauce over them can add a fun twist. Enjoy your hand pies warm for the best taste!
You now have everything needed to make delicious hand pies. From selecting the best apple varieties to preparing the filling and crust, each step counts. Follow the tips for a crispy result and avoid common mistakes for success. Explore various fruit fillings or spice options to keep it fun. Lastly, store any leftovers properly for future enjoyment. With these easy instructions and ideas, you can bake hand pies everyone will love. Enjoy creating and sharing them with others!


![- 1 lb boneless, skinless chicken breasts, cut into bite-sized pieces - 1 cup dill pickle juice - 1 cup all-purpose flour - 1 teaspoon onion powder - 1 teaspoon garlic powder - 1 teaspoon paprika - 1 teaspoon black pepper - 1/2 teaspoon salt - 2 large eggs, beaten - 1 cup breadcrumbs (use panko for added crunch) - 1/2 cup ranch dressing - Fresh dill, for garnish (optional) These ingredients create a tasty flavor mix. The chicken gets a nice tang from the dill pickle juice. The spices add warmth and depth. The ranch dressing gives a creamy finish. You will need some basic tools for the best results. Here’s what I suggest: - Mixing bowls for marinating and breading - A whisk for beating the eggs - A baking sheet lined with parchment paper or greased - Measuring cups and spoons for accuracy These tools help streamline your cooking process. They ensure that each step flows smoothly and efficiently. If you want to change things up, here are some easy swaps: - Use chicken thighs instead of breasts for more flavor. - Swap out ranch dressing for blue cheese dressing for a bolder taste. - Try gluten-free flour if you need a gluten-free option. - Use crushed cornflakes instead of breadcrumbs for extra crunch. These substitutions can make the recipe your own. You can keep it fun and exciting while still enjoying the core flavors. For the complete recipe, check the [Full Recipe]. To start, grab a mixing bowl. Place the bite-sized chicken pieces into it. Pour in the dill pickle juice, making sure the chicken is fully submerged. Cover the bowl with plastic wrap or a lid. Now, let it chill in the fridge. For best results, marinate for at least one hour. If you have time, overnight is even better. This step adds so much flavor to the chicken! Next, let’s set up a breading station. You will need three bowls. In the first bowl, mix the all-purpose flour with onion powder, garlic powder, paprika, black pepper, and salt. Stir well until everything is combined. In the second bowl, pour in the beaten eggs. Whisk them until they are smooth. In the third bowl, fill it with breadcrumbs, preferably panko. Panko gives a nice crunch to the bites. After marinating, take the chicken out of the fridge. Gently pat the chicken pieces dry with paper towels. Start by dredging each piece in the flour mix. Make sure to shake off any extra flour. Next, dip the chicken into the beaten eggs. Finally, coat the chicken well with the breadcrumbs. Now, preheat your oven to 400°F (200°C). Prepare a baking sheet by lining it with parchment paper or greasing it lightly. Arrange the breaded chicken bites in a single layer. Bake for 15-20 minutes. They should turn golden brown and crispy. Check that the internal temperature reaches 165°F (75°C). Once cooked, move the chicken bites to a serving platter. Drizzle ranch dressing on top and sprinkle with fresh dill if you like. This adds a lovely touch! For the full recipe, be sure to check the details. To get crispy chicken bites, follow a few key steps. First, make sure to marinate the chicken in dill pickle juice. This adds flavor and helps keep the meat moist. Next, dry the chicken pieces well before breading. Excess moisture can lead to soggy bites. When coating, use seasoned flour first, then dip in egg, and finally cover with breadcrumbs. I recommend using panko breadcrumbs for extra crunch. Bake at 400°F (200°C) until golden brown and fully cooked. Avoid common mistakes for the best results. Do not rush the marination process; it is crucial for flavor. Skipping the drying step can lead to less crispy bites. Also, ensure you do not overcrowd the baking sheet. Leave space between each piece to allow hot air to circulate. Lastly, check the internal temperature. Chicken should reach 165°F (75°C) to be safely eaten. For tailgating or parties, serve these bites with extra ranch dressing for dipping. This adds a nice creamy touch. You can also pair them with fresh pickle slices for added crunch. For a fun twist, consider setting up a dipping station. Include various sauces, like buffalo sauce or honey mustard. This lets guests customize their bites. {{image_4}} Want some heat? Add hot sauce to the marinade. This gives your chicken bites a spicy kick. You can also mix cayenne pepper into the flour. Adjust the amount to your taste. This adds flavor without overwhelming the pickle taste. If you enjoy heat, this variation is for you! Looking for a lighter option? Use an air fryer to cook your chicken bites. This method cuts down on oil and keeps them crisp. Preheat your air fryer to 400°F (200°C). Place the breaded chicken in a single layer. Cook for about 12-15 minutes. Check that they reach an internal temperature of 165°F (75°C). You get a crunchy texture without deep frying! Want a veggie twist? Try using cauliflower instead of chicken. Cut cauliflower into bite-sized florets. Marinate them in the dill pickle juice for the same time. Follow the same breading and cooking steps. Bake or air fry until golden and crispy. This gives you a tasty, plant-based snack that everyone will love. You can find the full recipe for Pickle Ranch Chicken Bites and try these fun variations! To keep your leftover chicken bites fresh, place them in an airtight container. Make sure they cool down to room temperature before sealing. This method helps prevent moisture, which can make them soggy. Store the container in the fridge for up to three days. When you're ready to enjoy your chicken bites again, reheating properly is key. I recommend using an oven or an air fryer for the best results. Preheat the oven to 375°F (190°C). Place the chicken bites on a baking sheet and heat for about 10-15 minutes. This method helps restore their crispy texture. If using an air fryer, set it to 350°F (175°C) and heat for about 5-7 minutes. If you want to save some chicken bites for later, freezing is a great option. First, let them cool completely. Then, arrange the bites in a single layer on a baking sheet and freeze for about an hour. Once frozen, transfer them to a freezer-safe bag or container. They can last up to three months in the freezer. When you're ready to eat, just reheat them from frozen, following the tips above for that perfect crunch. For the full recipe, check out the details above. The best way to marinate chicken is to use a flavorful liquid. For Pickle Ranch Chicken Bites, you will soak the chicken in dill pickle juice. This juice adds a zesty kick and keeps the meat juicy. Place the cut chicken in a bowl and cover it with the pickle juice. Make sure all pieces are fully submerged. Cover the bowl and refrigerate for at least an hour. For even better flavor, let it marinate overnight. This method works well for any chicken dish. Yes, you can use frozen chicken for this recipe. However, it is best to thaw the chicken first. Place it in the fridge overnight or submerge it in cold water for quicker thawing. Once thawed, cut the chicken into bite-sized pieces. After that, follow the marination steps as usual. Using frozen chicken may change the texture slightly, but it will still taste great. To make a low-carb version of Pickle Ranch Chicken Bites, you can skip the breadcrumbs. Instead, coat the chicken pieces in crushed pork rinds or almond flour. Both options give a nice crunch without the carbs. You can also use a low-carb ranch dressing for dipping. This way, you keep the flavor and texture while making it suitable for a low-carb diet. Enjoy your tasty bites without the guilt! In this post, we explored how to make Pickle Ranch Chicken Bites. We discussed key ingredients, cooking essentials, and helpful substitutions. I shared step-by-step instructions for marinating, breading, and baking. You learned tips for crispy bites and common mistakes to avoid. We covered variations like spicy bites and vegetarian options. Finally, I provided storage tips and answered FAQs. Try these bites for your next gathering. They’re fun, easy, and full of flavor! Enjoy your cooking adventure!](https://dishtreats.com/wp-content/uploads/2025/07/7f7f749c-ecc1-4920-b674-4460a511463b-768x768.webp)