60. Garlic Butter Steak Bites Savory and Simple Recipe
. It takes about 20 minutes to cook garlic butter steak bites. You spend 10 minutes prepping the ingredients and another 10 minutes cooking them. This quick cook time makes it easy to enjoy a tasty meal in no time. Yes, you can use other cuts of steak. Ribeye, filet mignon, or flank steak work well. Just remember to adjust the cooking time based on the cut you choose. Each cut has its own flavor and texture, so pick one you like best. You can serve garlic butter steak bites with various sides. Here are some great options: - Creamy mashed potatoes - Sautéed vegetables like green beans or broccoli - Fresh salad with light dressing - Crispy garlic bread These sides add flavor and balance to your meal. You can also use toothpicks for easy serving at parties or gatherings. For more ideas, check out the Full Recipe for garlic butter steak bites. It offers tips on presentation and other serving suggestions. In this post, we covered how to make garlic butter steak bites using simple ingredients. You learned about the key steps, from preparing the steak to combining it with garlic butter. We also shared tips for cooking and presented flavor variations to try. Finally, we discussed storage tricks and answered common questions. Keep this recipe handy for a quick and tasty meal. Enjoy your cooking and the delicious bites you create!](https://dishtreats.com/wp-content/uploads/2025/06/daf37226-e56f-491f-87e9-6665894a306e.webp)
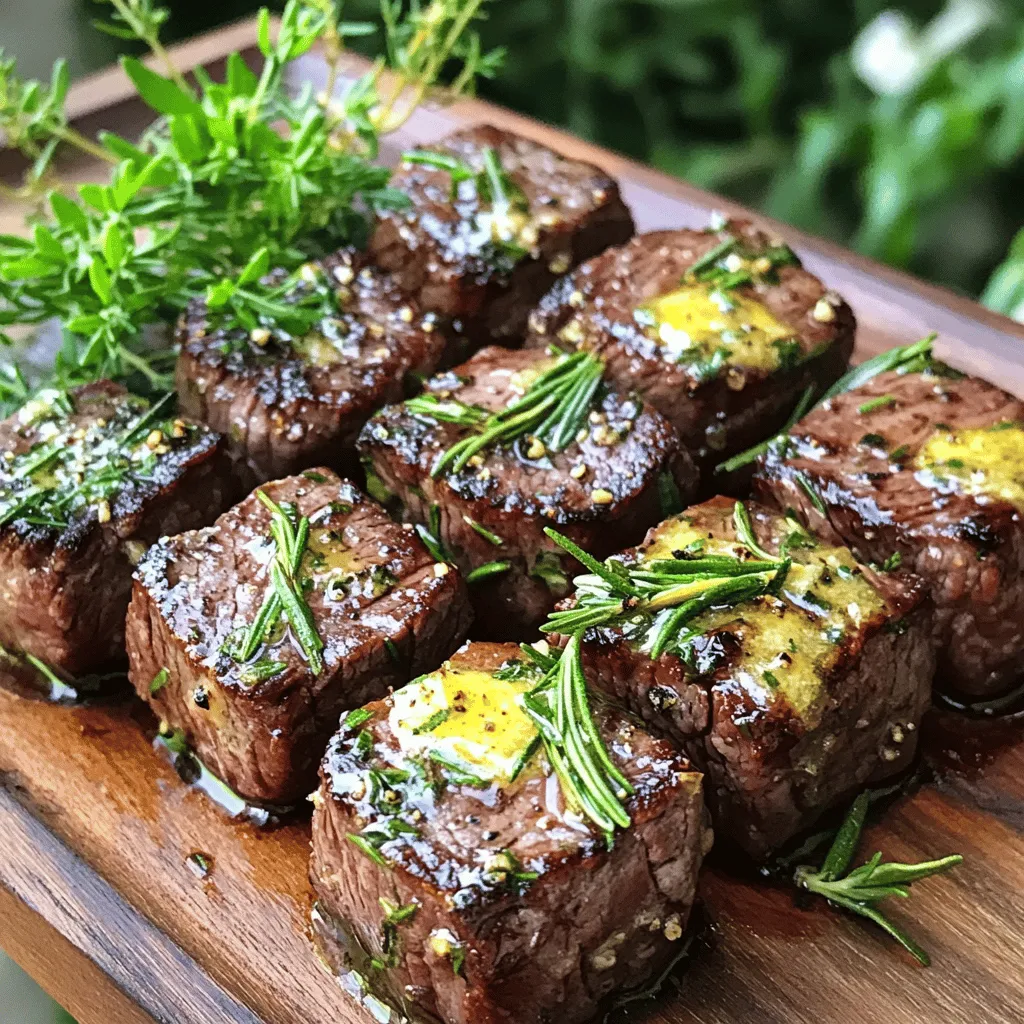
Welcome to a mouthwatering journey with my Garlic Butter Steak Bites recipe! In just a few simple steps, you can whip up tender, juicy bites of steak infused with rich garlic butter and fresh herbs. This dish is perfect for a quick weeknight dinner or a fun party appetizer. Stick around to discover all the easy ingredients and tips I’ve gathered for you to make this savory delight at home!
Ingredients
Main Ingredients for Garlic Butter Steak Bites
- 1 lb sirloin steak
- 4 tablespoons unsalted butter
- 5 cloves garlic
- Fresh herbs (rosemary, thyme)
- Salt and black pepper
The main ingredients make this dish shine. Sirloin steak is tender and flavorful. It cooks quickly, making it ideal for quick meals. The butter adds richness, while garlic gives a bold taste. Fresh herbs like rosemary and thyme enhance the flavors. Don’t forget to season with salt and pepper to make everything pop.
Optional Garnishes
- Fresh parsley
- Additional herbs
Garnishes add a nice touch. Fresh parsley brightens the dish and adds color. You can also use more herbs to boost flavor. A sprinkle of these garnishes makes the meal look appealing. The right garnishes can make your garlic butter steak bites even more special.
Step-by-Step Instructions
Preparation Steps
- Pat the steak cubes dry with paper towels.
- Season all sides with salt and black pepper.
Drying the steak helps it sear better. Moisture can cause steaming, which prevents a good crust. Seasoning is key for flavor. Use enough salt and pepper to coat each cube evenly. This step is quick but makes a big difference.
Cooking the Steak Bites
- Sear in a skillet over medium-high heat.
- Cook in batches for even results.
Heat a large skillet, then add 2 tablespoons of butter. When it foams, place half the steak cubes in a single layer. Sear them for about 2-3 minutes. Look for a rich brown crust. This shows they are ready to flip. Remove them from the skillet and set aside. Repeat with the second batch, adding more butter if needed. Cooking in batches ensures each piece cooks evenly.
Combining Garlic Butter and Steak
- Add garlic and fresh herbs.
- Mix everything well at the end.
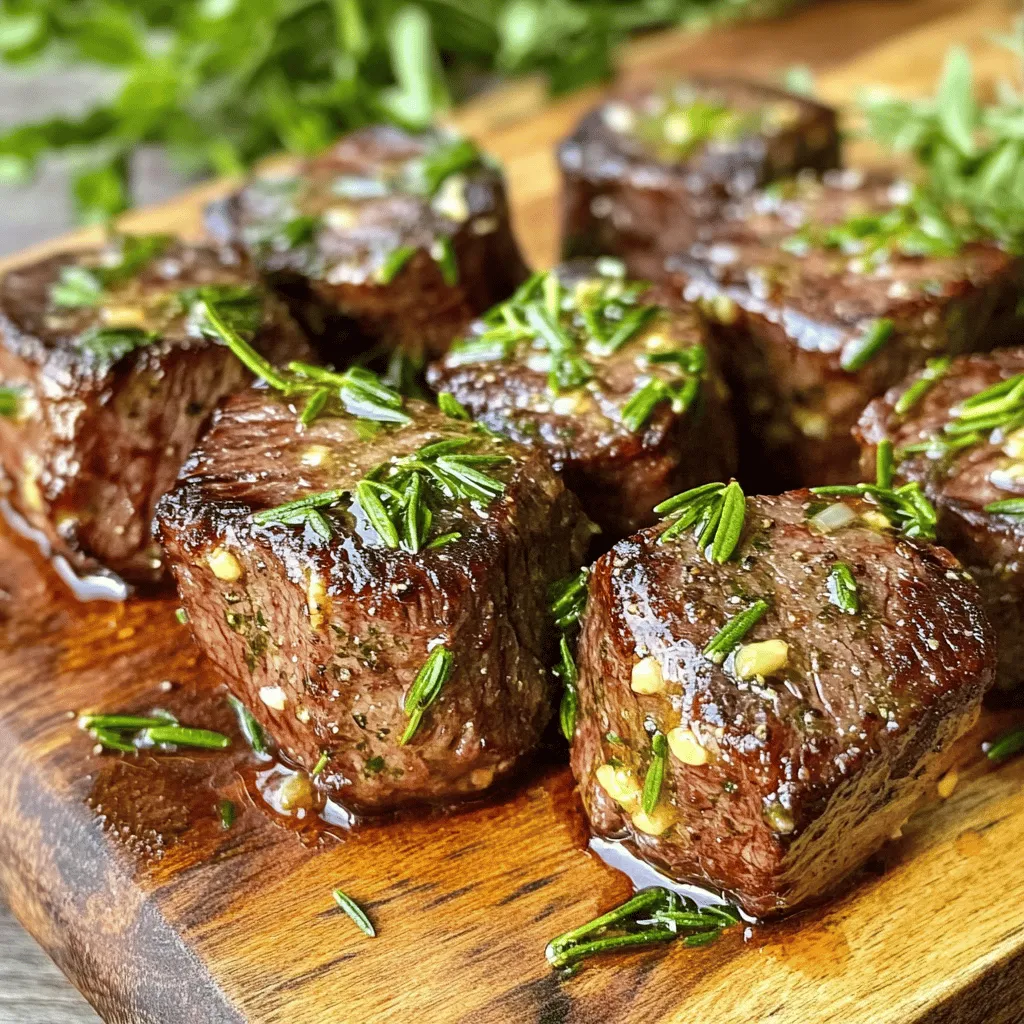
Lower the heat to medium-low after all steak bites are cooked. Return all the steak to the skillet. Add minced garlic, chopped rosemary, and thyme. Stir often and cook for another 1-2 minutes. The garlic should smell fragrant and turn golden. Remove from heat and mix in the last tablespoon of butter. This adds richness. Taste the steak bites and adjust the seasoning if needed. Garnish with fresh parsley before serving.
Tips & Tricks
Cooking Tips
- Achieving the perfect sear: To get that rich crust, dry the steak cubes well. Moisture can steam the meat. Use a hot skillet with enough butter. Sear each side for 2-3 minutes. Don’t overcrowd the pan. This step is key for great flavor.
- Selecting the right cut of steak: Sirloin steak is excellent for this recipe. It offers good flavor and tenderness. You can also use ribeye or tenderloin. Choose cuts that are well-marbled. Marbling adds extra flavor and juiciness.
Flavor Enhancement Tips
- Adjusting seasoning to taste: Start with salt and pepper, then taste. You can always add more. A pinch of smoked paprika gives a nice kick. Experiment with spices you love. Each cook can make it their own.
- Marinating options for added flavor: For more depth, marinate the steak before cooking. A simple mix of soy sauce, garlic, and olive oil works well. Let it sit for at least 30 minutes. This adds flavor and tenderizes the meat.
Presentation Tips
- Serving suggestions: Arrange the steak bites on a large platter. Sprinkle fresh herbs on top for color. Serve with toothpicks for easy eating. This makes it fun and casual.
- Best side dishes to complement the meal: Garlic butter steak bites pair well with creamy mashed potatoes. Sautéed green beans or a fresh salad also work nicely. Choose sides that balance the richness of the bites. For a special touch, consider serving with a dipping sauce.

Variations
Ingredient Substitutions
You might wonder if you can use other cuts of meat. Yes, you can! Here are some good alternatives for sirloin steak:
- Tenderloin
- Ribeye
- Flank steak
Each cut brings a unique flavor and texture. Flank steak offers a chewier bite, while tenderloin is super tender. Adjust your cooking time based on the cut you choose.
You can also switch up the herbs. If you don’t have rosemary or thyme, try these:
- Oregano
- Basil
- Parsley
Using different herbs can change the whole flavor. Fresh herbs work best, but dried ones can work too. Just use less dried herbs since they are stronger in taste.
Serving Variations
Garlic butter steak bites are very versatile. You can enjoy them in many ways! Try these ideas:
- In tacos with fresh salsa
- Over a salad with crunchy greens
- On a skewer for a fun appetizer
These servings make the bites easy to share. You can also pair them with sauces or dips. Some tasty options include:
- Creamy ranch dressing
- Spicy aioli
- Sweet chili sauce
These dips add extra flavor. They make every bite even more exciting!
Storage Info
Storing Leftovers
To keep your garlic butter steak bites fresh, store them in an airtight container. Place the container in the fridge. They will last up to three days this way. Make sure to cool them before packing. This helps avoid condensation and soggy bites.
For longer storage, you can freeze the leftovers. Use a freezer-safe bag or container. Remove as much air as possible before sealing. They can last up to three months in the freezer. When ready to eat, let them thaw in the fridge overnight.
Reheating Tips
To enjoy your garlic butter steak bites again, reheat them gently. The best way is to use a skillet over low heat. Add a bit of butter to keep them moist. Stir occasionally until warmed through.
You can also use the microwave, but it may dry them out. If you use this method, heat in short bursts. Start with 30 seconds and check often. Aim for an internal temperature of 165°F for safe eating.
For the best flavor and texture, reheating slowly is key. Enjoy your tasty bites just like the first time!
FAQs
How long does it take to cook garlic butter steak bites?
It takes about 20 minutes to cook garlic butter steak bites. You spend 10 minutes prepping the ingredients and another 10 minutes cooking them. This quick cook time makes it easy to enjoy a tasty meal in no time.
Can I use a different type of steak?
Yes, you can use other cuts of steak. Ribeye, filet mignon, or flank steak work well. Just remember to adjust the cooking time based on the cut you choose. Each cut has its own flavor and texture, so pick one you like best.
What can I serve with garlic butter steak bites?
You can serve garlic butter steak bites with various sides. Here are some great options:
- Creamy mashed potatoes
- Sautéed vegetables like green beans or broccoli
- Fresh salad with light dressing
- Crispy garlic bread
These sides add flavor and balance to your meal. You can also use toothpicks for easy serving at parties or gatherings.It offers tips on presentation and other serving suggestions.
In this post, we covered how to make garlic butter steak bites using simple ingredients. You learned about the key steps, from preparing the steak to combining it with garlic butter. We also shared tips for cooking and presented flavor variations to try. Finally, we discussed storage tricks and answered common questions. Keep this recipe handy for a quick and tasty meal. Enjoy your cooking and the delicious bites you create!
. It takes about 20 minutes to cook garlic butter steak bites. You spend 10 minutes prepping the ingredients and another 10 minutes cooking them. This quick cook time makes it easy to enjoy a tasty meal in no time. Yes, you can use other cuts of steak. Ribeye, filet mignon, or flank steak work well. Just remember to adjust the cooking time based on the cut you choose. Each cut has its own flavor and texture, so pick one you like best. You can serve garlic butter steak bites with various sides. Here are some great options: - Creamy mashed potatoes - Sautéed vegetables like green beans or broccoli - Fresh salad with light dressing - Crispy garlic bread These sides add flavor and balance to your meal. You can also use toothpicks for easy serving at parties or gatherings. For more ideas, check out the Full Recipe for garlic butter steak bites. It offers tips on presentation and other serving suggestions. In this post, we covered how to make garlic butter steak bites using simple ingredients. You learned about the key steps, from preparing the steak to combining it with garlic butter. We also shared tips for cooking and presented flavor variations to try. Finally, we discussed storage tricks and answered common questions. Keep this recipe handy for a quick and tasty meal. Enjoy your cooking and the delicious bites you create!](https://dishtreats.com/wp-content/uploads/2025/06/daf37226-e56f-491f-87e9-6665894a306e-300x300.webp)


![To make lemon garlic scallops, you need fresh and simple ingredients. Here is what you will need: - 1 pound sea scallops, thawed if previously frozen - 3 tablespoons extra virgin olive oil - 4 cloves garlic, finely minced - Zest and juice of 1 large lemon - Sea salt and freshly cracked black pepper, to taste - 1 tablespoon fresh parsley, finely chopped - Lemon slices for an elegant garnish Sea scallops are best for this dish. They have a sweet flavor and a firm texture. Choose bright, glossy scallops with a clean scent. Avoid any that smell fishy. Fresh garlic adds a punch of flavor. It gives depth and richness to the dish. Lemon brings brightness and acidity, balancing the sweet scallops. The zest adds an extra layer of lemony goodness. When sourcing ingredients, look for a trusted fish market. Ask about the origin of the scallops. Fresh, high-quality ingredients make a big difference in taste. You want to create a dish that shines with flavor and freshness. For the olive oil, choose a high-quality extra virgin variety. It enhances the overall flavor profile. Fresh parsley adds color and freshness at the end. Always use fresh herbs for the best taste. By selecting quality ingredients, you set the stage for a memorable meal. Follow the [Full Recipe] to create this delightful dish! First, drying scallops is key. Use paper towels to pat them dry. Moisture will stop them from searing well. Next, season both sides with sea salt and black pepper. A light touch works wonders here. When you place them in the skillet, space them out. Overcrowding will steam them instead of searing them. Heat your olive oil in a large skillet on medium-high heat. Watch for it to shimmer but not smoke. Carefully add the dry scallops in a single layer. Let them sear for 2-3 minutes without moving them. This helps form a nice golden crust. Once they look brown, gently flip them using tongs. Now, add the minced garlic to the pan. Cook for another 2-3 minutes. Stir the garlic to stop it from burning. The scallops should become opaque and fully cooked. Remove the skillet from heat right after cooking. Add the lemon zest and juice to the pan. Toss the scallops gently so they soak up the flavors. Lastly, sprinkle fresh parsley over the top. This adds color and fresh taste. For serving, place the scallops on a plate and drizzle the pan juices over them. Garnish with lemon slices for an elegant touch. You can pair them with sautéed greens or a crisp salad for a complete meal. - Overcooking scallops: This is a big mistake. Scallops cook fast. If you cook them too long, they become rubbery. Aim for a golden crust on the outside and opaque inside. - Not using enough oil for searing: Oil helps create a nice crust. If you skimp on oil, the scallops may stick. Use at least three tablespoons to get good results. - Ignoring the resting time post-cooking: Let your scallops rest for a minute after cooking. This helps them stay juicy. Don’t rush this step! - Recommended skillet types for best results: A heavy skillet works best. Cast iron or stainless steel distributes heat evenly. Avoid non-stick pans; they won’t give you a good sear. - Importance of temperature control: Start with a hot skillet. If it's too cool, scallops won’t brown. Heat the oil until it shimmers. This shows it’s ready for the scallops. - Suggestions for seasoning variations: Besides lemon and garlic, try fresh herbs or spices. Thyme, chili flakes, or even a splash of white wine can add depth. Experiment to find your favorite mix! For the full recipe, check out the details above and get cooking! {{image_4}} You can elevate your lemon garlic scallops with a few simple tweaks. - Incorporating herbs: Add fresh thyme or basil for a fragrant twist. These herbs enhance the dish’s aroma and add depth to the flavor. - Alternative citrus options: Try lime or orange juice for a unique taste. Each citrus brings its own brightness and pairs nicely with scallops. - Adding heat: If you like spice, sprinkle in some chili flakes or drizzle Sriracha. The heat balances the dish’s richness and excites your taste buds. Pair your scallops with sides to create a full meal. Here are some ideas: - Suggested side dishes: Serve with sautéed greens for a fresh crunch. A light salad or creamy risotto also works well to complement the scallops. - Pairing with wines or cocktails: A chilled white wine, like Sauvignon Blanc, enhances the dish. For cocktails, a gin and tonic is refreshing and bright. - Plating ideas: For a restaurant-style look, place the scallops on a clean plate. Drizzle the pan juices over them and add lemon slices for a pop of color. A sprinkle of parsley adds a final touch of green. For the full recipe, check out the Lemon Garlic Scallops recipe. After you finish your Lemon Garlic Scallops, store any extras right. First, place them in a shallow, airtight container. This helps keep them fresh. You can put them in the fridge for up to two days. If you wait longer, the taste and texture change. To reheat, use a non-stick skillet. Heat it over low to medium heat. Add a splash of water or broth to keep them moist. Cover the pan with a lid. This method helps keep the scallops tender. You can freeze scallops, but do it right. Raw scallops freeze well if you place them in a sealed bag. Remove as much air as possible. They can stay fresh for up to three months. If you want to freeze cooked scallops, make sure they cool first. Then, follow the same bag method. To thaw, leave them in the fridge overnight. Never thaw scallops in warm water. This can ruin their texture. When you reheat frozen scallops, use low heat again. Check them often to avoid overcooking. Enjoy your scallops as fresh as possible! For the full recipe, check out the details above. You should use sea scallops for this recipe. Sea scallops are larger and have a sweet taste. Bay scallops are smaller and can be more delicate. They work well in soups or pasta but may not sear as nicely. When picking scallops at the market, look for these signs: - They should smell fresh, like the ocean. - The meat should be firm and glossy. - Avoid scallops that look dry or have brown spots. Yes, you can use other oils. Grapeseed oil or avocado oil are good options. They have high smoke points, too. Using different oils can change the flavor. Olive oil adds a rich taste, while grapeseed is lighter. Choose based on your preference and what you have on hand. Perfectly cooked scallops are opaque and firm. They should have a golden crust outside. The safe internal temperature for scallops is 145°F (63°C). Use a food thermometer to check. If you don’t have one, look for that golden color and firm texture. For a full recipe, check out the Lemon Garlic Scallops guide! Lemon garlic scallops are a tasty dish that combines fresh ingredients and simple steps. Using quality sea scallops, fresh garlic, and lemon makes all the difference. I shared tips for cooking and avoiding common mistakes, like overcooking. Remember, you can customize your flavors with herbs or spices. Enjoy your cooking journey. Perfect scallops can impress anyone. With practice, you’ll master this dish and feel confident serving it. Take your time and savor the process!](https://dishtreats.com/wp-content/uploads/2025/07/19c1a638-1668-4343-8a69-d1fc169e2d79-768x768.webp)