58. Zucchini Noodles with Pesto Quick and Tasty Meal

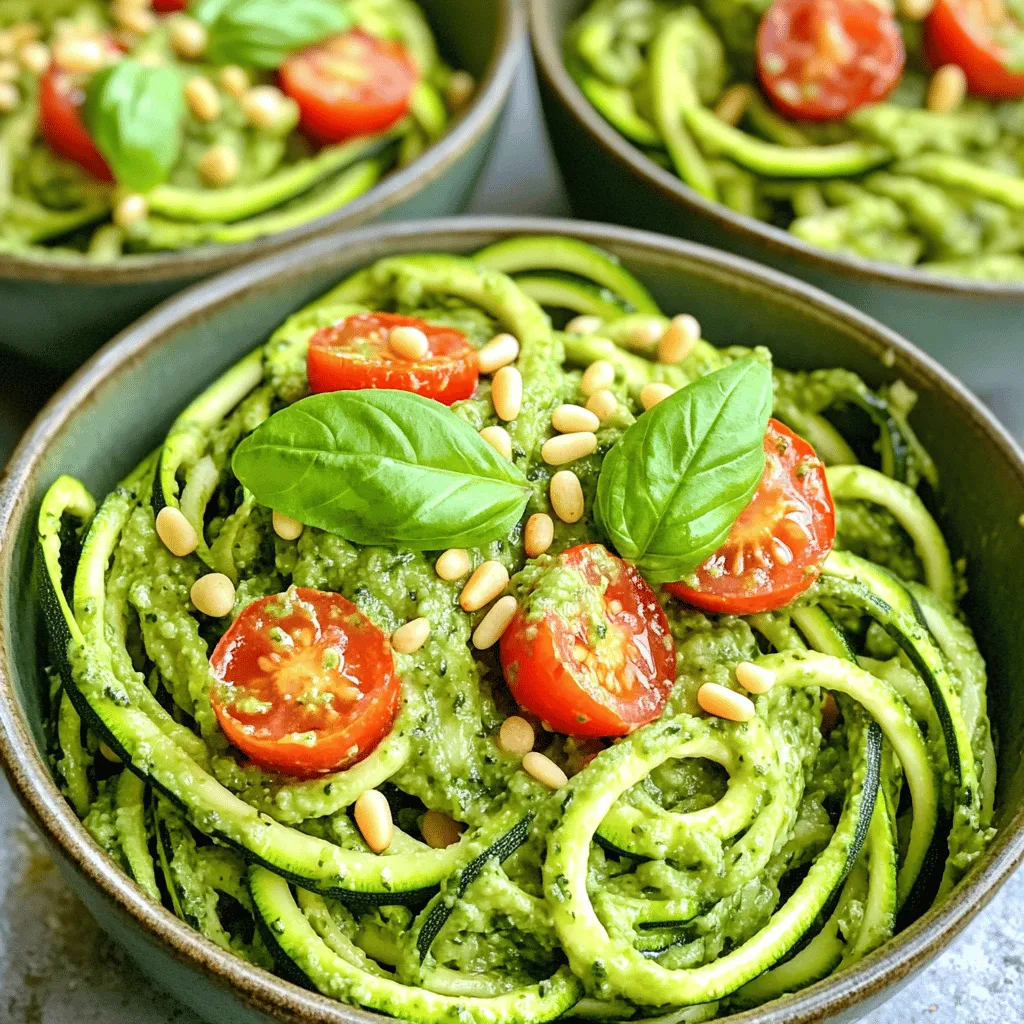
Are you looking for a quick and tasty meal that’s both healthy and satisfying? Zucchini Noodles with Pesto is the perfect dish for you! With just a few fresh ingredients, you can whip up this delicious pasta alternative in no time. In this guide, I’ll share everything you need to know about making this vibrant meal, from cooking tips to variations. Let’s get started on your new favorite recipe!
Ingredients
List of Ingredients
- 4 medium zucchinis
- 1 ripe avocado
- 1 cup fresh basil leaves
- 1/4 cup pine nuts (or walnuts)
- 2 tablespoons nutritional yeast
- 2 cloves garlic
- 2 tablespoons lemon juice
- 1/4 cup extra virgin olive oil
- Salt and pepper to taste
- Cherry tomatoes for garnish
- Grated parmesan cheese (optional)
The main ingredients for zucchini noodles with pesto are fresh and simple. Zucchini serves as a great base. You spiralize it to create fun noodles. The avocado adds creaminess to the pesto. Fresh basil gives it an aromatic touch.
Nutritional Information
A serving of zucchini noodles with pesto has about 300 calories. It contains 20g of carbs, 25g of fat, and 6g of protein. This meal is light yet filling. It is perfect for a quick lunch or dinner.
Vegan vs Non-Vegan Options
You can easily make this dish vegan. Just skip the parmesan cheese. The other ingredients keep the flavor strong. If you love cheese, add grated parmesan for richness. It enhances the taste but is not needed.
This recipe is flexible and fun.Enjoy making this tasty dish!
Step-by-Step Instructions
Making the Pesto
To make the pesto, gather these ingredients:
- 1 ripe avocado
- 1 cup fresh basil leaves
- 1/4 cup pine nuts (or walnuts)
- 2 tablespoons nutritional yeast
- 2 cloves garlic
- 2 tablespoons lemon juice
- 1/4 cup extra virgin olive oil
- Salt and pepper to taste
Start by placing the avocado, basil, pine nuts, nutritional yeast, garlic, and lemon juice into a food processor. Pulse it until the mix is smooth. Scrape down the sides if needed. While blending, slowly add the olive oil. This helps to emulsify the pesto. Taste it and add salt and pepper as you like.
Cooking the Zucchini Noodles
Heat a splash of olive oil in a large skillet over medium heat. Add the spiralized zucchini noodles to the pan. Cook them for about 3-4 minutes. Stir occasionally to keep them from sticking or burning. You want them tender but still firm. This keeps them from getting mushy.
Combining and Serving
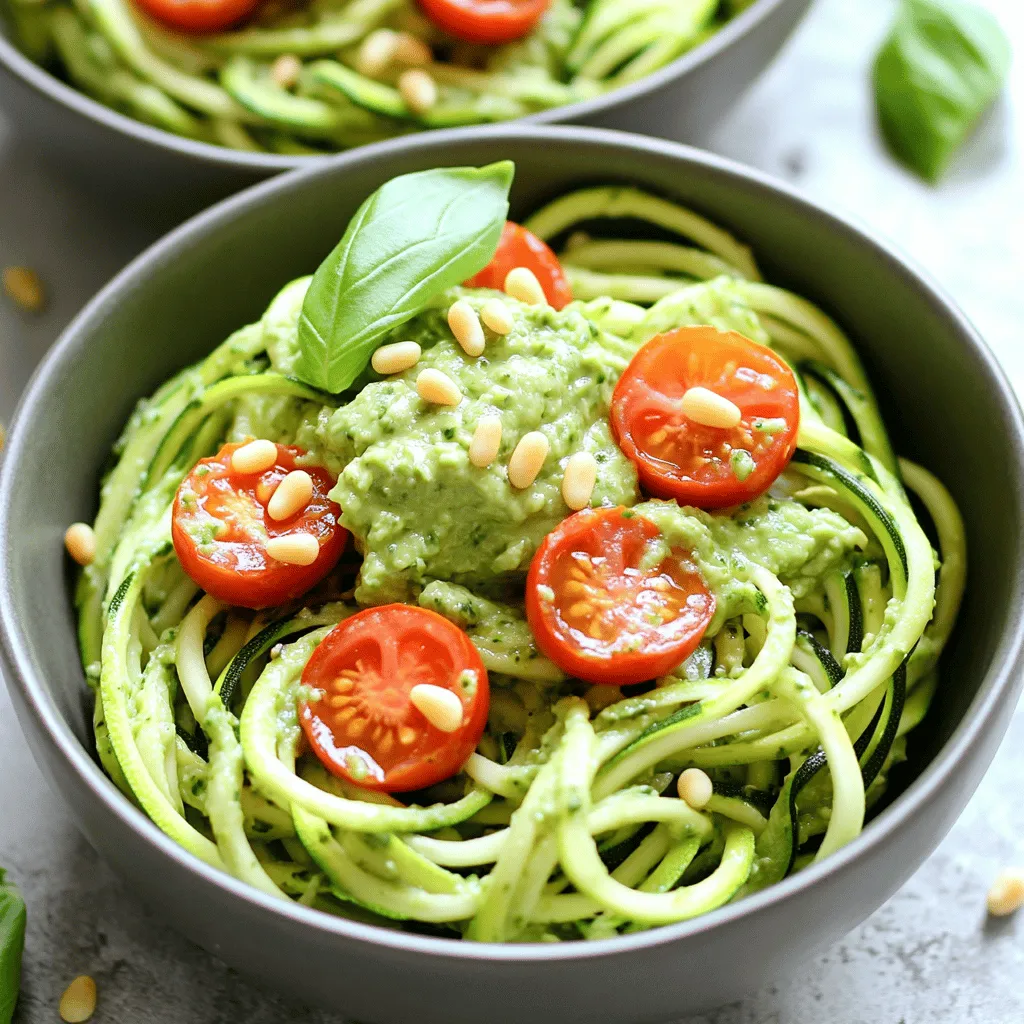
Once the noodles are ready, take the skillet off the heat. Add the creamy pesto to the noodles and toss them gently. Ensure every strand is coated. For a nice touch, serve the zoodles in deep bowls. Top them with halved cherry tomatoes and sprinkle with grated parmesan cheese if you want.
Tips & Tricks
Perfecting the Pesto
To make your pesto just right, focus on adjusting the consistency and flavor. If your pesto is too thick, add a bit more olive oil or a splash of water. For a richer taste, add more garlic or lemon juice. You can also try different nuts. Pine nuts are classic, but walnuts or cashews work well too. Each nut gives the pesto a unique twist.
Zucchini Noodle Tips
When you make zucchini noodles, the spiralizer is key. Use a good spiralizer for long, even noodles. If you don’t have one, a vegetable peeler can create thin strips. After cooking, store leftovers in an airtight container. Keep them in the fridge to stay fresh. To reheat, gently warm them in a pan or microwave. This helps keep their crunch.
Serving Suggestions
Zucchini noodles pair well with proteins like grilled chicken or shrimp. You can also serve them with a side salad or garlic bread for a full meal. For garnishing, sprinkle extra pine nuts or fresh basil on top. Halved cherry tomatoes add color and flavor. This makes your dish not only tasty but also beautiful.

Variations
Alternative Sauces
You can switch things up with different sauces. For a classic twist, try traditional basil pesto. This rich sauce brings a fresh burst of flavor. Simply blend basil, garlic, pine nuts, olive oil, and Parmesan cheese. If you want something creamy, consider a sauce made with cashews or yogurt. These creamy sauces pair nicely with zoodles.
Additional Ingredients
Boost your meal with extra ingredients. Adding protein can turn a light dish into a hearty meal. Grilled chicken or shrimp works well. You can also toss in colorful veggies like bell peppers or spinach. These not only add flavor but also make your dish more vibrant.
Flavor Enhancements
To elevate your dish, think about herbs and spices. Fresh parsley or oregano can brighten up the flavor. If you enjoy heat, sprinkle in some red pepper flakes. This adds a nice kick to your zoodles. Experiment with different seasonings to find your favorite mix.
Storage Info
Storing Leftovers
To keep your zucchini noodles fresh, use airtight containers. Glass or plastic containers work well. Store your leftovers in the fridge. They stay good for about 2 to 3 days. Make sure to separate the noodles from the pesto. This helps prevent sogginess.
Freezing Tips
You can freeze zucchini noodles, but do it right. Start by blanching them in boiling water for 1 to 2 minutes. Then, cool them in ice water. Drain and pat dry. Place them in freezer bags or containers. They last up to 3 months in the freezer. To use, thaw in the fridge overnight. Reheat in a skillet over low heat.
Freshness Tips
Check your zucchini for signs of spoilage. Look for soft spots, discoloration, or mold. These mean it’s time to toss them. To keep your ingredients fresh longer, store them in a cool, dry place. Avoid washing them before storage, as moisture can lead to spoilage. Always wash just before use to maintain freshness.
FAQs
What are zucchini noodles?
Zucchini noodles, or zoodles, are long strands made from fresh zucchini. They are a great pasta alternative. Zoodles are low in carbs and calories, making them perfect for healthy meals. They are also gluten-free and rich in vitamins. Using zucchini noodles can help increase your vegetable intake without sacrificing flavor.
Can I make zucchini noodles without a spiralizer?
Yes, you can! If you don’t have a spiralizer, use a regular peeler. Just peel the zucchini into thin strips. You can also use a box grater to shred the zucchini. Another option is a knife to cut the zucchini into thin noodles. Each method works well and gives you tasty zoodles.
How do I prevent zucchini noodles from getting soggy?
To keep zoodles from getting soggy, cook them for a short time. Sauté them for about 3-4 minutes until they are tender but still crisp. Draining the noodles after cooking helps remove excess water. You can also sprinkle salt on the zoodles before cooking to draw out moisture. This way, you’ll enjoy a perfect texture every time.
What can I substitute for pine nuts?
If you need a substitute for pine nuts, try walnuts or almonds. Both add a nice crunch and flavor to your pesto. Sunflower seeds also work well for a nut-free option. They give the same creamy texture without the nuts. So, feel free to mix and match based on what you have on hand!
This blog post covered a fresh, healthy dish featuring zucchini noodles and homemade pesto. We explored the key ingredients, cooking instructions, and essential tips. You learned to make zoodles, create a tasty pesto, and add personal twists through variations. Consider trying different proteins or herbs to enhance flavors. Storing and freezing suggestions help keep your dish fresh longer. With simple steps, you can enjoy a delicious meal that is both nutritious and satisfying. Embrace creativity in your cooking, and enjoy every bite!


![When making apple cinnamon overnight oats, you need simple and healthy ingredients. Here’s what you’ll need: - 1 cup rolled oats - 2 cups almond milk (or your preferred milk) - 1 medium apple, diced (a Granny Smith works great for a touch of tartness) - 1 tablespoon chia seeds - 1 tablespoon maple syrup (adjust based on your sweetness preference) - 1 teaspoon ground cinnamon - 1/2 teaspoon vanilla extract - A pinch of salt - Toppings: sliced almonds, additional apple slices, and a sprinkle of cinnamon These ingredients make a tasty breakfast that is full of fiber and nutrients. Rolled oats provide a solid base. Almond milk adds creaminess without extra calories. Diced apple brings natural sweetness and crunch. Chia seeds boost fiber and omega-3s. Maple syrup gives a touch of sweetness, while ground cinnamon adds warmth and flavor. A pinch of salt balances everything out. Feel free to adjust the ingredients to fit your taste. You can add more or less maple syrup, depending on how sweet you like it. I recommend using fresh apples for the best flavor. For a fun twist, try adding your favorite nuts or seeds on top. Check out the Full Recipe for all the details on making this delicious dish! To make apple cinnamon overnight oats, start with a clean space. Gather your ingredients first. This helps make the process smooth and quick. It only takes about ten minutes to prepare. You will need rolled oats, milk, chia seeds, and other tasty items. In a medium bowl, combine 1 cup of rolled oats and 2 cups of almond milk. Then, add 1 tablespoon of chia seeds, 1 tablespoon of maple syrup, and 1 teaspoon of ground cinnamon. Don't forget 1/2 teaspoon of vanilla extract and a pinch of salt. Whisk everything together until it’s mixed well. Next, fold in 1 diced apple. Make sure the apple pieces spread evenly through the mixture. This adds great flavor to every spoonful. Now, take two jars or airtight containers. Spoon the oat mixture evenly into them. Leave some space at the top. This space is important as the oats will expand. Seal the containers tightly and place them in the fridge. Let them chill overnight or for at least six hours. When you wake up, the oats will be ready! Just stir them, and if they are too thick, add a bit of almond milk to reach your desired creaminess. Enjoy! You can find the full recipe [here]. To get the best creamy oats, use the right milk. I like almond milk, but any milk will work. Soaking the oats overnight is key. This allows them to absorb the liquid. If your oats look too thick in the morning, add a splash of milk. Stir well to reach your perfect texture. Choosing the right apple makes a big difference. I recommend using Granny Smith apples for a nice tart flavor. They contrast well with the sweetness of the maple syrup. Other good choices are Honeycrisp or Fuji apples. Both add a sweet crunch and vibrant taste. For a beautiful presentation, use clear glass jars. Show off those lovely layers of oats, apples, and toppings. Just before serving, drizzle extra maple syrup on top. This adds shine and an extra touch of sweetness. Garnish with sliced almonds or apple slices for a pop of color. Enjoy the visual feast as much as the taste! {{image_4}} You can swap almond milk for any milk you like. Cow's milk gives a creamy taste. Cashew milk adds richness. Coconut milk brings a tropical twist. Each milk changes the flavor a bit, so try different ones to find your favorite. Maple syrup is the base for sweetness, but it’s not the only choice. You can use honey if you want a floral note. Agave syrup works well for a mild sweetness. If you prefer less sugar, try mashed bananas or stevia for a low-cal option. Adjust to your taste! Adding more ingredients is easy! You can mix in nuts or seeds for healthy fats. Try flax seeds for extra fiber. Some berries can add antioxidants and a pop of color. A spoonful of yogurt can make it creamy and add protein. Feel free to experiment with different add-ins to boost your overnight oats. Check the Full Recipe for more details on ingredients! You can store your apple cinnamon overnight oats in airtight containers. Glass jars work great. Make sure each jar is sealed tightly. This keeps the oats fresh and tasty. Place them in the fridge after making them. They last well in the cold. These oats are best when eaten within five days. After five days, their taste and texture change. If you see any mold, throw them away. Always check for a sour smell too. It’s better to be safe than sorry! You can freeze overnight oats if you want to keep them longer. Use freezer-safe containers or bags. Just leave some space to allow for expansion. When you're ready to eat, thaw them in the fridge overnight. You can also warm them in the microwave. This way, you enjoy a healthy breakfast boost anytime! For the full recipe, check out the details above. Yes, you can use instant oats, but the texture will change. Instant oats cook faster and may become mushy when soaked. If you want a creamier texture, stick with rolled oats. They absorb liquid well and hold their shape, giving you a better bite. You can change the flavor in many ways. Try different spices like nutmeg or ginger. Add a scoop of peanut butter or almond butter for creaminess. You can also mix in dried fruits, like raisins or cranberries, for a sweet touch. Experimenting with toppings can add crunch, too! Absolutely! This recipe is perfect for meal prep. Make a batch and store it in jars. It will last in the fridge for up to five days. Each morning, you can grab a jar, stir it up, and enjoy a healthy breakfast. Check the full recipe for more details on making these oats. This blog post showed you how to make delicious overnight oats. We covered the key ingredients and step-by-step instructions. Tips helped you achieve creamy texture and great flavor. Plus, I shared fun ways to personalize your oats. Remember, these oats store well, making them perfect for meal prep. Enjoy your tasty and healthy breakfast with ease. You can mix it up as you like and keep it fresh! Start experimenting today and make breakfast something you look forward to.](https://dishtreats.com/wp-content/uploads/2025/07/b5672784-8b9d-49df-af82-0a82d4d3c269-768x768.webp)
![To make Peanut Butter Chocolate Overnight Oats, you will need the following: - 1 cup rolled oats - 2 cups almond milk (or your preferred milk variety) - 2 tablespoons natural creamy peanut butter - 2 tablespoons unsweetened cocoa powder - 2 tablespoons maple syrup (or honey for sweetness) - 1/2 teaspoon pure vanilla extract - A pinch of salt - 1 ripe banana, sliced (for topping) - Chopped peanuts and dark chocolate shavings (for garnish) You can swap some ingredients to fit your taste. If you want a nut-free option, use sunflower seed butter instead of peanut butter. For a dairy-free choice, almond milk is great, but soy or oat milk works well too. You can replace maple syrup with agave nectar or any other sweetener you like. If cocoa powder is not your thing, try carob powder for a different flavor. Each serving of these overnight oats has around 350 calories. They provide a good mix of protein, carbs, and healthy fats. You get about 10 grams of protein and 7 grams of fiber, which helps keep you full. The oats give you energy, while the peanut butter adds creaminess and taste. Plus, the dark chocolate shavings offer a little indulgence without too much guilt. Enjoy every spoonful knowing it’s a balanced meal! First, gather your ingredients. You need rolled oats, almond milk, peanut butter, cocoa powder, maple syrup, vanilla extract, salt, a banana, chopped peanuts, and dark chocolate shavings. Start by measuring out one cup of rolled oats and two cups of almond milk. This forms the base of your overnight oats. In a medium bowl, combine the oats and almond milk. Next, add two tablespoons of peanut butter, two tablespoons of cocoa powder, and two tablespoons of maple syrup. Include half a teaspoon of vanilla extract and a pinch of salt. This mix gives your oats a rich flavor. Using a whisk, mix everything until it’s smooth and well blended. Make sure the peanut butter is fully mixed in. Once your mixture is ready, divide it into two jars or airtight containers. Fill them to your desired level. Seal the jars tightly and place them in the fridge overnight. This helps the oats absorb the liquid and soften. When you wake up, take the jars out of the fridge. Stir the oats to make them creamy. They should be thick and delicious. Top each jar with fresh banana slices. Add chopped peanuts and dark chocolate shavings for a tasty finish. You can enjoy your oats cold or warm them in the microwave for about one minute. For a lovely presentation, serve in clear jars to show off those yummy layers. Check out the Full Recipe for more tips! To get creamy oats, you need to use the right ratio of oats to liquid. I recommend using 1 cup of rolled oats with 2 cups of almond milk. This balance helps the oats soak up the milk overnight. Make sure to mix your ingredients well. If you want even creamier oats, you can add a little extra milk in the morning. Stir it in before you top your oats. This makes them smooth and easy to enjoy. Store-bought overnight oats can be quick, but they often lack fresh taste. Making your own lets you pick the best ingredients. Plus, you can control the sweetness and flavors. If you want to save time, consider making a big batch. You can store them in jars for the week. Homemade oats taste better and you can customize them to fit your needs. You can use many types of milk in this recipe. Almond milk is my go-to, but feel free to try oat milk, soy milk, or even coconut milk. Each type adds a unique flavor. If you choose unsweetened milk, adjust the sweetness with more maple syrup or honey. This way, you can still enjoy that rich taste of peanut butter and chocolate. {{image_4}} You can spice up your Peanut Butter Chocolate Overnight Oats in fun ways. Try adding a dash of cinnamon for warmth. A pinch of nutmeg adds a cozy vibe, too. For a kick, add cayenne pepper. It gives a surprising twist. If you love coffee, mix in a teaspoon of instant coffee. It pairs well with chocolate. Each addition makes the flavor unique and exciting. Toppings can change the whole dish. Fresh fruits are a great choice. Sliced strawberries or blueberries add color and taste. You can also use chopped nuts for crunch. They add healthy fats and protein. Try adding shredded coconut for a tropical flair. A drizzle of honey or maple syrup can sweeten things up. Get creative and mix and match! This recipe is easy to make vegan-friendly. Use almond milk or any plant-based milk. Choose a vegan peanut butter without added sugar. Maple syrup is already a vegan-friendly sweetener. You can skip the honey to keep it plant-based. With these simple swaps, everyone can enjoy this tasty dish. To keep your peanut butter chocolate overnight oats fresh, store them in airtight jars. This helps prevent spills and keeps the oats tasty. Always allow them to cool before sealing. If you plan to eat them later, make sure they are fully chilled. When stored properly, these oats last for up to five days in the fridge. After that, the oats may lose their texture and flavor. For the best taste, enjoy them within three days. Check for any signs of spoilage before eating. You can freeze your oats if you want to save them for later. To do this, place the mixture in freezer-safe containers. Make sure to leave some space at the top for expansion. They can last up to three months in the freezer. When ready to eat, thaw in the fridge overnight before serving. You can also reheat them in the microwave. This is a great way to enjoy a quick breakfast any day. For the full recipe, check out Peanut Butter Chocolate Dream Overnight Oats. Yes, you can make Peanut Butter Chocolate Overnight Oats in advance. In fact, I recommend it! Preparing them a day ahead lets the oats soak up the flavors. This also saves time in the morning. Just mix all your ingredients, store them in jars, and refrigerate overnight. You’ll wake up to a tasty breakfast ready to enjoy. If you need a substitute for peanut butter, there are great options. Almond butter works well and has a nice flavor. Sunflower seed butter is also a good choice for nut-free diets. You can even use tahini for a unique twist. Choose what fits your taste and dietary needs best. To make more servings, simply double or triple the ingredients. For example, if you want four servings, use 2 cups of rolled oats and 4 cups of almond milk. Just keep the proportions the same. This way, each batch stays creamy and delicious! Absolutely! This recipe is great for meal prep. You can make several jars at once and store them in the fridge. They last up to five days, so you can enjoy them throughout the week. Just make sure to top them with fresh fruits and nuts before serving for the best taste. If you want the full recipe, check it out here: [Full Recipe]. This blog post covers all you need to make delicious Peanut Butter Chocolate Overnight Oats. It details key ingredients, step-by-step methods, and handy tips for rich flavor. You learned how to customize your bowl to your taste and the best ways to store leftovers. In the end, making these oats is simple and rewarding. Enjoy experimenting with flavors. Your mornings will feel brighter and better!](https://dishtreats.com/wp-content/uploads/2025/07/2593ccab-01fc-4b79-821a-fa0cdb3949cb-768x768.webp)

