Looking for a quick, healthy meal that bursts with flavor? These stuffed bell peppers with quinoa are just what you need! Packed with vibrant colors and nutritious ingredients, this dish will impress even the pickiest eaters. With a blend of spices, beans, and ooey-gooey cheese, each bite offers a delicious twist. Let’s dive into how to make this easy recipe that’s perfect for dinner tonight!
Ingredients
To make stuffed bell peppers with quinoa, gather these tasty ingredients:
– 4 large bell peppers (mixed colors)
– 1 cup quinoa (rinsed)
– 2 cups vegetable broth
– 1 can black beans (drained and rinsed)
– 1 cup corn kernels
– 1 medium onion (finely chopped)
– 2 cloves garlic (minced)
– 1 teaspoon ground cumin
– 1 teaspoon chili powder
– ½ teaspoon smoked paprika
– Salt and pepper to taste
– 1 cup diced tomatoes
– 1 cup shredded cheese
– Fresh cilantro (optional for garnish)
These ingredients work together to create a colorful and healthy meal. Quinoa is the star here, adding protein and fiber. The bell peppers not only look great but also bring sweetness and crunch.
Step-by-Step Instructions
Preparation of Quinoa
– To cook quinoa with vegetable broth, start by rinsing 1 cup of quinoa under cold water. This step removes bitterness. Pour the rinsed quinoa into a medium saucepan. Add 2 cups of vegetable broth for added flavor. Bring the mixture to a boil over medium-high heat. Once boiling, reduce the heat to low. Cover the pan and let it simmer for about 15 minutes. You will know it’s done when all the liquid is absorbed.
– After cooking, fluff the quinoa with a fork. This makes it light and airy. Set the quinoa aside to cool while you prepare the other ingredients.
Sautéing Vegetables
– Heat a non-stick skillet over medium heat. Add 1 medium onion, finely chopped, and 2 cloves of minced garlic. Cook these until the onion turns soft and translucent. This takes about 3 to 5 minutes.
– Next, add 1 can of drained black beans and 1 cup of corn kernels to the skillet. Stir in 1 cup of diced tomatoes, along with 1 teaspoon of ground cumin, 1 teaspoon of chili powder, ½ teaspoon of smoked paprika, and salt and pepper to taste. Mix well and let it cook for an additional 5 minutes until everything is warm.
Stuffing the Peppers
– To prepare the bell peppers, slice off the tops and remove the seeds and membranes. Choose 4 large bell peppers for a colorful dish. Place the hollowed peppers upright in a baking dish. Make sure they stand stable.
– Now, fill each bell pepper with the quinoa and vegetable mix. Press it down gently to pack it in well. For a cheesy touch, top each pepper with 1 cup of shredded cheese. Let it cascade down the sides for a fun look.
Baking Instructions
– Cover the baking dish with aluminum foil. This helps keep the moisture in. Place it in the preheated oven at 375°F (190°C). Bake for 25 minutes.
– After 25 minutes, carefully remove the foil. Return the dish to the oven for another 10 to 15 minutes. You want the peppers to be tender, and the cheese to melt and bubble. It should have a lovely golden color when done.
Now you have a delicious, colorful dish ready to serve!
Tips & Tricks
Perfecting Your Stuffed Peppers
How to choose the right bell peppers
Pick large, firm bell peppers for stuffing. Look for vibrant colors like red, yellow, or green. The best peppers have smooth skin. Avoid any with soft spots or blemishes. This ensures a tasty bite every time.
Ensuring even cooking
Cut off the tops of the peppers evenly. This helps them stand upright. Remove seeds and membranes for better stuffing. Place them in a baking dish that fits snugly. This keeps them from tipping over during cooking.
Flavor Enhancers
Adding herbs or spices for variety
Fresh herbs like cilantro or parsley boost flavor. Try adding a pinch of oregano or thyme for depth. For a spicy touch, sprinkle in some red pepper flakes. These small tweaks make a big difference in taste.
Recommended cheese types for best flavor
Cheddar and mozzarella melt well and taste great. For a kick, use pepper jack cheese. If you like tang, feta cheese can add a nice twist. Experiment to find your favorite cheese blend.
Cooking Equipment
Essential kitchen tools and equipment
You’ll need a sharp knife and a cutting board for prep. A medium saucepan is great for cooking quinoa. Use a non-stick skillet for sautéing vegetables. A sturdy spoon helps you mix everything well.
Baking dish recommendations for even heat distribution
Choose a glass or ceramic baking dish. These materials distribute heat evenly. Make sure it’s big enough to hold all your stuffed peppers. This way, they cook through without burning.

Variations
Different Protein Options
You can change the protein in stuffed peppers easily. If you want a meat option, try ground turkey. It adds great flavor. For a plant-based choice, use tofu. You can mash it and mix it into the filling. Black beans are great, but these options offer variety.
You can also make vegetarian or vegan options. Use black beans or lentils for protein. These keep it meat-free. Just ensure you skip the cheese for a vegan meal. There are many ways to customize the protein to fit your needs.
Grain Alternatives
Quinoa is a fantastic base for stuffed peppers, but you can switch grains. Rice is a classic choice that works well. Farro or couscous can also bring a different texture. They make the meal hearty and filling.
If you need gluten-free options, use rice or quinoa. Both are naturally gluten-free. This way, everyone can enjoy your stuffed peppers without worry.
Flavor Profiles
Think about different flavors to spice things up. For a Mexican twist, add jalapeños or taco seasoning. This gives the dish a kick and adds excitement. You can also use salsa for added flavor.
For a Mediterranean vibe, add olives or crumbled feta cheese. These ingredients enhance the taste and bring a fresh feel. Both options are simple yet effective ways to change your stuffed peppers.
Storage Info
Storing Leftovers
To keep your stuffed bell peppers fresh, store them in the fridge. Place them in an airtight container. They will stay good for up to 4 days. If you want to save them for later, freezing is a great option. Wrap each stuffed pepper in plastic wrap, then put them in a freezer-safe bag. This way, they can last for up to 3 months.
Reheating Methods
For reheating in the oven, preheat it to 350°F (175°C). Place the peppers in a baking dish with a little broth or water. Cover with foil to keep moisture in. Bake for about 20 minutes or until heated through.
If you need a quick option, use the microwave. Place one stuffed pepper on a microwave-safe plate. Heat on high for about 2-3 minutes. If it’s not hot enough, heat in 30-second bursts until warm.
Shelf Life
Stuffed peppers last in the fridge for about 4 days. After that, they may spoil. Look out for any signs of spoilage. If you see mold or a bad smell, it’s time to toss them. Always trust your senses!
FAQs
How long do you bake stuffed bell peppers?
You typically bake stuffed bell peppers for 35 to 40 minutes. Start by covering them with foil for the first 25 minutes. This keeps them moist. After that, remove the foil to let the cheese melt and brown for another 10 to 15 minutes. Check the peppers to ensure they are tender but not mushy.
Can I make stuffed peppers ahead of time?
Yes, you can prepare stuffed peppers in advance. Stuff the peppers and place them in a baking dish. Cover with foil and store them in the fridge for up to 24 hours. When ready to bake, just pop them in the oven. You may need to extend the baking time by a few minutes.
What can I substitute for quinoa?
If you want to swap quinoa, try rice, farro, or couscous. These grains provide a nice texture. Rice cooks quickly and absorbs flavors well. Farro adds a chewy bite, while couscous is fluffy and light. You can also use lentils for a protein boost.
Are stuffed peppers healthy?
Stuffed peppers are quite healthy! They are full of fiber from the quinoa, beans, and veggies. Bell peppers are rich in vitamins A and C. This dish tends to be low in calories and high in nutrients. It offers a balanced meal with protein, carbs, and healthy fats.
Can I use different types of bell peppers?
Absolutely! You can use green, red, yellow, or orange bell peppers. Each type has a unique taste. Green peppers are more bitter, while red ones are sweet and fruity. Mixing colors not only looks pretty but also gives different flavors. Feel free to choose your favorite or what’s on hand!Here, I’ll share key details about the dish that will help you create a yummy meal your family will love.
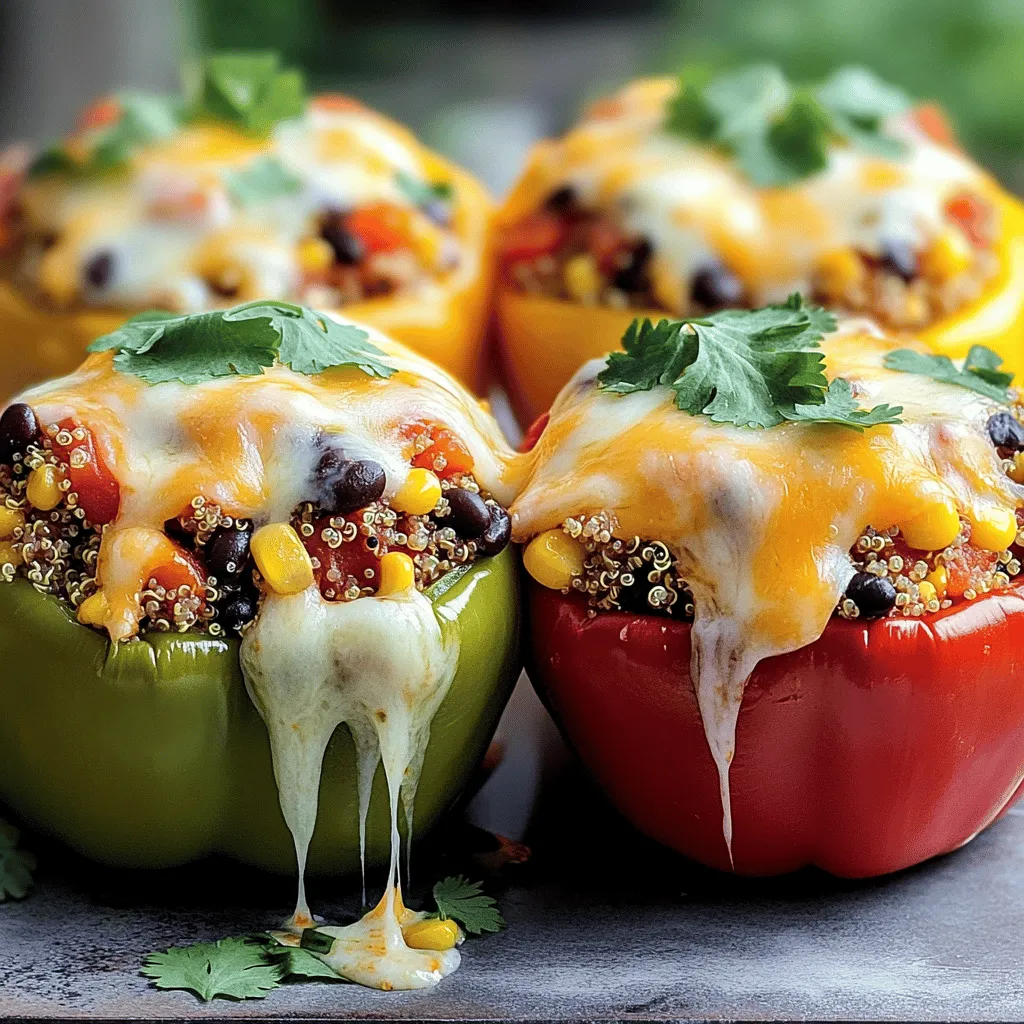
Stuffed bell peppers are colorful and fun. They make a great meal for any day. You can use any bell pepper color. Red, yellow, and green peppers add a nice look to your plate. Each color has a different taste too.
Quinoa is the star here. It’s a healthy grain packed with protein. Rinsing it before cooking helps remove any bitter taste. You cook quinoa in vegetable broth for extra flavor. This makes it soft and fluffy, perfect for mixing with veggies.
The filling is made from black beans, corn, diced tomatoes, and spices. Black beans add protein and fiber. Corn brings sweetness and crunch. Diced tomatoes add moisture and flavor, making the filling juicy.
The spices—cumin, chili powder, and smoked paprika—give your dish a tasty kick. They create layers of flavor that make each bite exciting. Don’t forget to add salt and pepper to taste!
When you stuff the peppers, pack the filling well. This keeps everything together during cooking. Topping with shredded cheese adds a melty touch. As the peppers bake, the cheese melts and gets golden.
Baking them with foil keeps the peppers moist. Then, removing the foil lets the cheese get bubbly and brown. The result is a beautiful dish that is sure to impress!
Stuffed peppers combine colorful ingredients into a tasty meal. We discussed how to prepare quinoa, sauté vegetables, and stuff the peppers. I shared tips for choosing the right peppers and flavoring your dish. Variations allow you to substitute proteins and grains based on your taste. Storing leftovers properly extends the life of your meal. Making stuffed peppers can be fun and creative. Enjoy trying new flavors and share this recipe with others!


