Go Back
- 1 can (15 oz) chickpeas, thoroughly drained and rinsed - 1 tablespoon extra virgin olive oil - 1 teaspoon smoked paprika - 1/2 teaspoon garlic powder - 1/2 teaspoon onion powder - 1/2 teaspoon ground cumin - 1/4 teaspoon cayenne pepper (adjust for spice preference) - Sea salt, to taste - Fresh parsley, finely chopped (for garnish) I love using simple ingredients to create a tasty snack. Chickpeas are my favorite base. They pack protein and fiber, making them a smart choice. First, grab a can of chickpeas. Drain it well and rinse under cold water. This step removes excess salt and makes them cleaner. Pat them dry with paper towels. The drier they are, the crunchier they will be! Next, you'll need some olive oil. It adds flavor and helps the spices stick. Measure out one tablespoon and toss it with the chickpeas. Now let's talk spices! I use smoked paprika for a warm, smoky flavor. Garlic powder and onion powder give it a savory kick. Ground cumin adds depth, while cayenne pepper brings a subtle heat. Adjust the cayenne based on your taste. Finally, add sea salt to enhance all the flavors. You can also garnish with fresh parsley. It adds a nice color and freshness to the dish. For the full recipe, check out the details above. You'll love how easy it is to whip up these crispy air fryer chickpeas! - Preheat air fryer to 400°F (200°C) for roughly 5 minutes. - Drain and rinse chickpeas, then pat dry. Getting the air fryer hot is key. This step helps the chickpeas crisp up well. After preheating, drain a can of chickpeas. Rinse them under cold water to wash off the canned taste. Next, pat them dry with paper towels. This step is vital for achieving that perfect crunch. If you want, you can remove any loose skins for extra crispiness. - Combine chickpeas with olive oil and spices in a bowl. - Spread chickpeas in a single layer in the air fryer basket. Now it’s time to season! In a medium bowl, mix the chickpeas with olive oil and your favorite spices. For this recipe, I use smoked paprika, garlic powder, onion powder, ground cumin, and cayenne pepper. Stir until each chickpea is well-coated. Then, spread the seasoned chickpeas in a single layer in the air fryer basket. Make sure they aren’t crowded. This allows hot air to circulate, ensuring even cooking. - Air fry for 15 to 18 minutes, shaking the basket halfway through. - Allow cooling for a few minutes before serving. Set the timer for 15 to 18 minutes. Halfway through, shake the basket to help the chickpeas cook evenly. Look for a golden brown color and a nice crunch. Once done, remove the chickpeas from the air fryer. Let them cool for a few minutes. This cooling time helps them get even crunchier. Now they’re ready to enjoy! You can use them as a snack or a crunchy topping for salads. Don't forget to check the full recipe for detailed steps! To make your chickpeas super crunchy, pat them dry well after rinsing. This step helps remove any excess moisture. When you place them in the air fryer, shake the basket halfway through cooking. This move ensures even cooking on all sides. Feel free to get creative with your spices! You can try different herbs like rosemary or even curry powder for a fun twist. If you want a cheesy flavor, add a sprinkle of cheese right before serving. For a charming look, serve your crispy chickpeas in small bowls lined with parchment paper. If you like to show off their crunchiness, use clear glass containers. Both options make your snack look appealing and ready to enjoy. {{image_4}} I love to play with flavors when making crispy air fryer chickpeas. Here are two tasty ideas: - Spicy BBQ Chickpeas: Add BBQ seasoning for a smoky flavor. This mix gives the chickpeas a sweet and spicy kick. - Mediterranean: Incorporate herbs like oregano and thyme for an aromatic twist. This version is fresh and full of flavor. These crispy chickpeas are versatile and fun to eat. Here are some ways to enjoy them: - Use as a crunchy topping on salads or grain bowls. They add great texture and taste. - Enjoy as a nutritious standalone snack. They are perfect for munching while watching TV. This recipe is both gluten-free and vegan-friendly. You can adapt it further: - Adjust spices to suit your taste or dietary needs. If you want more heat, add more cayenne. If you prefer milder flavors, skip the spicy ingredients. Remember to check out the Full Recipe for more details! Store your crispy air fryer chickpeas in an airtight container at room temperature. This helps keep them crunchy and tasty. Avoid leaving them out in open air, as that makes them soggy. These chickpeas are best eaten within 3 days for the best crunch. You can put them in the fridge, but they may lose their crispiness. If you notice them getting soft, it’s time to enjoy them! If you have leftovers, you can air fry them for a few minutes to regain their crunch. Just pop them back in the air fryer at 400°F (200°C) for about 3 to 5 minutes. Avoid using the microwave. Microwaving will make them soggy and less enjoyable. - Follow the detailed steps in the recipe above. - Yes, but they require soaking and cooking first. - Try hummus, tzatziki, or a spicy yogurt dip. - Yes, they're a high-protein, low-calorie snack option! This blog post showed you how to make crispy air fryer chickpeas. We covered the key ingredients, including chickpeas and spices. You learned step-by-step instructions for preparation and cooking. Tips for perfect crunch and variations for flavor make it easy to adapt. Storing options ensure they stay fresh, and I answered commonly asked questions. Enjoy experimenting with this tasty snack. The options are endless. You can make it your own!

Crispy Air Fryer Chickpeas

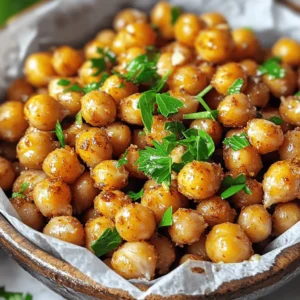
Elevate your snacking with these crispy air fryer chickpeas! This simple recipe transforms plain chickpeas into a crunchy, flavorful treat using spices like smoked paprika and cumin. Perfect as a snack or a topping for salads, they’re healthy and delicious. Follow our easy instructions to make this delightful dish in just 30 minutes. Click through for the full recipe and start enjoying these tasty bites today!

Ingredients
  

1 can (15 oz) chickpeas, thoroughly drained and rinsed

1 tablespoon extra virgin olive oil

1 teaspoon smoked paprika

1/2 teaspoon garlic powder

1/2 teaspoon onion powder

1/2 teaspoon ground cumin

1/4 teaspoon cayenne pepper (adjust for spice preference)

Sea salt, to taste

Fresh parsley, finely chopped (for garnish)

Instructions
 

Begin by preheating your air fryer to a temperature of 400°F (200°C) for roughly 5 minutes, ensuring it's hot before you add the chickpeas.

    While the air fryer warms up, drain and rinse your chickpeas thoroughly under cold running water. After rinsing, pat them dry with paper towels to remove excess moisture. For an extra crispy texture, you can remove any loose skins from the chickpeas.

      In a medium-sized mixing bowl, combine your dried chickpeas with the olive oil, smoked paprika, garlic powder, onion powder, cumin, cayenne pepper, and a sprinkle of salt. Use a wooden spoon or spatula to toss the ingredients together until each chickpea is uniformly coated with the spice mixture.

        Carefully spread the seasoned chickpeas in a single layer within the air fryer basket, ensuring they are not overcrowded to allow for even cooking.

          Air fry the chickpeas for 15 to 18 minutes, remembering to shake the basket halfway through the cooking time. Watch for a golden brown appearance and a crunchy texture as signs they’re ready.

            Once they reach the desired crispiness, remove the chickpeas from the air fryer and allow them to cool for a few minutes. They will continue to achieve optimal crunchiness as they cool.

              Transfer the chickpeas into a serving bowl, garnish with freshly chopped parsley for a pop of color, and enjoy them as a delicious snack or a crunchy topping for salads and grain bowls.

                Prep Time: 10 min | Total Time: 30 min | Servings: 4

                  - Presentation Tips: Serve the crispy chickpeas in a charming small bowl lined with parchment paper for a rustic look, or opt for transparent glass containers to highlight their appetizing crunch. These flavorful bites are perfect for enjoying as a nutritious snack or as a delightful crunchy addition to your favorite dishes!