Lemon Dill Grilled Salmon Savory and Simple Delight

If you’re craving a meal that’s both tasty and quick, Lemon Dill Grilled Salmon is your answer. This dish features fresh salmon, zesty lemon, and fragrant dill—perfect for those busy weeknights or leisurely weekend dinners. I’ll guide you step-by-step through the cooking process, share tips for grilling perfection, and offer serving suggestions that will impress anyone at your table. Let’s dive into this savory and simple delight!
Ingredients
Main Ingredients
- 4 salmon fillets (approximately 6 ounces each)
- 3 tablespoons extra-virgin olive oil
- 2 tablespoons fresh dill, finely chopped
- 2 garlic cloves, minced
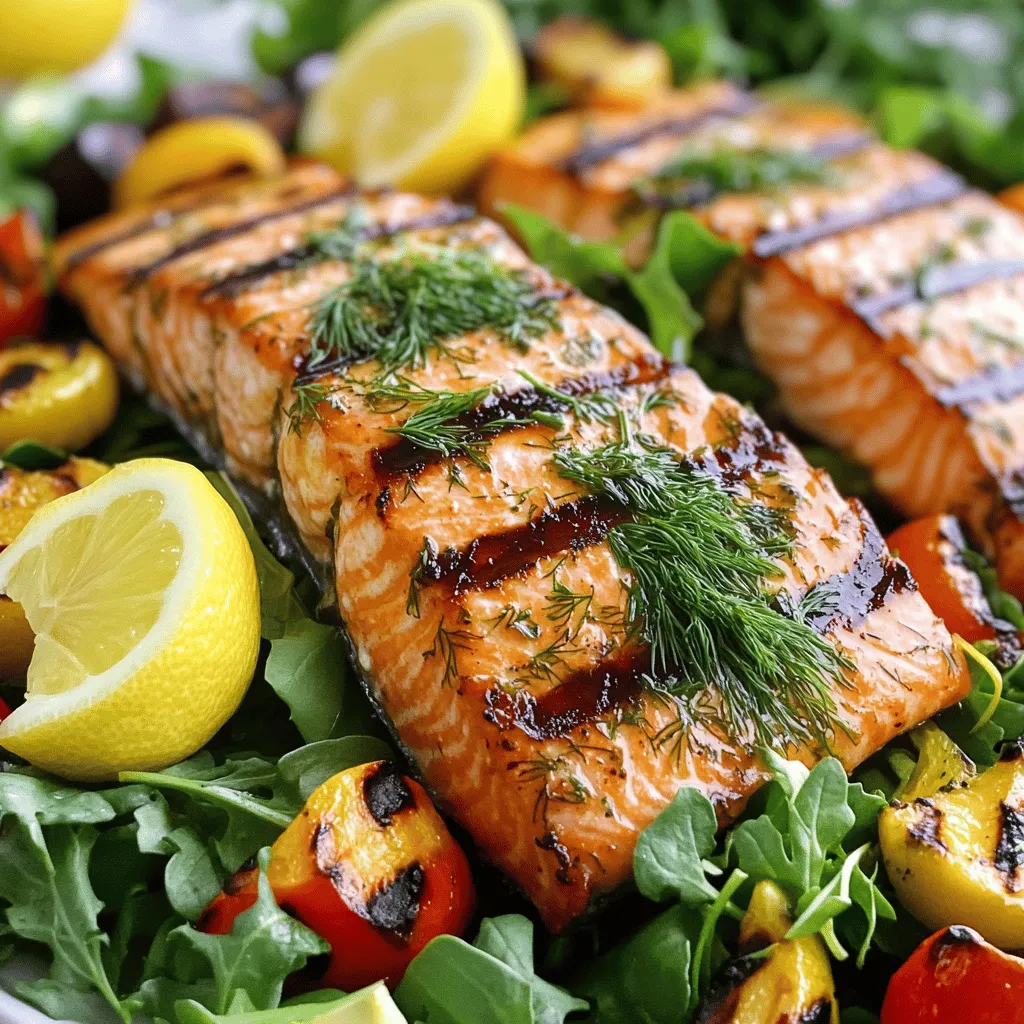
The main ingredients shine in this dish. The salmon fillets are the star, with their rich flavor and tender texture. I use extra-virgin olive oil for its fruity taste. Fresh dill adds a bright touch, while garlic brings depth. These simple ingredients combine to make a delightful meal.
Seasoning and Garnishes
- Salt and freshly cracked black pepper, to taste
- Lemon wedges, for serving
Seasoning enhances the natural flavors of the salmon. I recommend using salt and black pepper to taste. These simple spices work wonders. Lemon wedges add a fresh burst of flavor when served. You can squeeze them over the salmon for a zesty kick.
Serving Suggestions
- Ideal accompaniments: grilled vegetables or a fresh salad
- Pairing with side dishes: quinoa, rice, or roasted potatoes
When serving, I love pairing the grilled salmon with colorful grilled vegetables. A fresh salad also complements the dish well. For heartier options, consider serving with quinoa, rice, or roasted potatoes. These sides balance the meal and create a satisfying plate.
Step-by-Step Instructions
Preparing the Marinade
To start, you need to mix some simple ingredients. In a medium bowl, combine:
- 3 tablespoons extra-virgin olive oil
- Zest and juice from 2 large lemons
- 2 tablespoons fresh dill, finely chopped
- 2 minced garlic cloves
- Salt and freshly cracked black pepper to taste
Whisk these ingredients together until they blend well. This marinade adds great flavor to the salmon.
Marinating is key. Let the salmon soak up these flavors for at least 30 minutes in the fridge. This time allows the marinade to infuse the salmon deeply.
Grilling the Salmon
Now it’s time to grill. First, preheat your grill to medium-high heat. Brush the grates lightly with olive oil. This step helps to stop the salmon from sticking.
Once the grill is ready, take the salmon out of the fridge. Let any extra marinade drip off. Place the salmon skin-side down on the grill. Cook for about 4-5 minutes without moving it. This gives you nice grill marks.
Carefully flip the fillets using a spatula. Grill for another 3-4 minutes. You know the salmon is done when it looks opaque and flakes easily with a fork.
Finishing Touches
After grilling, it’s important to let the salmon rest for a couple of minutes. This helps keep it juicy.
When you are ready to serve, plate the grilled salmon warm. Add fresh lemon wedges for extra flavor. A squeeze of lemon brightens each bite.Enjoy your Lemon Dill Grilled Salmon!
Tips & Tricks
Perfecting the Grill Marks
To get those perfect grill marks, you need heat. Preheat your grill to medium-high. Brush the grates with olive oil to keep the salmon from sticking. Place the salmon skin-side down and avoid moving it for a few minutes. This helps the fish sear and form those beautiful char marks. Cook for about 4-5 minutes before flipping. Flip carefully with a spatula and cook for another 3-4 minutes. This method ensures you get those nice lines and a great taste.
Ensuring Moisture
Keeping your salmon juicy is key. Marinate the fish for at least 30 minutes. This lets the flavors soak in. Use a good amount of olive oil in your marinade. It helps lock in moisture while grilling. If your salmon is thick, you may need to grill it a bit longer. Just make sure it’s opaque and flakes easily. Let the salmon rest after grilling. This step helps keep it moist when you serve it.
Adjusting Flavor Profiles
Feel free to make the marinade your own. If you want a strong lemon flavor, add more lemon juice or zest. For a different twist, try adding some honey for sweetness. You can also switch out the dill for other herbs like parsley or thyme. This way, you can adjust the taste to fit your mood. Experimenting with the marinade allows you to create a dish that feels personal and unique.

Variations
Alternative Marinades
Switching up your marinade can make a big difference. You can try using different herbs. Basil or parsley can add fresh notes. Adding mustard or honey can also change the taste. For a smoky flavor, try adding smoked paprika. Mix and match to create a new dish every time.
Cooking Methods
While grilling is my favorite way to cook salmon, you can also bake it. To bake, set your oven to 375°F. Place the marinated salmon on a baking sheet. Bake for about 15-20 minutes, or until it flakes easily. Another method is pan-searing. Heat olive oil in a skillet over medium heat. Sear the salmon for 4-5 minutes on each side. This gives a lovely crust.
Serving Style Variations
How you serve your salmon can change the meal’s vibe. For a cozy dinner, place the salmon on a plate with rice and steamed veggies. For a fancy touch, serve on a bed of arugula with lemon slices. You can also add a drizzle of balsamic glaze for style. Don’t forget to sprinkle more fresh dill on top for color and flavor.
Storage Info
Refrigeration Guidelines
To store leftover grilled salmon, let it cool first. Place the salmon in an airtight container. Make sure to seal it well to keep out air. Store it in the fridge for up to three days. This keeps the salmon fresh and safe to eat.
Freezing Instructions
If you want to keep grilled salmon longer, freezing is a great option. Wrap each piece in plastic wrap, then place it in a freezer bag. Squeeze out as much air as you can before sealing. You can freeze it for up to three months. When you’re ready to eat, move the salmon to the fridge. Let it defrost overnight for the best texture.
Reheating Methods
Reheating grilled salmon can be tricky. You don’t want it to dry out. I recommend using the oven. Preheat it to 275°F (135°C). Place the salmon on a baking sheet and cover it with foil. Heat it for about 15 minutes. This keeps it moist and tasty. You can also use the microwave, but do it carefully. Heat in short bursts, checking often to avoid overcooking. Enjoy your leftover Lemon Dill Grilled Salmon just as much as the first time!
FAQs
How long should I marinate the salmon?
I recommend marinating the salmon for at least 30 minutes. This time allows the flavors of the marinade to seep into the fish. If you have longer, up to 2 hours works well too. Just avoid marinating for too long, as the acid from the lemon can change the texture.
Can I use frozen salmon for this recipe?
Yes, you can use frozen salmon. Just ensure it is fully thawed before marinating. Thaw it in the fridge overnight or place it in cold water for quicker results. This helps maintain the fish’s texture and flavor.
What are good side dishes to serve with Lemon Dill Grilled Salmon?
Some great side dishes include:
- Steamed asparagus
- Garlic mashed potatoes
- Quinoa salad
- Grilled zucchini
- Roasted Brussels sprouts
These sides complement the salmon’s bright flavors and create a balanced meal.
Can I make a non-grilled version of this recipe?
Absolutely! You can bake or pan-sear the salmon. To bake, set your oven to 400°F (200°C) and cook for about 12-15 minutes. For pan-searing, heat a skillet over medium-high heat, cook for about 4-5 minutes on each side. Both methods work well, just adjust your cooking time.
This blog post covered everything you need for making Lemon Dill Grilled Salmon. We discussed the key ingredients, step-by-step instructions, and tips for grilling. I shared variations, storage info, and answered common questions.
Grilling salmon at home can be fun and rewarding. With the right steps and ingredients, you can impress everyone. Enjoy this dish with your favorite sides for a delicious meal. Happy cooking!


![To make Blueberry Lemon Breakfast Quinoa, you will need the following ingredients: - 1 cup quinoa, thoroughly rinsed - 2 cups almond milk (or your preferred milk) - 1 cup fresh blueberries (or frozen if fresh are not available) - Zest of 1 lemon - Juice of 1 large lemon - 2 tablespoons pure maple syrup (or honey for sweetness) - 1 teaspoon pure vanilla extract - 1/2 teaspoon ground cinnamon - A pinch of salt - Optional toppings: sliced almonds, extra blueberries, or a generous dollop of Greek yogurt Choose bright blueberries with no wrinkles. Look for firm berries, as they taste best. For lemons, pick ones that feel heavy. They should have a smooth, shiny skin. This shows they are juicy. When choosing quinoa, look for a grain that is clean and free of debris. If you need a non-dairy milk, try oat milk or coconut milk. Both have nice flavors. For sweeteners, you can use agave syrup or brown sugar. Adjust the amount to your taste. If you want to skip the sweetener, ripe bananas work great too. You can mash them and mix them in! Start by rinsing 1 cup of quinoa under cold water. This helps remove any bitter taste. Use a fine mesh sieve for best results. This step is key for a great flavor. Next, gather a medium saucepan. Add the rinsed quinoa to the saucepan. Pour in 2 cups of almond milk and a pinch of salt. This combination makes the quinoa creamy and rich. Place the saucepan over medium heat. Bring the mixture to a gentle boil. Watch it carefully; it can boil over quickly. Once it boils, reduce the heat to low. Cover the saucepan with a lid. Let it simmer for about 15 minutes. The quinoa will absorb most of the liquid during this time. When the quinoa is tender, remove it from heat. Allow it to sit for 5 more minutes. This helps steam the quinoa and makes it fluffy. After 5 minutes, uncover the saucepan. Use a fork to fluff the quinoa gently. This step adds air and lightness. Now, it’s time to mix in the flavors. Add the lemon zest and juice. Pour in 2 tablespoons of maple syrup, 1 teaspoon of vanilla extract, and 1/2 teaspoon of cinnamon. Stir well to combine everything. Finally, fold in the blueberries gently. Reserve some blueberries for garnishing if you like. Serve warm in bowls, and enjoy your Blueberry Lemon Breakfast Quinoa! For the full recipe, check out the details above. To get the best quinoa texture, rinse it well before cooking. This removes the bitter coating called saponin. Use two cups of liquid for every cup of quinoa. This ratio helps the quinoa absorb enough moisture. Cook it on low heat after boiling. Let it simmer for about 15 minutes. After that, let it steam for 5 more minutes. This step makes the quinoa fluffy and light. Fluff it gently with a fork at the end. This adds air and prevents clumping. Adding lemon zest brings a bright flavor. You can also try a pinch of nutmeg for warmth. Cinnamon adds a lovely spice that pairs well with blueberries. If you want more sweetness, add a little more maple syrup. For a kick, a dash of ginger powder can elevate the taste. Don’t hesitate to experiment with these flavors. Each adds its unique touch to your breakfast. This recipe serves four people. Each person gets a warm bowl full of deliciousness. For presentation, use colorful bowls that catch the eye. Top with fresh blueberries and sliced almonds. A dollop of Greek yogurt adds creaminess and visual appeal. You can also drizzle extra maple syrup for shine. Garnish with lemon wedges and mint for a refreshing look. This makes breakfast not only tasty but also beautiful. {{image_4}} You can mix in other fruits to change the flavor. Try strawberries, raspberries, or bananas. Each fruit adds its own taste. For a tropical twist, add diced mango or pineapple. These fruits work well with the lemon and blueberry. You can even use dried fruits like cranberries or apricots for a chewy texture. Just remember to adjust the sweetener if needed. Adding nuts or seeds makes the dish crunchy. Try sliced almonds, walnuts, or pecans. They add a nice contrast to the soft quinoa. You can also use seeds like chia or flaxseeds. These seeds give extra fiber and healthy fats. Toss them in right before serving for a fresh crunch. This recipe is already vegan if you use plant-based milk. To ensure it’s gluten-free, check the quinoa package. Some brands process quinoa with gluten grains. Always read labels closely. You can substitute maple syrup with agave nectar for a different sweet flavor. This breakfast fits many dietary needs, making it a great choice for everyone. For the Full Recipe, refer to earlier sections. To keep your Blueberry Lemon Breakfast Quinoa fresh, store it in an airtight container. Let the quinoa cool to room temperature before sealing it. This helps prevent moisture build-up. Place it in the fridge if you plan to eat it within a few days. When you’re ready to enjoy your quinoa again, reheat it on the stove or in the microwave. If using the stove, add a splash of almond milk to keep it moist. Stir often over low heat until warmed through. In the microwave, heat it in short bursts, stirring in between, to avoid hot spots. Your quinoa can last up to five days in the fridge. For meal prep, consider making a larger batch. You can portion it out for quick breakfasts. Store portions in single-serving containers for easy grab-and-go meals. This way, you always have a tasty and healthy breakfast on hand. For the full recipe, check out the [Full Recipe]. Yes, quinoa is a very healthy choice for breakfast. It has lots of protein and fiber. This helps keep you full longer. Quinoa also has vitamins and minerals like magnesium and iron. These nutrients are great for your body. Eating quinoa can boost your energy and help you stay focused all morning. Yes, you can use frozen blueberries. They work well in your breakfast quinoa. Frozen blueberries are picked at their peak ripeness, so they still have great flavor. Just add them straight to your cooked quinoa. There is no need to thaw them first. This makes preparation easier and faster. You can easily prepare this dish ahead of time. Cook the quinoa and mix in the other ingredients. Let it cool and then store it in an airtight container. Keep it in the fridge for up to four days. When you are ready to eat, just reheat it in the microwave. You may want to add a splash of milk to keep it creamy. For the full recipe, check out the details above. In this blog post, I covered the key ingredients for making Blueberry Lemon Breakfast Quinoa. You learned how to select fresh items and swap non-dairy options. I guided you through easy preparation and cooking steps for perfect quinoa. Remember the tips to enhance flavor with spices and zest. Explore variations by adding your favorite fruits and toppings. Lastly, I shared storage tips for leftovers to keep your meals fresh. Now you can enjoy a healthy, delicious breakfast with ease.](https://dishtreats.com/wp-content/uploads/2025/07/a7a4f1ef-75d1-48e3-91fc-d5884226b8fe-768x768.webp)

![To make a delicious Vegan Lentil Shepherd's Pie, you will need: - 1 cup green or brown lentils, thoroughly rinsed - 3 cups vegetable broth - 1 medium onion, finely diced - 2 cloves garlic, minced - 2 medium carrots, diced into small cubes - 2 celery stalks, finely diced - 1 cup peas (fresh or frozen) - 2 tablespoons tomato paste - 1 tablespoon soy sauce or tamari - 1 teaspoon dried thyme - 1 teaspoon dried rosemary - Salt and freshly cracked pepper to taste - 4 large potatoes, peeled and chopped into chunks - 1/4 cup unsweetened plant-based milk (such as almond or soy) - 2 tablespoons vegan butter or olive oil You can enhance your shepherd's pie with these optional ingredients: - 1 teaspoon smoked paprika for a hint of smokiness - 1 tablespoon nutritional yeast for a cheesy flavor - 1 cup mushrooms, diced, for a hearty texture - A splash of red wine for depth of flavor This recipe serves 4-6 and is a healthy choice. Each serving has: - Approximately 300 calories - 14 grams of protein - 10 grams of fiber - Low in saturated fat - Rich in vitamins A and C from the veggies When you make this Vegan Lentil Shepherd’s Pie, you enjoy a meal that is tasty, filling, and good for you. For the complete cooking details, check out the Full Recipe. To cook the lentils, start by rinsing 1 cup of green or brown lentils. Next, place them in a medium pot with 3 cups of vegetable broth. Bring this mix to a boil, then reduce the heat. Let it simmer for 20-25 minutes. You want the lentils to be tender but not mushy. Drain any leftover liquid and put the lentils aside. In a large skillet, heat a drizzle of olive oil over medium heat. Add 1 diced onion and sauté for about 5 minutes until soft. Then, include 2 minced garlic cloves, 2 diced carrots, and 2 diced celery stalks. Cook this mix for another 5-7 minutes until all the veggies are tender. Now, stir in the cooked lentils, 1 cup of peas, 2 tablespoons of tomato paste, and 1 tablespoon of soy sauce. Add 1 teaspoon of dried thyme, 1 teaspoon of dried rosemary, and some salt and pepper. Let this simmer for about 5 minutes. While the lentil mix simmers, you can prepare the potatoes. Bring a large pot of salted water to a boil. Add 4 large, peeled, and chopped potatoes. Cook them until fork-tender, about 15-20 minutes. Drain the potatoes and return them to the pot. Mash them using a potato masher. Mix in 1/4 cup of plant-based milk and 2 tablespoons of vegan butter. Keep mashing until smooth and creamy. Adjust the seasoning with salt and pepper. Preheat your oven to 375°F (190°C). Grease a baking dish and spoon the lentil mixture into the bottom. Spread the creamy mashed potatoes over the top. Use a fork to create peaks for texture. Bake the pie for 25-30 minutes until the top is golden and crispy. This dish is now ready to enjoy! For the full recipe, check out the detailed instructions above. To make creamy mashed potatoes, start with hot potatoes. Use a potato masher or ricer for the best texture. Gradually add unsweetened plant-based milk and vegan butter for creaminess. Mix until smooth, but avoid over-mixing. A pinch of salt enhances the flavor. Use fresh ingredients for depth. Start by sautéing onions until soft. Add garlic, carrots, and celery for sweetness. Cook them until tender. Incorporate the lentils with herbs like thyme and rosemary. This step brings out the flavors. Don't forget to season with salt and pepper. Let it simmer briefly to blend all the tastes. Serve your Vegan Lentil Shepherd’s Pie hot. Pair it with a crisp green salad for balance. You can also add crusty bread for a hearty touch. For extra flair, sprinkle fresh parsley on top before serving. This adds color and freshness to your meal. Explore different side dishes like roasted vegetables or quinoa for variety. Enjoy your delightful and wholesome dinner! For the full recipe, check the [Full Recipe]. {{image_4}} You can make this lentil shepherd's pie gluten-free. Simply replace soy sauce with coconut aminos. This swap keeps the flavor but avoids gluten. Always check labels to ensure all ingredients are gluten-free. If you're avoiding lentils, try chickpeas or black beans as protein sources. For a nut-free version, skip the plant-based milk and use vegetable broth for mashing. You can also use cauliflower instead of potatoes for a low-carb twist. Incorporate seasonal vegetables to boost flavor and nutrition. Fresh spinach or zucchini works great in the filling. Mushrooms add a nice umami taste, too. Don't be afraid to mix it up based on what's in season. This keeps your dish fresh and exciting. For the full recipe, refer to the beginning of this article. To store your Vegan Lentil Shepherd's Pie, let it cool first. Once cooled, cover it tightly with plastic wrap or foil. You can also use an airtight container. Store it in the fridge for up to four days. This keeps the flavors intact and helps maintain the pie's texture. If you want to save some pie for later, freezing is a great option. Cut the pie into individual portions. Wrap each piece in plastic wrap and then in foil. This prevents freezer burn. Place the wrapped pieces in a freezer bag. You can freeze them for up to three months. When you are ready to enjoy, just thaw it in the fridge overnight. To reheat your shepherd's pie, use the oven for the best results. Preheat your oven to 350°F (175°C). Remove the pie from the fridge or freezer and unwrap it. Place it in a baking dish. Cover the dish with foil to keep it moist. Heat it for about 25-30 minutes if cold. If it’s frozen, it might take up to 45 minutes. Remove the foil for the last 5-10 minutes to crisp the top. Enjoy your delicious meal just like it was fresh! Yes, you can use canned lentils. Just drain and rinse them first. They cook faster. This saves time. For this recipe, use about 1.5 cups of canned lentils. You can serve it with a fresh salad or steamed vegetables. A side of crusty bread also works well. The pie is hearty, so keep sides light. It lasts for 3 to 5 days in the fridge. Store it in an airtight container. Reheat it in the oven or microwave. Yes, you can prepare it a day in advance. Assemble the pie, then cover it and chill. Bake it just before serving for the best taste. Check out the Full Recipe for more details! This blog post covered how to make a tasty vegan lentil shepherd's pie. We explored essential and optional ingredients, plus nutritional info. I provided clear, step-by-step cooking methods. You learned tips for creamy mashed potatoes and flavorful lentils. We noted variations for different diets and the best ways to store leftovers. In closing, I hope you enjoy making this dish! It’s a great meal for everyone.](https://dishtreats.com/wp-content/uploads/2025/06/9ba9e126-74d7-4f69-86a8-52952e7f4e77-768x768.webp)
