Homemade Cinnamon Sugar Donuts Irresistible Treat

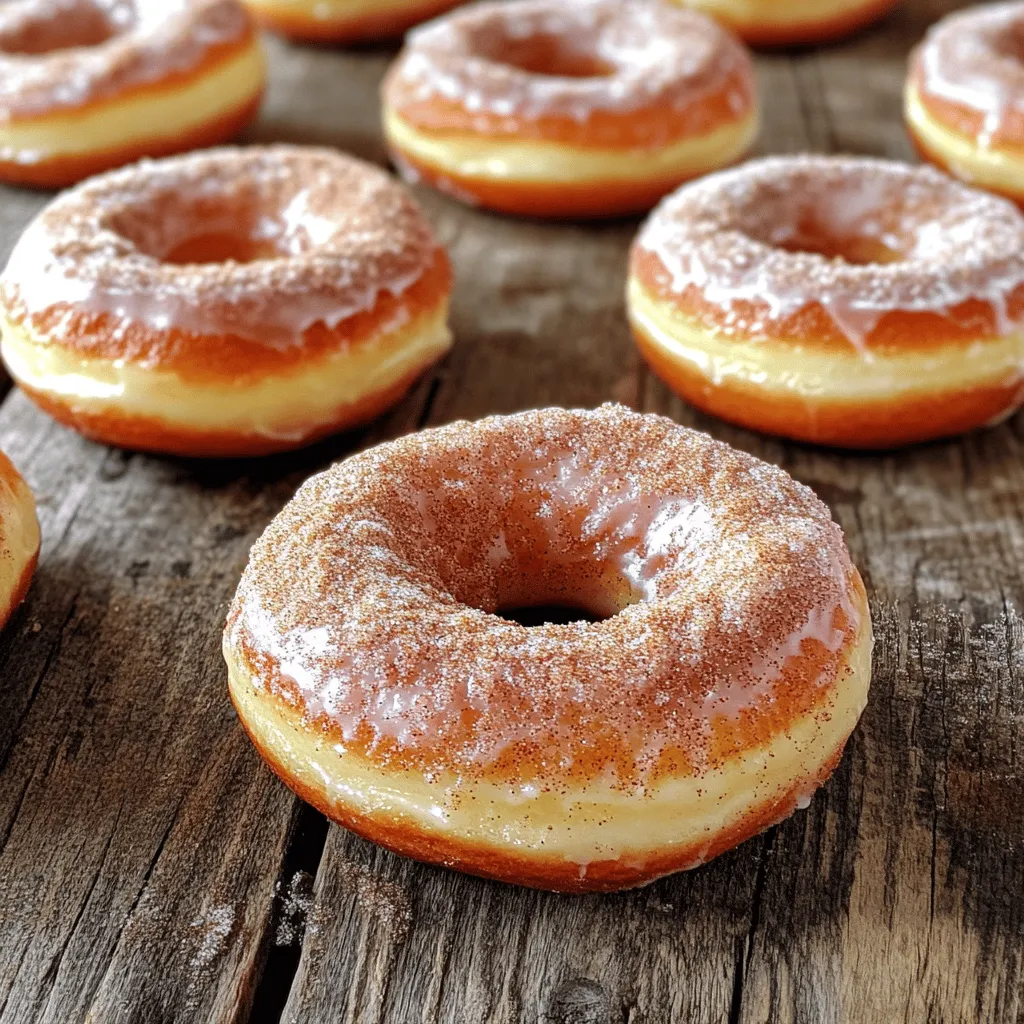
Who doesn’t love the warm, sweet aroma of homemade cinnamon sugar donuts spilling from the oven? These delightful treats are easy to make and perfect for any occasion! With a few simple ingredients and straightforward steps, you can create donuts that are soft, fluffy, and coated in irresistible cinnamon sugar. Let’s dive into the world of baking and turn your kitchen into a donut paradise!
Ingredients
Dry Ingredients
- All-purpose flour
- Granulated sugar
- Baking powder
- Salt
- Ground cinnamon
When making these donuts, start with the dry ingredients. Use one cup of all-purpose flour for a light base. Add half a cup of granulated sugar to sweeten the mix. Next, include two teaspoons of baking powder. This helps the donuts rise. A half teaspoon of salt enhances the flavor. Finally, mix in one teaspoon of ground cinnamon for that warm spice.
Wet Ingredients
- Large egg
- Milk
- Vanilla extract
- Melted butter
Now, let’s move on to the wet ingredients. You will need one large egg, which adds richness. Use half a cup of milk for moisture. A splash of vanilla extract gives a lovely aroma. Lastly, two tablespoons of melted butter add a rich, buttery taste.
Cinnamon Sugar Coating
- Granulated sugar
- Ground cinnamon
- Unsalted butter
After baking, it’s time for the cinnamon sugar coating. Combine one-fourth cup of granulated sugar with one tablespoon of ground cinnamon. This mixture will give the donuts a sweet and spicy finish. You will also need two tablespoons of melted unsalted butter. Brush this butter on the warm donuts before coating them in the cinnamon sugar mixture. This step ensures the sugar sticks well.
Step-by-Step Instructions
Preheat and Prepare
- Preheat the oven to 350°F (175°C).
- Grease your donut pan with a little butter or non-stick spray.
Mixing Ingredients
- In a large bowl, combine the dry ingredients: flour, sugar, baking powder, salt, and cinnamon.
- In another bowl, mix the wet ingredients: egg, milk, butter, and vanilla. Stir until smooth.
Combining Mixtures and Baking
- Gently fold the wet mixture into the dry mixture. Do not overmix; a few lumps are okay.
- Use a piping bag or zip-top bag to fill each donut mold two-thirds full with batter.
- Bake in the preheated oven for 10-12 minutes until golden brown. A toothpick should come out clean when inserted.
- Let the donuts cool in the pan for 5 minutes, then move them to a wire rack.
- While they cool, mix sugar and cinnamon in a small bowl for the coating.
- Brush the warm donuts with melted butter, then roll them in the cinnamon sugar until well coated.
Enjoy your fresh, homemade cinnamon sugar donuts!
Tips & Tricks
Achieving the Perfect Texture
To make the best cinnamon sugar donuts, don’t overmix the batter. Mixing too much can lead to tough donuts. Stir the wet and dry ingredients gently. You want to combine them just until no dry flour shows. This keeps your donuts soft and fluffy.
Even baking is key. Make sure to fill each mold about two-thirds full. This gives the donuts room to rise without spilling over. Rotate the pan halfway through baking. This helps all donuts cook evenly, so you get a perfect batch every time.
Serving Suggestions
Presentation matters! Serve your donuts on a pretty platter. You can sprinkle a little extra cinnamon sugar on top for a lovely touch. A light drizzle of icing also looks nice and adds sweetness.
Pair these donuts with a warm cup of coffee or tea. The warm drink balances the sweetness of the donuts. If you’re feeling adventurous, try serving them with a scoop of vanilla ice cream!
Equipment Recommendations
For the best results, use a good donut pan. A non-stick silicone pan works great. It allows for easy removal of your donuts. If you prefer metal, choose a heavy-duty pan for even baking.
Use mixing bowls that are big enough to hold your ingredients. A set of sturdy spatulas will help in mixing and transferring the batter. A piping bag or zip-top bag with the tip cut off makes filling the donut molds easy.

Variations
Flavor Additions
You can make your cinnamon sugar donuts even better with some fun flavors. Try adding chocolate chips to the batter. Just fold in about 1/2 cup of mini chocolate chips before you mix the wet and dry ingredients. The chocolate melts and adds a rich taste that pairs well with cinnamon.
Another great addition is fruit. You can mix in diced apples or mashed bananas. For apples, use about 1/2 cup of finely diced pieces. If you use bananas, one ripe banana adds sweetness and moisture. These fruits give the donuts a tasty twist and make them even more enjoyable.
Dietary Adaptations
If you need gluten-free donuts, simply swap out the all-purpose flour for a gluten-free blend. Look for a mix that works well in baking. This way, you can still enjoy these treats without gluten.
For those who follow a vegan diet, you can replace the egg and milk. Use 1/4 cup of unsweetened applesauce instead of the egg. For the milk, a plant-based milk like almond or oat milk works perfectly. These swaps keep the donuts fluffy and delicious without any animal products.
Different Coatings
While cinnamon sugar is classic, you can try different toppings. Dust your donuts with powdered sugar for a sweet finish. Or for a richer taste, dip them in a chocolate glaze. Melt about 1 cup of chocolate chips with 1 tablespoon of coconut oil. Dip the tops of the cooled donuts for a fun chocolatey treat.
Seasonal flavors can also add a nice touch. Try pumpkin spice in the batter for fall. Add 1 teaspoon of pumpkin spice along with the cinnamon for a cozy flavor. This slight change makes your donuts fit right in with the season’s spirit.Enjoy trying these variations and make your cinnamon sugar donuts even more special!
Storage Info
Refrigeration
To store your homemade cinnamon sugar donuts in the fridge, place them in an airtight container. This helps keep them fresh and moist. You can also wrap them in plastic wrap for extra protection. Refrigerated donuts stay good for about 3-4 days. After that, they may become dry or lose their flavor.
Freezing Options
If you want to keep your donuts longer, freezing is a great option. First, let the donuts cool completely. Then, wrap each donut in plastic wrap or foil. Place the wrapped donuts in a freezer-safe bag. They can last up to 3 months in the freezer. To serve, take them out and let them thaw at room temperature for about 30 minutes. You can also warm them in the oven for a few minutes to bring back the fresh taste.
Avoiding Staleness
To keep your donuts fresh longer, store them in a cool, dry place. Avoid exposing them to heat or sunlight. If they start to feel hard or dry, they may be stale. Signs of spoilage include a change in smell, mold, or an off taste. Always check before enjoying your sweet treat!
FAQs
How do you make homemade cinnamon sugar donuts?
To make homemade cinnamon sugar donuts, follow these essential steps:
1. Preheat the oven to 350°F (175°C).
2. Grease a donut pan lightly to prevent sticking.
3. In a bowl, mix flour, sugar, baking powder, salt, and cinnamon.
4. In another bowl, beat an egg, then add milk, melted butter, and vanilla.
5. Stir the wet mix into the dry mix until just combined.
6. Fill each donut mold two-thirds full with batter.
7. Bake for 10-12 minutes until golden brown.
8. Cool the donuts for a few minutes, then coat with melted butter and cinnamon sugar.
This recipe is simple and fun. You can enjoy warm donuts in about 30 minutes.
What can I use if I don’t have a donut pan?
If you lack a donut pan, don’t worry! Here are some good alternatives:
- Muffin tins: Fill the molds halfway for donut-like shapes.
- Baking sheets: Pipe the dough into circles on parchment paper.
- Silicone molds: These are great for any shape, including donuts.
Just remember to adjust baking times as needed. Muffins may take a bit longer to bake.
Can I make the batter in advance?
Yes, you can make the batter ahead of time! Here are some storage options:
- Refrigerate: Store the batter in an airtight container for up to 24 hours.
- Freeze: You can freeze the batter for up to a month. Just thaw in the fridge overnight before baking.
This makes it easy to whip up fresh donuts whenever you want!
In this blog post, I shared how to make delicious homemade cinnamon sugar donuts. You learned about the right ingredients, mixing methods, and baking tips. I also provided storage advice and fun variations to try. Donuts are simple to make and bring joy to any occasion. Remember, the key is not to overmix. Enjoy experimenting with flavors and toppings. With the right care, your donuts will be fresh and tasty for days. Happy baking!


![To make Chicken Pesto Pasta Salad, you need fresh and tasty ingredients. Here’s what you will use: - 2 cups penne pasta - 1 cup cooked chicken breast, shredded - 1/2 cup cherry tomatoes, halved - 1/2 cup mozzarella balls, drained - 1/4 cup fresh basil leaves, chopped - 1/4 cup pesto sauce - 2 tablespoons extra virgin olive oil - Juice of 1 fresh lemon - Salt and black pepper to taste - Optional: 1/4 cup pine nuts, toasted Each ingredient brings its own flavor. The penne pasta serves as a great base. The chicken adds protein. Tomatoes give freshness, while mozzarella adds creaminess. You can change things up with add-ins. Here are some great options: - Spinach or arugula for extra greens - Bell peppers for crunch - Grated Parmesan cheese for a salty kick - Cooked bacon for a smoky flavor - Quinoa instead of pasta for a healthier twist Feel free to mix and match. Your salad can be unique each time you make it. When it comes to pesto, you have choices. You can use fresh homemade pesto or store-bought pesto. Fresh pesto tastes bright and bold. You can make it with basil, garlic, pine nuts, cheese, and olive oil. Store-bought pesto saves time but may have preservatives. Both options work well in your salad. I recommend trying fresh pesto if you have the time. It elevates the dish and adds a personal touch. For the full recipe, check out the [Full Recipe]. 1. Cook the Pasta: Start by boiling water in a large pot. Add salt for flavor. When it boils, add 2 cups of penne pasta. Cook until al dente, about 8-10 minutes. Drain the pasta and rinse it with cold water to cool it down. 2. Mix the Ingredients: In a big mixing bowl, add 1 cup of shredded cooked chicken, 1/2 cup of halved cherry tomatoes, and 1/2 cup of drained mozzarella balls. Use a spatula to mix them well. 3. Combine with Pasta: Add the cooled penne pasta to the bowl. Gently mix to combine everything. Be careful not to break the mozzarella balls. 4. Make the Dressing: In a small bowl, whisk together 1/4 cup of pesto sauce, 2 tablespoons of extra virgin olive oil, and the juice from 1 fresh lemon. Add a pinch of salt and black pepper. 5. Dress the Salad: Pour the dressing over the pasta salad. Use a spoon or tongs to toss everything gently. Make sure all the ingredients are coated. 6. Fold in Fresh Herbs: Add 1/4 cup of chopped fresh basil and optional 1/4 cup of toasted pine nuts. Gently fold them into the salad without bruising the basil. 7. Taste and Adjust: Taste your salad. If it needs more flavor, add more salt, pepper, or lemon juice. 8. Chill Before Serving: Cover the salad with plastic wrap. Let it chill in the fridge for at least 30 minutes. This helps the flavors mix well. - Use a large pot to give the pasta room to move. - Salt the water before adding pasta. This makes it taste better. - Stir the pasta often while it cooks to prevent sticking. - Always taste the pasta a minute before the time is up. It should be firm but not hard. Making the dressing is quick and easy. In just a few steps, you can create a burst of flavor. Start with fresh pesto sauce. If you like a creamier dressing, mix in some yogurt or sour cream. Always taste your dressing before adding it to the salad. Adjust the flavors based on your taste. This simple dressing brings the whole dish together and makes it shine. For the full recipe, check out the details above. Mixing ingredients well is key to flavor. Start with the pasta. Make sure it is cold before adding other items. This keeps everything fresh. Next, add the chicken, tomatoes, and mozzarella. Use a spatula to fold gently. This ensures the mozzarella stays whole. It adds nice pops of flavor to each bite. Taste your dish as you cook. Start with a pinch of salt and pepper. The lemon juice adds brightness, so taste it first. If it needs more zing, add another squeeze. Always remember that you can add more, but you can't take it out. This rule helps you control the flavors. For a great look, serve the salad in a big bowl. Layer the salad for a beautiful view. Add extra basil leaves on top. A sprinkle of toasted pine nuts adds crunch. This makes your dish eye-catching and fun. Enjoy serving this colorful salad at any gathering! You can find the full recipe in the main article. {{image_4}} You can boost your Chicken Pesto Pasta Salad with more veggies and proteins. Adding fresh spinach or arugula gives a nice crunch. Bell peppers add color and sweetness. Toss in some peas or zucchini for a nutritious kick. You can also swap chicken for shrimp, tofu, or chickpeas. This way, you can cater to different tastes and dietary needs. When it comes to ingredients, you have choices. Using homemade pesto elevates your dish. It tastes fresh and bright. You can easily make pesto with basil, nuts, olive oil, and garlic. If you’re short on time, store-bought pesto works too. Just pick a brand with simple, quality ingredients. This saves time without losing flavor. You can adjust this recipe for various diets. For a gluten-free option, use gluten-free pasta. Many brands offer great alternatives. If you want a vegan version, replace the chicken with chickpeas or roasted vegetables. Use a vegan pesto made from nuts and nutritional yeast instead of cheese. These swaps keep the dish tasty and satisfying for everyone. To store leftover chicken pesto pasta salad, place it in an airtight container. Make sure the lid seals tightly to keep the salad fresh. You can keep it in the fridge for up to three days. If you notice the salad looking dry, add a splash of olive oil or lemon juice before serving. This will help restore some moisture. Freezing pasta salad is not the best choice since the texture can change. If you do want to freeze it, separate the chicken and pasta from the veggies and dressing. Store each part in a freezer-safe bag or container. You can freeze it for up to one month. When ready, thaw it in the fridge overnight before serving. Reheating chicken pesto pasta salad is simple. If you have stored it in the fridge, serve it cold or at room temperature. If you prefer it warm, place it in a microwave-safe dish. Heat it for about 30 seconds at a time until it reaches your desired warmth. Be careful not to overheat, as it can make the pasta mushy. Always check the seasoning again after reheating and adjust as needed. You can use tofu, shrimp, or chickpeas as great chicken alternatives. Tofu gives a nice texture. Shrimp adds a seafood twist. Chickpeas provide protein and a hearty feel. You can also try cooked turkey or beef for a different taste. The key is to use a protein you enjoy. This salad stays fresh in the fridge for three to five days. Make sure to store it in an airtight container. The flavors will blend nicely as it sits. However, the longer it sits, the softer the pasta becomes. Yes, you can prepare this salad a day in advance. It tastes even better after the flavors meld overnight. Just keep it covered in the fridge. If you use fresh basil, add it right before serving to keep it vibrant. Check out the Full Recipe for complete details! This article covered how to make a tasty Chicken Pesto Pasta Salad. You learned about key ingredients, and how to cook pasta just right. I shared some helpful tips for mixing and serving. Remember, you can add veggies or change spices to fit your taste. Store leftovers well for future meals. This salad is great for lunch or a gathering. Enjoy your cooking and happy eating!](https://dishtreats.com/wp-content/uploads/2025/06/0440c548-7b14-481e-8658-8224512ec7fd-768x768.webp)


![To make a Tropical Mango Pineapple Smoothie, gather these fresh ingredients: - 1 ripe mango, peeled and diced into small cubes - 1 cup fresh pineapple, diced into bite-sized pieces - 1 ripe banana, sliced into rounds - 1 cup coconut milk (or alternatively, almond milk for a nutty flavor) - 1 tablespoon honey or agave syrup (optional, for a touch of sweetness) - 1 tablespoon chia seeds (optional, for added texture and nutrients) - A handful of fresh mint leaves (for a fragrant garnish) - Ice cubes (to chill the bliss as desired) For the best flavor, I recommend these brands: - Coconut Milk: Look for Aroy-D or Chaokoh for rich taste. - Honey: Manuka honey is great for its unique flavor and health benefits. - Chia Seeds: Nutiva and Bob’s Red Mill offer high-quality chia seeds. If you want to switch things up, consider these alternatives: - Mango: Use peaches or papaya for a different twist. - Pineapple: Try using kiwi or strawberries to change the flavor. - Coconut Milk: Almond milk or oat milk can work well too. - Sweetener: Use maple syrup if you want a different sweetness. - Extras: Add spinach for added nutrients without changing the taste. This blend of ingredients creates a vibrant and tasty smoothie that's sure to refresh you! You can find the full recipe online to guide you through each step. First, you need to prepare the fruits. Take one ripe mango. Peel it and cut it into small cubes. Next, grab a cup of fresh pineapple. Dice it into bite-sized pieces. Then, slice one ripe banana into rounds. Make sure all your fruits are ripe. Ripe fruits taste better and are sweeter. Now, it’s time to blend! Get a high-speed blender. Add the diced mango, pineapple, and banana. Pour in one cup of coconut milk. If you like it sweeter, add one tablespoon of honey or agave syrup. You can also add one tablespoon of chia seeds for texture and nutrients. Toss in a handful of ice cubes to chill the drink. Start blending on low speed to break down the larger chunks. After that, switch to high speed. Blend until the mixture is smooth and creamy. Taste your smoothie. If it needs more sweetness, blend in more honey or agave syrup. Blend again briefly to mix. Pour your tropical smoothie into tall glasses. The colors will look vibrant and inviting. For a nice touch, garnish with mint leaves. This adds a lovely smell and makes the drink even more fun to enjoy. Serve it right away for the best flavor. You can find the full recipe above to guide you through every step! Pick ripe fruits for the best taste. A ripe mango should feel soft but firm. Look for a sweet smell near the stem. Choose fresh, golden pineapple. It should have a sweet fragrance. Bananas should be yellow with a few brown spots. These signs show they are sweet and ready to blend. If you pick unripe fruit, your smoothie might taste bland. For a smooth smoothie, use a high-speed blender. Start with the liquids first, like coconut milk. Then add the fruits. This helps blend them evenly. Use ice cubes to chill and thicken the smoothie. If it's too thick, add more coconut milk. If too thin, toss in more fruit. Blend on low first, then switch to high speed for a creamy finish. You can add a touch of honey or agave syrup for sweetness. If you want a nutrient boost, toss in chia seeds. Fresh mint leaves make a great garnish. They add flavor and a nice look. Don’t forget to taste before serving. Adjust the sweetness as needed. This way, your smoothie will be just right! You can find the full recipe above to ensure you get all the flavors right. {{image_4}} You can easily change the flavor of your Tropical Mango Pineapple Smoothie. Try adding berries like strawberries or blueberries. They add a nice color and a sweet taste. You can also mix in some kiwi for a tangy twist. Just remember to cut the fruits into small pieces. This keeps your smoothie smooth and creamy. If you want a dairy-free smoothie, coconut milk is a great choice. It gives a rich flavor. You can also use almond milk for a lighter taste. Oat milk is another option that adds a creamy texture. All these choices make your smoothie tasty without dairy. Need extra protein? You can add Greek yogurt or a scoop of protein powder. Both add creaminess and make the smoothie filling. For a plant-based option, try adding nut butter like almond or peanut. It gives a nice flavor boost and protein, too. You will enjoy a more satisfying drink with these additions. Feel free to explore more ideas in the [Full Recipe]. To keep your Tropical Mango Pineapple Smoothie fresh, store it in a sealed container. Glass jars work well. Fill the jar to the top to limit air exposure. Refrigerate the smoothie if you plan to drink it within one day. If you need to store it longer, consider freezing it. You can freeze your smoothie for later enjoyment. Pour the smoothie into ice cube trays or freezer-safe bags. This way, you can grab a few cubes when you want a quick treat. Just blend the frozen cubes with a little extra liquid when you're ready to drink. The ingredients in this smoothie have varying shelf lives. Fresh mango and pineapple last about 3-5 days in your fridge. Bananas ripen quickly, so use them within a few days. Coconut milk can stay fresh for up to a week when opened. Keep an eye on your ingredients to enjoy the best flavor. Yes, you can make this smoothie ahead of time. Blend your ingredients and store the smoothie in an airtight container. Keep it in the fridge for up to 24 hours. However, the smoothie may separate. Just give it a good shake or stir before drinking. Absolutely! Using frozen fruits can make your smoothie colder and thicker. If you choose frozen mango or pineapple, you may skip the ice. This will still give you a great taste and texture. This tropical smoothie is very healthy. It has vitamins from the mango, pineapple, and banana. They boost your energy and help your immune system. Coconut milk adds healthy fats, and chia seeds provide fiber. This combo keeps you full longer. To reduce sweetness, use less banana or honey. You can also add more coconut milk. This will keep the smoothie creamy without adding extra sugar. If you want a substitute for coconut milk, almond milk works well. It gives a nutty flavor and is lighter. Oat milk is another great choice. It adds creaminess without a strong taste. For a richer smoothie, try using whole milk. This recipe is a great way to enjoy tropical flavors. For the full recipe, check out the details above! This article covered all you need to know about making a great smoothie. We discussed key ingredients, brands you can trust, and helpful substitutions. I shared step-by-step instructions for prep, blending, and serving. You learned tips for picking fruits and achieving the best texture. We explored variations for taste and nutrition, plus proper storage methods for leftovers. In the end, enjoy experimenting and customizing your smoothie to fit your taste!](https://dishtreats.com/wp-content/uploads/2025/07/d019fb1b-c2a1-4262-9891-2815543aef27-768x768.webp)