Greek Yogurt Chicken Salad Tasty and Simple Meal

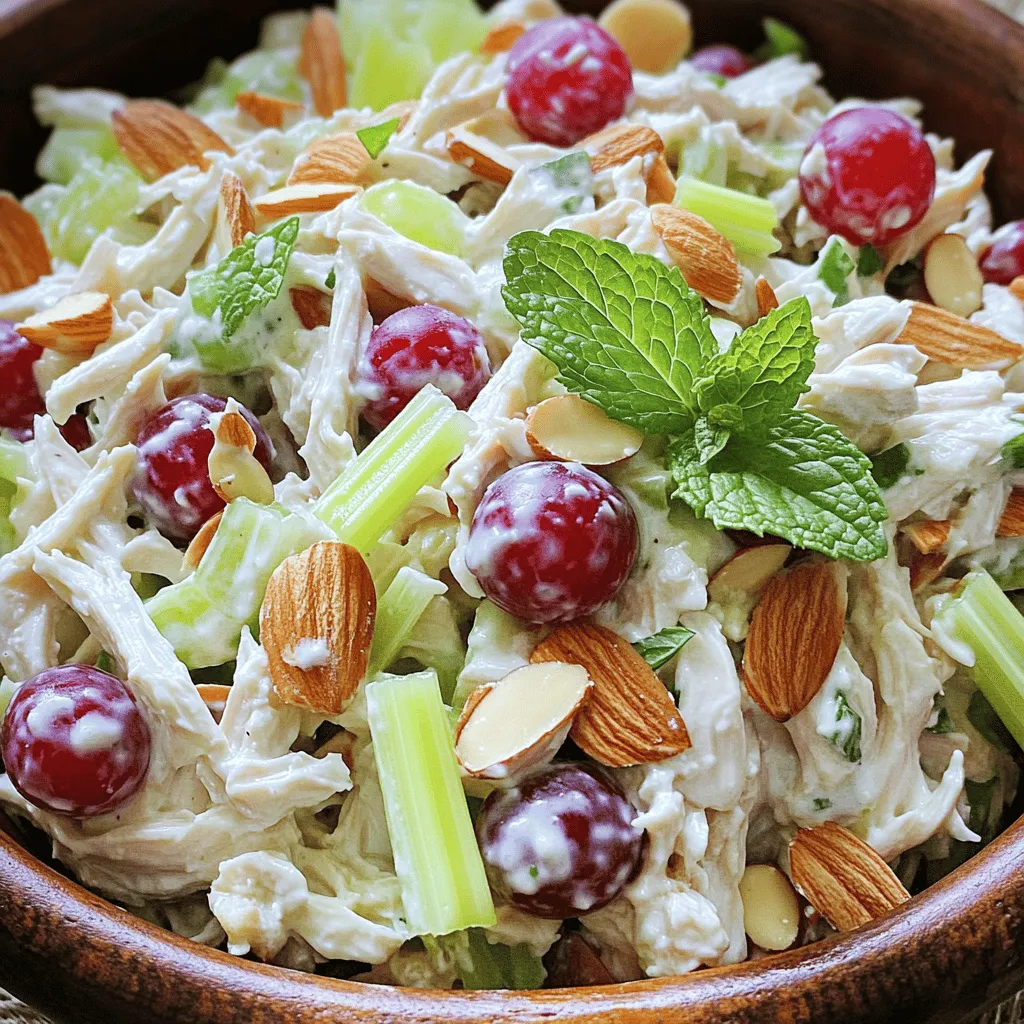
Looking for a quick and healthy meal? Greek yogurt chicken salad is your answer! Packed with shredded chicken, crunchy celery, and sweet grapes, this dish is both tasty and easy to make. You’ll love how Greek yogurt adds creaminess without the extra calories of mayo. Ready to impress your taste buds? Let’s dive into the simple steps to create this delicious salad that’s perfect for lunches, picnics, or any day!
Ingredients
Main Ingredients List
- 2 cups cooked chicken breast, shredded
- 1 cup plain Greek yogurt
- 1/2 cup celery, finely diced
- 1/2 cup red grapes, halved
- 1/4 cup almonds, sliced
- 1/4 cup green onions, chopped
Dressing Ingredients
- 2 tablespoons Dijon mustard
- 1 tablespoon honey
- 1 tablespoon fresh lemon juice
- Salt and freshly cracked black pepper
Optional Garnishes
- Fresh mint leaves
Gather these ingredients before you start. The chicken gives a hearty base. Greek yogurt adds creaminess and tang. Celery brings crunch, while red grapes add a sweet burst. Almonds add a nice texture, and green onions give a fresh lift.
For the dressing, Dijon mustard deepens the flavor. Honey balances the tang, and lemon juice adds brightness. Don’t forget salt and pepper to taste. If you like, fresh mint leaves can add a nice touch when serving.
This simple list will help you make a tasty Greek yogurt chicken salad.
Step-by-Step Instructions
Preparing the Chicken
Start with shredded chicken in a big bowl. Add Greek yogurt and mix it well. The yogurt should coat every piece of chicken. This makes a creamy base for your salad.
Combining Fresh Ingredients
Next, add the diced celery and halved grapes to the bowl. These ingredients bring crunch and sweetness. Mix everything gently until they are combined. This step adds freshness to your chicken salad.
Making the Dressing
In a separate bowl, whisk together Dijon mustard, honey, lemon juice, salt, and pepper. Blend these ingredients until smooth. This dressing will enhance the flavors of the salad.
Assembling the Salad
Drizzle the dressing over the chicken mixture. Gently fold everything together, making sure the chicken, yogurt, and dressing mix well. Taste the salad and tweak the seasoning if needed. You can add more salt, pepper, or lemon juice.
Chilling the Salad
Cover the bowl tightly with plastic wrap. Place it in the fridge for at least 30 minutes. This chilling time helps the flavors blend and taste better.
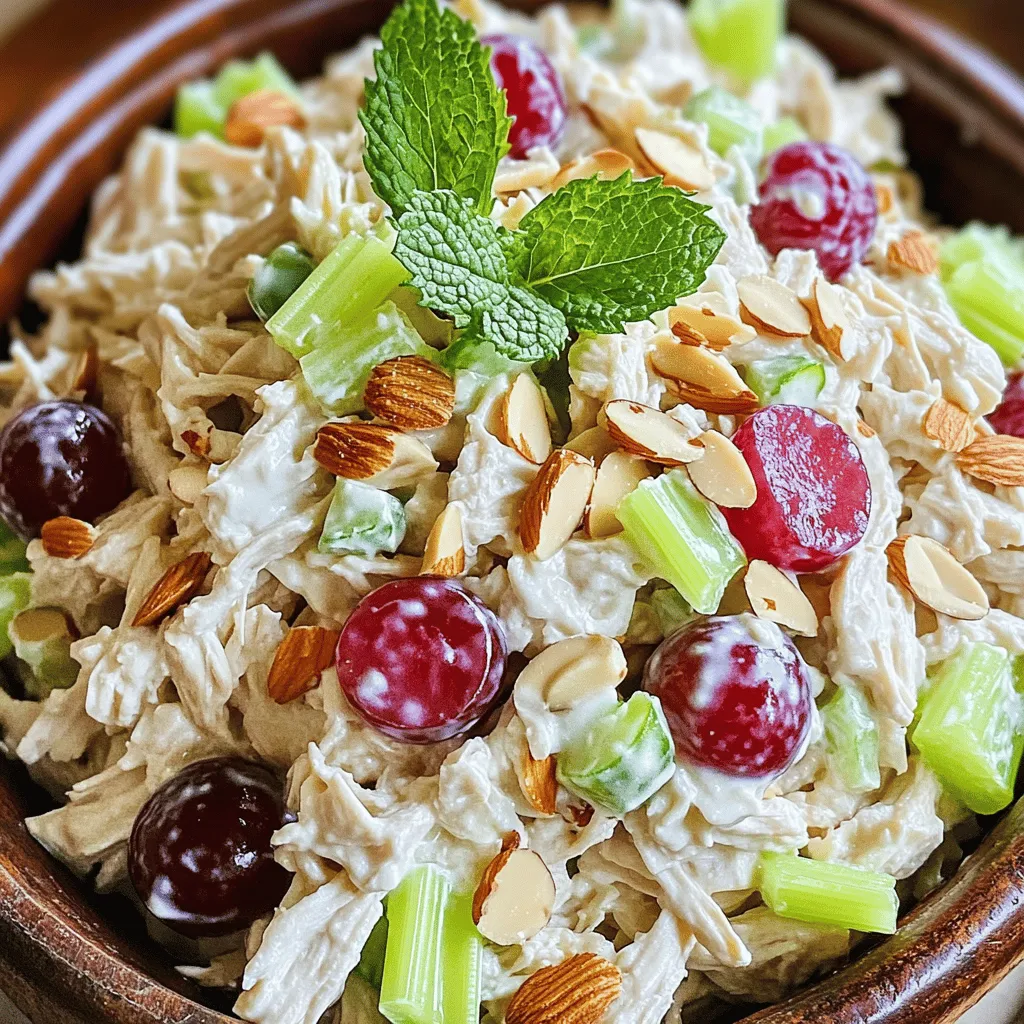
Serving Suggestions
When ready to serve, scoop the salad into bowls. Garnish it with fresh mint leaves. This adds a nice touch and fresh flavor to your dish. Enjoy!
Tips & Tricks
Perfecting the Flavor
To make your Greek yogurt chicken salad shine, adjust the seasoning. Start with salt and pepper. Taste as you go. This helps you find the right balance. Sometimes, a pinch more salt can bring the flavors alive. Don’t be shy to add pepper for a little kick.
Enhance Texture
For an extra crunch, use roasted almonds. They add a great texture contrast to the creamy yogurt. Toasting the almonds brings out their nutty flavor too. Simply spread them on a baking sheet and toast in the oven for a few minutes. Keep a close eye on them; they can burn quickly!
Serving Ideas
You can serve this salad in many ways. Try it on whole grain bread for a hearty sandwich. The bread adds fiber and flavor. For a lighter option, use lettuce wraps. They make a fresh, low-carb meal. Both options let you enjoy this tasty dish in style.

Variations
Different Protein Options
You can easily swap chicken for turkey or tofu. Turkey gives a leaner taste. Tofu is a great choice for a plant-based meal. Both options keep the salad light and tasty.
Additions for Extra Flavor
Want to spice it up? Try adding diced apples, cranberries, or bell peppers. Diced apples add a sweet crunch. Cranberries give a tangy burst. Bell peppers bring a fresh crunch and color. Each addition makes your salad unique and fun.
Greek Yogurt Alternatives
Change things up with flavored Greek yogurt. You can find options like honey, vanilla, or berry. These flavors add a new twist to your salad. Experimenting with different yogurts can surprise your taste buds and keep meals exciting.
Storage Info
Refrigeration Guidelines
To keep your Greek yogurt chicken salad fresh, store it in an airtight container. It will stay good for up to 3 days in the fridge. Make sure to check it for freshness before eating. If you notice any change in smell or texture, it’s best to toss it out.
Freezing Considerations
Freezing this salad is not recommended. The texture of the Greek yogurt and fresh ingredients will change when frozen. This can make the salad watery or mushy after thawing. Enjoy it fresh for the best flavor and crunch!
FAQs
Is Greek yogurt healthier than mayonnaise?
Yes, Greek yogurt is healthier than mayonnaise. It has fewer calories and less fat. Greek yogurt also packs in more protein, which helps keep you full. It has probiotics, too, which are good for your gut. Using Greek yogurt makes your chicken salad creamy without the extra calories of mayo.
Can I make the salad ahead of time?
You can make the salad ahead of time. It tastes even better after chilling. Just prepare the salad and store it in an airtight container. Keep it in the fridge for up to three days. This way, the flavors have time to blend together.
What to serve with Greek Yogurt Chicken Salad?
You can serve the salad with many tasty sides. Try it on whole grain bread for a sandwich. It also pairs well with fresh veggies or chips. A light green salad is another great choice. You could even enjoy it with crackers for a snack.
How can I customize the salad to my taste?
You can easily customize the salad. Add diced apples for sweetness or bell peppers for crunch. If you like spice, try adding some diced jalapeños. You can also swap out the almonds for walnuts or pecans. The options are endless, so feel free to get creative!
This Greek Yogurt Chicken Salad is a tasty blend of chicken, yogurt, and fresh ingredients. You start by mixing cooked chicken with yogurt, then add grapes and celery. The dressing is simple but adds great flavor. Chill the salad to let the tastes blend, then serve it your way.
Remember, you can swap out proteins or add fruits to change it up! Store leftovers for a quick meal later. Enjoy a healthy dish that satisfies your taste buds!


![To make tasty roasted veggie grain bowls, gather these items: - 1 cup quinoa, thoroughly rinsed - 2 cups vegetable broth - 1 zucchini, diced into bite-sized pieces - 1 red bell pepper, diced - 1 cup cherry tomatoes, halved - 1 cup broccoli florets, cut into small pieces - 2 tablespoons olive oil - 1 teaspoon garlic powder - 1 teaspoon smoked paprika - Salt and freshly cracked black pepper, to taste - 1 avocado, halved and sliced - ¼ cup tahini - 2 tablespoons freshly squeezed lemon juice - Fresh herbs (such as parsley or cilantro) for garnish Fresh ingredients make a big difference. Choose bright, firm veggies for the best flavor. Here are some tips to ensure freshness: - Look for vibrant colors: Fresh veggies should be bright and appealing. - Check for firmness: Avoid soft or wrinkled produce. - Buy local when possible: Seasonal veggies taste better and last longer. You can swap some ingredients based on your taste or what you have. Here are easy swaps: - Quinoa: Use farro, rice, or barley instead. - Veggies: Try carrots, asparagus, or sweet potatoes. - Tahini: Substitute with yogurt or nut butter for a different sauce. - Herbs: Use basil, dill, or chives for fresh flavor. Explore these options to make your roasted veggie grain bowls unique! For the complete recipe, check the Full Recipe. Start by preheating your oven to 425°F (220°C). This heat is perfect for roasting. While the oven warms, prepare the quinoa. In a medium saucepan, bring 2 cups of vegetable broth to a boil. Once boiling, add 1 cup of rinsed quinoa. Lower the heat, cover, and let it simmer for about 15 minutes. The quinoa will soak up the broth and become fluffy. After cooking, let it rest for 5 minutes. Fluff it with a fork before serving. While the quinoa cooks, prepare your veggies. Grab a large baking sheet and add the diced zucchini, red bell pepper, halved cherry tomatoes, and broccoli florets. Drizzle 2 tablespoons of olive oil over these veggies. Then, sprinkle 1 teaspoon of garlic powder, 1 teaspoon of smoked paprika, salt, and freshly cracked black pepper. Mix everything well to coat the veggies. Place the baking sheet in the oven and roast for 20-25 minutes. Halfway through, stir the veggies to ensure even cooking. They are done when tender and slightly caramelized. For the tahini sauce, combine ¼ cup of tahini and 2 tablespoons of freshly squeezed lemon juice in a small bowl. Whisk them together until smooth. Add a pinch of salt for flavor. If the sauce seems too thick, thin it out with a little water. Adjust it until you reach your desired consistency. You can check the [Full Recipe] for more details. When making roasted veggie grain bowls, avoid overcooking your vegetables. They should be tender but not mushy. Also, don't skip the seasoning. A little salt and pepper make a big difference. Lastly, ensure the quinoa is fluffed well after cooking. This helps the grains mix nicely with the veggies. To boost flavor, try marinating the veggies in olive oil and spices before roasting. You can add herbs like thyme or rosemary for a fresh taste. For texture, consider adding nuts or seeds. Toasted sunflower seeds or crunchy almonds add a nice bite. Roasted veggie grain bowls are great for a filling meal. Pair them with a side salad for more greens. You can also add a protein like grilled chicken or chickpeas for extra nutrition. For a wow factor, drizzle more tahini sauce on top or sprinkle with feta cheese. Check out the Full Recipe for more ideas! {{image_4}} You can switch up the grains in your bowl. Try brown rice, farro, or barley. Each grain brings a different taste and texture. Quinoa is great, but experimenting keeps it fun. You can also use millet for a unique twist. These grains offer more fiber and nutrients. Explore different cooking times for each grain to get them just right. Seasonal veggies make your grain bowl fresh and vibrant. In spring, use asparagus and peas. Summer calls for corn and eggplant. Fall brings sweet potatoes and kale. In winter, think about Brussels sprouts and root vegetables. Each season gives you new flavors and colors. Using fresh, local produce can boost taste and nutrition. Toppings can elevate your bowl. Consider adding nuts or seeds for crunch. Roasted chickpeas add protein and flavor. You might also try feta cheese for a salty kick. Fresh herbs like basil or cilantro can brighten the dish. A squeeze of lime or lemon juice adds freshness. For a spicy touch, drizzle hot sauce or sprinkle red pepper flakes. Each addition brings a new layer of flavor to your meal. Check out the Full Recipe for more ideas! To keep your roasted veggie grain bowls fresh, store them in airtight containers. Make sure to let the bowls cool down before sealing them. This helps prevent moisture buildup, which can make your veggies soggy. You can keep them in the fridge for up to four days. When you’re ready to enjoy your leftovers, reheat them gently. Use the microwave for quick heating. Heat in short bursts, stirring in between, to avoid hot spots. You can also warm them in a pan over low heat. Add a splash of water or broth to keep them moist. Meal prepping is a great way to save time. You can make extra quinoa and roast a variety of veggies. Store them separately in the fridge for easy access. This way, you can mix and match different flavors throughout the week. Just assemble the bowls when you're ready to eat. For a detailed recipe, check the Full Recipe for all the steps! Roasted veggie grain bowls are healthy meals filled with grains and vegetables. They combine cooked grains, like quinoa, with roasted veggies. This mix creates a tasty and colorful dish. You get fiber, vitamins, and minerals in every bite. The flavors blend well, making each bowl satisfying and fun to eat. To make roasted veggie grain bowls, follow these steps: 1. Preheat your oven to 425°F (220°C). 2. Cook 1 cup of quinoa in 2 cups of vegetable broth. Let it simmer until fluffy. 3. Prepare your veggies: dice zucchini, red bell pepper, and halve cherry tomatoes. Add broccoli florets. 4. Toss the veggies with olive oil, garlic powder, smoked paprika, salt, and pepper. 5. Roast the veggies for 20-25 minutes until tender and slightly caramelized. 6. Mix tahini with lemon juice, adding water if needed for the right texture. 7. Assemble the bowls with quinoa, roasted veggies, and avocado slices on top. 8. Drizzle with tahini sauce and add fresh herbs for garnish. You can find the full recipe above for more detailed steps. Yes, you can customize this recipe. Use different grains like brown rice or farro. Change the veggies based on what you like or what is in season. You can also add proteins like chickpeas or grilled chicken. Experiment with different sauces or toppings to make the dish your own. This flexibility makes roasted veggie grain bowls perfect for everyone. This blog covered how to make delicious roasted veggie grain bowls. We discussed key ingredients, focusing on freshness and substitutions. I shared step-by-step instructions for prepping, roasting, and creating a tasty tahini sauce. You learned helpful tips to avoid mistakes and enhance flavor. Variations allowed you to experiment with grains and veggies. Lastly, I provided storage tips to keep leftovers fresh. Roasted veggie grain bowls are flexible and fun. You can mix and match to fit your taste. Enjoy experimenting!](https://dishtreats.com/wp-content/uploads/2025/07/945baa8c-ba42-4ceb-8d11-39d9a326283a-768x768.webp)


![To make delicious spinach ricotta stuffed shells, gather these key ingredients: - 20 jumbo pasta shells - 2 cups fresh spinach, finely chopped - 1 cup creamy ricotta cheese - 1 cup shredded mozzarella cheese, divided - ½ cup grated Parmesan cheese - 1 large egg, lightly beaten - 2 cups marinara sauce, divided - 1 teaspoon garlic powder - 1 teaspoon onion powder - Salt and pepper, to taste - Fresh basil leaves, for garnish These ingredients create a rich and tasty filling. The spinach adds color and nutrition. The ricotta provides creaminess, while the mozzarella and Parmesan give a cheesy, savory flavor. While ricotta is the star, you can try other cheeses too. Here are some tasty options: - Cottage cheese: It’s similar to ricotta but a bit lighter. - Goat cheese: This adds a tangy flavor. - Cream cheese: It gives a rich, creamy texture. Feel free to mix and match! This lets you customize the taste to your liking. A good marinara sauce makes your dish shine. You can use store-bought or homemade. Here are some options: - Classic marinara: A simple, tomato-based sauce for a traditional taste. - Marinara with herbs: Look for added basil or oregano for extra flavor. - Spicy marinara: If you like heat, go for a sauce with red pepper flakes. You can find a perfect sauce that matches your style. The right sauce ties the whole dish together and makes it even more delicious. For the full recipe, check here: [Full Recipe]. Start by preheating your oven to 375°F (190°C). This heat will help cook the stuffed shells just right. Next, take a big pot and fill it with salted water. Bring the water to a boil. Once boiling, gently add the jumbo pasta shells. Cook them for 8-10 minutes until they are al dente. Be careful not to overcook them, or they will break. After cooking, drain the shells and let them cool for a bit. This step is vital for easy handling later. In a large bowl, mix the following ingredients for the filling: - 2 cups fresh spinach, finely chopped - 1 cup creamy ricotta cheese - ½ cup grated Parmesan cheese - 1 large egg, lightly beaten - 1 teaspoon garlic powder - 1 teaspoon onion powder - Salt and pepper, to taste Stir these ingredients until they blend well. The spinach should be evenly mixed with the cheeses and spices. This filling will give your shells a rich taste. Take a spoon and fill each jumbo shell with the spinach-ricotta mixture. Place the filled shells in a greased baking dish. Make sure they sit nicely side by side. After all shells are filled, pour half of the marinara sauce over them. This sauce keeps the shells moist and adds flavor. Next, sprinkle the remaining mozzarella cheese on top. Pour the rest of the marinara sauce over the shells. Cover the dish with aluminum foil to keep moisture in. Bake for 25 minutes. After that, remove the foil and bake for another 10-15 minutes. You want the cheese to be golden brown and bubbly. Let the shells cool a bit before serving. Garnish with fresh basil leaves for a pop of color and flavor. For the full recipe, check it out [Full Recipe]. When making spinach ricotta stuffed shells, some common mistakes can ruin the dish. First, avoid overcooking the pasta shells. They should be al dente, or firm. If you cook them too long, they may break apart when you fill them. Also, do not skimp on seasoning. Salt and pepper in the filling enhance the flavors. Lastly, ensure your filling is well mixed. Uneven filling can lead to bland bites. You can easily make this dish ahead of time. Prepare the stuffed shells as normal, but do not bake them. Instead, cover the dish with plastic wrap and foil. You can freeze them for up to three months. When you are ready to eat, bake them straight from the freezer. Just add an extra 10-15 minutes to the cooking time. This way, you have a delicious meal ready to go! To serve these stuffed shells, try pairing them with a simple salad or garlic bread. A fresh green salad adds a nice crunch. You can also sprinkle extra cheese or crushed red pepper on top for more flavor. For a touch of color, add fresh basil leaves as a garnish. It makes the dish look vibrant and appetizing. These little details make your meal special and enjoyable! For the full recipe, check the section above. {{image_4}} You can easily add meat to your spinach ricotta stuffed shells. Ground beef, turkey, or chicken work well. Just cook the meat in a skillet until it turns brown. Mix it into your filling of spinach and ricotta. This adds flavor and protein. It makes the dish heartier. If you want a vegetarian twist, try using different cheeses. Feta or goat cheese can add a nice tang. You can also mix in more veggies. Chopped mushrooms, bell peppers, or zucchini will enhance the filling. These options keep the dish fresh and exciting while still being meat-free. For gluten-free stuffed shells, look for gluten-free pasta shells. Many brands offer great options made from rice or corn. Cook them according to the package instructions. This way, you can enjoy delicious stuffed shells without gluten. The taste and texture remain satisfying, making it a great choice for everyone. You can find the full recipe [here](#). Store any leftover spinach ricotta stuffed shells in an airtight container. Allow them to cool first. This way, you keep the flavors fresh. You can also wrap them in plastic wrap if you prefer. To reheat, use your oven for the best results. Preheat your oven to 350°F (175°C). Place the stuffed shells in a baking dish. Cover with foil to keep them moist. Bake for about 20 minutes, or until warm. If you want to use a microwave, heat in short bursts. Stir gently between each burst to avoid hot spots. In the fridge, the stuffed shells last about 3-5 days. If you want to keep them longer, freeze them. In the freezer, they can last up to 3 months. To freeze, wrap them tightly in plastic wrap and then foil. This prevents freezer burn. When ready to eat, thaw in the fridge overnight before reheating. For the full recipe, check out the details above. You can use cottage cheese as a substitute for ricotta cheese. Blend it until smooth for a similar texture. Another option is cream cheese mixed with a bit of milk. This mix gives a rich flavor. If you want a dairy-free choice, try tofu blended with lemon juice and nutritional yeast. Each of these options works well in the recipe. You can use both fresh and frozen spinach. Fresh spinach gives you a bright taste. Just wash and chop it finely. Frozen spinach is easy and saves time. Make sure to thaw it and squeeze out the water. Too much water will make your filling soggy. Either choice will work well in your stuffed shells. The stuffed shells are done when the cheese is golden brown and bubbly. Bake them covered for the first 25 minutes. Then, remove the foil and bake for an extra 10-15 minutes. Check the edges of the sauce to see if it’s bubbling. If you see that, your stuffed shells are ready to enjoy. For more details, refer to the Full Recipe. In this post, we covered how to make spinach ricotta stuffed shells. We explored main ingredients, cheese choices, and marinara sauce options. I shared step-by-step instructions for cooking, filling, and baking. You learned tips to avoid mistakes and how to serve and store leftovers. Spinach ricotta stuffed shells are versatile and fun to make. With the right ingredients and techniques, you can enjoy a delicious meal that suits your taste. So, gather your ingredients, and get cooking!](https://dishtreats.com/wp-content/uploads/2025/07/1fe149c7-a7b6-44ce-beb5-3366f3dded82-768x768.webp)