Berry Coconut Chia Parfait Simple and Flavorful Delight
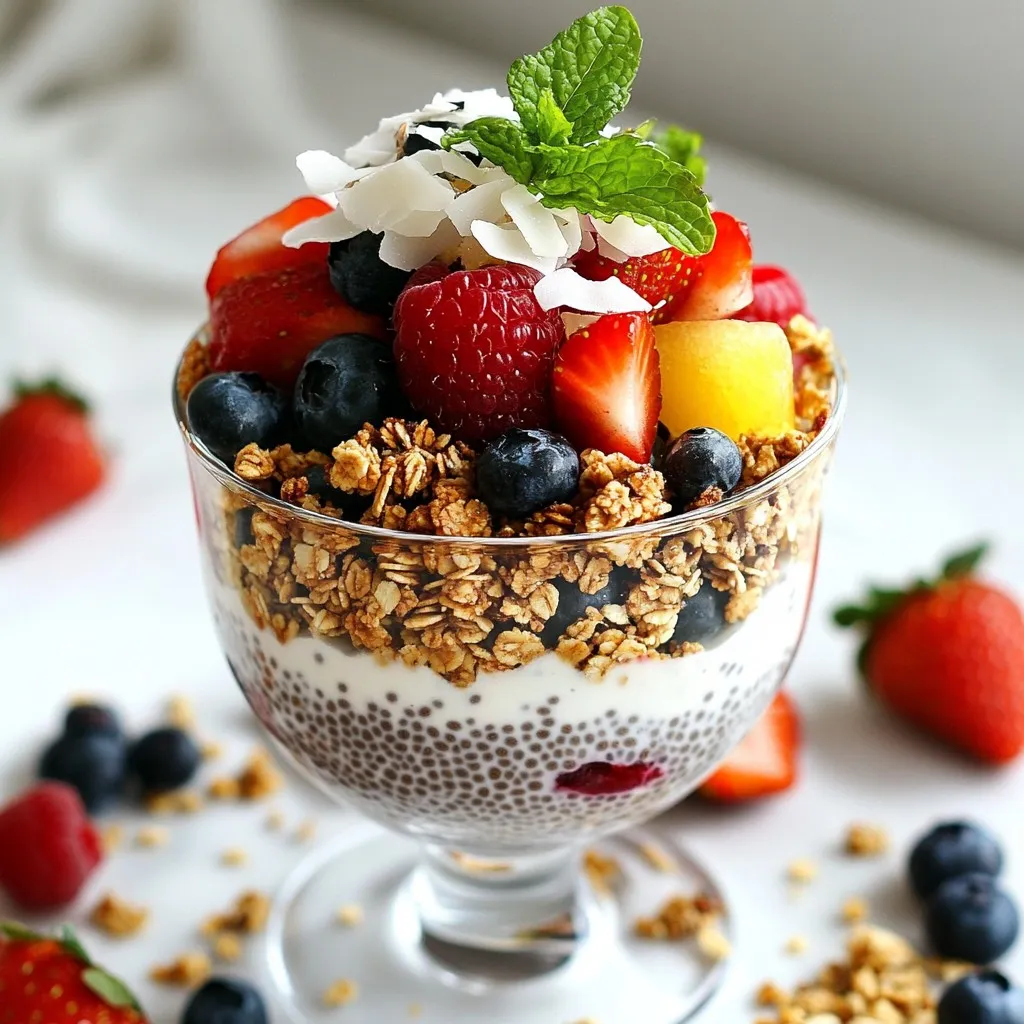
Are you ready to indulge in a healthy treat? The Berry Coconut Chia Parfait is simple to make and bursting with flavor. Imagine creamy coconut mingling with juicy berries and crunchy granola. This delightful parfait is perfect for breakfast or a snack. In this guide, I’ll share easy steps and tips to craft this tasty dish. Let’s dive in and make your taste buds dance!
Why I Love This Recipe
- Bright and Colorful: This parfait is a feast for the eyes, showcasing vibrant layers of berries that make it visually appealing.
- Healthy Ingredients: Packed with nutrients from chia seeds, berries, and coconut, this parfait is a guilt-free treat.
- Quick and Easy: With just 10 minutes of prep time, you can create a delicious and impressive dish without much effort.
- Versatile Layers: You can customize the layers with your favorite fruits and granola, making it perfect for any taste.
Ingredients
Main Ingredients for Berry Coconut Chia Parfait
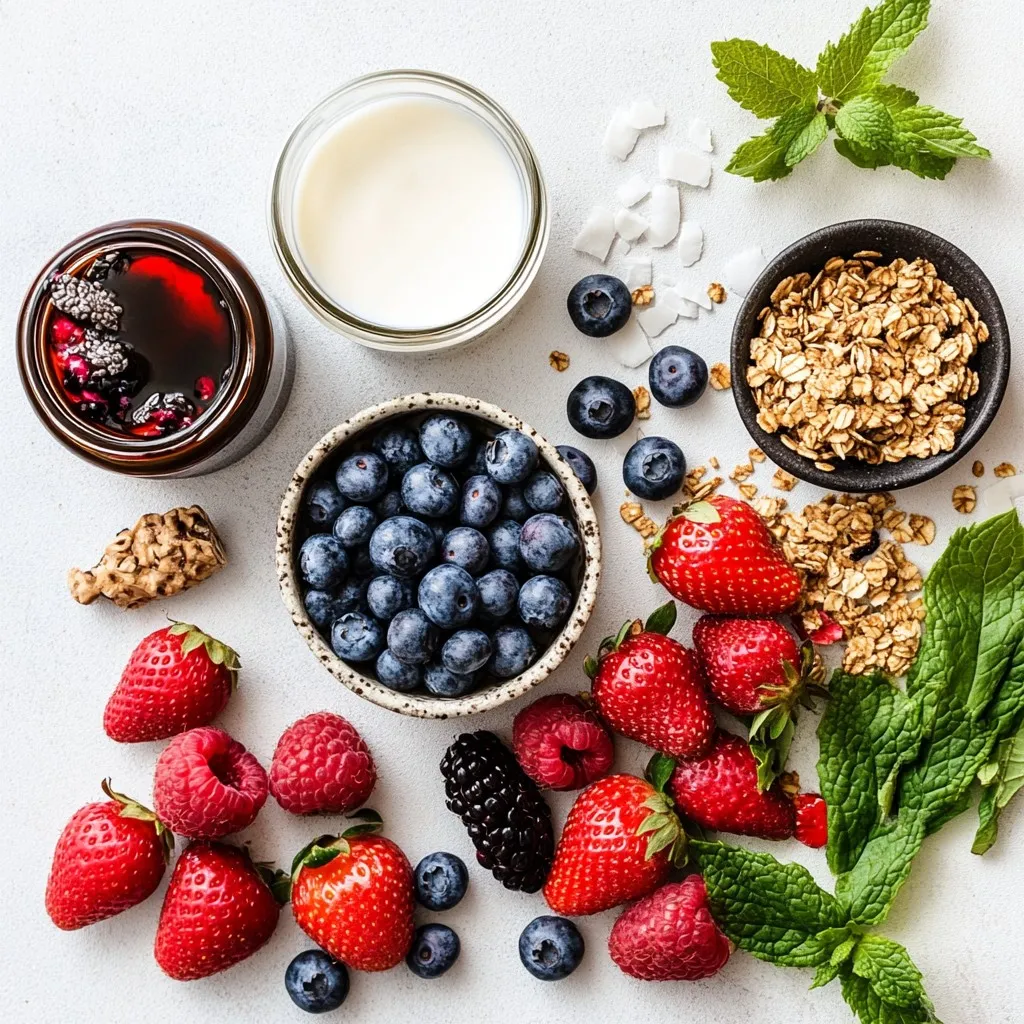
- 1 cup coconut milk
- 1/4 cup chia seeds
- 2 tablespoons maple syrup or honey
- 1 teaspoon vanilla extract
- 1 cup mixed berries
Optional Ingredients
- 1/2 cup granola
- 1/4 cup unsweetened shredded coconut
- Mint leaves for garnish
Nutritional Highlights
Chia seeds are small but mighty! They are packed with fiber and protein. One ounce contains about 138 calories, 9 grams of fat, and 11 grams of fiber. Berries add vitamins and antioxidants, making this parfait a healthy choice. Strawberries, blueberries, and raspberries are low in calories but high in flavor. This parfait not only tastes great but also offers health benefits that keep you feeling good. Enjoy it any time of day!
Step-by-Step Instructions
Preparing the Chia Pudding
1. Mixing coconut milk and chia seeds: In a medium bowl, combine 1 cup of coconut milk and 1/4 cup of chia seeds. Add 2 tablespoons of maple syrup and 1 teaspoon of vanilla extract. Whisk until well mixed. This step is key for flavor and texture.
2. Chilling time requirements: Cover the bowl and place it in the fridge. Chill for at least 4 hours, or overnight if you can wait. This helps the chia seeds absorb the liquid and turn into a thick pudding.
Assembling the Parfait
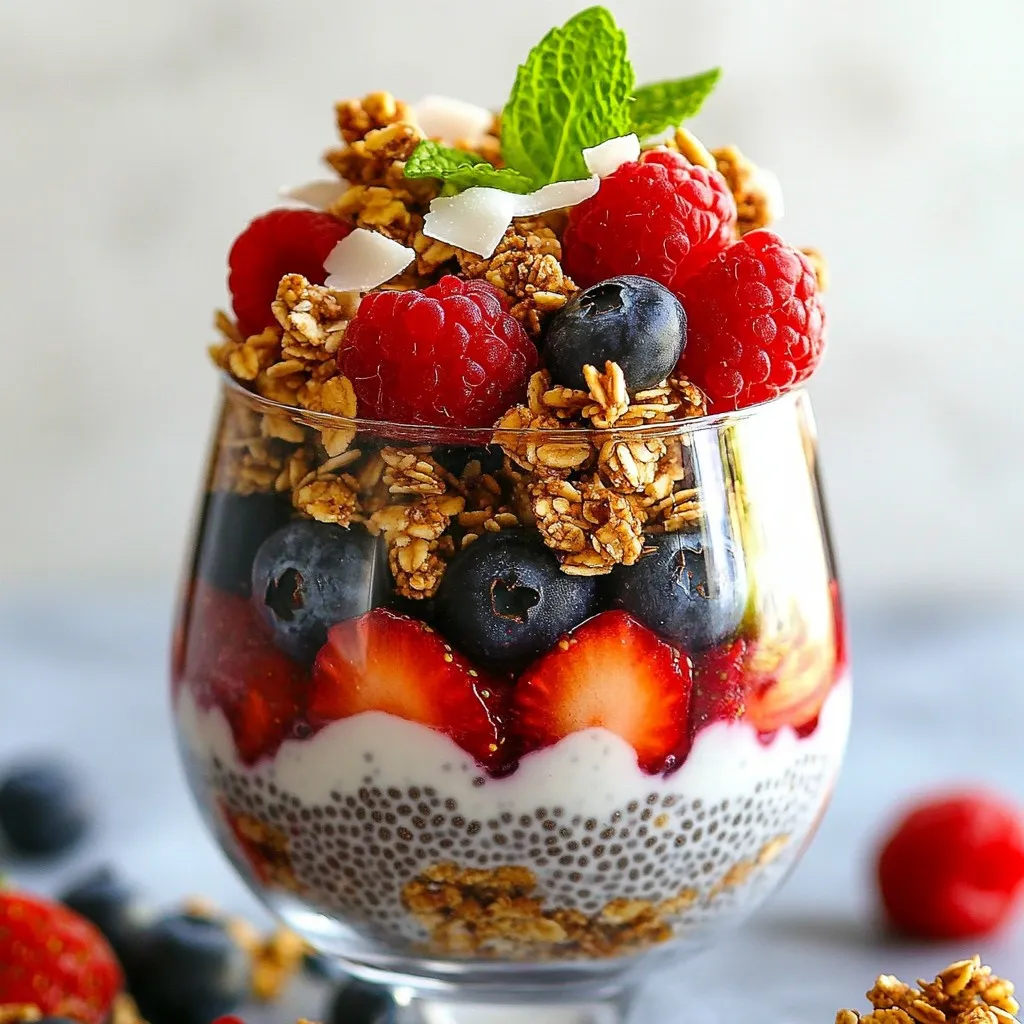
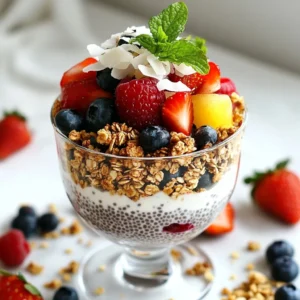
1. Layering chia pudding, berries, and granola: Grab clear glasses to show off those layers. Start with a layer of chia pudding at the bottom. Use a generous spoonful.
2. Tips for creating the perfect layers: Next, add a layer of mixed berries. Use a mix of strawberries, blueberries, and raspberries for color. Then sprinkle some granola on top for a crunchy bite. Repeat the layers until you reach the top of the glass.
Final Touches
1. Garnishing with shredded coconut and mint leaves: Finish with a layer of berries and a sprinkle of shredded coconut. For a pop of color, add a few fresh mint leaves on top.
2. Serving suggestions for the best presentation: Serve the parfaits in clear glasses to show off the beautiful layers. This makes for a stunning treat that tastes as good as it looks!
Tips & Tricks
Perfecting the Chia Pudding
To get smooth chia pudding, mix well. Start with coconut milk and chia seeds in a bowl. Use a whisk to blend them. This helps avoid clumps. Let it sit in the fridge for at least four hours. Leaving it overnight gives the best texture. The chia seeds absorb liquid and thicken nicely.
Enhancing Flavor
You can switch up sweetness! Try honey instead of maple syrup. Add a drop of almond extract for a new twist. You may also sprinkle in cinnamon or nutmeg. These spices add warmth and depth. Don’t be afraid to experiment with flavors to find what you love.
Customizing Your Parfait
Make your parfait your own! Change the layers as you wish. Use strawberries, blueberries, or even mango. You can also swap granola types; try a nut blend or a fruity one. This way, you create a parfait that matches your taste. The options are limitless, and fun to explore!
Pro Tips
- Chill Longer for Best Results: For a thicker consistency, let the chia pudding set overnight. This allows the seeds to fully absorb the liquid and gives a creamier texture.
- Fresh vs. Frozen Berries: While fresh berries are ideal for flavor and presentation, frozen berries can be used in a pinch. Just thaw them beforehand to avoid excess moisture in your parfait.
- Customize Your Sweetness: Adjust the amount of maple syrup or honey to your taste preference. You can also try adding a pinch of cinnamon for a unique flavor twist.
- Layering Technique: For a visually appealing parfait, aim for even layers and varying colors. This not only enhances presentation but also ensures a balanced flavor in every bite.
Variations
Seasonal Berry Options
You can switch up your berries based on what’s in season. In spring and summer, use fresh strawberries, blueberries, and raspberries. They add bright colors and sweet flavors. In fall, consider using tart cranberries or blackberries for a different taste. In winter, frozen berries work well too. They still pack great flavor and nutrients.
If you want a tropical twist, try using mango or pineapple. These fruits add a fun, sweet touch. Chop them into small pieces and layer them in your parfait. You can even mix in passion fruit for a zingy flavor.
Vegan or Gluten-Free Substitutions
To make this parfait vegan, swap the honey for maple syrup. This keeps it sweet without any animal products. For gluten-free options, choose certified gluten-free granola. This way, everyone can enjoy the parfait without worries.
You might want to try different toppings too. Instead of granola, use crushed nuts or seeds. They add a nice crunch and a boost of nutrients. You can also sprinkle on some pumpkin seeds or sunflower seeds for an extra layer of flavor.
Chocolate or Nutty Versions
For a chocolatey twist, mix in cocoa powder to the chia pudding. This adds a rich, deep flavor to your parfait. You can also swirl in nut butter, like almond or peanut butter, for creaminess.
If you enjoy crunch, top your parfait with nuts. Chopped almonds, walnuts, or pecans work wonderfully. They add texture and healthy fats. You can even sprinkle some cacao nibs for an extra chocolate crunch.
These variations let you play with flavors and textures. Mix what you love to create your own perfect parfait!
Storage Info
How to Store Made Parfaits
To keep your parfait fresh, use airtight containers. Glass jars work great for this. Store them in the fridge. They stay good for up to three days. Each layer keeps its taste and texture when sealed well.
Preparing Ahead of Time
You can make parts of this parfait ahead. Mix the chia pudding the night before. Let it chill overnight for the best texture. Slice your berries the day you plan to serve. This keeps them fresh and juicy. Always layer the parfait just before serving. This way, it looks pretty and tastes great.
Freezing Options
Can you freeze the parfait? It is not ideal to freeze it. Chia pudding can get weird when thawed. If you must freeze, just freeze the pudding. To serve later, thaw it in the fridge for a few hours. Then, layer it with fresh berries and granola before enjoying.
FAQs
What are chia seeds and why are they healthy?
Chia seeds are tiny black seeds from the Salvia hispanica plant. They pack a lot of nutrients. Here are some key benefits:
- High in Fiber: Chia seeds help with digestion.
- Good Source of Protein: They support muscle growth and repair.
- Rich in Omega-3 Fatty Acids: These are good for heart health.
- Packed with Antioxidants: They fight free radicals in the body.
People often use chia seeds in puddings, smoothies, or as egg substitutes in baking. Their ability to absorb liquid makes them great for thickening.
How long can I keep the Berry Coconut Chia Parfait in the fridge?
You can keep the Berry Coconut Chia Parfait in the fridge for up to 3 days. To store it properly:
- Use airtight containers to prevent air exposure.
- Place a layer of plastic wrap over the top if using glassware.
Check for any signs of spoilage, like off smells or unusual textures, before eating. Freshness is key for the best taste and quality.
Can I make this parfait without coconut milk?
Yes, you can make this parfait without coconut milk. Here are some alternatives:
- Almond Milk: This adds a nutty flavor.
- Soy Milk: It is creamy and rich.
- Oat Milk: This gives a mild taste and smooth texture.
Each milk will change the flavor and texture a bit. Experiment to find your favorite!
The Berry Coconut Chia Parfait is simple and healthy. We covered key ingredients like coconut milk, chia seeds, and mixed berries that make this treat special. I shared steps to prepare and layer your parfait, plus tips for perfecting the texture. You can customize it with seasonal fruits or alternative toppings. Don’t forget about storage—keep your parfait fresh and ready to enjoy. This delightful dish can fit into any diet. Exploring flavors and variations makes it even more fun. I hope you enjoy making your parfai
Berry Coconut Chia Parfait
Ingredients
- 1 cup coconut milk
- 1/4 cup chia seeds
- 2 tablespoons maple syrup
- 1 teaspoon vanilla extract
- 1 cup mixed berries
- 1/2 cup granola
- 1/4 cup unsweetened shredded coconut
- to taste mint leaves
Instructions
- In a medium-sized mixing bowl, thoroughly mix together the coconut milk, chia seeds, maple syrup, and vanilla extract. Use a whisk to ensure everything is well combined and the chia seeds are evenly distributed.
- Cover the bowl securely with plastic wrap or a lid and place it in the refrigerator. Allow it to chill for at least 4 hours, but for the best texture, let it sit overnight.
- After the chia mixture has set, gather your serving glasses or bowls.
- Start assembling your parfait: Spoon a generous layer of the chia pudding into the bottom of each glass.
- On top of the chia pudding, add a layer of mixed berries.
- Next, sprinkle a layer of granola over the berries.
- Follow this by scattering shredded coconut atop the granola.
- Repeat the layering process until each glass is filled, finishing with a lavish layer of mixed berries on top.
- Optional: Garnish each parfait with a few fresh mint leaves.



![When making peach streusel muffins, the right ingredients make all the difference. Here’s what you need: - 1 ½ cups all-purpose flour - 1 tsp baking powder - ½ tsp baking soda - ¼ tsp salt - ½ cup granulated sugar - ¼ cup packed brown sugar - ⅓ cup unsalted butter, melted - 1 large egg - 1 tsp vanilla extract - ½ cup buttermilk - 1 ½ cups fresh peaches, peeled and diced - ⅓ cup rolled oats - 1 tsp ground cinnamon These ingredients create a lovely balance of flavors. The fresh peaches add sweetness and moisture. The streusel topping gives a nice crunch. This recipe is simple and uses common items. I love how easy it is to find these ingredients at any store. For the full recipe, check out [Full Recipe]. It's a delightful way to enjoy seasonal peaches in a warm muffin. First, preheat your oven to 375°F (190°C). This step warms the oven, helping the muffins bake evenly. Next, prepare your muffin tin. You can line it with muffin liners or grease it lightly with some non-stick spray or butter. This will keep the muffins from sticking. In a medium bowl, whisk together the dry ingredients. Combine 1 ½ cups of all-purpose flour, 1 teaspoon of baking powder, ½ teaspoon of baking soda, and ¼ teaspoon of salt. Mix well until everything is blended. Set this bowl aside for now. In a large mixing bowl, combine the sugars and melted butter. Use ½ cup of granulated sugar and ¼ cup of brown sugar. Mix them well until they blend together. Then, add 1 large egg and 1 teaspoon of vanilla extract. Beat the mixture until it looks fluffy. Next, pour in ½ cup of buttermilk and stir gently. Now, it’s time to add the dry ingredients. Gradually fold the flour mixture into the wet ingredients. Be gentle and avoid overmixing. It’s okay if the batter has a few lumps. Finally, fold in 1 ½ cups of diced peaches. Make sure they are evenly spread throughout the batter. In a small bowl, mix together ⅓ cup of rolled oats, 1 teaspoon of ground cinnamon, and a pinch of sugar for the streusel topping. This mix will add a crunchy texture to your muffins. Using a scooper or a spoon, fill each muffin liner with the batter. Aim to fill them about two-thirds full. This gives your muffins room to rise. Once filled, sprinkle a generous amount of the streusel topping over each muffin. This adds that crispy layer on top. Place the muffin tin in your preheated oven. Bake for 18 to 20 minutes. Check for doneness by inserting a toothpick into the center of a muffin. If it comes out clean, your muffins are ready. After baking, let the muffins cool in the pan for about 5 minutes. Then, transfer them to a wire rack to cool completely. For a complete recipe and detailed instructions, check out the Full Recipe. To make great muffins, avoid overmixing the batter. When you mix too much, muffins can turn tough and dry. Gently fold the dry ingredients into the wet. Leave some lumps; they are okay! The batter should feel thick but not dry. Aim for a smooth mix with small bits of flour still visible. This keeps the muffins soft and fluffy. To keep your muffins fresh, store them in an airtight container at room temperature. They will stay good for up to three days. If you want to keep them longer, freeze them. Wrap each muffin in plastic wrap, then put them in a freezer bag. When ready to eat, thaw them in the fridge overnight or microwave them for about 20 seconds. This keeps them soft and tasty. These peach streusel muffins pair well with coffee or tea. They also taste great with a glass of milk. For a nice touch, dust the muffins with powdered sugar before serving. You can also add a slice of fresh peach on the side. This extra step makes your muffins look fancy and adds more peach flavor. Enjoy the delightful mix of tastes! {{image_4}} You can switch the peaches for other fruits. Blueberries and raspberries work great! They add a nice burst of flavor. You can even mix fruits, like peaches and blueberries, for a fun twist. Remember to adjust the amount of fruit based on what you use. Keep it around 1 ½ cups to fill the muffins well. Need a gluten-free option? Use a gluten-free flour blend instead of all-purpose flour. For a dairy-free version, replace buttermilk with almond milk or coconut milk. You can also use a flax egg instead of a regular egg. Just mix 1 tablespoon of flaxseed meal with 2.5 tablespoons of water. Let it sit for a few minutes to thicken. This will keep your muffins tasty and friendly for different diets. Want to kick up the flavor? Try adding nuts like walnuts or pecans to the batter. They give a nice crunch. You can also sprinkle some cinnamon or nutmeg in the batter for warmth. For a little zing, add a splash of lemon juice or zest. These small changes can make your muffins more exciting and tasty. For the full recipe, look for the Peach Streusel Muffins instructions above! You can store Peach Streusel Muffins at room temperature. Place them in an airtight container. This helps keep them fresh and soft. They will stay tasty for up to three days. If you want to keep them longer, consider freezing. Freezing is a great way to save these muffins for later. Wrap each muffin in plastic wrap. Then, place them in a freezer bag or container. This keeps them from getting freezer burn. You can freeze them for up to three months. To enjoy them later, thaw your muffins. Take them out of the freezer and let them sit at room temperature. This usually takes about an hour. You can also warm them in the oven at low heat for a fresh-baked taste. For the best experience, try the Full Recipe to make these delightful muffins again! Yes, you can use canned peaches. Look for peaches packed in juice or water. Drain them well and pat them dry to remove excess moisture. This step helps avoid soggy muffins. Cut the peaches into small pieces, similar to fresh ones. Canned peaches can be sweeter, so reduce the sugar in the recipe by a tablespoon. This keeps your muffins balanced. If your batter is thick, add a splash of milk or buttermilk. Mix well until you reach a smooth texture. Thick batter can lead to dry muffins. You want a batter that can easily drop from a spoon but is not runny. Another tip is to gently fold in a bit more diced peaches. This adds moisture and flavor. Check for doneness by inserting a toothpick into the center of a muffin. If it comes out clean or with a few crumbs, your muffins are ready. Look for a golden-brown top and a slight spring when you touch the surface. If the muffins still look wet or jiggly, bake them a few more minutes. Yes, you can prepare the batter ahead. Store it in the fridge for up to 2 hours. Mix the wet and dry ingredients separately. Combine them just before baking. This helps keep the muffins light and fluffy. If you plan to store longer, consider freezing the batter in muffin tins. This way, you can bake fresh muffins anytime. For the full recipe, check above. These peach muffins are easy to make and full of flavor. We covered the ingredients, step-by-step instructions, and tips to improve texture and taste. From using fresh peaches to adding oats, each detail counts. You can experiment with flavors and storage methods. Enjoy these muffins fresh or store them for later. Happy baking!](https://dishtreats.com/wp-content/uploads/2025/07/b62cebd8-d26b-48c0-b1ab-fab18f37a599-768x768.webp)
