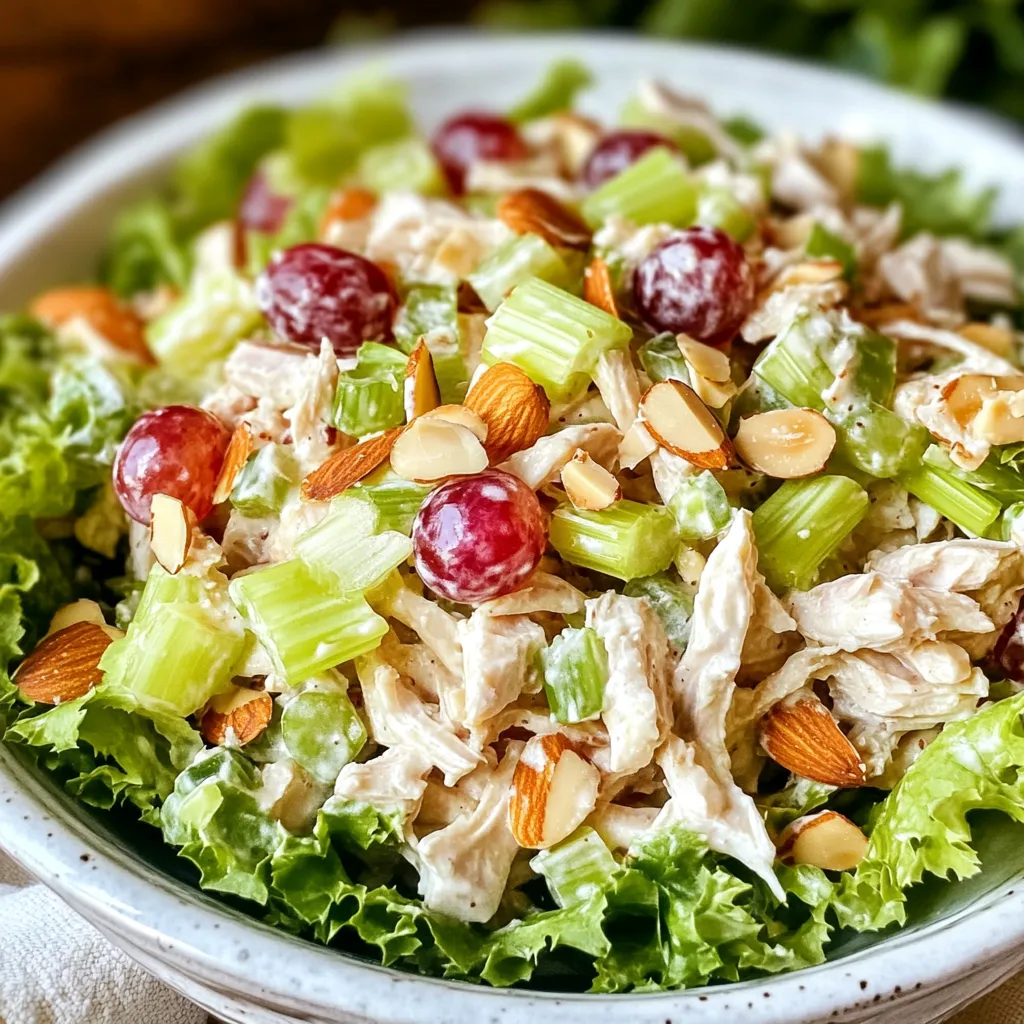
Greek Yogurt Chicken Salad Healthy and Fresh Dish
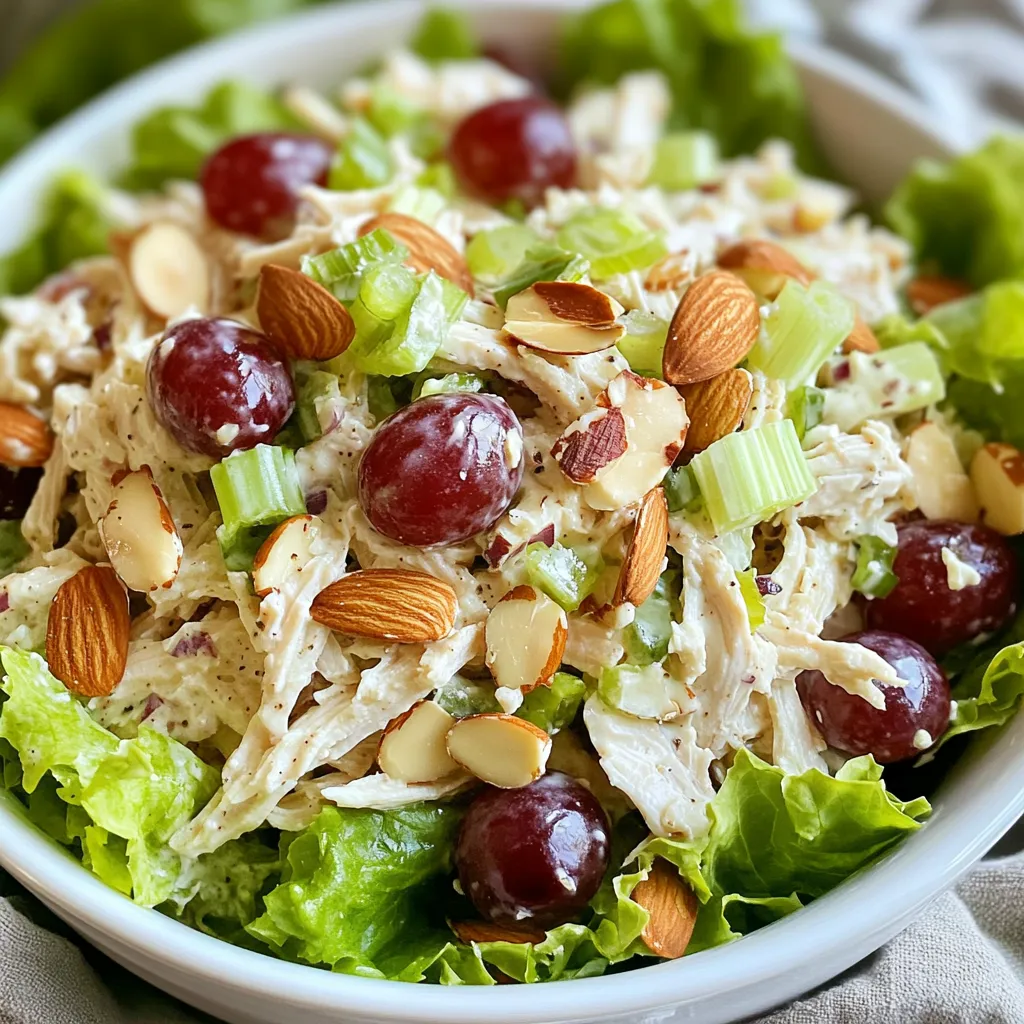
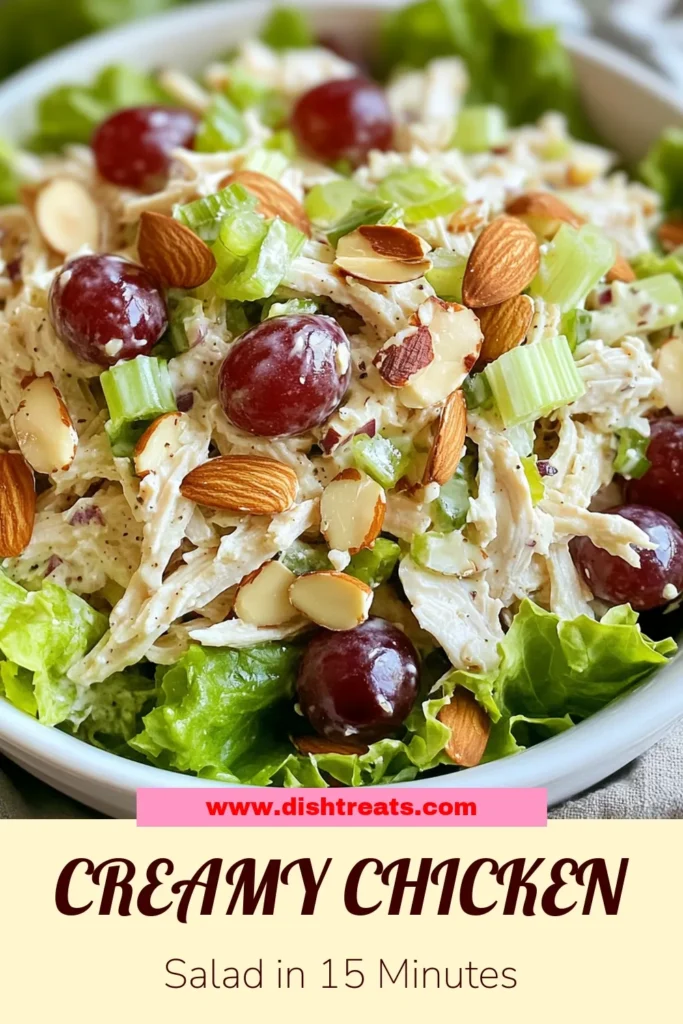
Looking for a tasty and nutritious dish? My Greek Yogurt Chicken Salad is a game changer! With a creamy yogurt dressing and fresh ingredients, it’s perfect for any meal. You’ll love how easy it is to customize. Plus, it packs a punch of flavor without the guilt. In this article, I’ll walk you through everything you need to know to create this healthy dish at home. Let’s dive in!
Why I Love This Recipe
- Healthy and Nutritious: This chicken salad is packed with protein from the chicken and Greek yogurt, making it a great option for a healthy meal.
- Quick and Easy: With only 15 minutes of prep time, this recipe is perfect for busy weekdays or a last-minute gathering.
- Flavorful and Versatile: The combination of grapes, almonds, and tangy dressing adds a burst of flavor and texture, making it delicious on its own or in wraps.
- Customizable: You can easily adjust the ingredients to suit your taste or dietary preferences, such as adding other fruits or nuts.
Ingredients
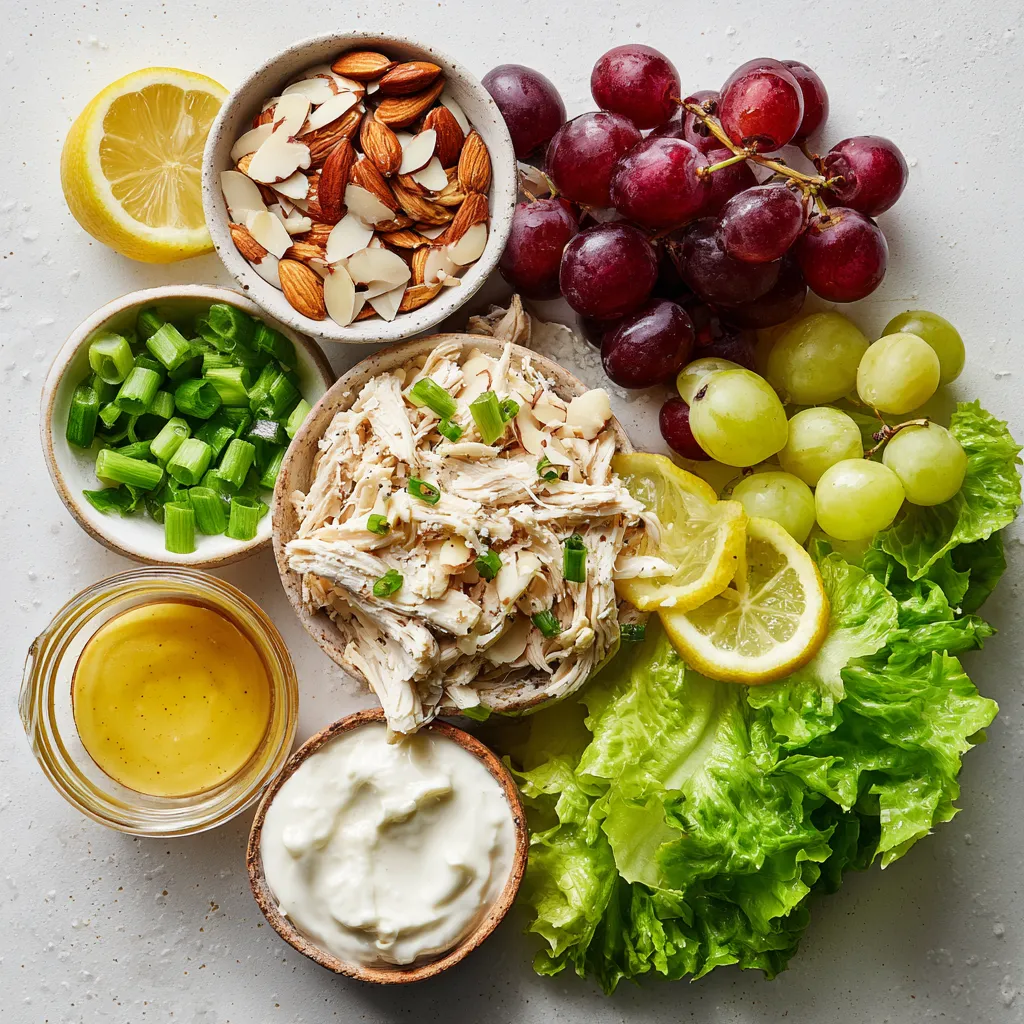
List of Key Ingredients
- 2 cups cooked chicken breast, shredded
- 1 cup plain Greek yogurt
- 1/2 cup celery, finely diced
- 1/2 cup red grapes, halved
- 1/4 cup sliced almonds, toasted
- 1/4 cup green onion, thinly sliced
- 1 tablespoon Dijon mustard
- 1 tablespoon honey
- 1 tablespoon fresh lemon juice
- Salt and freshly ground black pepper to taste
- Crisp lettuce leaves for serving (optional)
Optional Ingredients for Customization
You can add different fruits, nuts, or herbs to make this salad your own. Consider adding:
- Apples or pears for a crunch
- Walnuts or pecans for rich flavor
- Fresh dill or parsley for a herbaceous touch
Nutritional Benefits of Each Ingredient
- Chicken breast: High in protein, it helps build and repair muscles.
- Greek yogurt: Packed with probiotics, it supports gut health and adds creaminess.
- Celery: Low in calories and high in fiber, it helps with digestion.
- Red grapes: These add sweetness and are rich in antioxidants.
- Almonds: They provide healthy fats and add a satisfying crunch.
- Green onion: This adds flavor and is low in calories.
- Dijon mustard: A low-calorie way to add a tangy kick.
- Honey: Offers natural sweetness and antioxidants.
- Lemon juice: It brightens flavors and adds vitamin C.
- Salt and pepper: Essential for enhancing the dish’s overall taste.
- Lettuce: Adds a fresh crunch and makes the dish more filling.
By using these ingredients, you create a tasty and healthy dish. Each component contributes to a balanced meal.
Step-by-Step Instructions
Preparation of the Chicken
Start by shredding 2 cups of cooked chicken breast. You can use leftover chicken or bake it fresh. Shredding makes it easy to mix with other ingredients. In a large mixing bowl, add the shredded chicken. Next, finely dice 1/2 cup of celery. Toss the celery into the bowl with the chicken. This adds crunch and flavor to your salad.
Making the Greek Yogurt Dressing
In a medium bowl, combine 1 cup of plain Greek yogurt, 1 tablespoon of Dijon mustard, 1 tablespoon of honey, and 1 tablespoon of fresh lemon juice. Add a pinch of salt and freshly ground black pepper. Whisk all the ingredients together until smooth and creamy. This dressing will give your salad a rich and tangy taste.
Combining All Ingredients
Now, drizzle the yogurt dressing over the chicken and celery mixture. Gently toss everything together. Make sure the chicken and celery are coated well with the dressing. Next, fold in 1/2 cup of halved red grapes, 1/4 cup of sliced almonds, and 1/4 cup of thinly sliced green onions. Be careful not to break the grapes while folding. Taste the salad and adjust the seasoning if needed. For serving, scoop the chicken salad onto crisp lettuce leaves or use it in pita bread or wraps. Enjoy your tasty and healthy dish!
Tips & Tricks
How to Achieve the Creamiest Salad
To make your Greek yogurt chicken salad super creamy, choose full-fat Greek yogurt. This gives a rich texture. When mixing, whisk the yogurt until smooth. This helps blend all flavors well. If you find it too thick, add a splash of water or more lemon juice. This adds freshness and keeps it light.
Suggestions for Perfect Seasoning
Seasoning makes a big difference! Start with salt and black pepper. Taste after mixing. If it needs more kick, add a bit of Dijon mustard. Honey adds sweetness, balancing the tangy yogurt. Fresh lemon juice brightens the dish. Always adjust to your taste. Remember, seasoning is key for a tasty salad.
Presentation Tips for Serving
To make your chicken salad pop, use a bright bowl. Serve over crisp lettuce leaves. This adds color and crunch. Before serving, sprinkle extra red grapes on top. This gives a nice look and a sweet bite. Pair with whole-grain bread or crunchy crackers for a complete meal. Enjoy the beautiful dish!
Pro Tips
- Use Leftover Chicken: For a quicker prep, utilize leftover rotisserie or grilled chicken. This will cut down on cooking time and add delicious flavors.
- Add Fresh Herbs: Enhance the flavor by incorporating fresh herbs like dill or parsley. They add brightness and complexity to the salad.
- Chill Before Serving: For the best taste, allow the chicken salad to chill in the refrigerator for at least 30 minutes before serving. This helps the flavors develop.
- Experiment with Add-ins: Feel free to customize your salad by adding ingredients like diced apples or cranberries for a sweet twist, or even some chopped bell peppers for extra crunch.
Variations
Protein Substitutes
If you want to change up the protein in your Greek yogurt chicken salad, you have great options. Tofu is a fantastic choice for a plant-based version. It absorbs flavors well and gives a nice texture. Turkey is another lean protein that works wonderfully. Just shred it like chicken, and you’re ready to go.
Different Flavor Add-ins
Adding different herbs and spices can make your salad unique. Fresh dill or parsley can brighten the dish. You might also try adding a bit of curry powder for a warm twist. A splash of hot sauce can give it a nice kick. Experiment with what you love!
Serving Options
You can serve this salad in many ways. Use crisp lettuce leaves as a base for a fresh bite. Pita bread is great for a fun sandwich. You can also wrap it in a tortilla for a snack on the go. Each option adds a new twist to your meal. Enjoy finding your favorite way to serve it!
Storage Info
Best Practices for Storing Chicken Salad
To keep your Greek yogurt chicken salad fresh, store it in an airtight container. This prevents air from spoiling the ingredients. Ensure the container is clean and dry before adding the salad. If you plan to eat it later, avoid adding toppings like nuts or grapes until serving. This keeps them crunchy and fresh.
How Long It Lasts in the Refrigerator
Your chicken salad stays good in the refrigerator for about 3 to 4 days. After this time, the flavors can fade, and it may spoil. Always check for any off smells or changes in texture before eating. If it looks or smells odd, it’s best to toss it.
Tips for Freezing and Thawing
Freezing chicken salad can change its texture. If you must freeze it, use a freezer-safe container. Leave some space at the top, as it expands when frozen. When you’re ready to eat it, thaw it in the fridge overnight. After thawing, stir it well and check if it needs more seasoning.
FAQs
Can I use low-fat Greek yogurt?
Yes, you can use low-fat Greek yogurt. It keeps the salad creamy without adding too many calories. The taste stays similar, and you still get that nice tang. Just remember, low-fat yogurt might be a bit thinner. You may need to adjust the amount of honey or mustard for flavor balance.
How can I make it dairy-free?
To make this dish dairy-free, swap Greek yogurt for a plant-based option. Look for almond or coconut yogurt. Make sure it is unsweetened to avoid altering the taste. You can also mix in some mashed avocado for creaminess. This keeps the salad rich and delicious without any dairy.
What to serve with Greek Yogurt Chicken Salad?
You can serve Greek yogurt chicken salad in many ways. Here are a few ideas:
- Use crisp lettuce leaves as cups.
- Stuff it into pita bread for a tasty sandwich.
- Serve it on whole-grain bread for a hearty meal.
- Pair it with crunchy crackers for a light snack.
Each option adds a fun twist to the dish!
In this article, we explored key ingredients for Greek yogurt chicken salad and how to make it. I shared tips for achieving creaminess and great flavor. You learned about variations, storage, and answers to common questions.
Enjoying this salad is easy and healthy. You can swap ingredients and customize it to your taste. Try it out, and this dish will quickly become a favorit

Creamy Greek Yogurt Chicken Salad Delight
Ingredients
- 2 cups cooked chicken breast, shredded
- 1 cup plain Greek yogurt
- 0.5 cup celery, finely diced
- 0.5 cup red grapes, halved
- 0.25 cup sliced almonds, toasted
- 0.25 cup green onion, thinly sliced
- 1 tablespoon Dijon mustard
- 1 tablespoon honey
- 1 tablespoon fresh lemon juice
- Salt and freshly ground black pepper to taste
- Crisp lettuce leaves for serving (optional)
Instructions
- In a spacious mixing bowl, combine the shredded chicken and finely diced celery.
- In a separate medium bowl, whisk together the plain Greek yogurt, Dijon mustard, honey, fresh lemon juice, and a pinch of salt and pepper.
- Drizzle the yogurt dressing over the chicken and celery mixture and gently toss to coat.
- Delicately fold in the halved red grapes, sliced almonds, and green onions.
- Taste the chicken salad and adjust the seasoning with additional salt and pepper if desired.
- Serve the chicken salad on a bed of crisp lettuce leaves or use as a filling for pita bread or wraps.


![- 4 boneless, skinless chicken thighs - 2 cups long-grain rice - 4 tablespoons unsalted butter, divided - 5 cloves garlic, finely minced - 1 medium onion, finely chopped - 1 teaspoon dried oregano - 1 teaspoon paprika - Salt and freshly ground black pepper, to taste - 3 cups chicken broth - 1 cup frozen peas - Fresh parsley, chopped (for garnish) When I prepare Garlic Butter Chicken and Rice, I love the way the flavors mix. The chicken thighs bring a juicy texture. Long-grain rice soaks up all the savory chicken broth. Unsalted butter adds a rich taste. Aromatics play a big role here. Garlic cloves and onion give a sweet aroma. Dried oregano and paprika add warmth and depth. I always use fresh black pepper and salt to make the dish pop. For a splash of color, I toss in frozen peas. They keep their bright green shade when cooked. Fresh parsley adds a nice finish. It makes the dish look inviting and fresh. If you want to try this dish, check the Full Recipe for all the steps! You'll enjoy making it, and even more, eating it. 1. Start by melting 2 tablespoons of butter in a large skillet over medium heat. This will create a rich base for your dish. 2. Once the butter melts, add the chopped onion. Sauté it for about 5 minutes until it turns soft and fragrant. 3. Next, add 5 cloves of minced garlic to the skillet. Cook it for 1 minute, just until the garlic smells good but isn’t browned. 4. While the onion and garlic are cooking, season 4 chicken thighs on both sides. Use 1 teaspoon of oregano, 1 teaspoon of paprika, salt, and pepper. This will add a lot of flavor. 5. Move the onion and garlic to one side of the skillet. Place the seasoned chicken thighs in the center. Cook each side for 6-7 minutes until they turn golden brown. Once done, take the chicken out and set it aside. 1. In the same skillet, add the remaining 2 tablespoons of butter. Let it melt completely. 2. Now, stir in 2 cups of long-grain rice. Toast the rice for 2-3 minutes, stirring often. This step brings out the nutty flavor. 3. Pour 3 cups of chicken broth over the toasted rice. Gently stir to coat all the grains. Increase the heat to bring the mixture to a boil. 1. Once the broth is boiling, lower the heat to a simmer. Nestle the cooked chicken thighs on top of the rice. Cover the skillet with a lid and let it cook for 15-20 minutes. The rice should absorb most of the broth and become tender. 2. For the last 5 minutes of cooking, sprinkle 1 cup of frozen peas directly over the rice. Do not stir. This will keep the peas bright and fresh. 3. After cooking, remove the skillet from the heat. Leave it covered for an extra 5 minutes. This helps the rice fluff up nicely. 4. Finally, use a fork to fluff the rice and mix in the peas. Serve warm, with fresh parsley on top for color and flavor. This simple process makes Garlic Butter Chicken and Rice a fun and tasty comfort meal. For the complete recipe, check out the [Full Recipe]. To boost the flavor of your garlic butter chicken and rice, consider adding fresh herbs. Thyme, rosemary, or basil can bring new notes to the dish. You can also mix in some red pepper flakes for a little heat. Adjust the spices to fit your taste. If you like it spicy, add more paprika or even cayenne pepper. Remember, always taste as you go to find your perfect balance. Sautéing is key for great flavor. Start with a medium heat to avoid burning the garlic and onions. Stir them often to help them cook evenly. When cooking the chicken, ensure it's golden and cooked through. Use a meat thermometer to check the internal temperature. It should reach 165°F (75°C) for safe eating. This way, you get juicy chicken every time. For a beautiful presentation, serve your garlic butter chicken and rice on a large platter. Sprinkle fresh parsley on top for a pop of color. You can also add lemon wedges on the side. This adds a zesty touch when served. Pair your meal with a simple green salad or steamed vegetables. For drinks, try a light white wine or sparkling water with lemon. Enjoy your delicious creation! You can find the full recipe [here](#). {{image_4}} You can make this dish lighter by swapping rice for cauliflower rice. Cauliflower rice offers a low-carb option that still tastes great. It cooks quickly and absorbs flavors well. Using skinless chicken breasts instead of thighs is another healthy choice. Breasts have less fat but still provide protein. Spice things up by adding cayenne pepper for heat. A pinch can really enhance the dish. You can also try Italian seasoning for a different twist. Adding veggies like bell peppers or carrots boosts nutrition and color. They add crunch and sweetness that pairs well with garlic butter. If you need gluten-free options, use gluten-free chicken broth. It keeps the dish flavorful while meeting dietary needs. For those avoiding dairy, there are great butter substitutes. Look for dairy-free spreads made from plant oils. They work well in this recipe without losing taste. To keep your Garlic Butter Chicken and Rice fresh, store any leftovers in airtight containers. This helps lock in the flavor and moisture. Make sure to let the dish cool down before sealing it up. For longer storage, you can freeze it. Divide the dish into smaller portions to make thawing easier later. When it's time to reheat, use a skillet or a microwave. If using a skillet, add a splash of chicken broth to keep it moist. Heat it over low to medium heat, stirring gently. In the microwave, cover the dish with a damp paper towel. This keeps moisture in and avoids a dry result. Remember, you want your chicken and rice to stay tender. In the fridge, your Garlic Butter Chicken and Rice lasts about 3 to 4 days. Always check for signs before eating. Look for any off smells or changes in color. If it smells funny or looks slimy, it’s best to toss it. Always trust your senses to keep your meals safe and tasty. To amp up the flavor, try adding fresh herbs like thyme or rosemary. You can also mix in spices such as garlic powder or onion powder for extra depth. A splash of lemon juice at the end brightens the dish. For a spicy kick, consider adding crushed red pepper flakes. These little changes can make a big taste difference. Yes, you can! To adapt this recipe, first, brown the chicken thighs in a skillet. This step gives great flavor. Then, place the chicken, onions, garlic, and rice into the slow cooker. Add chicken broth and spices. Cook on low for 4-6 hours. Check the rice for doneness. Slow cooking makes this dish very tender and delicious. This dish pairs well with a side of steamed vegetables like broccoli or green beans. A fresh salad with vinaigrette is also nice. For drinks, consider serving iced tea or a light white wine. These choices balance the rich flavors of the chicken and rice. Absolutely! You can make this dish ahead of time. Store the chicken and rice in separate containers to keep them fresh. It lasts up to four days in the fridge. When ready to eat, simply reheat in the microwave or on the stovetop. This makes it a perfect option for busy weekdays. For the full recipe, check out the link above. This article guides you through making Garlic Butter Chicken and Rice. You learned about key ingredients like chicken thighs, long-grain rice, and garlic. I shared easy steps for cooking flavorful meals, plus tips to enhance taste and presentation. In conclusion, this dish is tasty and versatile. You can adjust it to fit your diet or mood. Enjoy experimenting with flavors and make it your own! Happy cooking!](https://dishtreats.com/wp-content/uploads/2025/05/2b69aced-7351-4258-8c9e-dc4a3c9f0304-768x768.webp)