Peach Cobbler Dump Cake Simple and Delicious Treat

If you love desserts that are quick and easy, then Peach Cobbler Dump Cake is for you! This dish combines sweet peaches with a simple cake mix, creating a treat you can whip up in no time. Whether you’re looking for a family-friendly dessert or something to impress friends, this recipe is sure to please. Join me as we dive into making this simple and delicious treat that everyone will enjoy!
Why I Love This Recipe
- Quick and Easy: This dump cake requires minimal prep time, making it perfect for busy days when you crave something sweet without the fuss.
- Deliciously Fruity: The combination of juicy peaches and warm spices creates a comforting flavor that’s hard to resist.
- Customizable: Add nuts for crunch or serve with ice cream for a decadent dessert experience tailored to your taste.
- Perfect for Sharing: This recipe yields enough to serve a crowd, making it an ideal choice for potlucks and gatherings.
Ingredients
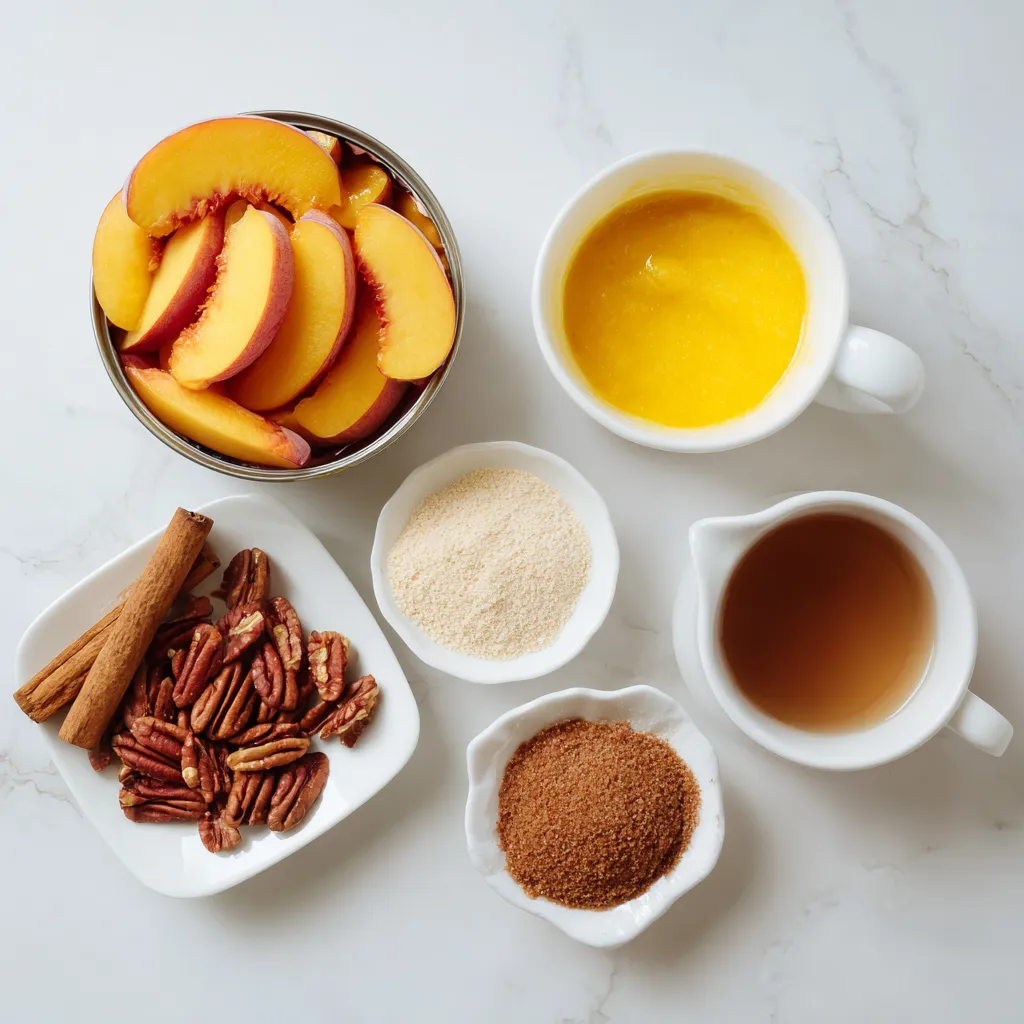
Required Ingredients for Peach Cobbler Dump Cake
To make a delicious Peach Cobbler Dump Cake, you will need the following ingredients:
- 1 can (29 oz) sliced peaches in syrup, undrained
- 1 box (15.25 oz) dry yellow cake mix
- 1/2 cup unsalted butter, melted
- 1 cup packed brown sugar
- 1 teaspoon ground cinnamon
- 1/2 teaspoon ground nutmeg
These ingredients create a rich and sweet dessert that combines the flavors of peaches and cake in every bite.
Optional Ingredients for Added Flavor
For those who want to enhance the flavor, consider adding:
- 1/2 cup chopped pecans or walnuts
- Whipped cream or vanilla ice cream for serving
The nuts add crunch, while the ice cream or whipped cream adds creaminess. Each option makes your dessert more special.
Ingredient Substitutions for Dietary Needs
You may need to adjust ingredients for different dietary needs. Here are some substitutions:
- Use gluten-free cake mix for a gluten-free version.
- Replace brown sugar with coconut sugar for a lower glycemic option.
- Use dairy-free butter for a dairy-free version.
These swaps ensure everyone can enjoy this tasty treat, no matter their dietary restrictions.
Step-by-Step Instructions
Preheating the Oven
First, set your oven to 350°F (175°C). This step is key. A hot oven helps the cake rise and bake evenly. Wait until the oven reaches the right heat before you start baking.
Preparing the Baking Dish with Peaches
Grab a 9×13-inch baking dish. Pour in one can of sliced peaches. Keep the syrup; it adds flavor. Spread the peaches out evenly. This way, every bite gets that juicy peach goodness.
Mixing and Layering Ingredients
In a medium bowl, mix together the brown sugar, ground cinnamon, and nutmeg. Stir these well until blended. Now, sprinkle this mixture over the peaches. This adds a warm, sweet layer. Next, pour the dry yellow cake mix over the peach layer. Make sure to spread it evenly. Do not stir! This keeps the texture nice and fluffy. Finally, drizzle melted butter over the cake mix. Cover every bit. If you like nuts, now’s the time to sprinkle them on top.
Baking and Cooling the Cake
Place the dish in your preheated oven. Bake for 45-50 minutes. Check it often. You want the top to turn golden brown. When done, take it out and let it cool for 10-15 minutes. This helps the flavors settle before you serve it.
Tips & Tricks
Best Practices for Mixing Ingredients
When making Peach Cobbler Dump Cake, it’s key to mix your spices well. Combine the brown sugar, cinnamon, and nutmeg in a bowl. Mix until there are no lumps. This will ensure an even flavor in every bite. Next, when adding the cake mix, do not stir it in! Just pour it evenly on top. This creates a nice texture that everyone loves.
How to Achieve the Perfect Texture
To get that perfect texture, drizzle the melted butter over the cake mix. Make sure to cover all parts. This helps the cake bake evenly and get that golden brown color. If you add nuts, sprinkle them on top. They will add a lovely crunch and a nice contrast to the soft cake. Bake until the top is bubbly and golden.
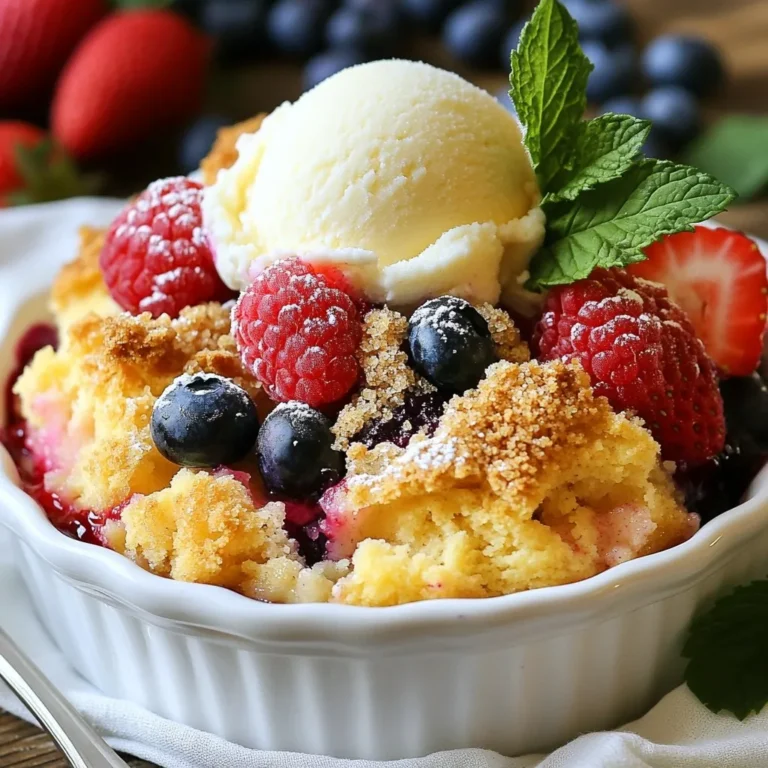
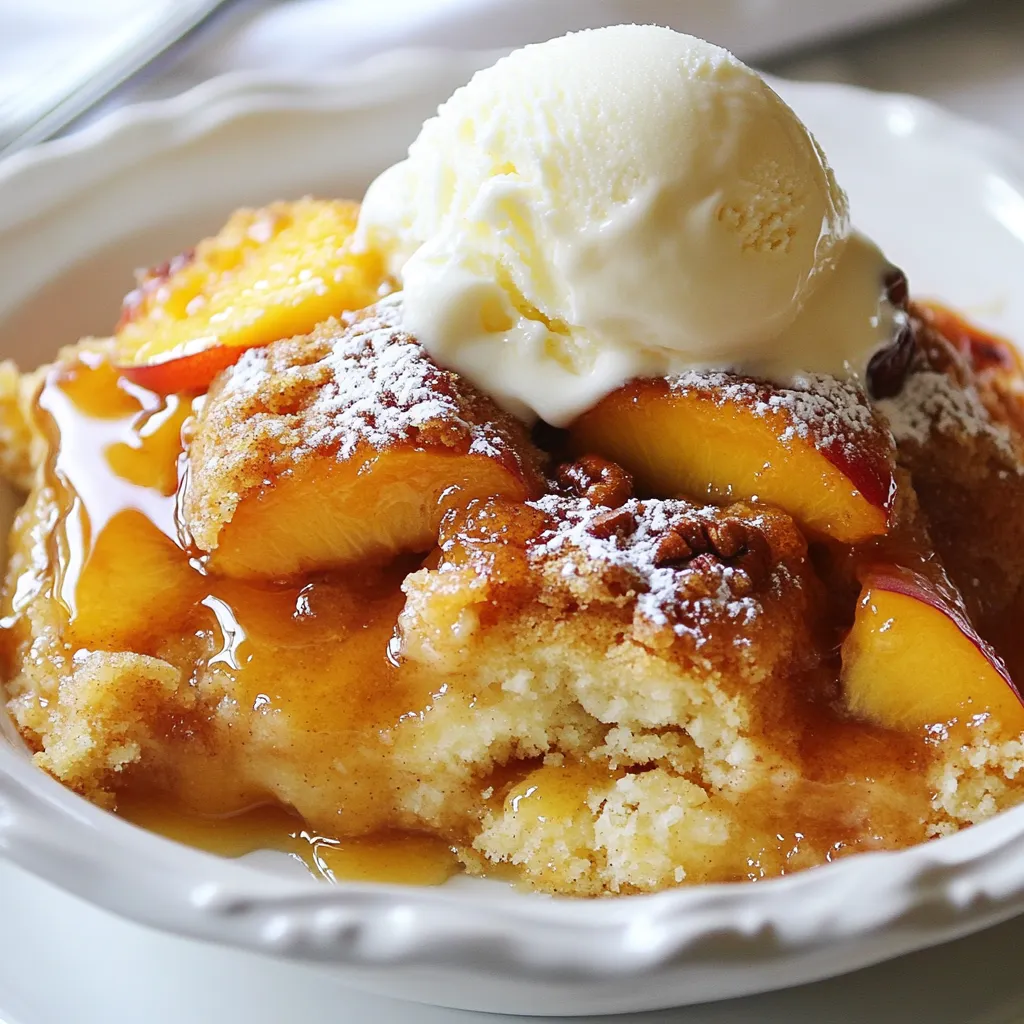
Presentation Ideas for Serving
When it’s time to serve, make it special! Dish out warm slices into bowls. Top each slice with a scoop of vanilla ice cream or a dollop of whipped cream. A sprinkle of cinnamon on top makes it look fancy. This simple touch can wow your guests and make the dish feel extra special. Enjoy every bite!
Pro Tips
- Use Fresh Peaches: If peaches are in season, consider using fresh ones instead of canned for a more vibrant flavor and texture.
- Customize the Toppings: Feel free to experiment with different nuts like almonds or even chocolate chips for a unique twist on the classic dump cake.
- Serve Warm: This cake is best enjoyed warm, right out of the oven, especially when paired with ice cream or whipped cream.
- Make Ahead: You can prepare the layers ahead of time and store them separately in the fridge. Just assemble and bake when you’re ready to serve.
Variations
Fruit Variations Beyond Peaches
You can switch up the fruit in this dump cake. Try using other fruits like cherries, blueberries, or apples. Each fruit adds its unique flavor. For cherries, use a can of sliced cherries in syrup. For blueberries, fresh or frozen berries work great. Apples can be sliced thin and mixed with a little cinnamon. Each fruit gives a new twist to the classic dump cake.
Gluten-Free and Vegan Adaptations
Making this cake gluten-free is simple. Just use a gluten-free cake mix instead of the regular one. You can find these at most grocery stores. For a vegan option, swap the butter for coconut oil or vegan butter. Make sure your cake mix is vegan too. These changes let everyone enjoy this treat, no matter their diet.
Seasonal Ingredients to Incorporate
You can make this dump cake special by using seasonal ingredients. In the summer, try fresh peaches or berries. In the fall, add chopped apples or pears with warm spices like nutmeg. Winter calls for citrus, so consider using oranges or grapefruits. Each season brings new flavors that can make your cake unique and fresh.
Storage Information
Best Way to Store Leftover Dump Cake
To store leftover dump cake, let it cool completely first. Then, cover it tightly with plastic wrap or aluminum foil. You can also place it in an airtight container. This helps keep it fresh and moist. Store the cake in the refrigerator.
How Long it Lasts in the Refrigerator
Leftover peach cobbler dump cake lasts about 3 to 5 days in the refrigerator. Make sure to check for any signs of spoilage before eating. If you see mold or an off smell, it’s best to toss it.
Freezing Tips for Peach Cobbler Dump Cake
You can freeze peach cobbler dump cake for up to 3 months. First, let the cake cool completely. Slice it into portions for easy serving. Wrap each piece in plastic wrap, then place them in a freezer bag. Be sure to label the bag with the date. When you’re ready to enjoy it, thaw it in the fridge overnight. You can reheat it in the oven or microwave for a warm treat.
FAQs
Can I use fresh peaches instead of canned?
Yes, you can use fresh peaches. Start by peeling and slicing about 4-5 ripe peaches. You will need around 4 cups of fresh peaches. Make sure to add some sugar to the fresh peaches. This helps bring out their natural sweetness. If you want a syrupy texture, add a bit of water or juice. Fresh peaches give a great taste but may need more time to bake.
How can I make my Peach Cobbler Dump Cake less sweet?
To cut the sweetness, reduce the brown sugar. Use about half a cup instead of a full cup. You can also skip the added sugar on the fresh peaches if you use them. Use a sugar substitute like stevia for an easy switch. Another tip is to add more spices, like cinnamon and nutmeg, which can enhance flavor without adding more sugar.
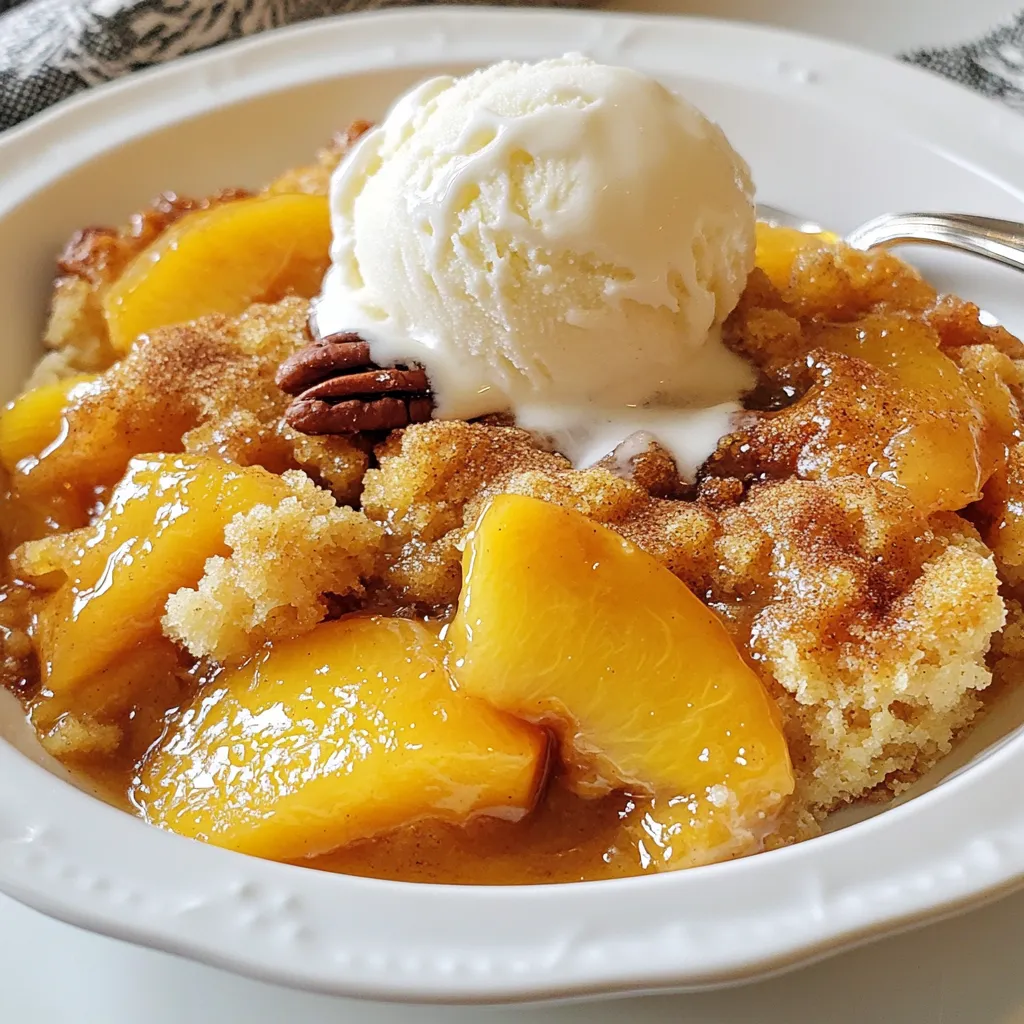
What should I serve with Peach Cobbler Dump Cake?
This dump cake tastes amazing with whipped cream or vanilla ice cream. You could also serve it with yogurt for a tangy touch. A scoop of ice cream melts into the warm cake, creating a creamy treat. For a fun twist, try adding a sprinkle of nuts on top for extra crunch.
Peach cobbler dump cake is a simple, tasty dessert you can enjoy. You need basic ingredients like peaches, cake mix, and butter. I showed you tips for mixing well and achieving a great texture. You can even try different fruits or make it gluten-free and vegan. Store your leftovers properly to keep them fresh longer. With these tips and tricks, you can create a delicious treat every time. Enjoy your bakin
Peachy Delight Dump Cake
Ingredients
- 29 oz sliced peaches in syrup, undrained
- 15.25 oz dry yellow cake mix
- 1/2 cup unsalted butter, melted
- 1 cup packed brown sugar
- 1 teaspoon ground cinnamon
- 1/2 teaspoon ground nutmeg
- 1/2 cup chopped pecans or walnuts (optional)
- to taste whipped cream or vanilla ice cream for serving (optional)
Instructions
- Preheat your oven to 350°F (175°C).
- In a 9x13-inch baking dish, pour the undrained sliced peaches evenly across the bottom.
- In a medium bowl, combine the brown sugar, ground cinnamon, and ground nutmeg. Mix well.
- Sprinkle the brown sugar and spice mixture evenly over the peaches.
- Carefully pour the dry yellow cake mix over the peach and sugar layers without stirring.
- Gently drizzle the melted butter evenly over the cake mix.
- If using, sprinkle the chopped pecans or walnuts on top of the butter.
- Bake for 45-50 minutes until the top is golden brown and bubbling.
- Allow to cool slightly for about 10-15 minutes before serving.
![To make your chocolate chip banana bread, you need these key ingredients: - 2 ripe bananas, thoroughly mashed - 1/3 cup coconut oil, melted - 1 teaspoon pure vanilla extract - 1/2 cup packed brown sugar - 1/4 cup granulated sugar - 2 large eggs at room temperature - 1 teaspoon baking soda - 1/4 teaspoon fine salt - 1 1/2 cups all-purpose flour - 1/2 cup semi-sweet or dark chocolate chips - 1/4 cup walnuts or pecans, chopped (optional) Each ingredient plays a vital role in crafting a moist and tasty loaf. Ripe bananas add sweetness and moisture. Coconut oil gives a rich flavor and a soft texture. The sugars create that perfect crust while the eggs help bind everything together. You can personalize your chocolate chip banana bread with fun add-ins. Here are some ideas: - Chopped nuts for crunch - Dried fruits like cranberries or raisins - A sprinkle of cinnamon for warmth - Peanut butter or nutella swirls for extra richness Feel free to mix and match! These add-ins can bring new flavors and textures to your bread. Using high-quality ingredients makes a big difference. Choose ripe bananas; they should be spotty and soft. Fresh eggs bring richness and flavor. Use pure vanilla extract for the best taste. For the oils, opt for organic coconut oil if possible. Quality flour helps create the right texture. Remember, great ingredients lead to great results! For the full recipe, check out the [Full Recipe]. Start by preheating your oven to 350°F (175°C). This step is crucial for even baking. Next, grab a 9x5 inch loaf pan. Lightly grease it with cooking spray or butter. You can also use parchment paper to line the pan. This makes removing the banana bread easier. In a large mixing bowl, take 2 ripe bananas and mash them well. You want them smooth with no lumps. Then, add 1/3 cup of melted coconut oil. Mix them together until they blend into a creamy base. This combination gives your bread moisture and flavor. Add 1 teaspoon of pure vanilla extract, 1/2 cup of packed brown sugar, and 1/4 cup of granulated sugar to the banana mix. Stir until it’s smooth. Now, crack in 2 large eggs. Mix well after each egg. Then, sprinkle 1 teaspoon of baking soda and 1/4 teaspoon of fine salt over the mix. Stir gently. Next, sift in 1 1/2 cups of all-purpose flour. Fold it in carefully. Don’t overmix; this keeps your loaf tender. Finally, gently fold in 1/2 cup of semi-sweet or dark chocolate chips. If you like, add 1/4 cup of chopped nuts too. Pour the batter into your prepared loaf pan. Smooth the top with a spatula. Place it in the oven and bake for 55-65 minutes. It’s done when a toothpick comes out clean or with a few crumbs. Let the bread cool in the pan for 10 minutes. Then, carefully move it to a wire rack to cool completely. This cooling step helps set the flavors. For the full recipe, refer to the section above. To get the best texture, use ripe bananas. The riper, the better! They must be soft and spotty. This way, you get a sweet and moist bread. Mash them well to avoid lumps. Mix ingredients gently after adding the flour. Over-mixing can make your bread tough. Aim for a light, fluffy loaf. Keep your banana bread fresh by wrapping it tightly. You can use plastic wrap or foil. Store it at room temperature for up to four days. If you want it to last longer, place it in the fridge for about a week. To keep it even longer, freeze it. Slice it before freezing for easy serving. Just make sure to wrap each slice well. Serve your chocolate chip banana bread warm. It tastes best right out of the oven! Add some butter on top for richness. You can also sprinkle powdered sugar for a sweet touch. For extra fun, top with fresh banana slices or more chocolate chips. This makes it look pretty and taste even better! For the complete recipe, check out the Full Recipe section in this article. {{image_4}} You can enjoy chocolate chip banana bread without gluten. Use a gluten-free flour blend. This blend works well as a one-to-one substitute. Make sure it has xanthan gum. This helps bind the ingredients. The flavor stays rich and delicious. Just follow the same steps as in the Full Recipe. You will love the texture and taste. For a vegan version, swap eggs for flax eggs. To make a flax egg, mix one tablespoon of flaxseed meal with three tablespoons of water. Let it sit for a few minutes to thicken. Use non-dairy milk and coconut oil as well. This keeps the bread moist and soft. You can still add chocolate chips, just choose dairy-free ones. You can add your favorite spices for extra flavor. Cinnamon and nutmeg pair well with bananas. A pinch of each can make a big difference. You can also try almond or coconut extract. These extracts add depth. Experiment to find your favorite combo. Each twist makes the bread unique and fun. To keep your chocolate chip banana bread fresh, store it at room temperature. Wrap it tightly in plastic wrap or foil. This helps keep moisture in. Place it in a cool, dry spot, away from direct sunlight. If you prefer, you can also use an airtight container. This will help maintain its soft texture and rich flavor. Freezing is a great option if you want to save some for later. First, let the banana bread cool completely. Then, wrap it tightly in plastic wrap, followed by aluminum foil. This extra layer prevents freezer burn. You can freeze it for up to three months. When you're ready to enjoy it, simply thaw it in the fridge overnight. Reheating banana bread can bring back its lovely warmth. You can use a toaster oven or a conventional oven. Preheat your oven to 350°F (175°C). Slice the bread and place it on a baking sheet. Heat for about 5-10 minutes. If you want a softer texture, cover it with foil. You can also pop a slice in the microwave for about 10-15 seconds. Enjoy it warm for a cozy treat! Your chocolate chip banana bread is done when a toothpick comes out clean. Insert it in the center. If it has a few crumbs, that is fine too. The bread usually bakes for 55-65 minutes. The top should look golden brown. Yes, you can substitute some ingredients. For example, use olive oil instead of coconut oil. You can also swap brown sugar for maple syrup. Make sure to adjust the amounts as needed for the best results. Chocolate chip banana bread lasts about 3-4 days at room temperature. Store it in an airtight container. For longer storage, keep it in the fridge for a week. You can also freeze it for up to 3 months. You can use applesauce or mashed bananas as egg substitutes. Use 1/4 cup of applesauce or 1/2 banana for each egg. Both options keep the bread moist and flavorful. This chocolate chip banana bread stands out because of its rich flavors. The combination of ripe bananas and chocolate chips creates a sweet treat. Using coconut oil adds a subtle depth to the taste. The option to add nuts gives extra texture. You can find the complete recipe in the Full Recipe section. This blog post covered how to make delicious chocolate chip banana bread. We discussed key ingredients, optional add-ins, and the importance of ingredient quality. I shared step-by-step instructions to guide you through the baking process. We explored tips for the perfect texture, storage methods, and fun variations like gluten-free and vegan options. With these insights, you can easily bake this treat and impress everyone. Enjoy your baking journey!](https://dishtreats.com/wp-content/uploads/2025/06/ff2d306f-7b8f-4bb2-a8a5-5e2882fba681-768x768.webp)