Spicy Garlic Tofu Stir Fry Flavorful and Easy Recipe

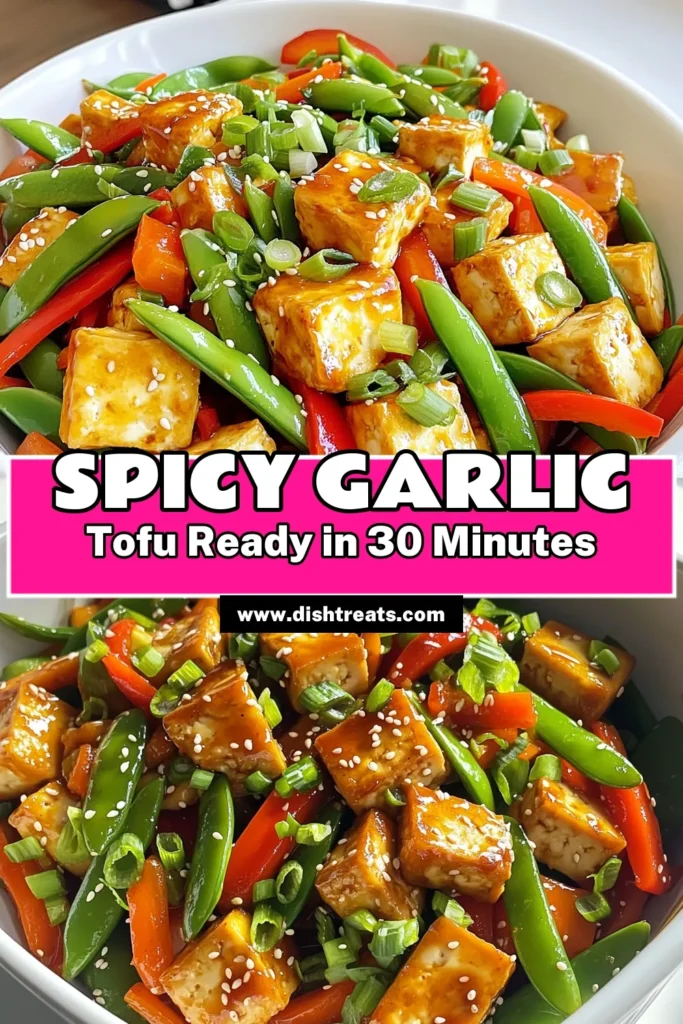
Are you ready to spice up your dinner routine? This Spicy Garlic Tofu Stir Fry is quick, tasty, and packed with flavor! With firm tofu, fresh veggies, and a zesty sauce, you can whip up a meal that is both satisfying and healthy. Perfect for busy nights, this recipe is easy to follow and delivers a big punch with every bite. Let’s dive into the ingredients and get cooking!
Ingredients
Main Ingredients
- 14 oz firm tofu, thoroughly drained and pressed
- 2 tablespoons vegetable oil
- 4 cloves fresh garlic, finely minced
- 1 inch piece fresh ginger, finely minced
- 1 red bell pepper, sliced into strips
- 1 cup fresh snap peas
- 1 small carrot, julienned thinly
Sauce Ingredients
- 3 tablespoons soy sauce
- 1 tablespoon sriracha
- 1 tablespoon rice vinegar
- 1 teaspoon sesame oil
Garnishing Elements
- 2 green onions, finely chopped
- Sesame seeds for garnish
Gather these simple ingredients to make a tasty dish. Firm tofu gives a great base. It soaks up all the flavors. Fresh garlic and ginger add warmth. The mix of vegetables brings color and crunch. The sauce ties everything together with a spicy kick. You can adjust the heat by adding more or less sriracha.
Don’t forget the green onions and sesame seeds. They add a nice finish to the dish. This recipe is easy and fun to make. Enjoy the bright colors and rich flavors on your plate!
Step-by-Step Instructions
Preparing the Tofu
First, cut the pressed tofu into bite-sized cubes or slices. This helps it cook evenly. I like to use a sharp knife for clean cuts. After cutting, heat two tablespoons of vegetable oil in a large skillet over medium-high heat. Once the oil shimmers, add the tofu in a single layer. Cook for about 8-10 minutes. Turn the tofu pieces often until they are golden brown and crispy. This gives them a nice texture. When done, remove the tofu and set it aside on a paper towel-lined plate to absorb excess oil.
Stir-Frying Aromatics
In the same skillet, add four cloves of minced garlic and one inch of minced ginger. Sauté these for about 30 seconds. You want them to release their lovely aroma but be careful not to burn them. This step adds a deep flavor to your dish.
Cooking the Vegetables
Next, add one sliced red bell pepper, one cup of snap peas, and one small julienned carrot to the skillet. Stir-fry these veggies for about 5 minutes. The goal is to keep their bright colors and crispness. Stir them gently, so they cook evenly.
Mixing in the Sauce
While the vegetables cook, whisk together three tablespoons of soy sauce, one tablespoon of sriracha, one tablespoon of rice vinegar, and one teaspoon of sesame oil in a small bowl. Pour this sauce over the cooked vegetables. Mix well to coat everything evenly. Then, fold the crispy tofu back into the skillet. Toss everything together for 2-3 minutes. This helps the tofu soak up the tasty sauce.
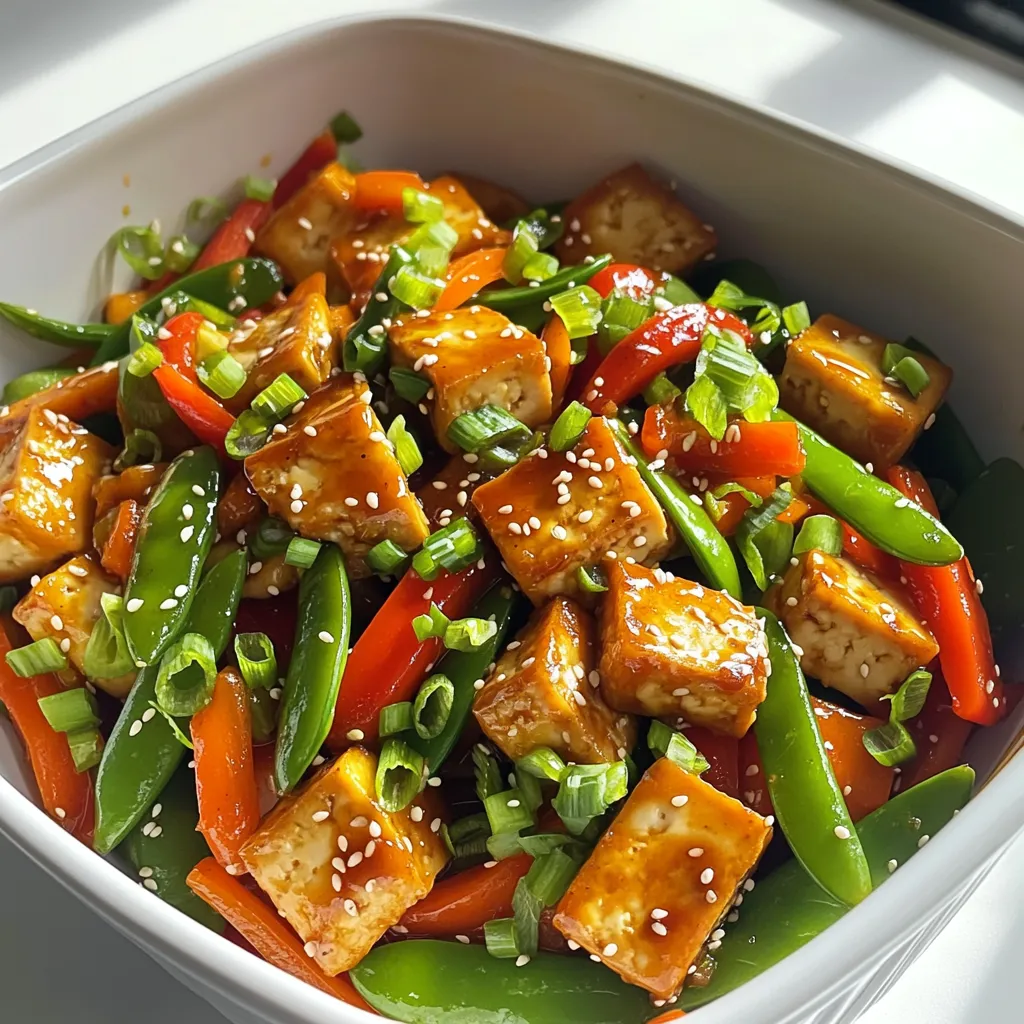
Final Touches
Once everything is heated through, remove the skillet from the heat. Garnish your stir-fry with finely chopped green onions and a sprinkle of sesame seeds. This adds a nice crunch and a pop of color. Serve your spicy garlic tofu stir-fry in a large bowl or on individual plates. For extra flair, drizzle sriracha on top. Enjoy it with fluffy steamed rice or savory noodles for a complete meal!
Tips & Tricks
Perfecting the Tofu Texture
Tofu is great when cooked right. First, press the tofu to remove water. You can wrap it in a clean towel and place a heavy pan on top for 15-30 minutes. This helps make it crispy. You can also use a tofu press if you have one.
Try cooking methods like baking or air frying for different textures. If you bake, cut the tofu into cubes and toss them with a little oil. Bake at 400°F (200°C) for about 25 minutes, flipping once. Air frying also gives a nice crispy finish.
Enhancing Flavor
To make your dish pop, add spices and herbs. Fresh herbs like cilantro or Thai basil can brighten the flavors. You can also add chili flakes for extra heat.
If you want more spice, adjust the sriracha to your taste. Start with one tablespoon and add more if you like it fiery. Adding a splash of lime juice at the end can also enhance the flavor.
Serving Suggestions
Serve your stir fry with fluffy steamed rice or noodles for a full meal. White rice, brown rice, or even quinoa are all great choices.
For a fun twist, you can wrap the stir fry in lettuce leaves for a fresh bite. This makes it light and crunchy. Adding a side of pickled vegetables can also bring a nice tang to your meal.
Variations
Protein Substitutes
You can swap tofu for other proteins. Tempeh is a great choice. It has a nutty flavor and firm texture. Seitan is also an option. It mimics meat and adds chewiness. Both alternatives soak up the sauce well. You can follow the same cooking steps as with tofu.
Vegetable Alternatives
Feel free to change the vegetables based on the season. Broccoli, zucchini, or asparagus work well. Use whatever is fresh and bright. Frozen vegetables can also fit into this dish. They cook quickly and save time. Just make sure to adjust the cooking time slightly.
Sauce Adaptations
If you need a gluten-free option, use tamari instead of soy sauce. This keeps the flavor without wheat. For vegan adjustments, ensure your sriracha is vegan. Some brands add fish sauce, so check the label. You can also create a spicy peanut sauce for a twist. Just mix peanut butter with soy sauce and sriracha.
Storage Info
Refrigeration Instructions
To store leftovers, let the stir fry cool first. Place it in an airtight container. The dish will stay fresh for up to three days in the fridge. Always keep it covered to prevent drying out.
Freezing Guidelines
You can freeze the cooked stir fry. Use a freezer-safe container or bag. Make sure to remove as much air as possible. It can last for up to three months in the freezer. When ready to eat, thaw it in the fridge overnight.
Reheating Tips
To reheat without losing texture, use a skillet. Heat over medium heat. Add a splash of water or oil to keep it moist. Stir often until heated through. You can also use the microwave, but be careful not to overheat. This method can make the tofu chewy. Enjoy your stir fry warm and fresh!
FAQs
What should I serve with Spicy Garlic Tofu Stir Fry?
For the best meal, serve this stir fry with:
- Steamed white or brown rice
- Noodles, like rice or egg noodles
- Quinoa for a healthy twist
- A fresh side salad for crunch
These options balance the flavors well and add nutrition to your meal.
Can I make this recipe ahead of time?
Yes, you can prepare this recipe in advance. Here are some tips:
- Cook the tofu and veggies ahead.
- Store them in airtight containers.
- Keep the sauce separate until you’re ready to eat.
- Reheat everything on the stovetop for best results.
This saves time and makes dinner easy on busy nights.
How spicy is this recipe, and can I adjust the heat?
This recipe has a nice kick from sriracha. If you prefer less heat:
- Use less sriracha or omit it.
- Add a bit of honey or sugar to balance flavors.
- For more heat, add extra sriracha or red pepper flakes.
You can always adjust spice to fit your taste!
Is this recipe suitable for meal prepping?
Absolutely! Meal prepping with this stir fry has great benefits:
- It keeps well in the fridge for up to four days.
- You can freeze portions for later.
- It reheats nicely without losing texture.
Meal prepping saves time and helps you eat healthy!
This blog post guides you through making a tasty Spicy Garlic Tofu Stir Fry. We discussed key ingredients, from firm tofu to fresh veggies and a bold sauce. You learned how to cook tofu for the right texture and combine flavors well. Each step matters for a delicious outcome.
Remember, this dish fits many diets with easy swaps. Enjoy the leftovers with smart storage tips. Cooking can be fun and rewarding. Dive in and make this stir fry your own!

. Enjoy making your air fryer sweet potato chips! You now know how to make tasty sweet potato chips with an air fryer. We covered the needed ingredients, proper preparation, and seasoning. I shared tips for perfect crispiness and suggested flavor boosts. I also explored storage and reheating methods to keep your chips fresh. Try different seasonings and root veggies for variety. Enjoy the fun of making your own snacks!](https://dishtreats.com/wp-content/uploads/2025/06/63cc0e6b-da42-45de-be59-e2118d293653-768x768.webp)
. - Ensure even space on the baking sheet for optimal roasting. - Toss halfway through cooking for uniform caramelization. Roasting carrots and chickpeas makes them sweet and crunchy. When you spread them out, they cook evenly. If they touch, they steam instead of roast. This can make them soggy and less tasty. Tossing the mixture halfway is key. It helps to brown all sides well. This step adds more flavor and a lovely texture. - Experiment with different citrus juices like lime or orange. - Substitute tahini with Greek yogurt for a creamy dressing. The dressing can change the whole dish. Use lime juice for a zesty twist. Orange juice gives a sweet touch. Both add freshness and brightness. If you want a creamy option, use Greek yogurt instead of tahini. It makes the dressing rich and smooth. This swap gives a fun flavor change too. - Serve in individual bowls for a refined presentation. - Add a lemon wedge for guests to use. Presenting this salad in bowls looks nice. It makes each serving feel special. Guests can enjoy their own portion. Adding a lemon wedge on the side is a great idea. It lets everyone add a splash of fresh juice. This brightens the salad even more. For the full recipe, check the details above. Enjoy your cooking! {{image_4}} You can make this salad even better. Try adding other roasted veggies. Bell peppers bring sweetness. Sweet potatoes add creaminess. Both enhance flavor and texture. You can also toss in nuts or seeds. Almonds or sunflower seeds add a nice crunch. They make the salad more filling and fun. If you want more protein, try grilled chicken or tofu. Both options work well with roasted carrots and chickpeas. Grilled chicken adds a savory touch, while tofu keeps it plant-based. You can also use canned tuna. It gives the salad a different flavor and makes it heartier. Want to boost flavor? Experiment with fresh herbs. Cilantro or mint can brighten the taste. They add freshness that complements the roasted veggies. You can also spice it up with hot sauce. Just a dash gives the salad a nice kick. It’s a fun way to change the flavor profile. For the complete recipe, check out the Full Recipe section above. Store leftovers in an airtight container in the fridge. They are best consumed within 2-3 days. After that, the carrots may lose their crunch, and the flavors fade. Freezing this salad is not recommended. The dressing may separate when frozen. This can change the texture and taste of your salad. You can enjoy this salad cold or at room temperature. If you prefer, reheat in the oven. This helps retain the texture of the roasted carrots and chickpeas. Yes, use maple syrup instead of honey and omit the feta cheese. This keeps the flavors rich and plant-based. You won’t miss the cheese, trust me. The roasted carrots and chickpeas bring enough taste and texture to satisfy everyone. You can use black beans or white beans as alternatives. Both options provide protein and fiber. They also add a nice twist to the taste. Black beans bring a bit of earthiness, while white beans offer a creamier texture. Serve the dressing on the side to keep the greens crisp until serving. This way, they stay fresh and crunchy. Drizzle the dressing just before you eat for the best taste and texture. Spinach, arugula, or chopped kale work well for base greens. Each option adds a different flavor. Spinach is mild, arugula is peppery, and kale adds a hearty bite. Choose what you like best! This blog post shares a tasty recipe featuring roasted carrots and chickpeas on fresh greens. It walks through each step, from prep to assembly, and includes tips for perfect results. You can even tweak the dressing and add your favorite proteins. Don’t hesitate to make this salad your own. Experimenting with flavors makes cooking fun! Enjoy your healthy, vibrant salad that brings flavor and nutrition to your table.](https://dishtreats.com/wp-content/uploads/2025/07/15b40619-46f3-4baf-96e6-94c974b2a42a-768x768.webp)