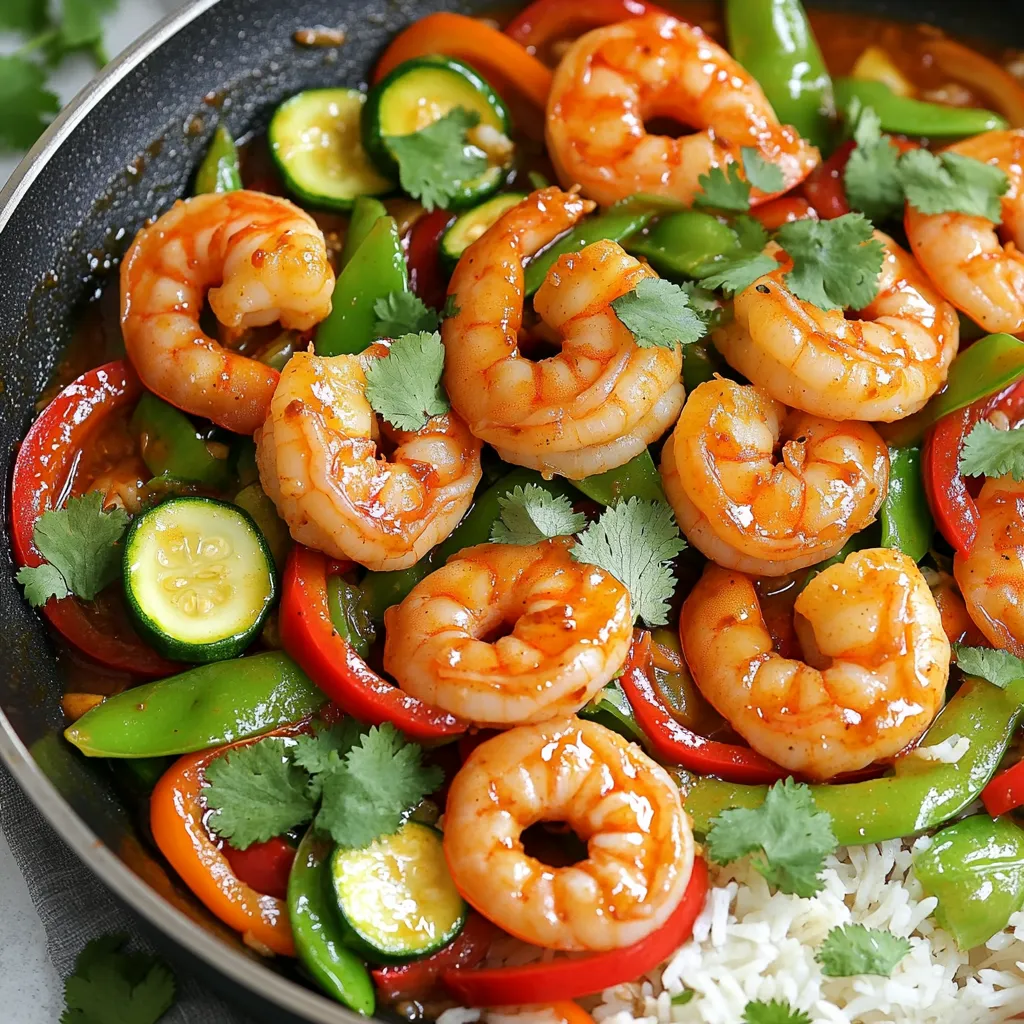
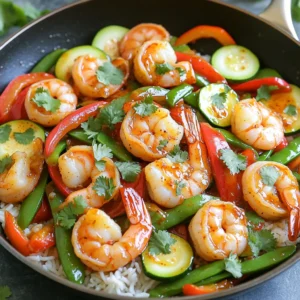
Minute Chili Garlic Shrimp Stir-Fry Quick and Easy Meal

Need a quick and delicious meal? This Minute Chili Garlic Shrimp Stir-Fry is just for you! In under 15 minutes, you will savor the bold flavors of shrimp and fresh veggies, all wrapped in a spicy garlic sauce. Perfect for busy weeknights, it’s fast, tasty, and customizable to your family’s preferences. Let’s dive into this easy recipe that’s sure to impress!
Ingredients
Main Ingredients
- 1 lb large shrimp, peeled and deveined
- 2 tablespoons vegetable oil
- 4 cloves garlic, minced
Vegetables
- 1 red bell pepper, sliced into thin strips
- 1 medium zucchini, sliced into half-moons
- 1 cup snap peas, trimmed
Sauce Ingredients
- 2 tablespoons soy sauce
- 1 tablespoon chili paste (adjust according to spice preference)
- 1 teaspoon honey or agave syrup
- Salt and freshly ground black pepper to taste
In this Minute Chili Garlic Shrimp Stir-Fry, the ingredients are fresh and vibrant. The shrimp brings protein and flavor. Use large shrimp for the best bite. Make sure they are peeled and deveined for easy eating.
Next, we add vegetable oil, which helps cook the garlic and shrimp. Garlic is key for flavor. Mince it well so it spreads its taste throughout the dish.
For a colorful crunch, I love using a red bell pepper. It adds sweetness and a bright look. The zucchini gives a nice texture and softens well. Snap peas add a crisp bite and vivid green color.
The sauce is simple but packed with flavor. Soy sauce adds saltiness, while chili paste gives it a spicy kick. Honey or agave syrup balances the heat with a touch of sweetness. Finish with salt and pepper for more depth. This mix of ingredients makes for a quick, tasty meal.
Step-by-Step Instructions
Preparing the Skillet
- Heat 2 tablespoons of vegetable oil in a large skillet over medium-high heat.
- Wait until the oil shimmers. This shows it is hot enough.
- Add 4 cloves of minced garlic. Sauté for about 30 seconds.
- Stir the garlic to avoid burning. The smell should be strong and fragrant.
Cooking the Shrimp
- Now, add 1 pound of peeled and deveined large shrimp.
- Cook for about 2-3 minutes. Watch for them to turn pink and opaque.
- Stir occasionally to cook evenly. Once they look good, they’re done.
Adding Vegetables and Sauce
- Next, add the sliced red bell pepper, zucchini half-moons, and snap peas.
- Stir-fry these for an extra 2-3 minutes. The veggies should soften but stay crisp.
- In a small bowl, mix 2 tablespoons of soy sauce, 1 tablespoon of chili paste, and 1 teaspoon of honey.
- Pour this sauce over the shrimp and veggies. Stir well to coat everything.
- Let it cook for one more minute. This helps blend all the flavors.
- Finally, taste and season with salt and black pepper. Enjoy your stir-fry over rice!
Tips & Tricks
Perfecting the Garlic Flavor
To avoid burning garlic, you need to keep a close eye on it. Garlic burns fast and turns bitter. Here are some tips:
- Use medium-high heat. This helps cook the garlic quickly without burning it.
- Stir the garlic often. This keeps it moving and prevents it from sitting too long in the hot oil.
- Add garlic after the oil is hot. This way, it starts cooking right away and stays flavorful.
Adjusting Heat Level
If you want to change the spiciness, chili paste is your friend. Here’s how to customize the heat:
- Start with a small amount of chili paste. You can always add more if you want it spicier.
- Mix the chili paste with the soy sauce before adding it to the pan. This helps spread the heat evenly.
- Taste the stir-fry before serving. If it needs more heat, add a bit more chili paste and stir well.
Enhancing Texture
To keep your vegetables crisp, follow these tips:
- Cut vegetables into even sizes. This helps them cook at the same rate.
- Stir-fry over high heat. This cooks them fast, keeping them crunchy.
- Add the vegetables after the shrimp. This way, they don’t overcook while the shrimp cooks.
Variations
Protein Substitutes
If you want to switch things up, consider using chicken or tofu. Chicken thighs add a rich flavor. Simply cut them into bite-sized pieces. Cook them like the shrimp until they’re no longer pink. Tofu is another great choice. Use firm tofu for the best texture. Cut it into cubes and pan-fry until golden. You can also try other seafood like scallops or fish. Just adjust the cooking time based on the protein you choose.
Vegetable Swaps
Not a fan of bell pepper? You can use carrots or broccoli instead. These will add a nice crunch. For zucchini, try yellow squash or asparagus. Both work well in stir-fry. If snap peas are not available, green beans or bok choy are tasty alternatives. Just remember to cut them into similar sizes for even cooking.
Flavor Enhancements
To boost the flavor, add fresh herbs like basil or cilantro. They bring a bright taste to the dish. You can also sprinkle some sesame seeds on top for a nutty crunch. If you enjoy heat, try adding sliced fresh chili or a dash of sriracha. These small changes can make a big difference in your stir-fry.
Storage Info
Refrigeration
To store your leftover Minute Chili Garlic Shrimp Stir-Fry, let it cool first. Place it in an airtight container. This method keeps the flavors nice and fresh. You can enjoy leftovers for up to three days. Reheat in a skillet over medium heat. Stir often until hot. This helps keep the shrimp tender and the veggies crisp.
Freezing
If you want to freeze your stir-fry, do it right after cooling. Use a freezer-safe container or bag. Make sure to remove as much air as possible. This helps prevent freezer burn. To reheat, thaw in the fridge overnight. Then, heat in a skillet over medium heat until warm. Adding a splash of water can help revive the dish.
Shelf Life
In the fridge, your stir-fry lasts about three days. If frozen, it can stay fresh for up to three months. After that, the quality may drop. Always check for off smells or changes in texture before eating. This way, you ensure a tasty meal every time you enjoy it.
FAQs
Can I use frozen shrimp for this recipe?
Yes, you can use frozen shrimp. Just make sure to thaw them first. Place the shrimp in a bowl of cold water for about 15-20 minutes. This method works best. After thawing, pat them dry with paper towels before cooking. This prevents extra water from making your stir-fry soggy.
What can I serve with chili garlic shrimp stir-fry?
You can pair this dish with a few side options. Here are some ideas:
- Steamed jasmine or basmati rice
- Quinoa for a protein boost
- A fresh green salad with a light dressing
- Simple stir-fried vegetables like broccoli or bok choy
These sides add color and flavor to your meal.
How can I make this dish vegetarian?
To create a vegetarian stir-fry, swap the shrimp for tofu. Firm tofu works best. Cut it into cubes and sauté it until golden. You can also add extra veggies like bell peppers, carrots, or mushrooms. Adjust the sauce to keep the flavors bold and tasty. This way, you still get a delicious meal.
This blog post shared a simple and tasty chili garlic shrimp stir-fry recipe. You learned about the main ingredients, easy steps, and handy tips for perfecting your dish. I also gave you ideas for variations and storage options.
Cooking is all about fun and making it your own. Enjoy trying different flavors and ingredients. With practice, you’ll impress anyone!
![To make these delightful cookies, you need a few key ingredients: - 1 cup ricotta cheese - 1/2 cup unsalted butter, softened - 1 cup granulated sugar - 1 large egg - 2 teaspoons fresh lemon zest - 2 tablespoons fresh lemon juice - 2 cups all-purpose flour - 1 teaspoon baking powder - 1/2 teaspoon baking soda - 1/4 teaspoon fine sea salt - Powdered sugar for dusting These ingredients create a soft and tasty cookie that bursts with lemon flavor. For this recipe, you will need: - A large mixing bowl - An electric mixer - A medium mixing bowl - Whisk - Baking sheet - Parchment paper - Cookie scoop or spoon - Wire rack Having the right tools makes baking easy and fun. You can easily swap some ingredients if needed: - Use low-fat ricotta for a lighter option. - Replace unsalted butter with coconut oil for a dairy-free cookie. - Substitute lemon with orange for a different flavor. - Use gluten-free flour to make these cookies gluten-free. These alternatives let you customize the recipe to fit your needs. For the full recipe, check the details provided above. First, heat your oven to 350°F (175°C). This step is key for baking. Next, line a baking sheet with parchment paper. This prevents the cookies from sticking. In a large bowl, mix the ricotta cheese and softened butter. Use an electric mixer on medium speed. Beat them for about 2-3 minutes. You want a smooth and creamy mix. This will be the base of your cookies. Now, it’s time to add the sugar. Gradually sprinkle in the granulated sugar, mixing as you go. Keep beating until it’s light and fluffy. Next, crack in the egg. Add the lemon zest and lemon juice. Mix until everything is well combined. In a separate bowl, whisk together the flour, baking powder, baking soda, and sea salt. Once mixed, add the dry ingredients to the ricotta mix. Stir gently until just combined. Be careful not to overmix. This helps keep the cookies soft. Use a spoon or cookie scoop to drop rounded tablespoons of dough onto the baking sheet. Leave about 2 inches of space between each cookie. This allows them to spread while baking. Place the sheet in the oven and bake for 12-15 minutes. Look for lightly golden edges and soft centers. After baking, let the cookies cool on the sheet for about 5 minutes. Then carefully transfer them to a wire rack. Let them cool completely. Once cooled, dust lightly with powdered sugar for a sweet touch. Enjoy these delightful lemon ricotta cookies! For the complete recipe, check out the [Full Recipe]. To make your lemon ricotta cookies soft, use fresh ricotta cheese. It adds moisture and flavor. Avoid overmixing the dough. Mix just until combined. This keeps the cookies light. Let the dough chill for about 30 minutes. Chilling helps the cookies hold their shape while baking. Accurate measurements are key to great cookies. Use dry measuring cups for flour and sugar. Spoon the flour into the cup, then level it off with a knife. Do not pack it down. For liquids, use a clear liquid measuring cup. Fill it to the desired line while checking at eye level. One common mistake is not preheating the oven. Always preheat to ensure even baking. Another mistake is baking on an ungreased or unlined pan. Use parchment paper to prevent sticking. Finally, don’t skip cooling the cookies on a wire rack. This helps them set and stay soft. For the full recipe, check out the step-by-step guide. {{image_4}} You can add chocolate chips for a sweet twist. Use semi-sweet or milk chocolate chips. Just fold in one cup of chips into the dough after mixing in the dry ingredients. This change creates a fun contrast with the lemon flavor. The rich chocolate and bright lemon make each bite exciting! To make these cookies gluten-free, swap the all-purpose flour with a gluten-free blend. Look for a blend that includes xanthan gum. This ingredient helps the cookies hold their shape. Follow the same recipe steps, and you will have delicious gluten-free cookies that everyone can enjoy. You can enhance the flavor by adding herbs or spices. Try mixing in a teaspoon of fresh thyme or rosemary for a unique taste. You could also use vanilla extract for warmth. These small changes can take your lemon ricotta cookies to a whole new level. Experiment with flavors and find what you like best! To keep your lemon ricotta cookies fresh, place them in an airtight container. This will help maintain their soft texture. I recommend layering the cookies with parchment paper. This way, they won’t stick together. Store the container at room temperature for up to five days. If you live in a humid area, consider refrigerating them. Just remember to bring them to room temperature before enjoying. If you want to save some cookies for later, freezing is a great option. First, let the cookies cool completely. Then, place them in a single layer on a baking sheet. Freeze for about an hour until firm. After that, transfer the cookies to a freezer-safe bag or container. Make sure to remove as much air as possible. You can freeze them for up to three months. When you’re ready to enjoy, thaw them in the fridge overnight. Lemon ricotta cookies are best enjoyed fresh, but they can last. If stored correctly, they stay soft for about five days at room temperature. Over time, they may become a bit dry. To refresh them, you can microwave a cookie for about 10 seconds. This will bring back some of the softness. Always check for any signs of spoilage before eating. If they smell off or look strange, it’s best to toss them. Enjoy your cookies! For the full recipe, refer to the main article. Yes, you can use pre-made ricotta cheese. Just make sure it is fresh and creamy. Store-bought ricotta saves time and still brings great taste. If it's a bit watery, drain it before use. This will keep your cookies from getting too soggy. To make these cookies dairy-free, replace ricotta cheese with tofu. Use firm tofu, blend it, and add a bit of lemon juice for flavor. For butter, try coconut oil or a dairy-free spread. These swaps keep the cookies soft and delicious without dairy. The best way to glaze these cookies is with a simple lemon glaze. Mix powdered sugar with fresh lemon juice until smooth. Drizzle the glaze over cooled cookies for a sweet finish. You can also add lemon zest on top for extra flavor. You will know the cookies are done when the edges turn golden. The centers should still look soft and puffy. A toothpick inserted in the center should come out clean or with a few crumbs. Avoid over-baking for the softest texture. Yes, you can make these cookies healthier. Use whole wheat flour instead of all-purpose flour. Replace granulated sugar with coconut sugar or a sugar substitute. You can also cut down on butter by using applesauce or Greek yogurt. These changes keep cookies tasty and lower in calories. For the full recipe, check the [Full Recipe]. In this post, we covered how to make lemon ricotta cookies step by step. We explored key ingredients, baking equipment, and helpful tips. I shared ways to customize the cookies with flavors and special diets. Finally, we discussed storage methods to keep them fresh. With these insights, you can bake delicious cookies that are soft and bright in flavor. Enjoy your baking experience and share these treats with friends!](https://dishtreats.com/wp-content/uploads/2025/07/5405bae2-00aa-4997-8585-ece8a42539ac-768x768.webp)