One-Pot Spicy Sausage Tortellini Soup Recipe Delight

Looking for a warm, hearty meal? My One-Pot Spicy Sausage Tortellini Soup is the answer! This simple recipe combines juicy sausage, tender tortellini, and fresh spinach, all cooked in one pot. It’s quick, full of flavor, and perfect for any night of the week. Join me as I share essential ingredients, step-by-step instructions, and tips to make this dish shine. You’ll love how easy and delicious it is!
Ingredients
Essential Ingredients for Spicy Sausage Tortellini Soup
To make this soup, you need a few key ingredients to get it right. Here’s what you’ll need:
- 1 tablespoon olive oil
- 1 pound spicy Italian sausage, casings removed
- 1 medium onion, finely diced
- 3 cloves garlic, minced
- 1 carrot, peeled and diced
- 1 red bell pepper, diced
- 1 can (14 oz) diced tomatoes, including juices
- 4 cups vegetable or chicken broth
- 1 teaspoon dried basil
- 1 teaspoon dried oregano
- ½ teaspoon red pepper flakes (adjust for spice)
- 1 package (9 oz) cheese tortellini
- 2 cups fresh spinach, roughly chopped
- Salt and pepper to taste
- Grated Parmesan cheese, for serving (optional)
- Fresh basil leaves, for garnish (optional)
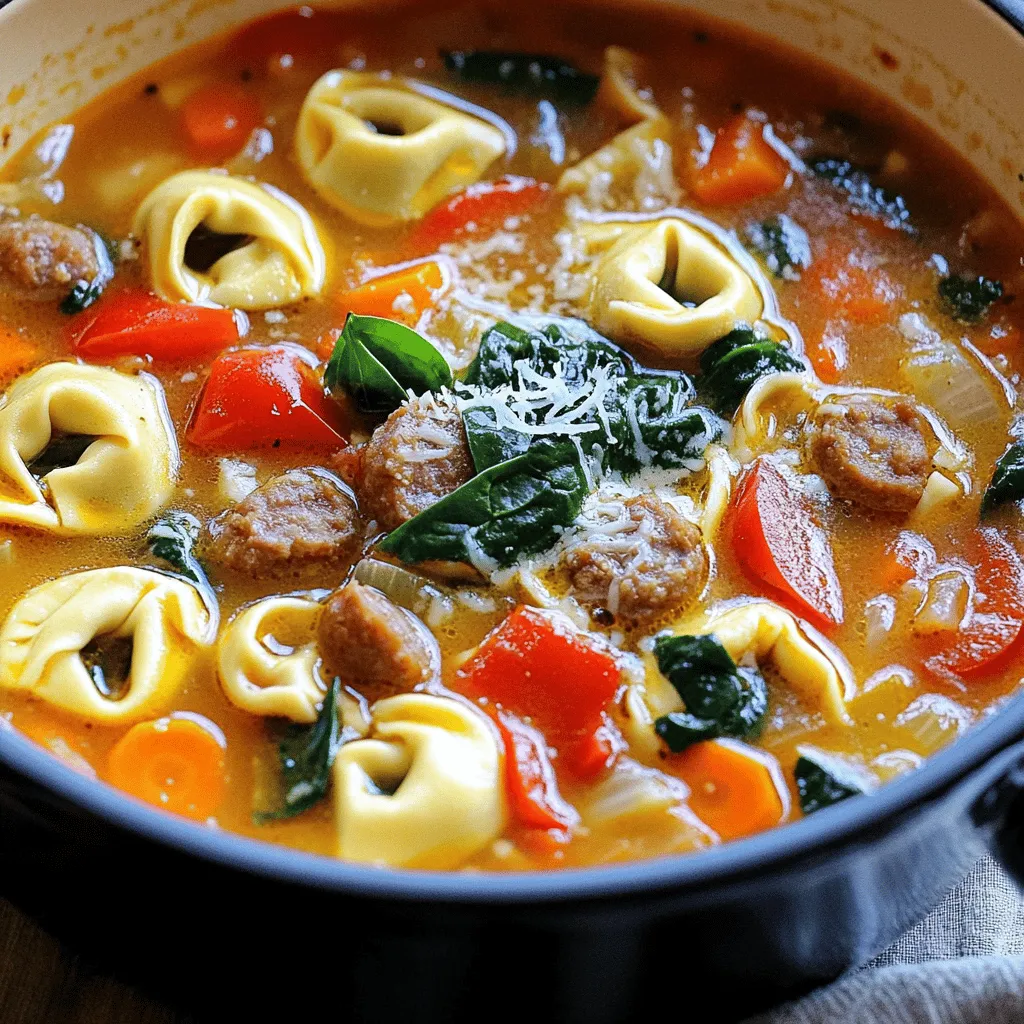
These ingredients work together to create a warm and hearty flavor. The spicy sausage adds a kick, while the cheese tortellini makes it filling.
Optional Ingredients for Enhanced Flavor
While the essential ingredients are great, you can add a few optional items for extra flavor:
- A splash of heavy cream for richness
- A squeeze of lemon juice for brightness
- Fresh herbs like thyme or parsley for freshness
These additions can take your soup to the next level. You can mix and match based on what you have at home.
Tips for Choosing the Best Sausage and Tortellini
When picking sausage, go for high-quality spicy Italian sausage. Fresh sausage has the best flavor. Look for one with visible herbs and spices.
For tortellini, choose cheese tortellini for a creamy texture. Fresh tortellini cooks faster and tastes great. If you want a different flavor, try spinach or meat-filled tortellini instead.
Always read the labels to check for allergens if needed. This ensures everyone can enjoy the soup happily.
Step-by-Step Instructions
Preparing the Base: Sautéing ingredients
Start by heating 1 tablespoon of olive oil in a large pot or Dutch oven over medium heat. Once the oil is warm, add 1 pound of spicy Italian sausage. Use a wooden spoon to break it apart as it cooks. Sauté the sausage for about 5 to 7 minutes until it turns brown and is fully cooked. Next, add 1 medium diced onion, 3 cloves of minced garlic, 1 diced carrot, and 1 diced red bell pepper. Cook these ingredients for another 5 minutes. Stir them often to help the veggies soften and smell great.
Combining and Simmering the Soup
Now it’s time to add more flavor. Pour in 1 can of diced tomatoes, including the juices. Then, add 4 cups of vegetable or chicken broth. Mix in 1 teaspoon of dried basil, 1 teaspoon of dried oregano, and ½ teaspoon of red pepper flakes. Stir everything well and bring the soup to a gentle simmer. This helps the flavors blend together nicely.
Cooking the Tortellini and Adding Spinach
When the soup begins to simmer, add 1 package of cheese tortellini. Cook the tortellini based on the package instructions, usually about 3 to 5 minutes. They should be tender and floating when done. After the tortellini cooks, stir in 2 cups of roughly chopped fresh spinach. Let it cook for 2 more minutes until the spinach wilts and looks vibrant. Taste the soup and add salt and pepper as needed. Enjoy the delicious smell as you prepare to serve!
Tips & Tricks
Adjusting Spice Levels for Your Preference
To adjust the spice, play with the red pepper flakes. Start with a little. You can always add more later. If you want less heat, skip the flakes entirely. For a milder soup, use sweet Italian sausage instead. This way, you keep the flavor without the spice.
How to Thicken the Soup (if needed)
If your soup seems too thin, you can thicken it easily. Add a bit more tortellini and let it cook longer. The pasta will soak up some broth. Another option is to blend a small portion of the soup. Use a blender or an immersion blender. This creates a thicker base while keeping chunky pieces.
Best Practices for Serving and Enjoying
Serve the soup hot for the best taste. Ladle it into bowls and add a sprinkle of Parmesan cheese. Fresh basil leaves add color and flavor. Pair it with crusty bread for dipping. Enjoy your meal with family or friends for a warm gathering.

Variations
Vegetarian Version: Swapping Out Ingredients
To make a vegetarian version, swap the spicy Italian sausage for plant-based sausage or lentils. This change keeps the soup hearty and flavorful. Use vegetable broth instead of chicken broth for added depth. When using lentils, add them early to cook through. Fresh herbs like thyme or rosemary can also boost flavor.
Adding Different Vegetables or Proteins
Feel free to add more vegetables to the soup. Zucchini, kale, or mushrooms work great. You can also add beans for protein. Chickpeas or white beans are excellent choices. Adjust cooking times if needed to ensure everything is tender. Mix and match your favorites for a unique twist every time.
Making It Creamy: Adding Dairy Alternatives
If you want a creamy soup, add a splash of coconut milk or cashew cream. This addition gives it a rich texture without overpowering the flavors. Stir in the cream just before serving to keep it fresh. You can also top with a dollop of sour cream or yogurt for extra creaminess.
Storage Info
How to Store Leftovers Properly
To keep your soup fresh, store leftovers in an airtight container. Let the soup cool to room temp first. Then, cover it well and place it in the fridge. This way, it can stay fresh for about 3 to 4 days. If you want to enjoy it later, freezing is a great option.
Reheating Instructions for Best Flavor
When you’re ready to eat, heat the soup on the stove for the best taste. Pour it into a pot over medium heat. Stir the soup often and cook until it’s hot. This helps keep the flavors bright. You can also use a microwave if you’re in a hurry. Just heat it in a bowl, stirring every minute until warm.
Freezing the Soup: Tips and Tricks
Freezing the soup is simple. Use freezer-safe containers or bags. Make sure to leave some space at the top, as liquids expand when frozen. It can last in the freezer for up to 3 months. When you’re ready to eat it, thaw it overnight in the fridge. Then, reheat on the stove. Enjoy your comforting soup anytime!
FAQs
Can I use frozen tortellini for this recipe?
Yes, you can use frozen tortellini. Just add them directly to the soup. Cook them for about 5-7 minutes, or until they float. This brings great flavor and saves time.
What can I substitute for Italian sausage?
You can use ground turkey or chicken for a lighter option. If you want more flavor, add spices like fennel or paprika. For a vegetarian choice, try crumbled tempeh or plant-based sausage.
How long will the soup last in the fridge?
The soup lasts about 3-4 days in the fridge. Store it in an airtight container to keep it fresh. Just reheat it on the stove or in the microwave before serving.
To sum it up, this blog post guides you through making spicy sausage tortellini soup. We covered key ingredients, step-by-step instructions, and tips for extra flavor. You learned how to choose the best sausage and tortellini and how to adjust spice levels. We also explored variations and how to store leftovers.
I hope you feel inspired to try this soup. It’s tasty, easy to make, and offers many options for customization. Enjoy each bowl filled with warmth and flavor!


![- 1 lb (450g) chicken breast, thinly sliced - 1 cup fresh Thai basil leaves, packed - 3 cloves garlic, minced - 2 red Thai chili peppers, thinly sliced (adjust based on your spice preference) For this dish, I prefer chicken breast. It cooks quickly and stays juicy. Fresh Thai basil gives this meal its unique flavor. Garlic adds a nice aroma, and Thai chili peppers bring heat. You can control the spice by adding more or less chili. - 2 tablespoons soy sauce - 1 tablespoon oyster sauce (or substitute with mushroom sauce for vegetarian) - 1 tablespoon fish sauce (or an extra tablespoon of soy sauce for vegetarian) - 1 teaspoon sugar (to balance flavors) - 1 tablespoon vegetable oil (for frying) These sauces are key to great taste. Soy sauce offers saltiness, while oyster and fish sauces add depth. Sugar balances the salty flavors, making everything taste better. - 1 bell pepper, sliced (your choice of color for visual appeal) - 1 small onion, sliced into thin wedges - Optional: other vegetables for added nutrition I like using bell pepper and onion for color and crunch. You can add other veggies like carrots or snap peas. They bring more nutrition and flavor, making the dish more vibrant. For the full recipe, refer to the [Full Recipe]. To start, you need to combine the chicken with the sauces. In a medium bowl, add the sliced chicken breast, soy sauce, oyster sauce, fish sauce, and sugar. Mix these ingredients well so the chicken gets all the flavor. Let it marinate for 15 minutes. This short time helps the chicken absorb the tasty sauces. Next, heat the vegetable oil in a large skillet or wok over medium-high heat. You want the oil to shimmer before adding anything. Then, add the minced garlic and sliced Thai chili peppers. Stir-fry them for about 30 seconds until they smell amazing. Be careful not to burn the garlic. Now, add the marinated chicken to the pan. Spread it out evenly for even cooking. Stir-fry for about 5 to 7 minutes. Cook until the chicken is no longer pink and has a nice brown color. After that, toss in the sliced bell pepper and onion. Stir-fry for another 3 to 4 minutes. This will make the vegetables tender but still crisp. Once the chicken and veggies are done, take the skillet off the heat. Gently fold in the fresh Thai basil leaves. They will wilt quickly from the heat and add a lovely aroma. Serve the dish hot, over a bed of fluffy jasmine rice. This rice complements the stir-fry well. Enjoy your Thai Basil Chicken Stir-Fry! For the full recipe, check out the details above. Using fresh ingredients makes a big difference. Fresh Thai basil gives a sweet and fragrant flavor to the dish. Always choose bright green basil leaves. They should smell strong and sweet. The chicken should be fresh, too. This keeps your stir-fry tasty and safe to eat. For the best flavor, cook on high heat. A hot pan helps to sear the chicken. This adds a nice caramel color and enhances the taste. When you add garlic and chili, cook them quickly. This brings out their strong flavors without burning them. You can change the heat level easily. If you want it milder, remove the seeds from the chili peppers. You can also use fewer peppers or substitute with sweet bell peppers. If you like a kick but want it less spicy, try adding sugar. It balances the heat. You can also use a bit of honey for sweetness without heat. Pair your Thai basil chicken stir-fry with jasmine rice. The rice absorbs the sauce well. You can also add a side of steamed veggies for extra nutrition. For garnishes, consider adding lime wedges or crushed peanuts. They add color and crunch. Fresh cilantro or extra basil leaves also make it pop. Enjoy your meal with these simple touches! For the full recipe, check out the details above. {{image_4}} For a vegetarian or vegan version, you can swap chicken for tofu or tempeh. These options give a nice texture. Use mushroom sauce instead of oyster sauce. It brings depth and umami flavor. For the fish sauce, simply add an extra tablespoon of soy sauce. This keeps the taste bold. To maintain flavor, marinate the tofu or tempeh just like chicken. Allow it to soak up the sauces. When cooking, make sure to press out excess moisture. This helps achieve that nice, crispy texture we all love. If you want to try something new, switch the chicken for shrimp or beef. Shrimp cooks quickly, so cut down the cooking time to about 3-4 minutes. Beef takes longer. Slice it thin and cook it for about 6-8 minutes. Remember, cooking times change based on what protein you use. Always make sure your protein is fully cooked before adding in the veggies. Want to shake things up? Add sauces like teriyaki or sriracha for an exciting twist. Teriyaki gives a sweet flavor, while sriracha adds heat. You can even mix both for a sweet and spicy kick. Feel free to experiment with herbs and spices too. Adding cilantro or mint can brighten the dish. Try a sprinkle of lime juice for an extra zest. These tiny changes can create a whole new taste experience. For the full recipe, check the section above. Enjoy cooking! To keep your Thai basil chicken stir-fry fresh, store it in an airtight container. Refrigerate the leftovers within two hours of cooking. If you want to save it longer, freeze the stir-fry. Make sure to cool it completely before freezing. This method helps retain flavor and texture. When you reheat your stir-fry, use a skillet for the best results. Heat it over medium warmth and stir often. This keeps the chicken juicy and prevents it from drying out. For rice, add a splash of water and cover it. This helps the rice steam and become fluffy again. In the fridge, your Thai basil chicken stir-fry lasts up to four days. If frozen, it can last for about three months. Always check for off smells or changes in color. If you see these, it's best to discard it for safety. Thai Basil Chicken Stir-Fry has roots in Thai street food. This dish reflects the vibrant flavors of Thai cuisine. It showcases fresh herbs, bold spices, and simple cooking techniques. Thai basil, known for its unique flavor, is key to this dish. It adds a sweet and slightly spicy note that enhances the chicken. This meal represents the balance of sweet, salty, and spicy tastes typical in Thai dishes. Each bite transports you to bustling markets in Thailand. Yes, you can prepare Thai basil chicken stir-fry in advance. Cook and store it in the fridge for up to three days. To keep it fresh, store it in an airtight container. When you are ready to eat, simply reheat it on the stove. This dish tastes even better the next day as flavors meld. Serve it over freshly cooked jasmine rice for a quick meal. If you cannot find Thai basil, you have options. Sweet basil or holy basil works well as a substitute. Sweet basil offers a milder flavor, while holy basil is spicier. You can also mix in a bit of mint for a fresh twist. While these substitutes change the taste slightly, they still create a tasty dish. Just remember, the flavor will differ from the original recipe. The spice level of Thai Basil Chicken Stir-Fry can vary. It depends on the number of Thai chili peppers you use. Typically, this dish has a mild to medium heat. If you prefer a milder dish, use fewer chilis or remove the seeds. For those who love heat, add extra chilis or a dash of hot sauce. Adjusting spice levels allows everyone to enjoy this flavorful meal. Thai Basil Chicken Stir-Fry is a simple yet flavorful dish. You learned about the key ingredients, like fresh basil and chicken. The step-by-step instructions make cooking easy, even for beginners. We explored tips to enhance flavor and adjust spice levels to suit your taste. You can even try fun variations with different proteins or herbs. Enjoy making it your own, and savor the fresh flavors. Every bite will bring joy to your table.](https://dishtreats.com/wp-content/uploads/2025/06/20a2f9de-1755-4b6a-ade1-393123d10e24-768x768.webp)


