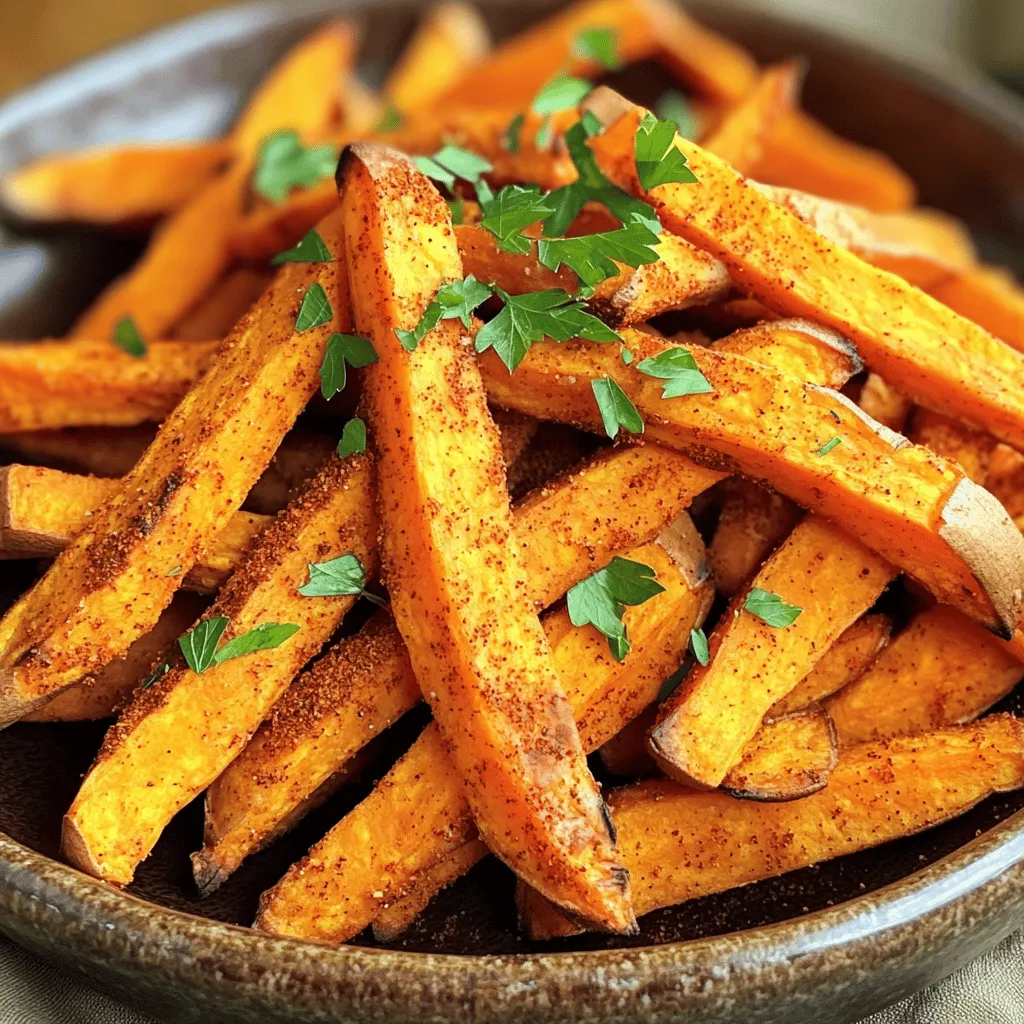
Air Fryer Spicy Sweet Potato Fries Crunchy and Flavorful
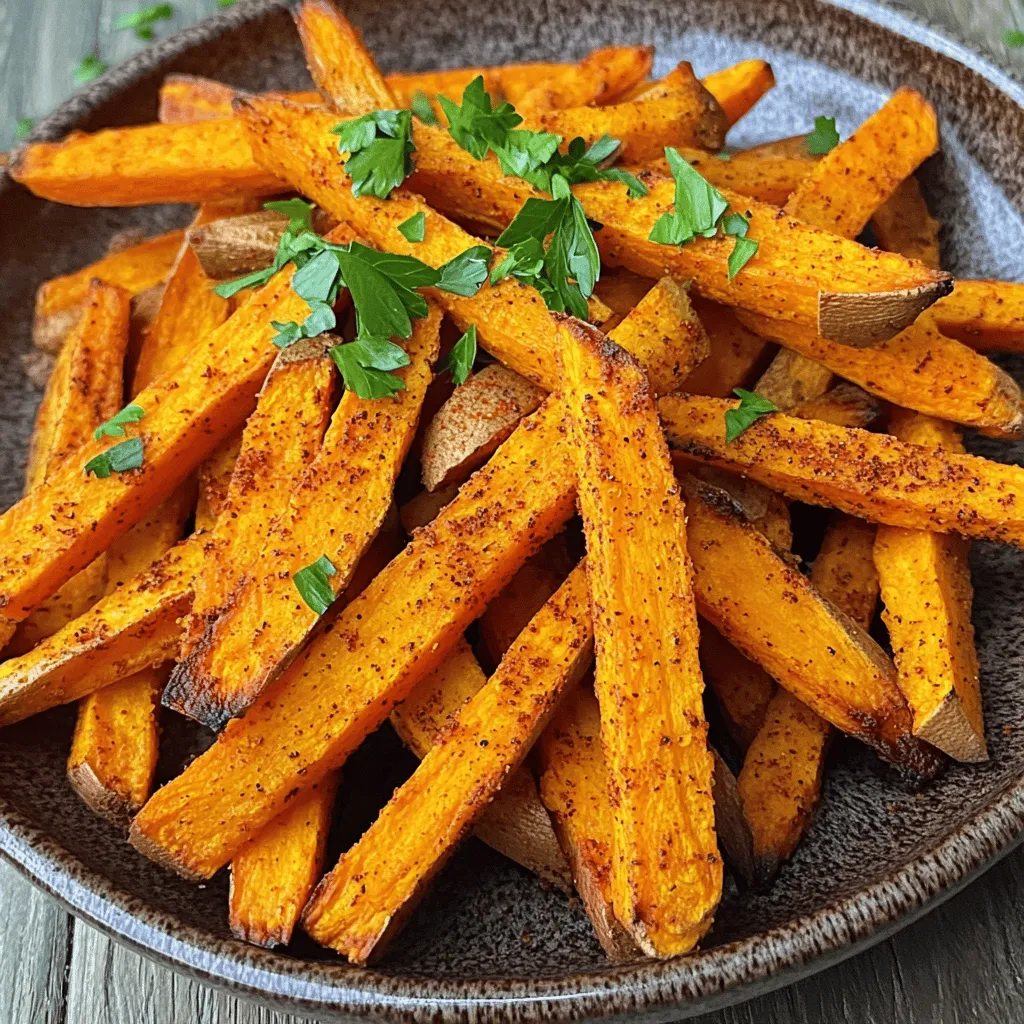
Looking to spice up your snack game? These Air Fryer Spicy Sweet Potato Fries are crunchy, flavorful, and easy to make! I’ll show you step-by-step how to whip up these tasty treats that are perfect for any occasion. Plus, I’ll share tips for getting the ideal crispiness and options for personalizing your spice level. Dive in and discover a new favorite side dish that’s sure to impress!
Ingredients
List of Ingredients
- 2 large sweet potatoes, peeled and cut into uniform fries
- 2 tablespoons extra virgin olive oil
- 1 teaspoon smoked paprika
- 1 teaspoon chili powder
- 1/2 teaspoon cayenne pepper (adjust based on your preferred spice level)
- 1 teaspoon garlic powder
- 1/2 teaspoon ground cumin
- Salt to taste
- Fresh parsley, finely chopped (for garnish)
Notes on Ingredient Quality
Using fresh sweet potatoes gives the best flavor and texture. Look for firm potatoes with smooth skin. Extra virgin olive oil adds richness and a hint of fruitiness. The spices should be fresh for the best taste. Check the dates on your spice jars to ensure they pack a punch.
Substitutes for Common Ingredients
If you don’t have sweet potatoes, you can try regular potatoes or even carrots. Canola oil or avocado oil works well instead of olive oil. For spices, you can skip the cayenne if you want milder fries. Use smoked paprika for that unique flavor, but regular paprika is fine too. If garlic powder is missing, fresh garlic works as well. Just chop it finely and use a small amount.
Step-by-Step Instructions
Preheating the Air Fryer
First, set your air fryer to 400°F (200°C). Preheat it for about 5 minutes. This step helps the fries cook evenly and get crispy.
Preparing the Sweet Potatoes
Next, take 2 large sweet potatoes. Peel them and cut them into uniform fries. Aim for a shape that is about 1/4 inch thick. This size helps them cook well.
Seasoning the Fries
In a big mixing bowl, add the sweet potato fries. Pour in 2 tablespoons of extra virgin olive oil. Toss the fries gently to coat them evenly. Now, sprinkle in the seasonings:
- 1 teaspoon smoked paprika
- 1 teaspoon chili powder
- 1/2 teaspoon cayenne pepper (more if you like it spicier)
- 1 teaspoon garlic powder
- 1/2 teaspoon ground cumin
- Salt to taste
Mix everything well to ensure each fry gets a good dose of flavor.
Cooking Process in the Air Fryer
Carefully place the seasoned fries into the air fryer basket. Make sure they are in a single layer. This helps them cook evenly. Cook them for 15 to 20 minutes at 400°F (200°C). Remember to shake the basket halfway through cooking. This step helps the fries crisp up nicely. They are done when they turn golden brown and feel crispy. Once cooked, take them out and place them on a plate. Garnish with finely chopped parsley for a fresh touch.
Tips & Tricks
How to Achieve Maximum Crispiness
To get the best crunch from your sweet potato fries, start by cutting them evenly. Try to make each fry about the same size. This helps them cook evenly. Next, don’t skip the olive oil. It adds flavor and helps with crispiness. Toss the fries well to coat them. When you place them in the air fryer, make sure they are in a single layer. If they overlap, they won’t crisp up right. Shake the basket halfway through cooking. This allows hot air to reach all sides of the fries.
Adjusting Spice Levels for Personal Preference
Adjusting spice levels is easy and fun. If you like it milder, use less cayenne pepper. Start with just a pinch and taste. You can always add more spice if you want it hotter. For those who love heat, feel free to increase the cayenne or add more chili powder. Just remember, the flavors build up, so go slow. You want your fries spicy but still tasty!
Recommended Dipping Sauces for Serving
Dipping sauces can make these fries even better. I love serving them with spicy mayo. It adds creamy heat that pairs well with the sweetness. Another great option is creamy avocado ranch. It cools down the spice and adds a fresh taste. You can also try a simple garlic aioli for a rich flavor. Don’t be afraid to get creative!
Variations
Add-Ons and Mix-Ins
You can make your sweet potato fries even better with fun add-ons. Try adding grated cheese right before they finish cooking. A sprinkle of parmesan adds a salty, rich taste. You can also toss in some chopped jalapeños for extra heat. Want a crunch? Add some panko breadcrumbs to the mix before cooking. It gives a nice texture.
Alternative Seasonings
Spice things up by changing the seasoning. Instead of smoked paprika, use curry powder for a warm twist. Or try a blend of Italian herbs for a herby flavor. You can even go sweet with cinnamon and a pinch of sugar. This gives your fries a unique taste that’s still yummy.
Vegetarian and Vegan-Friendly Versions
These fries are already vegetarian and vegan-friendly, but you can enhance them. Use coconut oil instead of olive oil for a subtle flavor shift. Add some nutritional yeast to the spices for a cheesy taste without dairy. If you enjoy a tangy kick, drizzle some lemon juice on top right after cooking. These tweaks keep the dish fresh and exciting!
Storage Info
How to Store Leftover Fries
To keep your leftover fries fresh, place them in an airtight container. Let them cool first. Once cool, cover them tightly. Store in the fridge for up to three days. This keeps them from getting soggy.
Reheating Tips for Optimal Texture
To reheat your fries, use the air fryer again. Preheat it to 350°F (175°C). Place the fries in a single layer. Heat for about 5-7 minutes. This helps them regain their crispiness. You can also use an oven at the same temperature. Spread the fries on a baking sheet and bake for 10 minutes.
Freezing Options
If you want to keep fries longer, freezing is a great choice. First, let them cool completely. Then, spread them on a baking sheet. Freeze for about an hour. This prevents them from sticking together. After they are frozen, transfer them to a freezer bag. They can last for up to three months. When ready to eat, cook them directly from frozen in the air fryer.
FAQs
What is the best way to cut sweet potatoes for fries?
The best way to cut sweet potatoes for fries is to make uniform sticks. Aim for about 1/4 to 1/2 inch thick. This size helps them cook evenly and get crispy. Use a sharp knife for clean cuts. You can also use a mandoline for even slices.
Can I use regular potatoes instead of sweet potatoes?
Yes, you can use regular potatoes. They will taste different but will still be tasty. Just remember, regular potatoes may not be as sweet or nutritious as sweet potatoes. The cooking time may vary slightly, so keep an eye on them.
How do I know when the fries are cooked?
You will know the fries are cooked when they turn golden brown. They should also feel crispy on the outside. Use a fork to check the inside; it should be soft. If you shake the basket halfway through cooking, it helps them cook evenly.
Can I make these fries in a conventional oven?
Yes, you can make these fries in a conventional oven. Preheat your oven to 425°F (220°C). Spread the fries on a baking sheet in a single layer. Bake for about 25-30 minutes, flipping halfway through for even cooking.
How spicy are these fries with the cayenne pepper?
The fries have a nice kick with cayenne pepper. If you like heat, use the full 1/2 teaspoon. If you prefer mild, use less. You can always taste and add more spice if needed. Adjusting the spice lets you customize the heat level.
What are the nutritional benefits of sweet potatoes?
Sweet potatoes are very nutritious. They are high in vitamins A and C. They also provide fiber and potassium. Eating sweet potatoes can help with digestion and vision. Plus, they are lower in calories than regular potatoes. Enjoying them baked or fried is a great choice!
You learned how to make crispy sweet potato fries with the air fryer. We covered ingredient quality, cooking steps, and tips for perfect results. You can try various seasonings and even make vegan versions. Storing and reheating leftover fries ensures you enjoy them later.
Now, you have the tools to create tasty, healthy snacks. Get ready to impress friends and family with your new skills!


. To make One-Pan Garlic Herb Salmon, I start by gathering all my ingredients. This way, I avoid running around the kitchen. I always preheat my oven to 400°F (200°C). This ensures the salmon cooks evenly. I make sure to have a large baking dish or a lined baking sheet ready for the salmon. 1. First, I whisk together the olive oil, garlic, oregano, thyme, smoked paprika, salt, and pepper in a mixing bowl. This creates a tasty marinade. 2. Next, I place the salmon fillets skin-side down in the baking dish. I use a brush or spoon to coat each fillet with the marinade. I want to make sure each piece is well covered. 3. I then arrange lemon slices, halved cherry tomatoes, and zucchini around the salmon. I drizzle any leftover marinade over the veggies for extra flavor. 4. After that, I transfer the dish to the oven and bake for 12 to 15 minutes. The salmon should flake easily when done, and the veggies should look vibrant. 5. Once cooked, I take the dish out and let it rest for a few minutes. This helps the flavors blend better. 6. Just before serving, I sprinkle fresh parsley on top for a nice touch. To get the best salmon, I recommend using high-quality fillets. Fresh salmon tastes better than frozen. Keep an eye on the cooking time. Overcooking can dry out the fish. If you like crispy skin, place the salmon skin-side up under the broiler for the last minute. This gives it a nice crunch. If you're looking for the full recipe, check out the Full Recipe section. Enjoy your meal! To get crispy skin on your salmon, dry it well before cooking. Pat the skin with paper towels to remove moisture. This step helps the skin crisp up nicely. Use high-quality olive oil in your marinade. This oil helps the skin get golden and crunchy. Bake the salmon skin-side down, and avoid flipping it. This keeps the skin intact and crispy. For added flavor, try using fresh herbs instead of dried. Fresh parsley or dill adds a bright taste. Lemon zest is another great addition. It brings a fresh zing that pairs well with salmon. You can also add a splash of white wine to the baking dish. This adds depth to the sauce and enhances the overall flavor. One common mistake is overcrowding the pan. Make sure each salmon fillet has space around it. This helps the heat circulate and cook evenly. Another mistake is not checking for doneness. Salmon should flake easily with a fork. If you overcook it, it may become dry. Lastly, don’t skip the resting step after baking. Letting it rest helps the juices redistribute, leading to a juicier fillet. For the complete recipe, check out the Full Recipe section. {{image_4}} You can change up the veggies in this dish. Try using asparagus, bell peppers, or broccoli. These vegetables cook well and add color. They also provide different flavors. For a twist, add spinach or kale near the end of cooking. This keeps them bright and fresh. This recipe is naturally gluten-free and dairy-free. If you need to avoid gluten, ensure your ingredients are certified gluten-free. You can use coconut oil instead of olive oil for a different flavor. This keeps the dish healthy and tasty. You can cook this salmon in several ways. Besides baking, try grilling it for a smoky taste. To do this, preheat your grill and cook the salmon on medium heat. You can also pan-sear it on the stovetop. Just heat a non-stick pan and cook the salmon for about 4-5 minutes per side. Each method gives you a unique flavor and texture. For the full recipe, check out the One-Pan Garlic Herb Salmon Delight. After you enjoy your One-Pan Garlic Herb Salmon, store leftovers quickly. Place the salmon and veggies in an airtight container. This keeps them fresh and tasty. Make sure to cool them to room temperature before sealing. Store in the fridge for up to three days. If you want to keep it longer, freezing is a great option. When you're ready to eat leftovers, avoid the microwave if you can. It can dry out the salmon. Instead, preheat your oven to 350°F (175°C). Place the salmon and veggies on a baking sheet. Cover them with foil to keep moisture in. Heat for about 10 to 15 minutes, or until warm. You can also reheat in a skillet over low heat, adding a bit of olive oil to keep it moist. Freezing is a smart way to save your One-Pan Garlic Herb Salmon. To freeze, wrap each salmon fillet in plastic wrap, then place them in a freezer-safe bag. Remove as much air as possible before sealing. The veggies can go in the same bag or a separate one. This meal can last in the freezer for up to three months. When you're ready to eat, thaw it overnight in the fridge before reheating. Enjoy! You can tell salmon is cooked when it flakes easily with a fork. The fish should change from translucent to a light pink color. The internal temperature should reach 145°F (63°C). Always use a food thermometer for the best results. Yes, you can use frozen salmon! Just make sure to thaw it first. Place the salmon in the fridge overnight or use a quick method by sealing it in a bag and running it under cold water. This keeps the fish safe and helps it cook evenly. You can serve this dish with many sides. Try steamed rice, quinoa, or a fresh salad. Roasted vegetables pair well too. For a full meal, consider serving garlic bread or a light pasta. You can find the Full Recipe for One-Pan Garlic Herb Salmon here, which gives a complete picture of this delightful dish. In this blog post, we explored the best ingredients for making One-Pan Garlic Herb Salmon. I shared quality recommendations, possible substitutions, and step-by-step cooking instructions. You learned tips for achieving crispy skin and enhancing flavors. We discussed variations using different vegetables and cooking methods, along with storage and reheating tips. Remember, cooking salmon can be easy and fun. Stick to the tips and enjoy your meal! Check out the full recipe for detailed steps.](https://dishtreats.com/wp-content/uploads/2025/06/57d74547-3b02-425a-a5fa-1ca9189b97a5-768x768.webp)