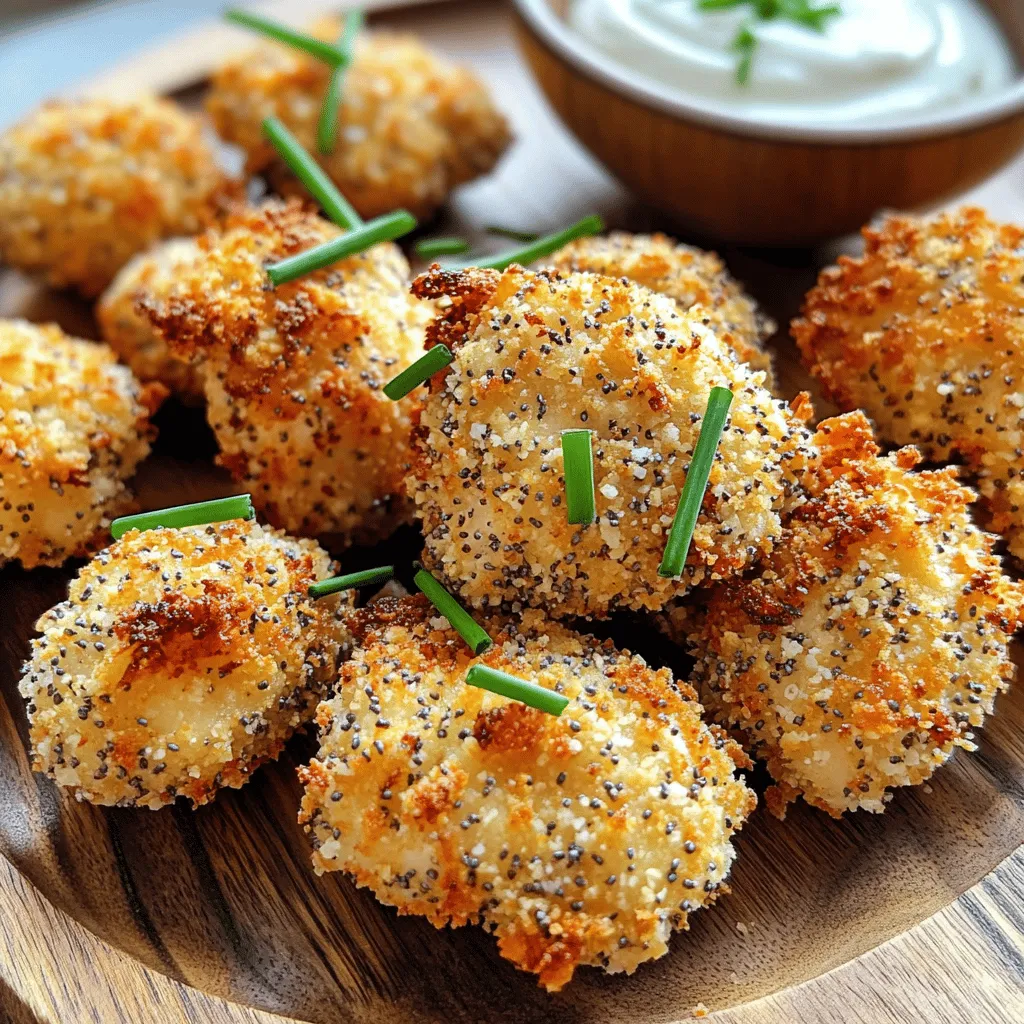
Air Fryer Everything Bagel Chicken Bites Crunchy Treat
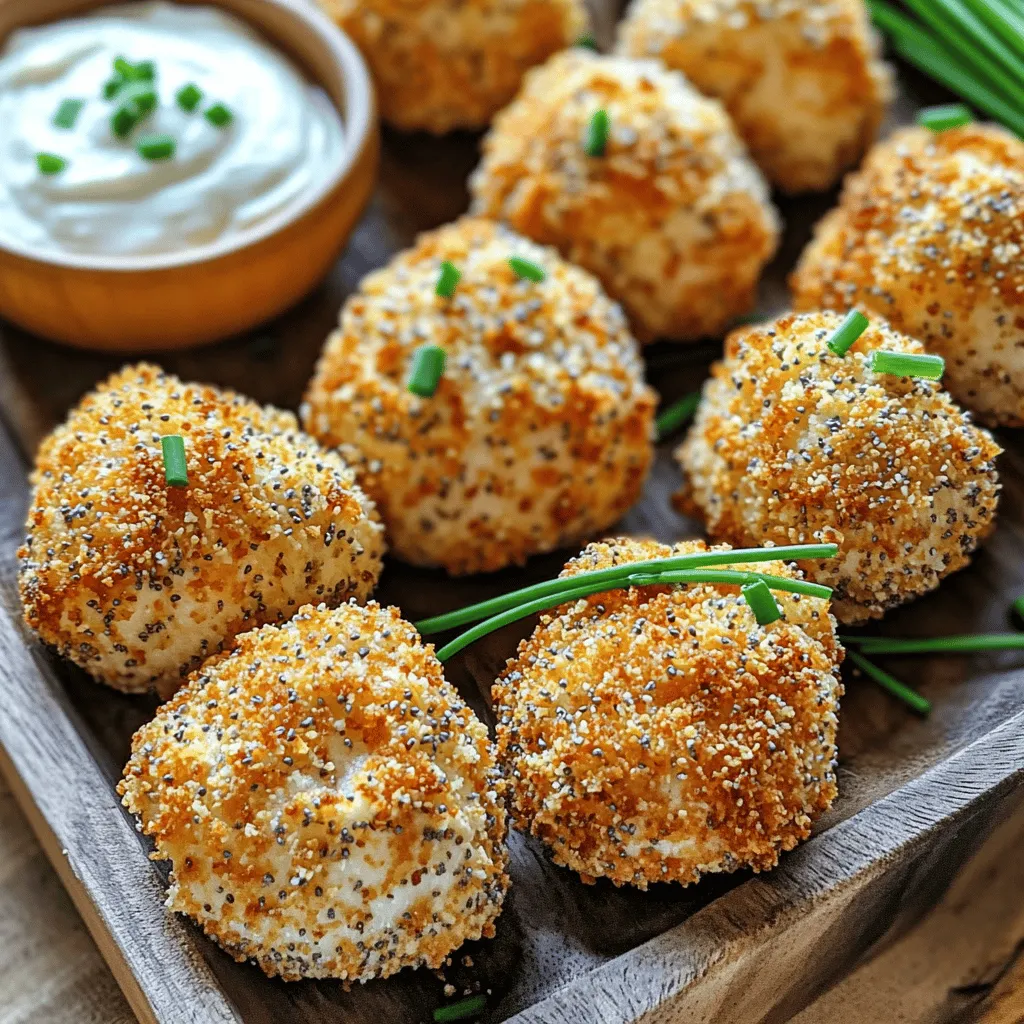
If you crave a tasty snack that’s easy to make, I’ve got just the thing! Air Fryer Everything Bagel Chicken Bites are a crunchy treat you won’t want to miss. With simple ingredients and a few quick steps, you can enjoy a delightful bite, packed with flavor. Let’s dive into how to create this fun dish that’s perfect for game day or a quick snack anytime!
Ingredients
To make Air Fryer Everything Bagel Chicken Bites, gather these fresh and simple ingredients:
- 1 pound chicken breast, cut into bite-sized chunks
- 1 cup panko breadcrumbs
- 2 tablespoons everything bagel seasoning
- 1 teaspoon garlic powder
- 1 teaspoon onion powder
- 1/2 teaspoon black pepper
- 1/2 teaspoon salt
- 1 large egg, beaten
- 2 tablespoons olive oil (plus more for spraying)
These ingredients bring together the crunch and flavor you crave. The chicken breast provides a lean protein base. Panko breadcrumbs add that delightful crunch we love in a good snack. Everything bagel seasoning packs a punch of flavor, making these bites stand out.
Garlic and onion powders enhance the taste without overpowering it. Black pepper and salt help balance all the flavors. The egg acts as glue, keeping the breadcrumbs on the chicken. Lastly, olive oil adds richness and helps achieve that golden brown finish in the air fryer.
With these items, you’ll create a tasty treat that’s perfect for snacking or serving at a gathering. Don’t skip the olive oil spray; it’s key for crispiness!
Step-by-Step Instructions
Preparing the Coating
- In a bowl, mix together the panko breadcrumbs, everything bagel seasoning, garlic powder, onion powder, black pepper, and salt. Stir well to combine all the dry ingredients.
- Next, take the chicken pieces and dip each one into the beaten egg. Let any extra egg drip off, then roll the chicken in the seasoned panko mixture. Press down gently to help the crumbs stick to the chicken.
Cooking in the Air Fryer
- Preheat your air fryer to 400°F (200°C) for about 5 minutes. This step is key for a crispy finish.
- Lightly spray the air fryer basket with olive oil. This helps prevent sticking.
- Arrange the coated chicken bites in a single layer in the basket. Make sure they do not overlap, as this ensures even cooking. If you have a lot, cook in batches.
- Lightly spray the tops of the chicken bites with olive oil for extra crunch.
- Cook the chicken bites for 10-12 minutes. Flip them halfway through to brown both sides. They should turn golden brown and reach an internal temperature of 165°F (75°C).
Final Touches
- Once the chicken bites are done, carefully remove them from the air fryer. Let them cool for a few minutes before serving. This cooling time helps enhance their flavor.
Tips & Tricks
Achieving Perfect Crispiness
Preheating your air fryer is key. It creates a hot environment that helps the chicken bites crisp up nicely. Set your air fryer to 400°F (200°C) and let it warm for about 5 minutes.
Using olive oil spray is also important. A light spray on the chicken bites before cooking adds flavor and helps achieve a golden crust. It prevents sticking and ensures they turn out crispy every time.
Common Mistakes to Avoid
Avoid overcrowding the air fryer. If the chicken bites are too close together, they won’t cook evenly. This can lead to soggy areas instead of a nice crunch. Cook in batches if needed.
Not measuring ingredients can ruin your dish. Stick to the recipe for the best results. Each spice and ingredient adds unique flavor, so be precise when mixing dry ingredients.
Serving Suggestions
Pair your chicken bites with dips for extra fun. Cream cheese dip or a zesty yogurt-based dip works great. They add a creamy contrast to the crunchy bites.
Garnishing options can elevate your dish. Freshly chopped chives or parsley not only looks good but also adds a fresh taste. Serve the chicken bites on a vibrant platter for an eye-catching presentation.
Variations
Flavor Variations
You can add a spicy twist to your chicken bites. Just toss in some hot seasoning. Try cayenne pepper or chili powder for a kick. Mix these with your breadcrumbs for a zesty flavor.
You might also enjoy alternative seasoning blends. Consider using ranch seasoning or taco seasoning. These add unique tastes and keep things exciting.
Ingredient Swaps
If you want to switch things up, use turkey instead of chicken. Ground turkey works well too. It keeps the bites moist and tasty.
For those who need gluten-free options, swap panko breadcrumbs with crushed cornflakes or gluten-free breadcrumbs. This keeps the crunch without gluten.
Storage Info
Storing Leftovers
To keep your Air Fryer Everything Bagel Chicken Bites fresh, store them correctly. First, let the chicken bites cool completely. Place them in an airtight container. This prevents moisture and keeps them crispy. You can also use a resealable plastic bag for easy storage. Just remove as much air as you can before sealing. For best results, keep them in the fridge. They will stay good for up to three days.
Reheating Tips
When you want to enjoy your leftovers, reheating is key. To keep the bites crispy, I recommend using the air fryer again. Preheat it to 375°F (190°C). Place the chicken bites in a single layer. Cook for about 5-7 minutes, flipping halfway through. This method revives the texture without making them soggy. If you don’t have an air fryer, you can use the oven. Set it to 375°F (190°C) and bake for 10-15 minutes. Always check that they reach an internal temperature of 165°F (75°C) before eating.
FAQs
Can I make Air Fryer Everything Bagel Chicken Bites ahead of time?
Yes, you can make these chicken bites ahead of time. To prep in advance, follow these steps:
- Coat the Chicken: Prepare the chicken bites and coat them in the panko mixture.
- Store in the Fridge: Place the coated chicken bites in an airtight container. They can stay fresh for up to 24 hours.
- Cook When Ready: When you are ready to eat, just air fry them. You might need to add a minute or two to the cooking time if they are cold.
How do I know when the chicken is fully cooked?
To know if the chicken is fully cooked, check the internal temperature.
- The chicken should reach 165°F (75°C) to be safe to eat.
- Use a meat thermometer to check this. Insert it into the thickest part of a chicken piece.
- If it reads 165°F (75°C), you’re good to go. If not, cook for a few more minutes and check again.
Can I use other proteins for this recipe?
Yes, you can use other proteins for this recipe. Here are some suggestions:
- Turkey Breast: Cut it into bite-sized pieces, just like chicken.
- Pork Tenderloin: Slice it into small chunks and coat as you would with chicken.
- Tofu: For a vegetarian option, use firm tofu. Just press it to remove excess water and then coat it.
Feel free to get creative with your protein choice!
In this post, we covered how to make Air Fryer Everything Bagel Chicken Bites. You learned about the ingredients needed and followed step-by-step instructions for coating and cooking. We discussed tips for crispiness and common mistakes to avoid. Variations and storage tips ensure you can enjoy these bites later.
These easy chicken bites are sure to please everyone. Experiment with flavors, and enjoy your meal!

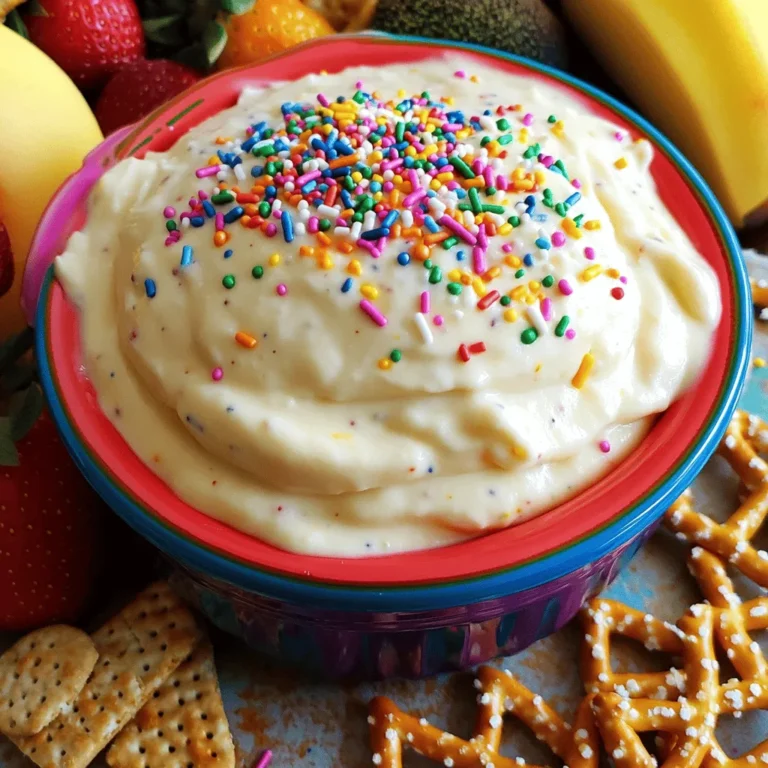
![To make a delicious strawberry banana smoothie, you need fresh ingredients. Here’s what to gather: - 1 cup fresh strawberries, hulled - 1 ripe banana, sliced into rounds - 1 cup Greek yogurt (can be plain or flavored) - 1 cup almond milk (or any milk of your choice) - 1 tablespoon honey (optional, can be adjusted to taste) - 1 tablespoon chia seeds - 1 teaspoon pure vanilla extract - A handful of ice cubes These ingredients pack a punch of flavor and nutrients. The strawberries give a sweet and tangy taste. The banana adds creaminess and natural sweetness. Greek yogurt provides protein and a smooth texture. Almond milk keeps it light. You can customize your smoothie with optional add-ins. Here are a few ideas: - Spinach or kale for added greens - Protein powder for an extra boost - Nut butter for richness and healthy fats - Flax seeds for more fiber - Coconut flakes for tropical flavor Feel free to mix and match these to fit your taste. Each add-in changes the flavor and nutrition a bit. To make your smoothie, you don't need much. Here’s what I recommend: - A high-speed blender for a smooth mix - A measuring cup for accurate amounts - A knife for slicing the banana - A cutting board for easy prep This simple equipment makes the process quick and fun. You’ll enjoy making your strawberry banana smoothie with these tools! For the full recipe, check out the Berry Bliss Banana Smoothie section. First, rinse your strawberries under cold water. This removes any dirt. Next, hull the strawberries by taking off the green tops. This step makes them sweet and tasty. Slice your banana into small rounds. The smaller pieces make blending easier. They also help release more sweetness. Grab a high-speed blender. Add the hulled strawberries and banana slices. Next, include Greek yogurt and almond milk. If you want extra sweetness, add honey. Don't forget your chia seeds and vanilla extract. Measure everything well for the best taste. Now, toss in a handful of ice cubes. This will chill your smoothie and make it refreshing. Blend on high until smooth and creamy. If it’s too thick, add a little more almond milk. Taste your smoothie and adjust the honey if you like it sweeter. Pour it into your favorite glasses. For a great look, add a fresh strawberry slice on the rim. You can also sprinkle some chia seeds on top. Enjoy your drink with colorful straws for a fun touch! To get the best smoothie texture, start with ripe fruit. Ripe strawberries and bananas blend smoothly and taste sweeter. Use a high-speed blender to mix all ingredients well. If your smoothie is too thick, add more almond milk slowly. Keep blending until it’s creamy and smooth. This ensures no chunks remain, giving you that perfect sip. Many people make simple mistakes when making smoothies. One common error is not measuring ingredients. Accurate measurements give a balanced flavor. Another mistake is adding too much ice. Ice is great for chill, but too much can make it watery. Always blend your smoothie long enough to mix all ingredients well. If you skip this step, you might end up with a grainy texture. You can boost the flavor and nutrition of your smoothie easily. Add a spoonful of nut butter for richness and protein. A sprinkle of cinnamon can add warmth and depth. If you want more nutrients, try adding spinach or kale. These greens blend well and don’t change the taste much. For sweetness, adjust the honey to your liking. Following these tips can make your drink even more enjoyable while keeping it healthy. For the complete recipe, check the Full Recipe section. {{image_4}} You can switch up the fruits in your smoothie for fun. If you want, try mango or blueberries instead. These fruits add new flavors and colors. You can also mix in some spinach or kale. This adds nutrients without changing the taste much. Just remember to keep the same amount of fruit for balance. If you want a dairy-free smoothie, it's easy! Use coconut yogurt instead of Greek yogurt. Almond milk works great too, but you can choose oat or soy milk as well. These options keep your smoothie creamy while being kind to your tummy. Check the labels for any added sugars if you're watching your intake. Want to boost your smoothie’s health? Add a scoop of protein powder for energy. You can also toss in flax seeds or hemp seeds for omega-3s. For fiber, try adding oats. They blend well and keep you full longer. You can find these extras at local stores or online. Just remember, keep your total additions balanced to maintain that delicious taste from the [Full Recipe]. If you have leftover smoothie, pour it into a container. Seal it tightly. Refrigerate the smoothie. It stays fresh for up to 24 hours. Just remember, smoothies can separate. Give it a good shake before you drink it again. Freezing smoothies is easy and smart! Pour your smoothie into ice cube trays. Once frozen, pop the cubes into a freezer bag. They last for about three months. You can blend them later with a bit of milk for a quick treat. Use glass jars or BPA-free plastic containers for storage. They help keep the smoothie fresh. Choose containers with tight lids to prevent spills. Make sure they are easy to clean for hassle-free use. Yes, you can use frozen strawberries and bananas. They make the smoothie colder and creamier. Frozen fruit also lasts longer and is easy to keep on hand. Just remember to adjust the amount of almond milk if it gets too thick. To make a thicker smoothie, use less liquid. You can also add more yogurt or fruit. Frozen bananas work well for thickness. If you want a creamier texture, try adding avocado or a scoop of nut butter. This smoothie packs many health benefits. Strawberries are rich in vitamin C and antioxidants. Bananas provide potassium and fiber, which is good for digestion. Greek yogurt adds protein, making it filling. Chia seeds are great for omega-3s and help keep you full longer. Enjoy this smoothie as a tasty way to fuel your day! For the complete recipe, check out the Full Recipe section above. In this blog post, we explored how to make a great smoothie. We discussed fresh ingredients, optional add-ins, and the tools you need. I gave step-by-step instructions on preparing fruits, blending, and adding final touches. You learned tips to get the best texture and how to avoid common mistakes. I shared variations and storage tips for smoothies too. Smoothies are fun, easy, and healthy. With the right steps, you can create flavors you love!](https://dishtreats.com/wp-content/uploads/2025/06/52d7bf2d-2fe9-4d4d-9d05-04ba55bebe58-768x768.webp)