Creamy Garlic Parmesan Gnocchi 15 Minutes Delight
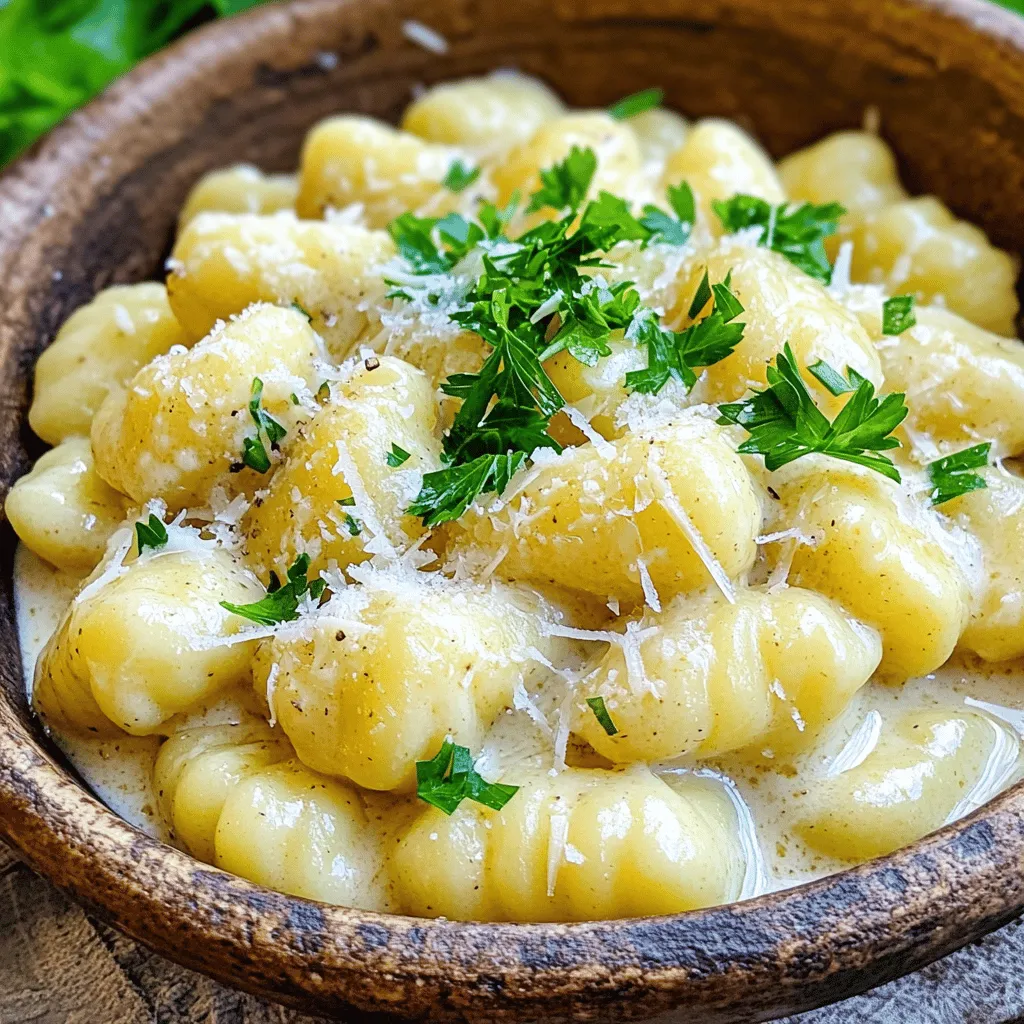
Craving a quick and tasty meal? This Creamy Garlic Parmesan Gnocchi takes just 15 minutes to make! You’ll enjoy the rich flavors of garlic and cheese, combined with soft gnocchi. Whether you’re a busy professional or a home cook, this dish is simple and satisfying. Let’s dive into the ingredients and steps to create this delicious dinner that will impress in no time!
Ingredients
Main Ingredients
- 1 package (16 oz) gnocchi
- 2 tablespoons unsalted butter
- 4 cloves garlic, minced
Dairy Ingredients
- 1 cup heavy cream
- 1 cup freshly grated Parmesan cheese
Seasoning Ingredients
- 1/2 teaspoon garlic powder
- Salt and freshly ground black pepper to taste
- Fresh parsley, finely chopped (for garnish)
The main ingredients of this dish set the stage for a rich, flavorful experience. Gnocchi serves as the base, providing a soft and pillowy texture. Unsalted butter and garlic blend together to create a fragrant foundation for our sauce.
For the dairy, heavy cream adds a luscious quality, while fresh Parmesan cheese brings depth and richness. These two work together to make the sauce creamy and satisfying.
The seasoning ingredients elevate the dish. Garlic powder adds an extra layer of flavor. Salt and black pepper enhance the overall taste, making it more robust. Fresh parsley brings a pop of color and freshness, making this dish visually appealing.
Gather these ingredients, and you are ready to create a delightful meal in just 15 minutes!
Step-by-Step Instructions
Preparing the Gnocchi
First, grab a large pot and fill it with water. Add salt to the water. Bring this water to a rolling boil. You want it hot! Once it boils, add the gnocchi. Cook them for about 2-3 minutes. You’ll know they are done when they float. This means they are ready! Drain the gnocchi in a colander and set them aside.
Making the Creamy Garlic Sauce
Next, take a spacious skillet. Put it on medium heat and add the unsalted butter. Once the butter melts, add the minced garlic. Sauté the garlic for 1-2 minutes. Stir it often. You want it fragrant and golden. Be careful not to burn the garlic! After that, slowly pour in the heavy cream. Keep stirring as you add it. Let the mixture simmer for 1-2 minutes. Then, whisk in the grated Parmesan cheese. Keep whisking until the sauce is creamy and smooth.
Combining Gnocchi and Sauce
Now, it’s time to mix! Add the cooked gnocchi into the skillet. Use a spatula or a wooden spoon to toss them. Coat the gnocchi in the creamy garlic sauce. This is where the magic happens! Season the dish with garlic powder, salt, and freshly ground black pepper. Taste it and adjust as needed. Enjoy the rich flavors!
Tips & Tricks
Perfecting the Sauce
To make a creamy sauce, use heavy cream and fresh Parmesan cheese. Start by melting two tablespoons of butter in a skillet over medium heat. Add minced garlic and sauté it for one to two minutes. Stir often to avoid burning the garlic. Burnt garlic can taste bitter, ruining your dish. If your garlic turns brown too fast, turn down the heat. Once the garlic is fragrant, pour in the cream slowly. Keep stirring to mix well. When the sauce is simmering, add the grated Parmesan. Whisk until the sauce is smooth and creamy.
Gnocchi Cooking Tips
For the best gnocchi texture, boil salted water in a large pot. When the water is boiling, add the gnocchi. They typically cook in two to three minutes. Watch for them to float to the surface. This means they are done. If your gnocchi do not float, they may need more time. Let them cook a little longer until they rise. Once cooked, drain the gnocchi in a colander. Toss them gently in the sauce to coat well. Enjoy the creamy garlic goodness in every bite.

Variations
Add-in Ingredients
You can mix things up with add-in ingredients. Adding vegetables can boost flavor and nutrition. I love using spinach or mushrooms. They add color and texture. Just sauté them with the garlic before adding cream.
You might want some protein too. Chicken or shrimp works great in this dish. Cook the protein first, then toss it in with the gnocchi. It makes the meal heartier and more filling.
Dietary Modifications
If you need dietary changes, there are options. You can find gluten-free gnocchi at many stores. This keeps the dish tasty for those who avoid gluten.
For a vegan version, swap the cream and cheese. Use coconut cream or cashew cream instead. Nutritional yeast can replace the Parmesan. This gives you that cheesy flavor without dairy. Enjoy crafting your own twist on this creamy delight!
Storage Info
Storing Leftovers
To keep your creamy garlic parmesan gnocchi fresh, store it in an airtight container. This helps prevent moisture loss and keeps flavors intact. You can place the container in your fridge. Your leftovers will stay good for 3 to 4 days. If you want to keep them longer, consider freezing. Just make sure to use a freezer-safe container. Frozen gnocchi can last up to 2 months.
Reheating Instructions
When you’re ready to enjoy your leftovers, reheating is key. The best way to reheat gnocchi is on the stove. Place it in a skillet over low heat. Add a splash of cream or water to help the sauce. Stir gently to warm it through. This keeps the sauce smooth and prevents it from separating. You can also use the microwave, but it may not heat evenly. If you choose this method, cover the dish and add a little liquid. Happy reheating!
FAQs
How long does it take to make creamy garlic parmesan gnocchi?
It takes just 15 minutes to make creamy garlic parmesan gnocchi. Here’s how the time breaks down:
- Prep time: 5 minutes
- Cook time: 10 minutes
You cook the gnocchi for about 2-3 minutes in boiling water. While the gnocchi cooks, you can make the creamy garlic sauce in the skillet. This quick method makes it easy to enjoy a delicious meal without spending too much time in the kitchen.
Can I use store-bought gnocchi?
Yes, you can use store-bought gnocchi. It saves time and is very convenient. Fresh gnocchi will taste great, but dry gnocchi works too. Store-bought gnocchi often cooks faster, so check the package for cooking time. The flavor of the dish remains rich and creamy, no matter which type you choose.
What can I serve with creamy garlic parmesan gnocchi?
Creamy garlic parmesan gnocchi pairs well with various side dishes. Here are some suggestions:
- Steamed vegetables: Broccoli or green beans add color and nutrients.
- Salad: A fresh side salad balances the richness of the gnocchi.
- Garlic bread: Perfect for soaking up any extra sauce.
- Protein: Grilled chicken or shrimp enhances the meal’s heartiness.
These sides complement the dish and create a satisfying dining experience. Enjoy mixing and matching to find your perfect combination!
In this blog post, we explored how to make creamy garlic parmesan gnocchi, from key ingredients to step-by-step instructions. I shared tips on perfecting the sauce and cooking the gnocchi just right. Remember, adding veggies or proteins can enhance your dish. You can also adjust it for different diets. Store leftovers properly to enjoy them later, and follow reheating tips to keep it creamy. With these insights, you can confidently create a delicious meal at home. Enjoy your cooking!


![To make Chicken Pesto Pasta Salad, you need fresh and tasty ingredients. Here’s what you will use: - 2 cups penne pasta - 1 cup cooked chicken breast, shredded - 1/2 cup cherry tomatoes, halved - 1/2 cup mozzarella balls, drained - 1/4 cup fresh basil leaves, chopped - 1/4 cup pesto sauce - 2 tablespoons extra virgin olive oil - Juice of 1 fresh lemon - Salt and black pepper to taste - Optional: 1/4 cup pine nuts, toasted Each ingredient brings its own flavor. The penne pasta serves as a great base. The chicken adds protein. Tomatoes give freshness, while mozzarella adds creaminess. You can change things up with add-ins. Here are some great options: - Spinach or arugula for extra greens - Bell peppers for crunch - Grated Parmesan cheese for a salty kick - Cooked bacon for a smoky flavor - Quinoa instead of pasta for a healthier twist Feel free to mix and match. Your salad can be unique each time you make it. When it comes to pesto, you have choices. You can use fresh homemade pesto or store-bought pesto. Fresh pesto tastes bright and bold. You can make it with basil, garlic, pine nuts, cheese, and olive oil. Store-bought pesto saves time but may have preservatives. Both options work well in your salad. I recommend trying fresh pesto if you have the time. It elevates the dish and adds a personal touch. For the full recipe, check out the [Full Recipe]. 1. Cook the Pasta: Start by boiling water in a large pot. Add salt for flavor. When it boils, add 2 cups of penne pasta. Cook until al dente, about 8-10 minutes. Drain the pasta and rinse it with cold water to cool it down. 2. Mix the Ingredients: In a big mixing bowl, add 1 cup of shredded cooked chicken, 1/2 cup of halved cherry tomatoes, and 1/2 cup of drained mozzarella balls. Use a spatula to mix them well. 3. Combine with Pasta: Add the cooled penne pasta to the bowl. Gently mix to combine everything. Be careful not to break the mozzarella balls. 4. Make the Dressing: In a small bowl, whisk together 1/4 cup of pesto sauce, 2 tablespoons of extra virgin olive oil, and the juice from 1 fresh lemon. Add a pinch of salt and black pepper. 5. Dress the Salad: Pour the dressing over the pasta salad. Use a spoon or tongs to toss everything gently. Make sure all the ingredients are coated. 6. Fold in Fresh Herbs: Add 1/4 cup of chopped fresh basil and optional 1/4 cup of toasted pine nuts. Gently fold them into the salad without bruising the basil. 7. Taste and Adjust: Taste your salad. If it needs more flavor, add more salt, pepper, or lemon juice. 8. Chill Before Serving: Cover the salad with plastic wrap. Let it chill in the fridge for at least 30 minutes. This helps the flavors mix well. - Use a large pot to give the pasta room to move. - Salt the water before adding pasta. This makes it taste better. - Stir the pasta often while it cooks to prevent sticking. - Always taste the pasta a minute before the time is up. It should be firm but not hard. Making the dressing is quick and easy. In just a few steps, you can create a burst of flavor. Start with fresh pesto sauce. If you like a creamier dressing, mix in some yogurt or sour cream. Always taste your dressing before adding it to the salad. Adjust the flavors based on your taste. This simple dressing brings the whole dish together and makes it shine. For the full recipe, check out the details above. Mixing ingredients well is key to flavor. Start with the pasta. Make sure it is cold before adding other items. This keeps everything fresh. Next, add the chicken, tomatoes, and mozzarella. Use a spatula to fold gently. This ensures the mozzarella stays whole. It adds nice pops of flavor to each bite. Taste your dish as you cook. Start with a pinch of salt and pepper. The lemon juice adds brightness, so taste it first. If it needs more zing, add another squeeze. Always remember that you can add more, but you can't take it out. This rule helps you control the flavors. For a great look, serve the salad in a big bowl. Layer the salad for a beautiful view. Add extra basil leaves on top. A sprinkle of toasted pine nuts adds crunch. This makes your dish eye-catching and fun. Enjoy serving this colorful salad at any gathering! You can find the full recipe in the main article. {{image_4}} You can boost your Chicken Pesto Pasta Salad with more veggies and proteins. Adding fresh spinach or arugula gives a nice crunch. Bell peppers add color and sweetness. Toss in some peas or zucchini for a nutritious kick. You can also swap chicken for shrimp, tofu, or chickpeas. This way, you can cater to different tastes and dietary needs. When it comes to ingredients, you have choices. Using homemade pesto elevates your dish. It tastes fresh and bright. You can easily make pesto with basil, nuts, olive oil, and garlic. If you’re short on time, store-bought pesto works too. Just pick a brand with simple, quality ingredients. This saves time without losing flavor. You can adjust this recipe for various diets. For a gluten-free option, use gluten-free pasta. Many brands offer great alternatives. If you want a vegan version, replace the chicken with chickpeas or roasted vegetables. Use a vegan pesto made from nuts and nutritional yeast instead of cheese. These swaps keep the dish tasty and satisfying for everyone. To store leftover chicken pesto pasta salad, place it in an airtight container. Make sure the lid seals tightly to keep the salad fresh. You can keep it in the fridge for up to three days. If you notice the salad looking dry, add a splash of olive oil or lemon juice before serving. This will help restore some moisture. Freezing pasta salad is not the best choice since the texture can change. If you do want to freeze it, separate the chicken and pasta from the veggies and dressing. Store each part in a freezer-safe bag or container. You can freeze it for up to one month. When ready, thaw it in the fridge overnight before serving. Reheating chicken pesto pasta salad is simple. If you have stored it in the fridge, serve it cold or at room temperature. If you prefer it warm, place it in a microwave-safe dish. Heat it for about 30 seconds at a time until it reaches your desired warmth. Be careful not to overheat, as it can make the pasta mushy. Always check the seasoning again after reheating and adjust as needed. You can use tofu, shrimp, or chickpeas as great chicken alternatives. Tofu gives a nice texture. Shrimp adds a seafood twist. Chickpeas provide protein and a hearty feel. You can also try cooked turkey or beef for a different taste. The key is to use a protein you enjoy. This salad stays fresh in the fridge for three to five days. Make sure to store it in an airtight container. The flavors will blend nicely as it sits. However, the longer it sits, the softer the pasta becomes. Yes, you can prepare this salad a day in advance. It tastes even better after the flavors meld overnight. Just keep it covered in the fridge. If you use fresh basil, add it right before serving to keep it vibrant. Check out the Full Recipe for complete details! This article covered how to make a tasty Chicken Pesto Pasta Salad. You learned about key ingredients, and how to cook pasta just right. I shared some helpful tips for mixing and serving. Remember, you can add veggies or change spices to fit your taste. Store leftovers well for future meals. This salad is great for lunch or a gathering. Enjoy your cooking and happy eating!](https://dishtreats.com/wp-content/uploads/2025/06/0440c548-7b14-481e-8658-8224512ec7fd-768x768.webp)