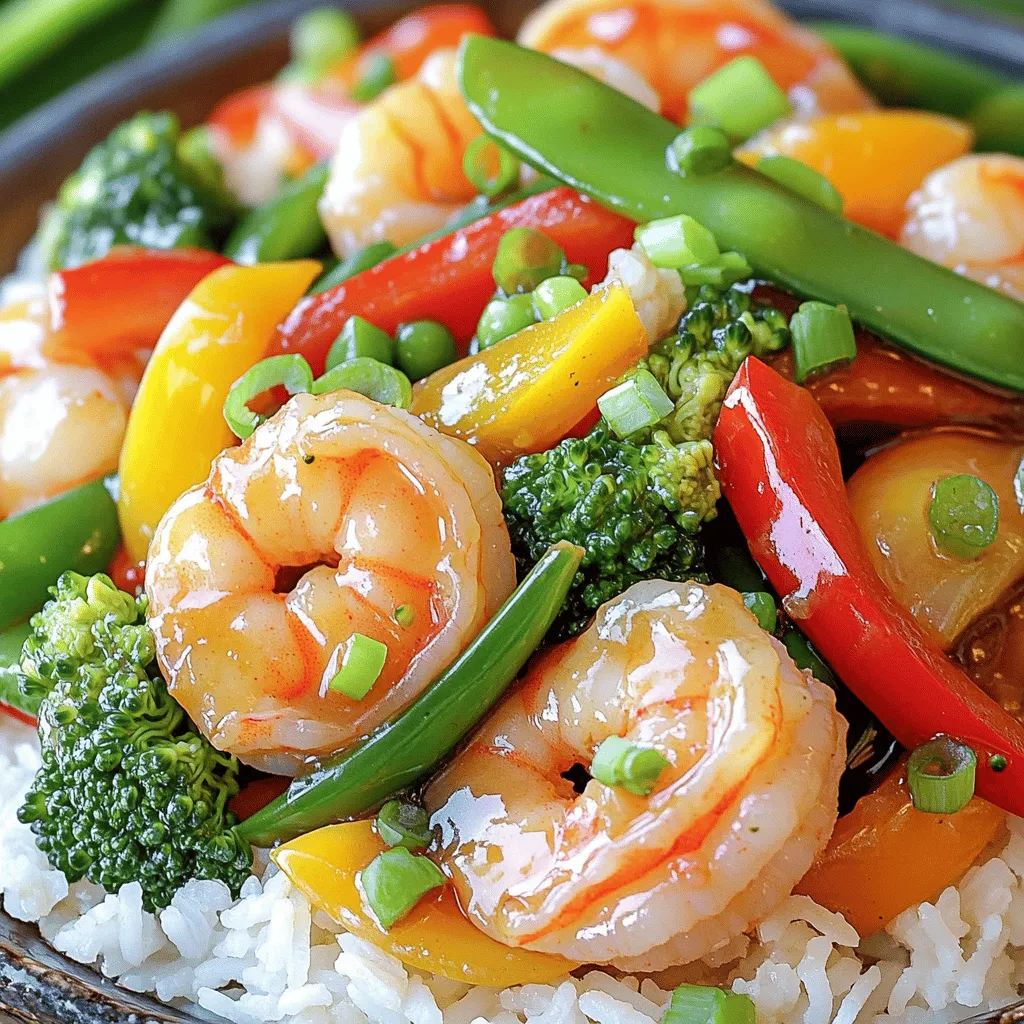
Honey Garlic Shrimp Stir Fry Quick and Tasty Meal

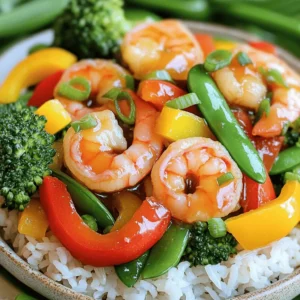
Are you ready to whip up a dish that’s quick, tasty, and full of flavor? This Honey Garlic Shrimp Stir Fry is your answer! In just a few steps, you can create a vibrant meal that will impress your family and friends. Packed with tender shrimp and colorful veggies, this recipe offers both ease and excitement. Let’s dive into the ingredients and cooking tips to make this meal a hit!
Ingredients
Main Ingredients for Honey Garlic Shrimp Stir Fry
For this tasty dish, you will need a few key items:
- 1 pound large shrimp, peeled and deveined
- 1 bell pepper (red or yellow), sliced into thin strips
- 1 cup snap peas, trimmed
- 1 cup broccoli florets
- 2 green onions, sliced diagonally
- 2 tablespoons vegetable oil
These main ingredients form the base of your stir fry, giving it a mix of flavors and textures. The shrimp provide protein, while the vegetables add crunch and color.
Special Ingredients for the Sauce
The sauce is what makes this dish pop. Gather these items:
- 2 tablespoons honey
- 3 tablespoons soy sauce
- 1 tablespoon sesame oil
- 2 cloves garlic, minced
- 1 teaspoon fresh ginger, grated
Mixing these ingredients creates a sweet and savory sauce that coats the shrimp and veggies perfectly.
Suggested Garnishes and Serving Options
To make your dish shine, consider these garnishes and serving options:
- Sliced green onions for a fresh taste
- A wedge of lime for a zesty kick
- Cooked rice or quinoa as a base
Serving your honey garlic shrimp stir fry over rice or quinoa balances the sweetness of the sauce and makes for a filling meal.
Step-by-Step Instructions
Preparing the Sauce
To make the sauce, grab a small mixing bowl. Add 2 tablespoons of honey, 3 tablespoons of soy sauce, and 1 tablespoon of sesame oil. Then, add 2 cloves of minced garlic and 1 teaspoon of grated ginger. Whisk everything together until it blends well. Set this bowl aside; your sauce is ready!
Cooking the Shrimp
Next, heat 1 tablespoon of vegetable oil in a large skillet or wok over medium-high heat. Wait until the oil shimmers. Place 1 pound of large shrimp in a single layer in the hot oil. Cook the shrimp for 2-3 minutes on each side. They should turn pink and opaque. Once cooked, remove the shrimp from the skillet and place them on a plate.
Stir-Frying the Vegetables
In the same skillet, add another tablespoon of vegetable oil. Now, toss in 1 sliced bell pepper, 1 cup of snap peas, and 1 cup of broccoli florets. Stir-fry the veggies for about 3-5 minutes. You want them to be tender-crisp and bright. After that, return the cooked shrimp to the skillet. Pour in the honey garlic sauce and toss everything together. Stir-fry for an extra 1-2 minutes to mix all the flavors well. Remove the skillet from heat and top with sliced green onions for garnish. Serve this dish over cooked rice or quinoa for a filling meal. Enjoy!
Tips & Tricks
Perfecting the Shrimp Texture
To get the best shrimp, start with fresh or thawed shrimp. Peeled and deveined shrimp cook quickly. Heat your pan on medium-high. When the oil shimmers, add shrimp in a single layer. Cook for 2-3 minutes on each side. They should turn pink and opaque. Avoid overcooking; it makes shrimp tough.
Choosing the Right Vegetables
For this stir fry, I love bright vegetables. Bell peppers add crunch and color. Snap peas give a nice snap, while broccoli florets add depth. Choose fresh, crisp veggies. Cut them into even sizes for a consistent cook. This helps each piece stay tender but not mushy.
Serving Suggestions for Best Flavor
Serve your stir fry over fluffy rice or nutty quinoa. A squeeze of lime adds a fresh zing. For a rustic touch, use shallow bowls. Top with green onions for a pop of color. You can also add sesame seeds for extra crunch. Enjoy the mix of sweet and savory!
Variations
Adding Other Proteins
You can swap shrimp for other proteins. Chicken, beef, or tofu work well. Use one pound of your choice. Just adjust the cooking time. Cook chicken until it’s no longer pink. For beef, ensure it reaches the right doneness. Tofu should be golden and crispy for the best texture.
Vegetarian Option Replacements
For a vegetarian dish, replace shrimp with firm tofu or tempeh. Cut them into cubes and sauté them until golden. You can also add more veggies. Try mushrooms, zucchini, or carrots. These additions will keep the dish colorful and tasty.
Different Flavor Profiles
Want to change the flavor? Use different sauces! Swap soy sauce for teriyaki or coconut aminos. For a spicy kick, add sriracha or chili flakes. Adding a splash of lime juice can brighten the dish. Experiment with fresh herbs like basil or cilantro for a fresh twist.
Storage Info
How to Store Leftover Stir Fry
To keep your honey garlic shrimp stir fry fresh, place it in an airtight container. Make sure it cools down before sealing. Store it in the fridge. This way, it stays tasty for up to three days.
Reheating Instructions
When you’re ready to enjoy leftovers, use a skillet or microwave. For the skillet, heat it on medium. Add a splash of water or extra sauce to keep it moist. Stir until warm. If using a microwave, cover the dish and heat in short bursts, stirring in between. This helps to heat evenly.
Freezing Tips for Future Meals
To freeze, let the stir fry cool completely. Place it in a freezer-safe bag or container. Remove as much air as you can. Label the bag with the date. It can last up to three months. When ready to eat, thaw in the fridge overnight. Reheat in a skillet for best results.
FAQs
How long does honey garlic shrimp last in the fridge?
Honey garlic shrimp lasts about 3 to 4 days in the fridge. Make sure to store it in an airtight container. This keeps it fresh and safe to eat later. When you want to enjoy it again, just reheat it on the stove. It will taste great!
Can I use frozen shrimp for this recipe?
Yes, you can use frozen shrimp! Just thaw it before cooking. Place the shrimp in the fridge overnight or run it under cold water for quicker thawing. This saves time, and your meal stays tasty. Make sure to pat it dry before cooking for the best results.
What can I serve with honey garlic shrimp stir fry?
You can serve honey garlic shrimp stir fry with cooked rice or quinoa. Both options soak up the sauce well. Green salad or steamed vegetables also make great sides. They add freshness and balance to your meal. You can even try it with noodles for a fun twist!
This blog post covered how to make a tasty honey garlic shrimp stir fry. We explored key ingredients, step-by-step cooking, and useful tips. You learned about variations to fit your taste and how to store leftovers.
This dish is not only simple, but it also lets you experiment. Feel free to try new proteins or veggies. Enjoy the flavors and make it your own! Now, get cooking and impress your family with this quick meal.