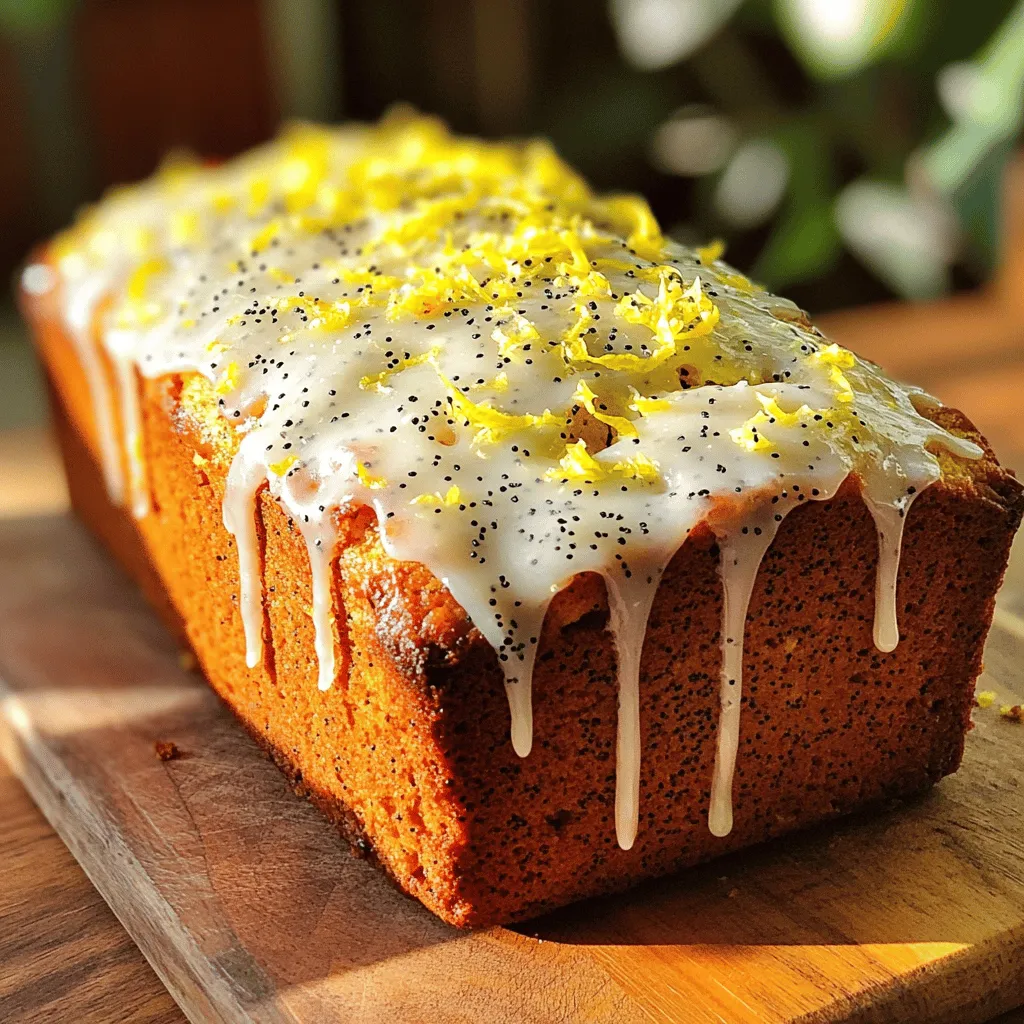
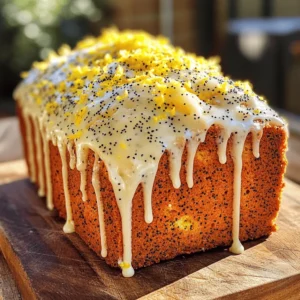
Lemon Poppy Seed Loaf Simple and Tasty Recipe
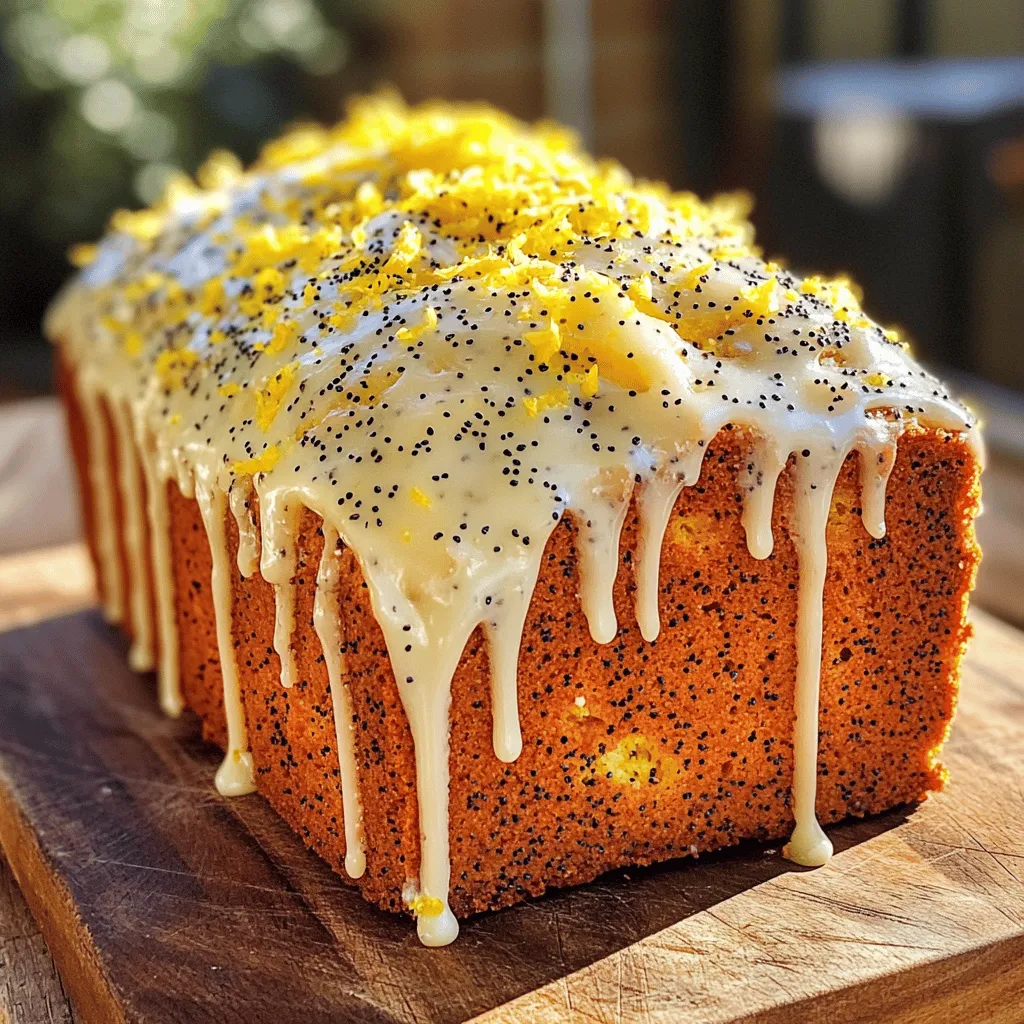
Are you craving a fresh, zesty treat? This Lemon Poppy Seed Loaf is the perfect answer! With its bright flavor and light texture, it’s simple to make and incredibly tasty. I’ll guide you through each easy step, from mixing the ingredients to glazing the top. Discover tips and tricks to elevate your baking game, and enjoy this delightful loaf at any occasion. Let’s get started!
Ingredients
Complete Ingredient List
- 1 ½ cups all-purpose flour
- ½ cup granulated sugar
- 2 tablespoons poppy seeds
- 1 teaspoon baking powder
- ½ teaspoon baking soda
- ¼ teaspoon salt
- 1 large egg
- ½ cup plain Greek yogurt
- ⅓ cup vegetable oil
- 2 teaspoons vanilla extract
- Zest of 1 lemon
- ¼ cup freshly squeezed lemon juice
- ½ cup powdered sugar (for glaze)
- 1-2 tablespoons lemon juice (for glaze)
You need simple ingredients to make this Lemon Poppy Seed Loaf. Each one plays an important role.
The all-purpose flour gives the loaf structure. Granulated sugar adds sweetness and helps with browning. Poppy seeds add a nice crunch and a fun look. Baking powder and baking soda help the loaf rise.
Salt balances the sweetness and deepens the flavor. You will use one large egg for moisture and richness. Plain Greek yogurt keeps the loaf moist and adds a bit of tang.
Vegetable oil helps keep the loaf tender. Vanilla extract adds warmth and enhances flavor. Lemon zest brings bright, fresh notes to the loaf. Freshly squeezed lemon juice gives the loaf its delicious tartness.
For the glaze, you need powdered sugar and lemon juice. This glaze makes the loaf look pretty and taste even better. Use these ingredients, and you will create a tasty treat that everyone loves!
Step-by-Step Instructions
Preparation of the Oven and Pan
First, preheat your oven to 350°F (175°C). This helps your loaf bake evenly. Next, take a 9×5-inch loaf pan. Grease it with cooking spray or line it with parchment paper. Lining it makes it easier to remove the loaf later.
Mixing the Ingredients
In a large bowl, combine the dry ingredients. Use a whisk to mix together the all-purpose flour, granulated sugar, poppy seeds, baking powder, baking soda, and salt. This step ensures that all the leavening agents and flavors mix well.
In a second bowl, mix the wet ingredients. Crack the egg and beat it lightly with a fork. Add the Greek yogurt, vegetable oil, vanilla extract, lemon zest, and lemon juice. Whisk until the mixture is smooth and creamy. It should not have any lumps.
Now, pour the wet mixture into the bowl with the dry ingredients. Gently stir with a spatula or wooden spoon. Mix just until combined. It’s okay if the batter is a bit lumpy; overmixing can make the loaf dense.
Baking and Cooling
Next, transfer the batter into the greased loaf pan. Use a spatula to smooth the top. This helps create a nice dome shape as it bakes. Place the loaf pan in the oven. Bake for 50-60 minutes. To check if it’s done, insert a toothpick in the center. If it comes out clean, your loaf is ready.
Once baked, remove the loaf from the oven. Let it cool in the pan for about 10 minutes. Then, carefully transfer it to a wire rack. Allow it to cool completely before glazing. This helps avoid a soggy bottom.
Tips & Tricks
Ensuring Perfect Texture
To make your Lemon Poppy Seed Loaf just right, avoid overmixing the batter. Mix until the wet and dry ingredients are combined. It’s okay if there are small lumps. Overmixing can make the loaf tough instead of soft.
To check if your loaf is done, insert a toothpick into the center. If it comes out clean, your loaf is ready. If it has batter on it, bake for a few more minutes.
Glazing Techniques
The glaze is simple but important. To get the right consistency, mix powdered sugar with 1-2 tablespoons of lemon juice. Whisk until smooth. If it’s too thick, add a little more lemon juice. If it’s too runny, add more powdered sugar.
When drizzling the glaze, use a spoon or a small whisk. Start in the center and let it flow down the sides. This gives a nice look and a burst of flavor.
Serving Suggestions
When serving, pair your loaf with a cup of tea or coffee. The bright lemon flavor shines with these drinks.
This loaf is great for brunch, afternoon snacks, or dessert. It’s perfect for celebrations or just a cozy day at home. Enjoy every slice!
Variations
Flavor Additions
You can easily change the flavor of your Lemon Poppy Seed Loaf. Try adding different citrus zests. Lime or orange zest can give a fresh twist. You can also add nuts or dried fruits. Chopped walnuts or cranberries can add nice texture and taste. Just mix them in with the dry ingredients for best results.
Dietary Modifications
If you need gluten-free options, you can use almond flour or a gluten-free blend. Both work well and keep the loaf tasty. For vegan substitutions, replace the egg with a flax egg. Mix one tablespoon of flaxseed meal with three tablespoons of water. Let it sit for a few minutes to thicken before adding it to the wet ingredients. You can also switch Greek yogurt for a plant-based yogurt.
Alternate Serving Styles
Want to change how you serve this loaf? Try making mini loaves instead. They bake faster and are fun for sharing. You can also make lemon poppy seed muffins. Just pour the batter into a muffin tin and bake for about 20-25 minutes. These options make your treat perfect for any gathering or snack time.
Storage Info
Storing Leftovers
To keep your Lemon Poppy Seed Loaf fresh, store it at room temperature. Wrap it tightly in plastic wrap or foil. This keeps it moist for up to three days. If you want it to last longer, place it in the fridge. In the fridge, it stays fresh for up to a week. Use an airtight container to prevent it from drying out.
Freezing Guidance
Freezing this loaf is simple. First, let it cool completely. Then, wrap it in plastic wrap. After that, wrap it in aluminum foil for extra protection. This way, it lasts up to three months in the freezer. To thaw, remove it from the freezer and keep it in the fridge overnight. You can also thaw it at room temperature for about two hours.
Reheating Options
For reheating, preheat your oven to 350°F (175°C). Place the loaf on a baking sheet and cover it with foil. Heat for about 10-15 minutes or until warm. This method keeps the texture nice and soft. You can also use a microwave. Heat a slice for about 20-30 seconds. But be careful, as it can become too soft or rubbery if overheated.
FAQs
Common Questions about Lemon Poppy Seed Loaf
What can I substitute for plain Greek yogurt?
You can use sour cream or buttermilk instead. Both will keep your loaf moist. You can also use a dairy-free yogurt for a vegan option.
Can I use lemon extract instead of fresh lemon juice?
Yes, you can use lemon extract. Use about half the amount of extract as lemon juice. The flavor will be strong, so adjust to your taste.
How do I know when my loaf is baked through?
Insert a toothpick into the center of the loaf. If it comes out clean, your loaf is done. If it has wet batter, bake for a few more minutes.
Troubleshooting Issues
Why is my loaf dense?
A dense loaf can happen if you overmix the batter. It can also be due to too much flour or not enough leavening agents. Be careful with your measurements!
How can I fix a soggy loaf?
A soggy loaf may be underbaked or too moist from added liquids. Try baking longer or letting it cool fully on a wire rack to remove excess moisture.
Nutritional Information
Caloric content and macronutrients
One slice of lemon poppy seed loaf has about 180 calories. It contains around 5g of protein, 6g of fat, and 30g of carbs.
Health benefits of key ingredients
Lemon juice is rich in vitamin C. Poppy seeds offer healthy fats and fiber. Greek yogurt adds protein and probiotics for gut health.
This blog explored making a delicious lemon poppy seed loaf. You learned about the essential ingredients and the step-by-step baking process. I shared tips for perfect texture and glossy glaze, plus serving ideas. You can also modify the recipe to suit dietary needs. Remember, proper storage and reheating keep your loaf fresh. Enjoy baking and experimenting with this flavorful treat! Stick to these tips for the best results. Happy baking!
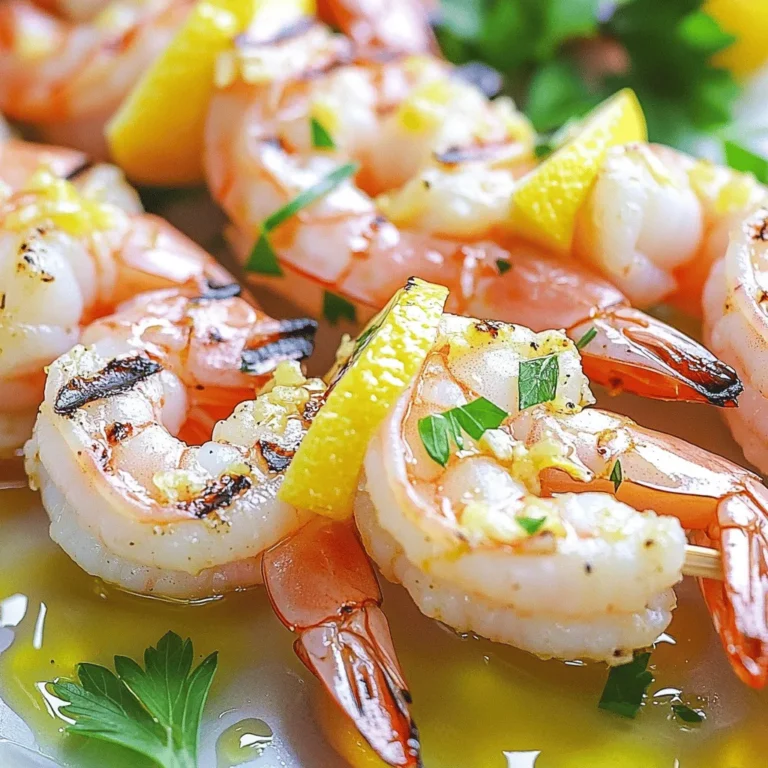
![To make lemon garlic scallops, you need fresh and simple ingredients. Here is what you will need: - 1 pound sea scallops, thawed if previously frozen - 3 tablespoons extra virgin olive oil - 4 cloves garlic, finely minced - Zest and juice of 1 large lemon - Sea salt and freshly cracked black pepper, to taste - 1 tablespoon fresh parsley, finely chopped - Lemon slices for an elegant garnish Sea scallops are best for this dish. They have a sweet flavor and a firm texture. Choose bright, glossy scallops with a clean scent. Avoid any that smell fishy. Fresh garlic adds a punch of flavor. It gives depth and richness to the dish. Lemon brings brightness and acidity, balancing the sweet scallops. The zest adds an extra layer of lemony goodness. When sourcing ingredients, look for a trusted fish market. Ask about the origin of the scallops. Fresh, high-quality ingredients make a big difference in taste. You want to create a dish that shines with flavor and freshness. For the olive oil, choose a high-quality extra virgin variety. It enhances the overall flavor profile. Fresh parsley adds color and freshness at the end. Always use fresh herbs for the best taste. By selecting quality ingredients, you set the stage for a memorable meal. Follow the [Full Recipe] to create this delightful dish! First, drying scallops is key. Use paper towels to pat them dry. Moisture will stop them from searing well. Next, season both sides with sea salt and black pepper. A light touch works wonders here. When you place them in the skillet, space them out. Overcrowding will steam them instead of searing them. Heat your olive oil in a large skillet on medium-high heat. Watch for it to shimmer but not smoke. Carefully add the dry scallops in a single layer. Let them sear for 2-3 minutes without moving them. This helps form a nice golden crust. Once they look brown, gently flip them using tongs. Now, add the minced garlic to the pan. Cook for another 2-3 minutes. Stir the garlic to stop it from burning. The scallops should become opaque and fully cooked. Remove the skillet from heat right after cooking. Add the lemon zest and juice to the pan. Toss the scallops gently so they soak up the flavors. Lastly, sprinkle fresh parsley over the top. This adds color and fresh taste. For serving, place the scallops on a plate and drizzle the pan juices over them. Garnish with lemon slices for an elegant touch. You can pair them with sautéed greens or a crisp salad for a complete meal. - Overcooking scallops: This is a big mistake. Scallops cook fast. If you cook them too long, they become rubbery. Aim for a golden crust on the outside and opaque inside. - Not using enough oil for searing: Oil helps create a nice crust. If you skimp on oil, the scallops may stick. Use at least three tablespoons to get good results. - Ignoring the resting time post-cooking: Let your scallops rest for a minute after cooking. This helps them stay juicy. Don’t rush this step! - Recommended skillet types for best results: A heavy skillet works best. Cast iron or stainless steel distributes heat evenly. Avoid non-stick pans; they won’t give you a good sear. - Importance of temperature control: Start with a hot skillet. If it's too cool, scallops won’t brown. Heat the oil until it shimmers. This shows it’s ready for the scallops. - Suggestions for seasoning variations: Besides lemon and garlic, try fresh herbs or spices. Thyme, chili flakes, or even a splash of white wine can add depth. Experiment to find your favorite mix! For the full recipe, check out the details above and get cooking! {{image_4}} You can elevate your lemon garlic scallops with a few simple tweaks. - Incorporating herbs: Add fresh thyme or basil for a fragrant twist. These herbs enhance the dish’s aroma and add depth to the flavor. - Alternative citrus options: Try lime or orange juice for a unique taste. Each citrus brings its own brightness and pairs nicely with scallops. - Adding heat: If you like spice, sprinkle in some chili flakes or drizzle Sriracha. The heat balances the dish’s richness and excites your taste buds. Pair your scallops with sides to create a full meal. Here are some ideas: - Suggested side dishes: Serve with sautéed greens for a fresh crunch. A light salad or creamy risotto also works well to complement the scallops. - Pairing with wines or cocktails: A chilled white wine, like Sauvignon Blanc, enhances the dish. For cocktails, a gin and tonic is refreshing and bright. - Plating ideas: For a restaurant-style look, place the scallops on a clean plate. Drizzle the pan juices over them and add lemon slices for a pop of color. A sprinkle of parsley adds a final touch of green. For the full recipe, check out the Lemon Garlic Scallops recipe. After you finish your Lemon Garlic Scallops, store any extras right. First, place them in a shallow, airtight container. This helps keep them fresh. You can put them in the fridge for up to two days. If you wait longer, the taste and texture change. To reheat, use a non-stick skillet. Heat it over low to medium heat. Add a splash of water or broth to keep them moist. Cover the pan with a lid. This method helps keep the scallops tender. You can freeze scallops, but do it right. Raw scallops freeze well if you place them in a sealed bag. Remove as much air as possible. They can stay fresh for up to three months. If you want to freeze cooked scallops, make sure they cool first. Then, follow the same bag method. To thaw, leave them in the fridge overnight. Never thaw scallops in warm water. This can ruin their texture. When you reheat frozen scallops, use low heat again. Check them often to avoid overcooking. Enjoy your scallops as fresh as possible! For the full recipe, check out the details above. You should use sea scallops for this recipe. Sea scallops are larger and have a sweet taste. Bay scallops are smaller and can be more delicate. They work well in soups or pasta but may not sear as nicely. When picking scallops at the market, look for these signs: - They should smell fresh, like the ocean. - The meat should be firm and glossy. - Avoid scallops that look dry or have brown spots. Yes, you can use other oils. Grapeseed oil or avocado oil are good options. They have high smoke points, too. Using different oils can change the flavor. Olive oil adds a rich taste, while grapeseed is lighter. Choose based on your preference and what you have on hand. Perfectly cooked scallops are opaque and firm. They should have a golden crust outside. The safe internal temperature for scallops is 145°F (63°C). Use a food thermometer to check. If you don’t have one, look for that golden color and firm texture. For a full recipe, check out the Lemon Garlic Scallops guide! Lemon garlic scallops are a tasty dish that combines fresh ingredients and simple steps. Using quality sea scallops, fresh garlic, and lemon makes all the difference. I shared tips for cooking and avoiding common mistakes, like overcooking. Remember, you can customize your flavors with herbs or spices. Enjoy your cooking journey. Perfect scallops can impress anyone. With practice, you’ll master this dish and feel confident serving it. Take your time and savor the process!](https://dishtreats.com/wp-content/uploads/2025/07/19c1a638-1668-4343-8a69-d1fc169e2d79-768x768.webp)