
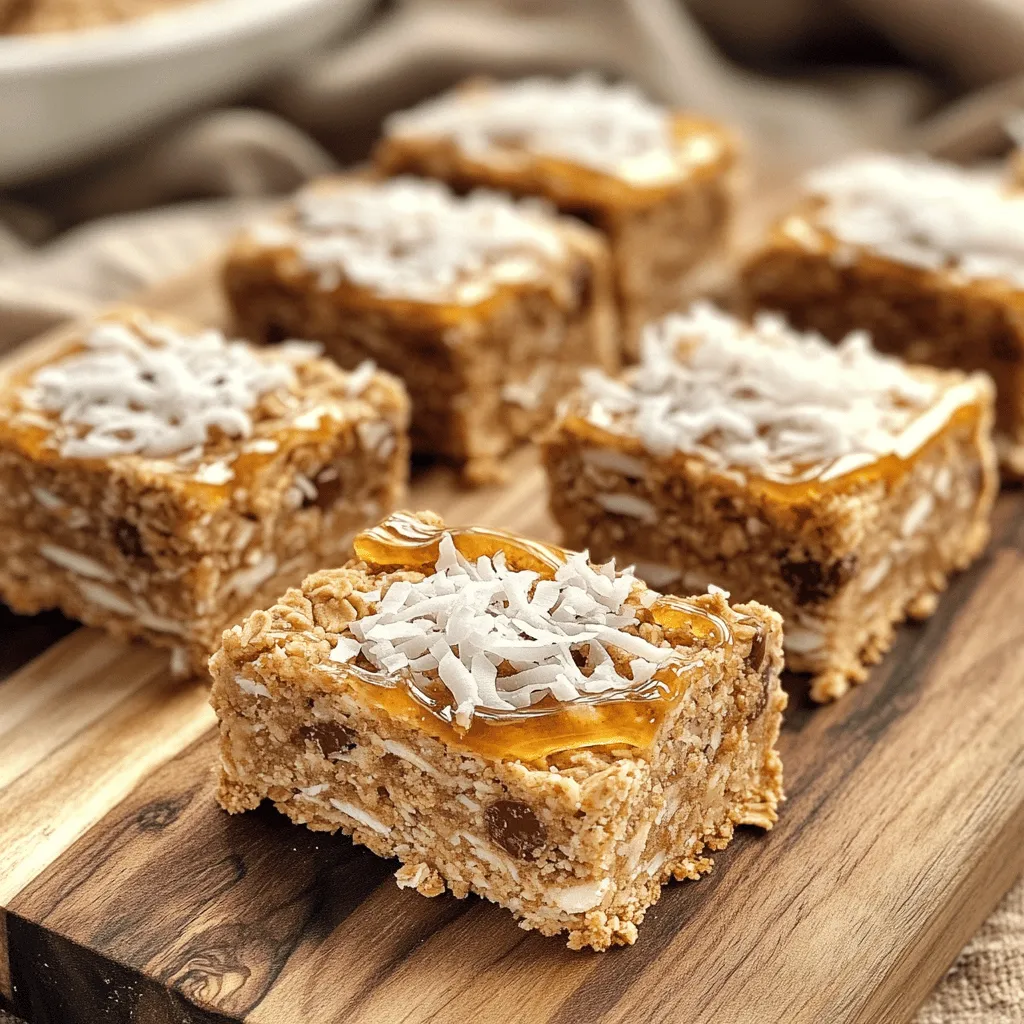
No Bake Oatmeal Cookie Bars Quick and Easy Delight

Looking for an easy snack that’s both delicious and healthy? These No Bake Oatmeal Cookie Bars are your answer! With just a handful of simple ingredients, you can create a tasty treat in no time. No baking needed means quicker prep and more time to enjoy! Let me show you how to whip up these delightful bars that everyone will love. Ready to satisfy your sweet tooth? Let’s dive in!
Ingredients
To make your no bake oatmeal cookie bars, gather these simple ingredients:
- 2 cups rolled oats
- 1 cup natural peanut butter
- 1/2 cup honey or maple syrup
- 1/2 cup almond flour
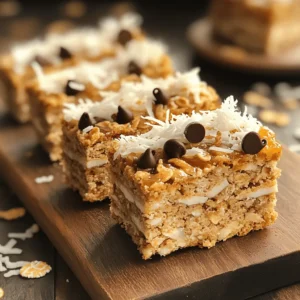
- 1/4 cup mini chocolate chips
- 1/4 cup shredded unsweetened coconut
- 1 teaspoon vanilla extract
- 1/2 teaspoon sea salt
- Optional: a sprinkle of cinnamon
These ingredients make a tasty treat that is quick and easy to prepare. You can mix and match based on what you have at home. The oats provide a hearty base while peanut butter adds protein. Honey or maple syrup gives it natural sweetness. Almond flour makes it rich and nutty, while chocolate chips add fun. Shredded coconut adds texture and a hint of tropical flavor. The sea salt balances the sweetness perfectly. You can also add a sprinkle of cinnamon for a warm spice note. This recipe makes tasty bars perfect for snacks or dessert.
Step-by-Step Instructions
Preparation of Dry Ingredients
First, grab a large mixing bowl. Add 2 cups of rolled oats, 1 cup of almond flour, and 1/4 cup of shredded coconut. Mix these dry ingredients well. You want all the oats, flour, and coconut to blend evenly. This step helps the bars taste great.
Preparing the Peanut Butter Mixture
Next, take a microwave-safe bowl. Add 1 cup of natural peanut butter and 1/2 cup of honey (or maple syrup). Warm this mixture in the microwave for about 30 seconds. This helps it mix easier. After warming, add 1 teaspoon of vanilla extract and 1/2 teaspoon of sea salt. Stir until it is smooth.
Combining Ingredients
Now, pour the warmed peanut butter mixture over the dry ingredients. Use a spatula to mix everything together. Make sure it is well blended. You want a thick, sticky mixture. Then, gently fold in 1/4 cup of mini chocolate chips. This adds a sweet touch.
Forming the Bars
Line an 8×8 inch baking dish with parchment paper. Leave some paper hanging over the edges for easy removal. Transfer the mixture into the dish. Spread it out evenly. Press down firmly to compact the mixture. This helps the bars hold their shape.
Setting the Bars
Place the dish in the refrigerator for at least 2 hours. This lets the bars set properly. Once they are firm, lift them out using the parchment paper. Carefully cut them into bars of your desired size. Enjoy these delicious treats as a snack or dessert!
Tips & Tricks
Best Practices for Perfect Bars
To make the best no bake oatmeal cookie bars, focus on consistency. The mixture should be thick but not dry. If it feels too crumbly, add a bit more honey or peanut butter. To avoid sticky mixtures, make sure to coat your hands with a little oil before pressing the mixture into the pan. This simple trick keeps the bars from sticking to your fingers.
Serving Suggestions
For a great presentation, serve the bars on a wooden board. A sprinkle of shredded coconut on top adds a nice touch. If you want to pair them with a drink, consider a glass of almond milk or a warm cup of tea. Both drinks complement the flavors well and make for a cozy treat.
Enhancements for Flavor
Want to boost the flavor? Adding a sprinkle of cinnamon can elevate the taste. It adds warmth and richness to the bars. You can also experiment with different nut butters. Almond butter or sunflower seed butter can give a new twist to this classic recipe. Each nut butter brings its own flavor, so try them out!
Variations
Ingredient Swaps
If you want to switch things up, you can easily make swaps. For a gluten-free version, use gluten-free oats. They work just as well! If you need a nut-free option, try sunflower seed butter instead of peanut butter. It gives a nice flavor without the nuts.
Add-ins for Customization
Feel free to add your favorite items. Dried fruits like raisins or cranberries can add sweetness. Nuts and seeds, such as walnuts or chia seeds, can give extra crunch and nutrition. Just make sure to keep the total amount similar to the original recipe.
Themed Versions
Get creative with themes! For holidays, add spices like pumpkin pie spice or peppermint extract. For kids, try colorful sprinkles or using cookie cutters to shape the bars. These fun touches make the bars more appealing and exciting to eat.
Storage Info
Best Storage Practices
To keep your no bake oatmeal cookie bars fresh, use airtight containers. These containers keep air and moisture out. You can wrap the bars in plastic wrap, but this may not keep them as fresh. I recommend storing them in an airtight container for the best taste. When stored correctly, the bars can last up to one week in the fridge.
Freezing Instructions
If you want to save some bars for later, freezing is a great option. First, cut the bars into squares. Then, wrap each square in plastic wrap. Place them in a freezer-safe bag or container. When you want to eat them, take out the number you need. Let them thaw in the fridge or at room temperature for about 30 minutes.
Signs of Spoilage
Check your bars for signs of spoilage. If they smell off or feel sticky, throw them away. Look for any mold or discoloration, too. If they taste stale, it’s best to discard them. Always trust your senses when deciding if food is safe to eat.
FAQs
Can I substitute peanut butter?
Yes, you can switch out peanut butter for almond butter or sunflower seed butter. Both options work well. They will give your bars a unique taste. Just ensure they are smooth and creamy. This helps keep the texture nice.
How long do no bake oatmeal cookie bars last?
These bars last about one week in the fridge. Keep them in an airtight container. If you want them to last longer, you can freeze them. They will stay good for three months in the freezer.
Can I use quick oats instead of rolled oats?
Quick oats are not the best choice for this recipe. They may lead to a mushy texture. Rolled oats maintain the right chewiness. If you only have quick oats, you can use them, but adjust the liquid slightly.
Are these bars gluten-free?
Yes, the bars can be gluten-free! Just make sure to use certified gluten-free oats and almond flour. This way, you avoid any gluten contamination. Enjoy these tasty bars without worry!
What’s the best way to cut these bars?
To cut the bars easily, use a sharp knife. First, chill the bars well. This helps them firm up. Then, lift them out using the parchment paper. Use a gentle sawing motion to cut them into even pieces. Enjoy your homemade treats!
These no-bake oatmeal cookie bars are easy to make and full of flavor. We covered the key ingredients, step-by-step instructions, and helpful tips to get them just right. You can also customize them to fit your taste or diet needs. Remember, these bars store well and can last if kept right. Enjoy making them and feel free to get creative! You’ll love how simple and delicious they are.


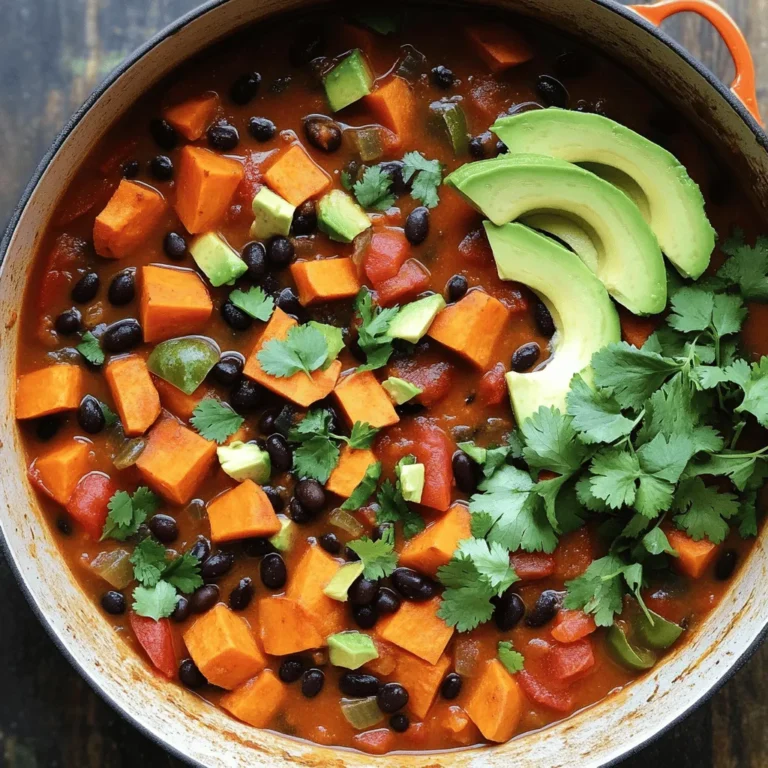

![- 12 oz (340g) penne pasta - 1 lb (450g) smoked sausage, sliced into rounds - 1 bell pepper, diced (choose your favorite color) - 1 medium onion, finely chopped - 3 cloves garlic, minced - 1 tablespoon Cajun seasoning - 1 teaspoon smoked paprika - 1/2 teaspoon cayenne pepper (adjust to your spice preference) - 2 cups low-sodium chicken broth - 1 cup heavy cream - Fresh parsley, chopped (for garnish) - Salt and freshly ground black pepper to taste When I make One Pot Cajun Sausage Pasta, I love how simple the ingredients are. You start with penne pasta, which cooks beautifully in the same pot. The smoked sausage gives it a rich flavor. Fresh veggies like bell pepper, onion, and garlic add color and crunch. For spices, Cajun seasoning gives that classic kick. A little smoked paprika adds depth, and cayenne pepper lets you control the heat. You can adjust it based on your taste. The chicken broth is key; it helps cook the pasta and keeps everything moist. When you add heavy cream, it makes the dish creamy and rich. Don’t forget the fresh parsley for a pop of color. A sprinkle of salt and pepper enhances all the flavors. You can find the full recipe with exact measurements and cooking steps. Enjoy making this easy and flavorful dish! 1. Heating the oil: Start by pouring two tablespoons of olive oil into a large pot. Heat it over medium heat until it shimmers. This takes about a minute. 2. Sautéing the sausage: Next, add one pound of sliced smoked sausage to the pot. Cook the sausage for about 4-5 minutes. Stir it until it turns brown and crispy. This adds great flavor. Then, remove the sausage from the pot and set it aside for later. 1. Cooking the bell pepper and onion: In the same pot, toss in one diced bell pepper and one finely chopped medium onion. Sauté these for about 3-4 minutes. You want them to soften and turn slightly translucent. 2. Adding garlic and spices: Now, add three minced garlic cloves. Cook for one more minute until it smells amazing. Then, stir in one tablespoon of Cajun seasoning, one teaspoon of smoked paprika, and half a teaspoon of cayenne pepper. Cook for another minute. This step brings out the flavors of the spices. 1. Combining ingredients in the pot: Carefully pour in two cups of low-sodium chicken broth. Use a wooden spoon to scrape any brown bits from the pot. Next, add 12 ounces of penne pasta and one can of undrained diced tomatoes. Mix everything well. 2. Simmering the mixture: Bring the mixture to a boil, then reduce the heat to low. Cover the pot and let it simmer for 12-15 minutes. Stir occasionally to keep the pasta from sticking. Cook until the pasta is tender and the liquid thickens. Now you can check the [Full Recipe] for additional details. To make sure your pasta does not stick, keep a close eye on the pot. Stir the pasta every few minutes while it cooks. This simple step prevents clumping and ensures even cooking. If you find your dish too thick, add a splash of chicken broth or water to loosen it up. For creaminess, adjust the amount of heavy cream to fit your taste. Start with one cup, then add more if you like it richer. Customizing the spice levels in your Cajun sausage pasta is easy. If you want more heat, add an extra pinch of cayenne pepper. You can also mix in some crushed red pepper flakes for a different kick. To add freshness, try throwing in herbs like thyme or oregano. These herbs bring depth to your dish and balance the spices well. Choosing the right pot is important for this dish. A large, deep pot works best since it holds all the ingredients and allows for easy stirring. I recommend using a heavy-bottomed pot to prevent burning. When sautéing, heat the oil until it shimmers, then add your sausage. This ensures a nice brown color and flavor. Always scrape the bottom of the pot to release any fond, which adds great taste to your sauce. {{image_4}} You can swap smoked sausage for different meats. Chicken or turkey sausage works well. They add less fat but keep great flavor. This dish still shines with these changes. For those with gluten issues, use gluten-free pasta. Options like brown rice pasta or chickpea pasta fit nicely. They change the texture but keep the taste. Want to change the spice? You can add more or less Cajun seasoning. If you like it mild, skip the cayenne pepper. For more heat, add a bit more. You can also add different vegetables. Spinach, zucchini, or mushrooms all mix well. They add color and nutrition, making the dish more exciting. Pair your pasta with sides for a well-rounded meal. A fresh salad adds crunch. Garlic bread brings warmth and comfort. For plating, serve in deep bowls. Garnish with fresh parsley for a pop of color. You can even sprinkle extra Cajun seasoning on top. This will enhance the flavors and make it look fancy. For the full recipe, check out One Pot Cajun Sausage Pasta. After you enjoy your One Pot Cajun Sausage Pasta, you may have leftovers. To store them, let the dish cool down first. Then, place it in an airtight container. This helps keep it fresh. You can keep it in the fridge for about 3 to 4 days. When you're ready to eat again, you can easily reheat it. Just place it in a pot over low heat, stirring often. You can also use the microwave. Heat it in short bursts, stirring in between, until it's warm. If you want to save the dish for longer, you can freeze it. First, let the pasta cool completely. Then, transfer it to a freezer-safe container. Make sure to leave some space at the top, as it may expand when frozen. You can freeze it for up to 3 months. To reheat from frozen, move it to the fridge overnight to thaw. Next, warm it in a pot or microwave until hot. You may need to add a splash of chicken broth or cream to keep it creamy. One Pot Cajun Sausage Pasta can last in the fridge for about 3 to 4 days. If you freeze it, aim to use it within 3 months for the best taste. Always check for signs of spoilage before eating. If you see any mold or if it smells off, it's best to throw it away. Remember, food safety is important for a delicious experience every time! Cajun seasoning is a blend of spices that gives dishes a bold flavor. It often includes paprika, garlic powder, onion powder, black pepper, cayenne pepper, and oregano. You can easily make it at home by mixing the following: - 1 tablespoon paprika - 1 teaspoon garlic powder - 1 teaspoon onion powder - 1 teaspoon black pepper - 1 teaspoon cayenne pepper - 1 teaspoon dried oregano - 1 teaspoon thyme Combine these in a bowl, and you have your own Cajun seasoning! This mix adds warmth and depth to your One Pot Cajun Sausage Pasta. Yes, you can easily make this dish vegetarian. Instead of sausage, you can use these options: - Plant-based sausage - Grilled mushrooms - Chopped tempeh These substitutes give a hearty texture. For protein, consider adding: - Chickpeas - Lentils - Tofu These choices keep the dish filling and nutritious while focusing on flavors. To amp up the heat in your pasta, you can adjust the spice levels. Here’s how: - Increase the cayenne pepper in the recipe. - Add crushed red pepper flakes while cooking. For more heat during cooking, try adding fresh chopped jalapeños or hot sauce. Just remember, start with a little and taste as you go! You want to enjoy the flavors without overwhelming your palate. This recipe is simple and delicious. We covered the best ingredients needed, such as penne pasta, smoked sausage, and fresh veggies. I shared tips for perfecting texture and flavor, plus ways to change things up. You can store leftovers easily and even freeze the dish for later. With this guide, cooking is quick and fun. So grab your ingredients and start creating a tasty meal today. Enjoy the process and make it your own!](https://dishtreats.com/wp-content/uploads/2025/06/1c4c8226-f553-4583-9158-57397e0bfaf8-768x768.webp)