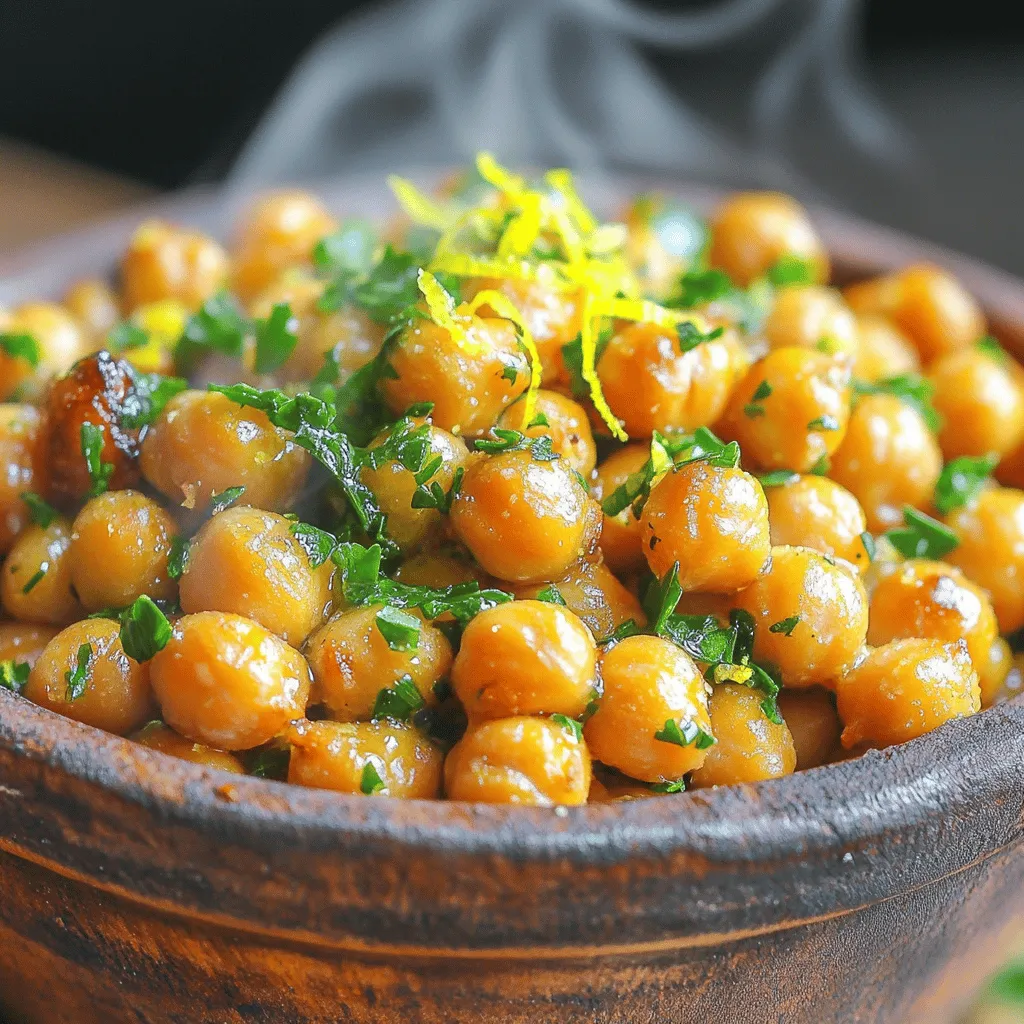
Lemon Garlic Roasted Chickpeas Crispy and Flavorful Snack

Looking for a crunchy snack that bursts with flavor? Lemon Garlic Roasted Chickpeas are just what you need! This easy recipe combines crispy chickpeas with zesty lemon and garlic for a snack you can’t resist. Whether you want a healthy treat or a topping for salads, these roasted delights deliver on all fronts. Let’s dive into the ingredients and get ready to make a snack that’s both tasty and good for you!
Ingredients
Main Ingredients
- 1 can (15 oz) of chickpeas
- 2 tablespoons extra virgin olive oil
- Zest of 1 medium lemon
- 2 tablespoons freshly squeezed lemon juice
- 3 cloves garlic, finely minced
Seasoning & Garnish
- 1 teaspoon smoked paprika
- 1/2 teaspoon cayenne pepper
- Salt and freshly ground black pepper
- Fresh parsley for garnish
To make lemon garlic roasted chickpeas, you need a few simple ingredients. First, grab a can of chickpeas. Rinse them well and drain thoroughly. This step is key for crispiness. Next, gather your flavor boosters: olive oil, lemon zest, lemon juice, and garlic. The lemon adds brightness, while garlic gives depth.
For seasoning, you’ll want smoked paprika and a hint of cayenne for heat. Adjust the cayenne to match your spice level. Don’t forget salt and pepper for taste. Finally, fresh parsley adds a pop of color and a fresh note when serving.
Step-by-Step Instructions
Preparation
1. Preheat your oven to 400°F (200°C). This helps the chickpeas get nice and crispy.
2. Open the can of chickpeas and drain them well. Rinse them under cold water.
3. Use a paper towel to dry the chickpeas. Drying is key for crunchiness.
Mixing Ingredients
1. In a small bowl, mix together the olive oil, lemon zest, lemon juice, and minced garlic.
2. Add the smoked paprika, cayenne pepper, salt, and black pepper. Stir until well combined.
Roasting Process
1. Pour the olive oil mixture over the dried chickpeas. Toss them gently to coat well.
2. Spread the chickpeas out on a large baking sheet in a single layer.
3. Place the sheet in the oven and roast for 25-30 minutes.
4. Remember to shake the baking sheet halfway through. This helps them roast evenly.
5. When they are golden brown and crispy, take them out and let them cool for a few minutes.
6. Taste and adjust the seasoning if needed.
7. Garnish with fresh parsley before serving.
These steps make tasty lemon garlic roasted chickpeas that are perfect for snacking or adding crunch to your meals.
Tips & Tricks
Achieving Perfect Crispiness
To get that perfect crunch, start by drying your chickpeas well. After rinsing, use a paper towel to soak up any extra moisture. This step is key! Moisture leads to soggy chickpeas, and we want crispy ones.
Next, set your oven to 400°F (200°C). This high heat helps the chickpeas crisp up nicely. If your oven is not hot enough, the chickpeas may not get crunchy.
Flavor Enhancement
You can adjust the spice level to fit your taste. If you like it hot, add more cayenne pepper. For a milder flavor, use less. Testing the spices before roasting is a great way to find your perfect mix.
Fresh ingredients are a must for great flavors. Always use fresh garlic and lemon juice. They add a bright taste that dried spices cannot match. Trust me; this makes a big difference in the end result.
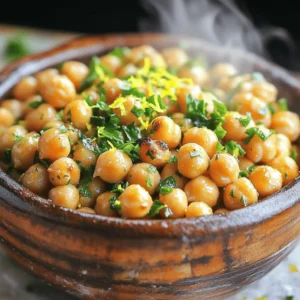
Serving Suggestions
For plate presentation, serve your lemon garlic roasted chickpeas in a fun bowl. You can also spread them on a platter for a party. Sprinkle more lemon zest or fresh parsley on top for extra flair.
These chickpeas work well as a snack or a crunchy topping. Pair them with salads, grain bowls, or soups. They add both texture and flavor to any dish.
Variations
Flavor Variations
You can change the taste of your lemon garlic roasted chickpeas easily. Try adding herbs like rosemary or thyme. These herbs bring a fresh twist to your dish. You can also mix in spices like cumin or curry powder. These spices add warmth and depth. Experimenting with flavors makes your snack unique and exciting.
Ingredient Substitutions
If you want to try different oils, use avocado oil or coconut oil. Both give a nice flavor. You can also switch up the vinegar. Balsamic or apple cider vinegar can work well too. If you prefer using dried chickpeas, soak them first. This method takes longer but offers a great texture.
Serving Style
You can enjoy roasted chickpeas in many ways. They make a great snack on their own. But you can also use them as a topping for salads or grain bowls. They add crunch and protein, making your meal more filling. Feel free to get creative with how you serve them!
Storage Info
How to Store
To keep your leftover lemon garlic roasted chickpeas fresh, store them in an airtight container. This helps keep them crisp and prevents moisture. A glass jar with a tight lid works well. You can also use a plastic container, but make sure it seals tightly. Let the chickpeas cool completely before storing them.
Reheating Methods
When you want to enjoy your chickpeas again, reheating is key. The oven is the best choice for keeping them crispy. Preheat your oven to 350°F (175°C) and spread the chickpeas on a baking sheet. Heat them for about 10 minutes, shaking the pan halfway through. If you use a microwave, they may become soft and chewy. So, the oven is the way to go!
Shelf Life
In the fridge, lemon garlic roasted chickpeas can last for about 3 to 5 days. After that, they may lose their crunch and flavor. If you want them to last longer, consider storing them in the freezer. Just remember, freezing can change their texture. To enjoy them at their best, eat them within a week!
FAQs
How to make Lemon Garlic Roasted Chickpeas from scratch?
To make Lemon Garlic Roasted Chickpeas, start by preheating your oven to 400°F (200°C). Drain and rinse one can of chickpeas. Pat them dry with a paper towel to help them crisp. In a bowl, mix olive oil, lemon zest, lemon juice, minced garlic, smoked paprika, cayenne pepper, salt, and black pepper. Toss the chickpeas in this mixture to coat them well. Spread them on a baking sheet and roast for 25-30 minutes, shaking halfway through. Enjoy the crispy snack!
Are roasted chickpeas healthy?
Yes, roasted chickpeas are very healthy! They are high in protein and fiber. This makes them great for a filling snack. Chickpeas also contain vitamins and minerals. They can help support heart health and improve digestion. Choosing this snack can boost your energy and satisfy your hunger.
Can I use dried chickpeas instead?
You can use dried chickpeas! However, you need to soak them first. Start by soaking them in water for at least 8 hours or overnight. After soaking, cook them in boiling water for about 1 hour until tender.This will give you a fresh, tasty snack.
What dishes can I pair lemon garlic roasted chickpeas with?
Lemon garlic roasted chickpeas are versatile! You can enjoy them on their own or add them to salads for crunch. They make a great topping for grain bowls or soups. You can also serve them as a snack with dips like hummus or tzatziki. Their zesty flavor pairs well with many dishes, making them a perfect addition to your meals.
Lemon garlic roasted chickpeas are simple and tasty. You learned the ingredients, steps, and tips to make them perfect. Play with flavors and adjust spices to fit your taste. Store leftovers right to keep them crisp. These chickpeas are versatile; serve them as a snack or a salad topping. Enjoy your cooking journey and explore new ways to use this healthy snack! Dive into flavor and make it yours!


![To make Rainbow Fruit Skewers, you need a mix of fresh fruits. Here’s the list of what you’ll need: - Fresh strawberries (1 cup) - Juicy orange segments (1 cup) - Sweet pineapple chunks (1 cup) - Crisp green grapes (1 cup) - Plump blueberries (1 cup) - Deep purple grapes or blackberries (1 cup) - Optional: Honey (2 tbsp) for drizzling - Fresh mint leaves for garnish Each fruit brings a burst of color and taste. Fresh strawberries add a sweet tang. Juicy orange segments bring a citrusy pop. Sweet pineapple chunks add tropical flair. Crisp green grapes offer crunch. Plump blueberries add a mild sweetness. Deep purple grapes or blackberries provide a rich finish. Feel free to mix and match. Use your favorite fruits or whatever you have at home. The goal is to create a vibrant, tasty treat. You can also drizzle honey on top for added sweetness. Mint leaves add a nice touch. They make the dish look fancy and smell great. Remember, this is just a guide. You can adjust the amounts to fit your needs. For the full recipe, check out the complete instructions above. Enjoy your colorful creation! To start, wash all your fruits under cool running water. This step keeps them clean and safe to eat. For strawberries, remove the green tops. If they are big, slice them in half. Next, peel the oranges. Cut them into segments and toss out any seeds. Chop the pineapple into bite-sized chunks. Rinse the green grapes and blueberries to remove dirt and make them shine. Grab your wooden skewers. If you plan to grill them, soak the skewers in water for 10 minutes to prevent burning. Now, it’s time to thread the fruits onto the skewers! I like to start with one strawberry, then add one orange segment, a pineapple chunk, and a green grape. After that, toss on a few blueberries and finish with a purple grape or blackberry. This order gives you a bright, colorful look. Aim for a rainbow effect with every skewer! For a little extra sweetness, drizzle honey over the assembled skewers. This step is optional but adds a nice touch. If you want a chill treat, place the skewers in the fridge for about 30 minutes. Chilling helps the flavors pop and makes them extra refreshing. Enjoy these delicious Rainbow Fruit Skewers at your summer gatherings or as a fun snack! For the full recipe, check out [Full Recipe]. Picking ripe fruits is key for tasty skewers. Here are signs to watch for: - Strawberries: Look for bright red color without any green tops. - Oranges: Choose firm, heavy oranges with smooth skin. - Pineapple: Smell the bottom. A sweet aroma means it's ripe. - Green Grapes: Look for a vibrant green color and firm texture. - Blueberries: Pick plump blueberries with a deep blue hue. - Purple Grapes/Blackberries: Choose ones that are dark and slightly soft. Keep your fingers safe while making skewers. Here’s how: - Use wooden skewers that are at least 10 inches long. - Soak them in water for 10 minutes. This helps avoid burning. - Hold the fruit steady with one hand. Use the other to push it onto the skewer. - Start with firm fruits like strawberries. This helps stabilize softer fruits later. - Avoid using too much force. This can break the fruit apart. Make your skewers look as good as they taste. Try these tips: - Arrange skewers in a colorful pattern. Use a mix of all the fruits. - Place them on a bright platter. A white dish makes colors pop. - Garnish the platter with fresh mint leaves. They add a lovely aroma. - For extra flair, drizzle honey on top. It adds shine and sweetness. Explore more ideas in the [Full Recipe]. {{image_4}} You can switch up the fruits based on the season. In spring, use strawberries and blueberries for sweetness. In summer, opt for ripe peaches and cherries. Fall brings apples and pears, adding crunch. Winter is perfect for citrus like tangerines and pomegranates. Each season offers fresh flavors for your skewers. You can create fun themes for parties. For a summer BBQ, use red, white, and blue fruits for a patriotic look. For Halloween, add orange slices and blackberries for a spooky vibe. During the holidays, use red strawberries and green grapes for a festive feel. Matching colors makes your skewers pop! Adding protein can make your skewers more filling. You can thread cubes of cheese like cheddar or mozzarella between the fruits. Greek yogurt is another option—use it as a dip on the side. This adds taste and gives you energy for your summer fun. For the full recipe, check out Rainbow Fruit Skewers! To keep your rainbow fruit skewers fresh, store them in an airtight container. This helps keep moisture in and prevents the fruit from drying out. You can also cover them with plastic wrap if you don’t have a container. In the fridge, these skewers stay fresh for up to three days. After that, the fruit may start to lose its flavor and texture. You can make these skewers a few hours before your event. Just prepare the fruit and assemble the skewers. Store them in the fridge until you are ready to serve. If you want to save time, wash and cut the fruit a day ahead. Keep the pieces in separate containers. This way, you can quickly assemble your skewers when needed. Check out the Full Recipe for more tips on making and storing your rainbow fruit skewers! To scale this recipe, double or triple the ingredients. Use a mix of fruits to please all tastes. Prepare a large platter to display the skewers. Set up a fruit station where guests can make their own skewers. This way, everyone can choose their favorite fruits. You can use frozen fruit, but it may not look as good. Frozen fruit tends to be softer and can lose its shape. If using frozen fruit, let it thaw and drain any excess water. Fresh fruit gives a better texture and taste for skewers. Yes, Rainbow Fruit Skewers are very healthy! Each fruit offers vitamins and minerals. For instance, strawberries provide vitamin C. Oranges are high in fiber. Pineapple contains bromelain, which helps digestion. Grapes and blueberries are full of antioxidants. Enjoy these colorful treats guilt-free! If you want a vegan option, use maple syrup or agave nectar. You can also try yogurt or nut butter for creaminess. For a sugar-free choice, use a sugar-free syrup. These alternatives add sweetness and keep the skewers fun and tasty. To keep fruit fresh, soak apple or banana slices in lemon juice. This helps prevent browning. Store skewers in the fridge until serving. Keep them covered to avoid drying out. Fresh mint leaves also help keep everything looking bright and fresh. For a full recipe, check out the detailed steps in the earlier section! Rainbow fruit skewers combine fresh fruits for a colorful and tasty treat. We walked through selecting ripe fruits, skewering them, and adding sweet touches like honey. You can use fun themes for parties or add proteins for a snack. Keep them chilled and store them well to enjoy later. In the end, these skewers are fun to make and good for you. Enjoy creating your own rainbow of flavors!](https://dishtreats.com/wp-content/uploads/2025/06/1f4123b9-dd53-4d15-af26-e58167d567ef-768x768.webp)