Salted Caramel Chocolate Tart Irresistible Delight
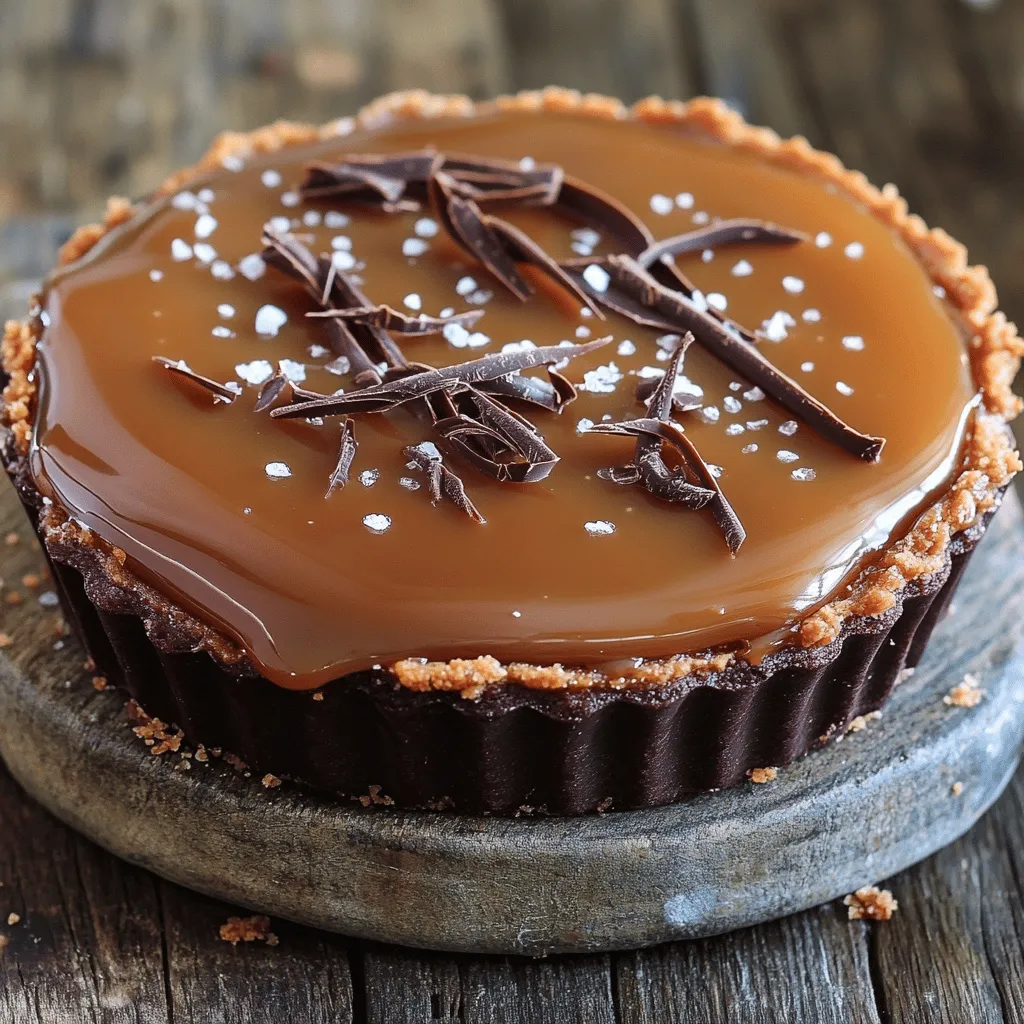
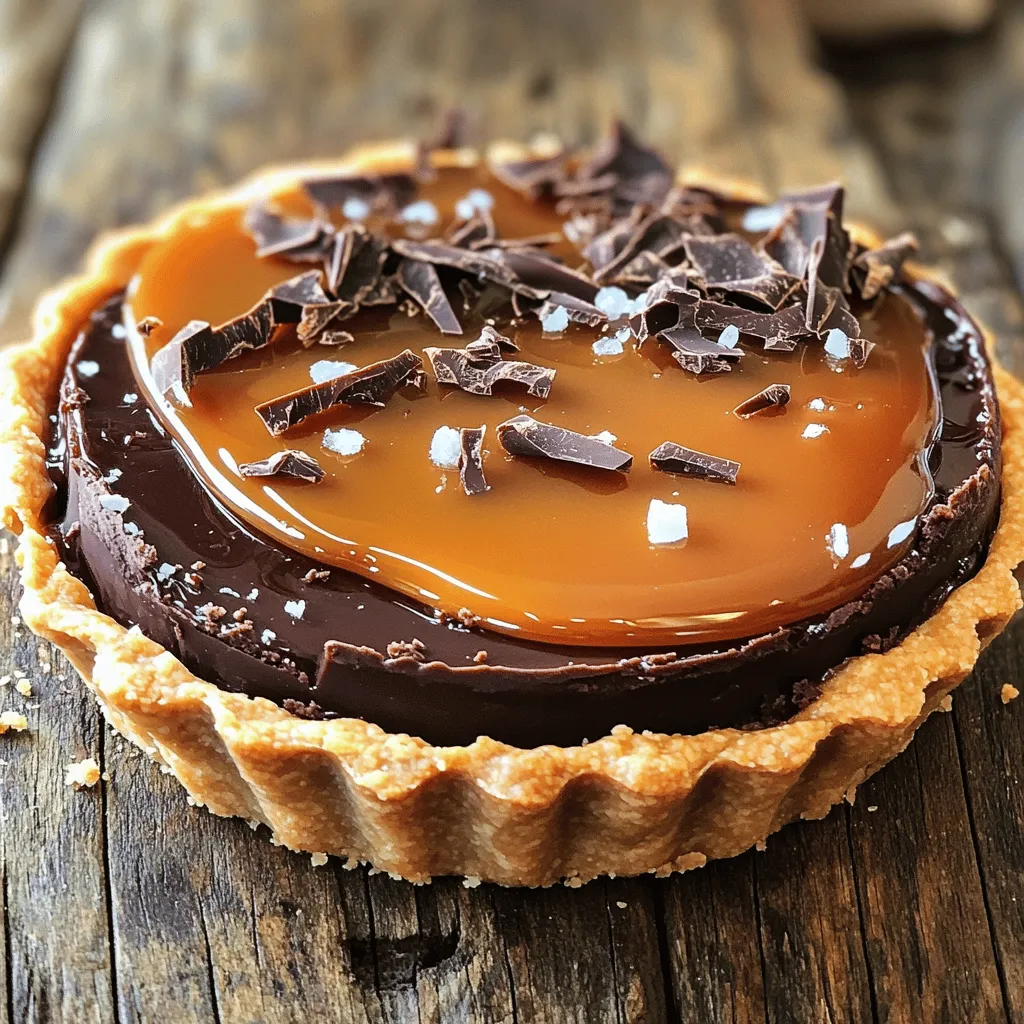
Get ready to indulge in the ultimate dessert experience with my Salted Caramel Chocolate Tart! This rich, creamy delight combines the perfect balance of sweet and salty, making it impossible to resist. I will walk you through every step, from crafting the tart crust to making the luscious salted caramel and chocolate layers. Let’s create a show-stopping dessert that will impress everyone! Your taste buds are in for a treat!
Ingredients
Detailed List of Ingredients
To make a salted caramel chocolate tart, gather these key ingredients:
- 1 ½ cups all-purpose flour
- 1/2 cup unsweetened cocoa powder
- 1/4 cup powdered sugar
- 1/2 cup cold unsalted butter, cubed
- 1 large egg yolk
- 2 tablespoons ice water
- 1 cup granulated sugar
- 1/2 cup heavy cream
- 1/4 cup unsalted butter, diced
- 1 teaspoon sea salt (divided)
- 8 ounces dark chocolate (60-70% cacao), chopped
- 1 teaspoon vanilla extract
Each ingredient plays a vital role in the tart’s taste and texture. The all-purpose flour and cocoa powder create a rich crust. The powdered sugar adds sweetness. Cold butter ensures a flaky crust. The egg yolk binds the dough, while ice water helps form it.
For the salted caramel, granulated sugar transforms into a golden delight. Heavy cream and butter lend richness, while sea salt balances the sweetness. Finally, dark chocolate and vanilla extract combine for a luscious layer.
This combination creates a tart that is truly irresistible.
Step-by-Step Instructions
Preparing the Tart Crust
- In a food processor, combine:
- 1 ½ cups all-purpose flour
- 1/2 cup unsweetened cocoa powder
- 1/4 cup powdered sugar
- 1/2 cup cold unsalted butter, cubed
Pulse until the mix looks like coarse sand.
- Add:
- 1 large egg yolk
- 2 tablespoons ice water
Pulse until the dough forms. If too dry, add water slowly.
- Shape the dough into a disc. Wrap it in plastic. Chill for at least 30 minutes.
- Preheat your oven to 350°F (175°C). Roll the chilled dough to about 1/4-inch thick.
- Carefully fit the dough into a 9-inch tart pan. Prick the base with a fork to prevent bubbling. Bake for 15-18 minutes until set. Cool on a wire rack.
Making the Salted Caramel
- In a medium saucepan, melt:
- 1 cup granulated sugar
Heat on medium until it turns a deep amber color. Swirl the pan gently as it melts.
- Once melted, carefully add:
- 1/2 cup heavy cream
- 1/4 cup unsalted butter, diced
- 1 teaspoon sea salt (divided)
The mix will bubble up. Stir until smooth and blended. Set aside to cool slightly.
Creating the Chocolate Layer
- Place in a heatproof bowl:
- 8 ounces dark chocolate (60-70% cacao), chopped
- 1 teaspoon vanilla extract
- Pour the warm salted caramel over the chocolate. Let it sit for a minute. Stir until it becomes smooth and glossy.
- Pour this chocolate-caramel mix into the cooled tart crust. Use a spatula to smooth it out. Sprinkle with the remaining 1/2 teaspoon sea salt.
- Chill the tart for at least 2 hours to set. Enjoy slicing it into delicious portions!
Tips & Tricks
Perfecting the Tart Crust
- For a great dough, mix flour, cocoa, and sugar well. Add cold butter until it looks like coarse sand.
- If the dough feels too dry, add cold water slowly. Make sure it holds together but isn’t sticky.
- Prick the crust with a fork before baking to stop it from bubbling. Bake until firm for a perfect base.
Mastering Salted Caramel
- To make good caramel, heat sugar slowly until it turns a deep amber. Don’t stir it; just swirl the pan gently.
- When adding heavy cream, do it slowly. The mixture will bubble up, so be careful. Stir in butter and sea salt for flavor.
- Watch the sugar closely. If it smells burnt, start over. Perfect caramel should be smooth and shiny.
Presentation Tips
- For a fancy touch, drizzle extra caramel sauce over each slice before serving.
- Add a sprinkle of sea salt on top for that salty-sweet balance.
- Enhance the look with chocolate shavings or edible flowers. They make your tart stand out and look special.
Variations
Flavor Variations
You can boost this tart’s taste by adding espresso or coffee. Just a tablespoon can make a big difference. It adds a rich depth that balances the sweet caramel. Try different types of chocolate too. Dark chocolate gives a deep flavor. Milk chocolate adds creaminess, while white chocolate offers sweetness. Mix and match to find your favorite combo.
Dietary Modifications
If you need a gluten-free option, use almond flour or a gluten-free flour blend. This keeps the crust tasty and safe for everyone. For a dairy-free tart, swap heavy cream with coconut cream. You can also use dairy-free chocolate. Brands now offer great options that melt well and taste yummy.
Additional Toppings
Toppings can take your tart to the next level. Consider adding nuts for crunch. Chopped pecans or walnuts work great. Whipped cream can add a light touch and balance the richness. Fresh fruit like berries or slices of banana can add freshness and color. Get creative and make it your own!
Storage Info
Best Storage Practices
To keep your salted caramel chocolate tart fresh, store it in the refrigerator. Use an airtight container or cover it tightly with plastic wrap. This prevents moisture loss and keeps the tart from absorbing other smells in your fridge. It can stay fresh for up to five days. If you want to keep it longer, consider freezing it.
Freezing Options
You can freeze your salted caramel chocolate tart for longer storage. First, let it cool completely after making it. Once it is cool, wrap it tightly in plastic wrap. Then, place it in a freezer-safe container or bag. This helps avoid freezer burn. The tart can last up to three months in the freezer.
When you’re ready to serve, take the tart out of the freezer. Leave it in the fridge overnight to thaw slowly. This helps preserve the texture and taste. After thawing, serve it cold for the best flavor. Enjoy your delicious tart!
FAQs
How long does it take to make a Salted Caramel Chocolate Tart?
Making a salted caramel chocolate tart takes about 2.5 hours in total. This includes:
- Prep Time: 30 minutes
- Chill Time: 2 hours
- Bake Time: 15-18 minutes
Can I make the tart in advance?
Yes, you can prepare the tart ahead of time. Here are some tips:
- Make the tart crust a day before.
- Store it in the fridge after cooling.
- Prepare the salted caramel the day before, too.
- Assemble everything the day you plan to serve it for the best taste.
What can I serve with the Salted Caramel Chocolate Tart?
Pair the tart with delicious options:
- Beverages: Coffee, tea, or dessert wine
- Desserts: Vanilla ice cream or whipped cream
- Fruits: Fresh berries or sliced bananas
Can I customize the salted caramel level?
Absolutely! Adjust the sweetness and saltiness by:
- Reducing the granulated sugar for a less sweet caramel.
- Adding more sea salt to enhance the flavor.
- Tasting as you go to find the right balance for you.
This blog post covered all you need for a perfect Salted Caramel Chocolate Tart. You learned about essential ingredients, step-by-step instructions, and useful tips. We also explored fun variations and storage methods.
Baking is rewarding and fun. Don’t hesitate to try your own twists. Enjoy every bite of your delicious creation!





![- 1 pound boneless, skinless chicken breast, thinly sliced - 1 tablespoon extra virgin olive oil - 1 teaspoon chili powder - 1 teaspoon ground cumin - ½ teaspoon smoked paprika - ½ teaspoon garlic powder - ½ teaspoon onion powder - Sea salt and freshly cracked black pepper, to taste - 1 red bell pepper, sliced into thin strips - 1 yellow bell pepper, sliced into thin strips - 1 medium onion, sliced - 1 head of iceberg or romaine lettuce, leaves carefully separated I always choose organic chicken when I can. It tastes better and is healthier. Good seasoning transforms chicken into a flavorful dish. Chili powder and cumin bring warmth, while smoked paprika adds depth. Keep your vegetables fresh! Use bright, crisp bell peppers and onions. They add color and crunch to your wraps. For the lettuce, iceberg or romaine works best. Their sturdy leaves hold the filling well. - 1 ripe avocado, sliced - Fresh cilantro leaves, for garnish - Lime wedges, for drizzling Avocado adds creaminess and balances the spiciness. Cilantro brings a fresh burst of flavor. Lime juice brightens the dish and enhances all the tastes. For sauces, you can use salsa for a zesty kick. A yogurt sauce makes a cool contrast to the spicy chicken. These toppings and dips elevate your chicken fajita lettuce wraps. You can find the Full Recipe for more details on preparation and cooking. Enjoy making these fresh and flavorful meals! To make your chicken fajita lettuce wraps burst with flavor, seasoning is key. Start by mixing the chicken with olive oil and spices. Use chili powder, cumin, smoked paprika, garlic powder, onion powder, sea salt, and black pepper. This mix will coat the chicken well and enhance its taste. Next, let’s slice the vegetables correctly. For even cooking, cut the bell peppers and onion into thin strips. This helps them cook through while keeping a nice crunch. Remember, uniform slices ensure they cook at the same rate. Now, prepare the lettuce leaves. Rinse them gently under cold water. Pat them dry with a towel to avoid soggy wraps. Choose firm leaves that can hold the filling well. Iceberg or romaine works best for this recipe. Heat your skillet to medium-high. This temperature is perfect for cooking the chicken. When it's hot, add the seasoned chicken and cook for about 5-7 minutes. Stir occasionally to get an even golden-brown color. Make sure the chicken is fully cooked and no longer pink inside. After the chicken is done, add your sliced vegetables. Cook for an extra 4-5 minutes. Stir frequently to keep the veggies bright and tender-crisp. This technique ensures they maintain great texture and taste. Now, it's time to assemble your wraps. Take a lettuce leaf and spoon in a generous amount of the chicken and vegetable mix. Add a few slices of creamy avocado on top. Finish with fresh cilantro for extra flavor. For presentation, arrange the wraps on a nice platter. Serve with lime wedges to add a zesty touch. A squeeze of lime juice brightens the flavors and makes each bite pop. Enjoy this fresh and flavorful meal from the full recipe! To avoid overcooking the chicken, use a meat thermometer. Chicken should reach 165°F. Remove it from the heat the moment it's done. This keeps the meat juicy and tender. Let the chicken rest for 5 minutes before serving. This helps the juices redistribute, making each bite full of flavor. To add heat, include diced jalapeños or cayenne pepper. Start with a small amount, then taste as you go. You can also try chipotle powder for a smoky kick. To balance flavors, squeeze fresh lime juice over the wraps. The acidity brightens the dish and complements the spices. Pair your chicken fajita wraps with a fresh side salad. A simple mix of greens, tomatoes, and cucumbers works well. You can also serve them with corn on the cob or seasoned rice. These wraps are perfect for casual gatherings or family dinners. They are also great for a fun weeknight meal! For the full recipe, check the earlier section. {{image_4}} You can swap out chicken for other proteins. Shrimp works great and cooks fast. Tofu is a perfect choice for a plant-based option. Both give you tasty results. If you need gluten-free or low-carb wraps, try using collard greens or cabbage leaves instead of lettuce. These options hold up well and add a nice crunch. You can change the spice blend to suit your taste. Try adding cayenne for heat or smoked paprika for a deeper flavor. You can also use a store-bought fajita seasoning if you're short on time. Seasonal veggies can make your wraps pop. In summer, throw in fresh corn and zucchini. In fall, use roasted butternut squash for a sweet twist. For parties, serve the wraps on a large platter. Arrange the lettuce leaves and filling bowls in a fun way. This lets guests build their own wraps, making it interactive and fun. If you want to prepare these wraps for lunch, pack the filling and lettuce separately. This keeps the lettuce crisp and fresh. You can also use small containers for dips like salsa or guacamole. For the full recipe, visit [Full Recipe]. To keep your chicken fajita lettuce wraps fresh, follow these steps: - Separate the filling and lettuce: Store the chicken and veggies in one container, and the lettuce in another. This keeps the lettuce crisp. - Use airtight containers: Choose containers that seal tightly to prevent air from getting in. - Cool before storing: Let the filling cool to room temperature before sealing. This helps avoid condensation, which can make the chicken soggy. When it's time to enjoy your leftovers, here are some tips: - Reheat in a skillet: Place the chicken fajita filling back in a skillet over medium heat. Stir often to warm evenly without drying it out. - Add a splash of water: If the filling seems dry, add a little water or broth. This keeps it moist and flavorful. - Refresh the lettuce: Rinse the lettuce leaves again under cold water. This helps them feel crisp and fresh. If you want to save your chicken fajitas for later, follow these guidelines: - Freeze the filling: Place cooled chicken and veggies in a freezer-safe bag. Remove as much air as possible before sealing. - Label and date: Write the date on the bag. Use within three months for best taste. - Thaw safely: When ready to eat, thaw the filling overnight in the fridge. Reheat it as mentioned earlier. Prepare fresh lettuce just before serving. For the full recipe, check out the spicy chicken fajita lettuce wraps. To add heat, try these spices and sauces: - Red pepper flakes - Jalapeños, diced - Hot sauce of your choice - Chipotle powder - Fresh diced chili peppers Mix these into your chicken or drizzle on top. You can adjust the heat based on your taste. If you want a smoky flavor, chipotle powder works great. Yes, you can prep ingredients in advance. - Slice the chicken and veggies the night before. - Store them in airtight containers in the fridge. - Cook the chicken and veggies just before serving. This way, you can save time and still enjoy fresh flavors. Absolutely! They are low in carbs and high in protein. - One serving contains lean chicken and fresh veggies. - You get vitamins from the peppers and lettuce. - Avocado adds healthy fats. This meal is tasty and supports a balanced diet. Yes, you can use other greens. Here are some ideas: - Butter lettuce for a softer wrap - Green leaf lettuce for extra crunch - Collard greens for a sturdy option These alternatives can change the taste and feel of your wraps. These sides complement your wraps nicely: - Fresh corn salad - Quinoa salad with lime - Black bean salsa - Grilled veggies These options add color and variety to your meal. For the full recipe, check the main section of this article. Chicken fajita lettuce wraps are a great way to enjoy fresh ingredients and bold flavors. We covered the key ingredients, from quality chicken to perfect seasoning. I shared step-by-step instructions for preparation and cooking, plus tips to avoid common mistakes. You can also explore fun variations and creative ways to serve these wraps. Don't forget about storage options to keep your leftovers fresh. With this guide, you can easily create a tasty and healthy meal anytime. Enjoy experimenting with flavors and serving styles!](https://dishtreats.com/wp-content/uploads/2025/07/3ff26f4d-3e29-49ec-9670-a4271fb272fb-768x768.webp)