Cheesy Broccoli Tater Tot Casserole Quick and Easy Meal
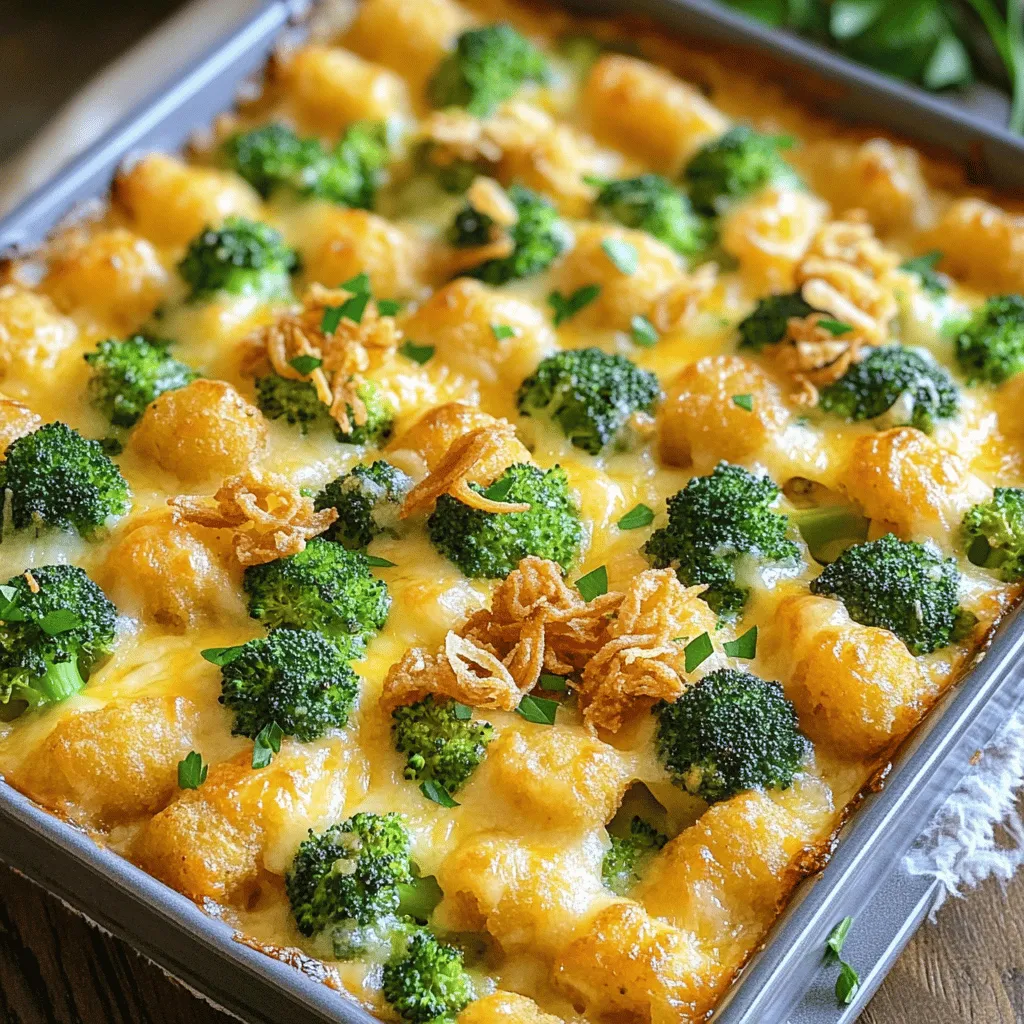
Looking for a quick comfort dish that the whole family will love? Look no further than my Cheesy Broccoli Tater Tot Casserole. This easy recipe combines crispy tater tots, fresh broccoli, and gooey cheese into one amazing meal. It’s perfect for busy nights and even better for potlucks! Grab your baking dish, and let’s dive into making this cheesy goodness that everyone will ask for again.
Ingredients
Main Ingredients for Cheesy Broccoli Tater Tot Casserole
- 1 bag (32 oz) frozen tater tots
- 3 cups fresh broccoli florets
- 2 cups shredded cheddar cheese, divided
- 1 cup sour cream
- 1 can (10.5 oz) cream of mushroom soup
- 1 cup milk
The base of this dish is frozen tater tots. They give a crispy texture. Fresh broccoli florets add brightness and nutrients. Shredded cheddar cheese makes it gooey and rich. Sour cream adds creaminess. The cream of mushroom soup brings a savory flavor. Lastly, milk helps blend everything together.
Spices and Seasonings
- 1 teaspoon garlic powder
- 1 teaspoon onion powder
- Salt and pepper to taste
Garlic powder and onion powder enhance the flavor of the dish. Salt and pepper balance everything. These spices are simple but vital for taste.
Optional Toppings
- 1 cup crispy fried onions (optional, for topping)
- Fresh chopped parsley for garnishing
Crispy fried onions add crunch on top. Fresh parsley gives a pop of color and flavor. You can mix and match toppings based on your taste.
Step-by-Step Instructions
Preparing the Oven and Broccoli
- Preheat oven to 400°F (200°C).
- Bring a large pot of water to a boil. Add the broccoli florets and blanch them for 2-3 minutes. They should turn bright green and be slightly tender. Drain and set aside.
Making the Cheesy Mixture
- In a large bowl, combine sour cream, cream of mushroom soup, milk, garlic powder, onion powder, and a pinch of salt and pepper. Whisk until smooth.
- Gently fold in the blanched broccoli and 1.5 cups of shredded cheddar cheese until everything is well mixed.
Assembling the Casserole
- Grease a 9×13-inch baking dish. Layer the tater tots evenly across the bottom.
- Carefully pour the cheesy broccoli mixture over the tater tots. Spread it out evenly.
- Sprinkle the remaining 0.5 cups of shredded cheddar cheese on top. If you want, add crispy fried onions for extra crunch.
Follow these steps to create a warm and cheesy meal.
Tips & Tricks
Baking Tips
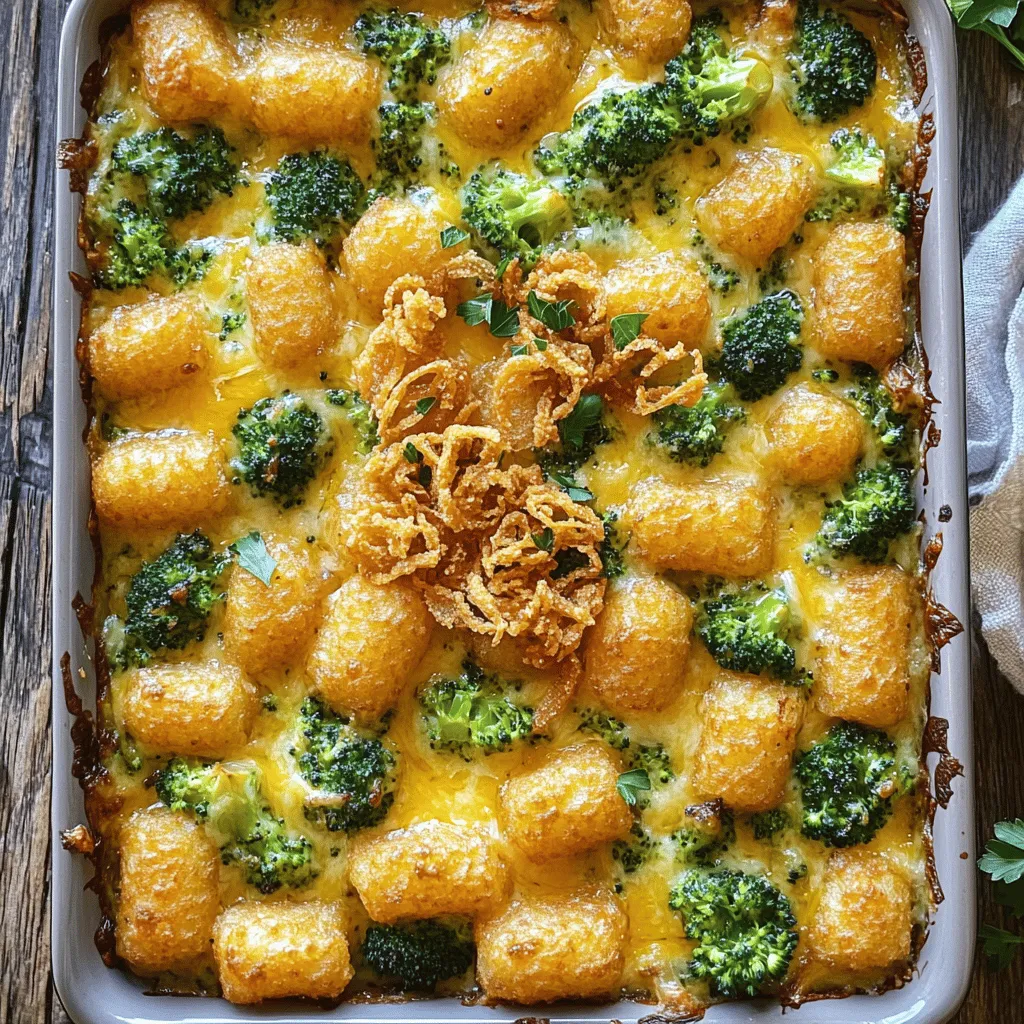
To ensure your casserole cooks evenly, spread the tater tots in a single layer. This helps create a lovely golden crust. If your oven runs hot or cool, keep an eye on the casserole. You may need to adjust the time by a few minutes. If it looks bubbly and golden, it’s time to take it out.
Serving Suggestions
Serve the casserole hot for the best taste. A sprinkle of fresh parsley adds color and flavor. You can pair this dish with a simple salad or some crusty bread. These sides balance the rich taste of the casserole.
Make-Ahead Tips
You can prepare the casserole in advance. Assemble it, cover it, and store it in the fridge for up to 24 hours. If you want to freeze it, do so before baking. Wrap the dish tightly and freeze for up to three months. To reheat, bake it straight from the freezer. Just add extra time to ensure it heats through.
Variations
Vegetarian Variations
You can make this dish even better by adding other veggies. Cauliflower, carrots, or even bell peppers work great. They add color and taste. You can also switch out the creamy ingredients. Instead of sour cream, use Greek yogurt for a tangy twist. You can replace cream of mushroom soup with a homemade version made from blended mushrooms and vegetable broth.
Protein Additions
To make it heartier, consider adding protein. Cooked chicken or ground beef mixes well with the flavors. Shred leftover rotisserie chicken for quick prep. Ground beef gives a nice texture and can be seasoned to your liking. If you prefer vegetarian options, try adding cooked lentils or chickpeas. They bring protein and a satisfying bite.
Gluten-Free Options
For a gluten-free version, use gluten-free tater tots. Many brands offer tasty options that fit the bill. You should also look for gluten-free cream of mushroom soup. You can make your own by combining mushrooms, broth, and a gluten-free thickener. This keeps the dish creamy without the gluten.
Explore these variations to customize your cheesy broccoli tater tot casserole.
Storage Info
Storing Leftovers
To keep your Cheesy Broccoli Tater Tot Casserole fresh, place leftovers in the fridge. Use airtight containers to prevent moisture loss and keep flavors intact. Glass or plastic containers work well. Make sure to let the casserole cool down before sealing it. This helps avoid condensation inside the container.
Freezing the Casserole
You can freeze the casserole for longer storage. First, let it cool completely. Then, cover the dish tightly with plastic wrap or aluminum foil. This prevents freezer burn. You can also portion it into smaller containers for easy meals later. When you’re ready to eat, thaw the casserole in the fridge overnight. For reheating, place it in the oven at 350°F (175°C) until hot throughout.
Shelf Life
In the fridge, the casserole lasts about 3-4 days. If you freeze it, it can last up to 2-3 months. Watch out for signs of spoilage, like an off smell or a change in color. If you see any mold, throw it away immediately. Keeping an eye on these details ensures you enjoy your delicious meal to the fullest.
FAQs
How long does it take to bake Cheesy Broccoli Tater Tot Casserole?
Baking this casserole takes about 30 to 35 minutes. I recommend setting your oven to 400°F (200°C). Keep an eye out for the cheese. It should be bubbly and golden brown when done. Every oven varies slightly, so check for doneness. If you like a crispier top, you can bake it a bit longer. Just make sure it doesn’t burn.
Can I use fresh cheese instead of shredded cheddar?
Yes, you can use fresh cheese! Fresh cheese, like mozzarella or gouda, can add a unique flavor. However, shredded cheese melts better and mixes well. If you choose fresh cheese, grate it finely for best results. You might also want to blend different cheeses for a richer taste. Experimenting with cheese can lead to fun flavors!
Is this casserole suitable for potlucks?
Absolutely! This casserole is a great choice for potlucks. It’s easy to make and always a hit. To transport it, cover the dish tightly with foil. If you can, bring it in an insulated carrier to keep it warm. You can serve it right from the baking dish. Just make sure to bring a spatula or spoon for easy serving. Everyone will love digging into this cheesy delight!
This Cheesy Broccoli Tater Tot Casserole is a fun and tasty dish. You learned about the key ingredients, like tater tots, cheese, and broccoli. We went step by step on how to prepare, bake, and store it. Remember, you can add veggies or protein if you want. This casserole is great for family meals or potlucks. I hope you enjoy making it as much as I do. Happy cooking!



![- 1 pre-made pizza dough - 1/2 cup fresh basil pesto - 1 cup shredded mozzarella cheese - 1 medium lemon (zested and juiced) - 1 cup cherry tomatoes, halved - 1/4 cup finely grated Parmesan cheese - 1 tablespoon extra-virgin olive oil - Salt and freshly ground black pepper to taste - Fresh basil leaves for garnish - Additional toppings (e.g., olives, peppers) - Alternative cheese options (feta, goat cheese) To make a great Lemon Basil Pesto Pizza, you need these ingredients. They work together to create a fresh, bright flavor. First, the pre-made pizza dough saves time and makes this recipe easy. You can find it in stores. Fresh basil pesto adds a rich, herby taste. It’s the star of this dish. Shredded mozzarella cheese melts beautifully. It gives that familiar cheesy texture we love. The lemon zest and juice bring a tangy punch. Cherry tomatoes add sweetness and color. Grated Parmesan cheese gives a nutty, salty flavor. The olive oil helps everything blend well. Salt and pepper round out the taste. For those who want to mix things up, you can add more toppings. Olives and peppers are great choices. You might also try different cheeses like feta or goat cheese for a twist. With these simple and tasty ingredients, you’re on your way to making a delightful pizza. For the full recipe and step-by-step guide, check out the [Full Recipe]. 1. Preheat your oven to 475°F (245°C). If you have a pizza stone, place it in the oven. This helps the crust cook evenly. If not, use a baking sheet. 2. Lightly flour a clean surface. Roll out the pizza dough to your desired thickness. Make sure it fits your baking surface. 3. Once rolled out, move the dough onto parchment paper. This will help you transfer the pizza later. 1. Spread the fresh basil pesto over the dough. Leave a half-inch border for the crust. 2. Sprinkle the shredded mozzarella cheese over the pesto. Make sure it covers the whole pizza. 3. Add the halved cherry tomatoes on top of the cheese. This adds color and flavor. 4. Drizzle the extra-virgin olive oil over everything. Season with salt and freshly ground black pepper to taste. 5. Zest the lemon and sprinkle it evenly on the pizza. This adds a fresh citrus aroma. 1. Slide the parchment paper with the pizza onto the preheated pizza stone or baking sheet. 2. Bake for about 12-15 minutes. Look for a golden brown crust and bubbling cheese. 3. Carefully take the pizza out of the oven. Drizzle fresh lemon juice over the top. 4. Sprinkle grated Parmesan cheese over the warm pizza. Add fresh basil leaves for garnish. 5. Use a sharp knife or pizza cutter to slice the pizza into wedges. Serve hot for the best taste. You can find the Full Recipe for this delicious Lemon Basil Pesto Pizza above. To get the best crust, I recommend using a pizza stone. It heats up and gives your pizza a crispy base. If you don’t have one, a baking sheet works too. Just make sure you preheat it well. Roll your pizza dough to the right thickness. Aim for about a quarter-inch thick. This allows for a nice rise and crunch without being too thin. For flavor, balance the saltiness with fresh lemon juice. A squeeze of lemon brightens up the taste. It makes the pizza feel fresh and lively. Use only fresh ingredients. Fresh basil, ripe tomatoes, and good cheese make a big difference. They add depth and vibrancy to your dish. When serving, place the pizza on a rustic wooden board. It adds a nice touch. You can also use a colorful platter for a fun look. Garnish with whole basil leaves and a lemon wedge. This makes it visually appealing and invites your guests to dig in. Serve it hot for the best taste! For the full recipe, check out the complete details above. {{image_4}} You can switch up the sauce for your pizza. Tomato sauce works well if you want a classic taste. You can also try a creamy white sauce. This adds a rich flavor that pairs nicely with lemon. Seasonal pesto is another fun option. You can make it with fresh herbs like parsley or cilantro. This gives a new twist to your dish. If you need a gluten-free pizza, several dough options are available. Many stores sell gluten-free pizza crusts. You can also make your own using almond flour or cauliflower. For those who follow a vegan diet, you can skip the cheese. There are many tasty vegan cheese substitutes. Look for brands made from nuts or soy for a creamy texture. Toppings can make your pizza unique. Popular choices include pepperoni, mushrooms, and bell peppers. Try mixing and matching your favorites. Seasonal vegetables add color and flavor. In summer, fresh zucchini or bell peppers work well. In winter, roasted butternut squash or kale can be a great choice. Don't be afraid to get creative with your toppings! To keep your Lemon Basil Pesto Pizza fresh, let it cool to room temperature. This step is key to avoid moisture buildup. Wrap each slice in plastic wrap or aluminum foil. You can also place them in an airtight container. This helps retain flavor and texture. Store the pizza in the fridge for up to three days. For best results, enjoy it within this time frame. When it's time to eat leftovers, you can use either an oven or a microwave. The oven is best for maintaining crispiness. Preheat your oven to 375°F (190°C). Place the pizza on a baking sheet and heat for about 10 minutes. This warms it up well without making it soggy. If you choose the microwave, place a slice on a microwave-safe plate. Add a cup of water next to it. This helps keep the crust from getting too chewy. Heat in 30-second intervals until warm. But remember, the microwave won't keep it crispy. For the best taste, the oven is your friend! Use these tips to enjoy your pizza even after the first delightful slice. For the full recipe, check out the complete article. To make your own basil pesto, you need a few simple ingredients. Combine fresh basil, garlic, pine nuts, Parmesan cheese, and olive oil in a food processor. Blend until smooth. Adjust the taste with salt and pepper. This mix adds great flavor to your pizza. Yes, you can freeze lemon basil pesto pizza. First, let the pizza cool completely. Then, wrap it in plastic wrap and place it in a freezer bag. It can last for up to three months. When you are ready to eat, bake it straight from the freezer. This makes a quick meal! Several side dishes pair well with lemon basil pesto pizza. Here are some of my favorites: - A light green salad with vinaigrette - Garlic bread for a crunchy side - Roasted vegetables for added flavor These sides balance the pizza's taste and make for a complete meal. To cut your pizza into even slices, use a sharp pizza cutter or knife. Start by cutting it in half, then cut each half into smaller sections. Aim for 8 slices for a standard pizza. This way, everyone gets a fair share! You can find high-quality pre-made pizza dough at many grocery stores. Look in the refrigerated section or the freezer aisle. Some local pizzerias also sell their dough. If you want a special option, check out artisan bakeries. They often have fresh dough made with quality ingredients. In this pizza guide, we covered essential ingredients, step-by-step instructions, and useful tips. You learned how to customize your pizza and store leftovers. Remember, fresh ingredients make a big difference in taste. If you try different toppings or variations, have fun with it! I believe cooking should be enjoyable and creative. Follow these steps, and you’ll create delicious pizza every time. Enjoy your cooking adventure!](https://dishtreats.com/wp-content/uploads/2025/06/c2cede7a-626b-4fd1-91be-1b09c425b287-768x768.webp)