
Strawberry Chocolate Chip Scones Tasty and Simple Treat


Are you ready for a delicious treat that’s easy to make? Strawberry Chocolate Chip Scones offer a perfect blend of sweet strawberries and rich chocolate. They are light, flaky, and sure to brighten your morning. In this guide, I’ll show you how to whip up these tasty scones using simple ingredients and a few easy steps. Let’s dive into the world of baking and create a treat you’ll love to share!
Why I Love This Recipe
- Delicious Flavor Combination: The blend of fresh strawberries and rich chocolate chips creates a delightful balance of sweetness and tartness in every bite.
- Easy to Make: This scone recipe is straightforward and requires minimal ingredients, making it perfect for both novice and experienced bakers.
- Perfect for Any Occasion: Whether for breakfast, brunch, or an afternoon treat, these scones are versatile and sure to impress guests.
- Beautiful Presentation: The golden-brown scones topped with coarse sugar and served with fresh strawberries make for an inviting and visually appealing dish.
Ingredients
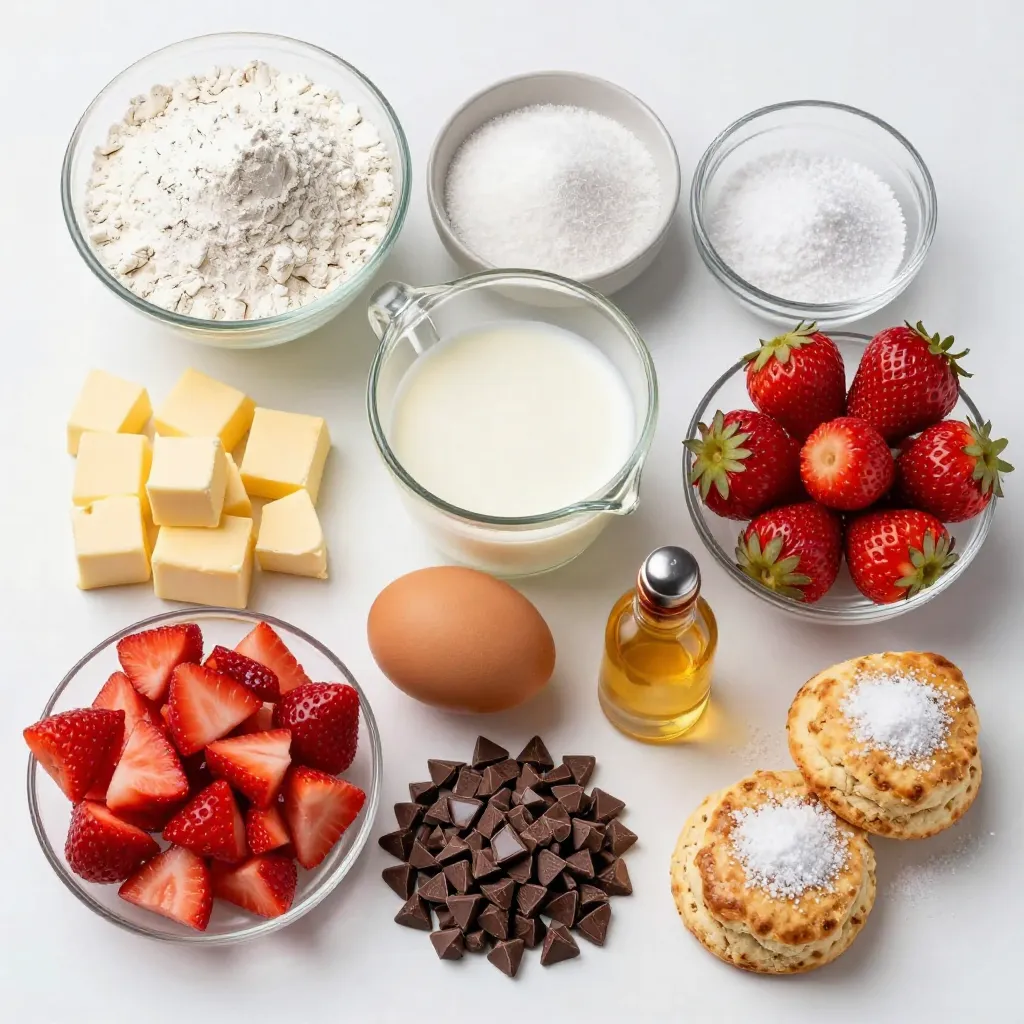
List of Key Ingredients
- 2 cups all-purpose flour
- 1/4 cup granulated sugar
- 2 teaspoons baking powder
- 1/2 teaspoon salt
- 1/2 cup cold unsalted butter, diced into small cubes
- 1/2 cup heavy cream
- 1 large egg, at room temperature
- 1 teaspoon vanilla extract
- 1 cup fresh strawberries, hulled and diced into small pieces
- 3/4 cup semisweet chocolate chips
- 1 tablespoon coarse sugar for topping
When I make these scones, I use fresh and high-quality ingredients. Each one plays a key role. The flour provides the base, while sugar adds sweetness. Baking powder makes them rise. Salt enhances the flavors and balances the sweetness.
Using cold butter is crucial. It creates a flaky texture. The heavy cream brings moisture to the dough. The egg helps bind everything together. Vanilla adds a warm flavor that pairs well with chocolate and strawberries.
Fresh strawberries bring a burst of flavor and color. They add moisture and a fruity zing. Semisweet chocolate chips give a rich sweetness that complements the strawberries. Lastly, coarse sugar on top gives a nice crunch.
Optional Enhancements
- Fresh herbs like basil or mint can uplift the flavor.
- Adding citrus zest, like lemon or orange, brightens the scone.
- You can also swap sugar for honey or maple syrup.
- Use almond flour or oat flour for gluten-free options.
These enhancements allow you to customize the recipe. Feel free to experiment based on your taste. Use what you have on hand to create your perfect scone.
Step-by-Step Instructions
Preparation Overview
- Preheat your oven to 400°F (200°C). This step is key for a good bake.
- Line a baking sheet with parchment paper. This helps prevent the scones from sticking.
- In a large bowl, mix 2 cups of all-purpose flour, 1/4 cup of granulated sugar, 2 teaspoons of baking powder, and 1/2 teaspoon of salt. Whisk these dry ingredients together well.
Making the Dough
- Add 1/2 cup of cold unsalted butter, diced into small cubes, to the flour mixture.
- Use a pastry cutter or your fingers to mix the butter into the flour. You want a crumbly texture. This helps the scones become light and flaky.
- In a separate bowl, whisk together 1/2 cup of heavy cream, 1 large egg, and 1 teaspoon of vanilla extract. Mix until smooth.
Combining and Shaping
- Pour the wet mixture into the dry ingredients. Gently stir until just combined. Be careful not to overmix.
- Fold in 1 cup of diced fresh strawberries and 3/4 cup of semisweet chocolate chips. Make sure they are evenly mixed.
- Transfer the dough onto a floured surface. Pat it into a round disc about 1-inch thick.
- Use a sharp knife to cut the disc into 8 wedges. Place the wedges on the prepared baking sheet. Leave space between each scone.
- Sprinkle 1 tablespoon of coarse sugar on top of each scone for a nice finish.
- Bake the scones for 15 to 20 minutes. They should be golden brown at the edges. Watch them closely as they bake!
- Once done, cool the scones on a wire rack for a few minutes. Enjoy them warm!
Tips & Tricks
Ensuring Light and Flaky Scones
To make light and flaky scones, use cold butter. Cold butter makes small pockets in the dough. This helps create a tender texture. Cut the butter into the flour until it looks like coarse crumbs. This step is key for great scones.
Be careful not to overmix the dough. Overmixing can lead to tough scones. Mix until just combined. This keeps your scones soft and fluffy.
Perfect Baking Techniques
Watch the bake time closely. You want golden edges for perfect scones. Depending on your oven, bake for 15 to 20 minutes. Check them at the 15-minute mark to avoid burning.
Let the scones cool on a wire rack. This helps them keep a nice texture. Cooling allows steam to escape, keeping them fluffy.
Serving Suggestions
Serve your scones warm with whipped cream or fruit jams. A dollop of whipped cream adds a rich touch. You can also use your favorite jam for a sweet burst of flavor.
Pair the scones with tea or coffee. A hot drink complements the sweet scones well. Enjoy them as a delightful breakfast or snack!
Pro Tips
- Use Cold Ingredients: Ensure your butter and cream are cold to achieve the best texture for your scones. This helps create a flaky and tender result.
- Don’t Overmix: Mix the dough just until combined. Overmixing can lead to dense scones, so be gentle when combining the wet and dry ingredients.
- Fresh Strawberries: Use fresh strawberries for the best flavor and texture. Frozen strawberries can make the dough too wet and affect the baking process.
- Watch the Baking Time: Keep an eye on the scones towards the end of baking. They should be golden brown at the edges, and a few minutes can make a significant difference.
Variations
Seasonal Fruit Swaps
You can change the fruit to suit the season. Blueberries and raspberries work great in this recipe. They add a fresh taste and look beautiful. If you find a fruit in season, give it a try! You may discover a new favorite. Just make sure to chop any larger fruits into small pieces. This helps the dough mix evenly.
Different Chocolate Options
Chocolate chips can vary too! You can choose dark chocolate instead of semisweet. Dark chocolate gives a richer taste. If you prefer something sweeter, go for white chocolate chips. Each type of chocolate brings a unique flavor to the scones. Feel free to mix and match your chocolate choices for fun experiments.
Gluten-Free Alternatives
If you need gluten-free scones, you can use gluten-free flour mixes. These mixes are easy to find in stores. They can replace regular flour in a 1:1 ratio. Just check the packaging for any special instructions. Your scones will still taste delicious and fluffy! Enjoy all the flavors without the gluten.
Storage Info
Storing Leftover Scones
To keep your scones fresh, store them in an airtight container. This method helps maintain their soft texture. You can leave them at room temperature for up to two days. If you want to keep them longer, consider freezing.
Freezing Scones
You can freeze both pre-baked and baked scones. For pre-baked scones, shape the dough and place the wedges on a baking sheet. Freeze them for about an hour. Once frozen, transfer them to a zip-lock bag. For baked scones, let them cool completely before wrapping in plastic wrap. Then place them in a freezer bag. To thaw, leave them at room temperature for a few hours. Reheat baked scones in the oven at 350°F for about 10 minutes for a fresh taste.
FAQs
How do I know when scones are done baking?
Look for a few signs. The scones should turn golden brown around the edges. You can also lightly tap the top; it should feel firm. If they sound hollow when you knock on the bottom, they are done.
Can I make the dough ahead of time?
Yes, you can prepare the dough in advance. Mix the dry and wet ingredients, then combine. Wrap the dough in plastic wrap and refrigerate it for up to 24 hours. When you are ready, shape and bake the scones as usual.
What’s the best way to warm up leftover scones?
To warm leftover scones, preheat your oven to 350°F (175°C). Place the scones on a baking sheet lined with parchment. Heat them for about 5 to 10 minutes. This method keeps them fresh and tasty. Enjoy with a bit of butter for added flavor.
This blog post covered all the important steps to make delicious scones. You learned about the key ingredients and optional enhancements that can make your treats unique. We discussed preparation, dough-making, and shaping tips to ensure your scones are light and flaky.
Remember to try different fruits, chocolates, and gluten-free options for variety. Finally, store leftovers properly or freeze them to keep them fresh. With these tips, you’ll bake perfect scones every time. Enjoy your baking adventur

Strawberry Chocolate Chip Scones
Ingredients
- 2 cups all-purpose flour
- 1/4 cup granulated sugar
- 2 teaspoons baking powder
- 1/2 teaspoon salt
- 1/2 cup cold unsalted butter, diced into small cubes
- 1/2 cup heavy cream
- 1 large egg, at room temperature
- 1 teaspoon vanilla extract
- 1 cup fresh strawberries, hulled and diced into small pieces
- 3/4 cup semisweet chocolate chips
- 1 tablespoon coarse sugar for topping
Instructions
- Preheat your oven to 400°F (200°C) and line a baking sheet with parchment paper to prevent sticking.
- In a large mixing bowl, combine the all-purpose flour, granulated sugar, baking powder, and salt. Whisk these dry ingredients together until evenly mixed.
- Add the cold diced butter to the flour mixture. Using a pastry cutter or your fingertips, quickly work the butter into the flour until the mixture achieves a texture resembling coarse crumbs.
- In a separate bowl, whisk together the heavy cream, egg, and vanilla extract until the mixture is smooth and well combined.
- Carefully pour the wet mixture into the dry ingredients. Gently mix together until just combined – avoid overmixing to keep the scones tender.
- Gently fold in the diced strawberries and semisweet chocolate chips, ensuring they are evenly distributed throughout the dough without overworking it.
- Transfer the dough onto a lightly floured surface and gently pat it into a round disc about 1-inch thick.
- Using a sharp knife, cut the disc into 8 equal wedges. Place the wedges onto the prepared baking sheet, ensuring there is space between each scone for proper baking.
- Generously sprinkle coarse sugar over the top of each scone to enhance sweetness and create a lovely texture when baked.
- Bake the scones in the preheated oven for 15 to 20 minutes, or until they are golden brown at the edges and cooked through.
- Once baked, remove the scones from the oven and allow them to cool on a wire rack for a few minutes before serving.


![- 2 cups watermelon, diced into bite-sized cubes - 1 cup fresh pineapple, diced - 1 cup ripe mango, peeled and diced - 1 cup strawberries, hulled and sliced - 1 cup plump blueberries - 1 tablespoon pure honey - 2 tablespoons freshly squeezed lime juice - 1 teaspoon finely grated lime zest - Fresh mint leaves, for a lovely garnish When picking fruits, look for bright colors and firm textures. Choose watermelon that feels heavy for its size. Make sure the skin is smooth and free from blemishes. For pineapple, smell the base; a sweet scent means it's ripe. Ripe mangoes should yield slightly when you press them. Strawberries should be bright red, without white tips. Pick blueberries that are firm and plump, with a deep color. This fruit salad is not just tasty; it’s also packed with nutrients. Watermelon is hydrating and low in calories. Pineapple provides vitamin C and enzymes that aid digestion. Mango is rich in antioxidants and vitamins A and C. Strawberries boost heart health due to their high fiber and vitamin C content. Blueberries are known for their powerful antioxidants. The honey adds a natural sweetness, while lime juice helps with vitamin C and adds a zesty kick. Each bite not only delights your taste buds but also nourishes your body. First, gather all your fruits. You will need watermelon, pineapple, mango, strawberries, and blueberries. Wash each fruit well to remove any dirt. Dice the watermelon into cubes. Cut the pineapple and mango into small pieces. Hull and slice the strawberries. Finally, add the blueberries. Place all the fruit into a large mixing bowl. Be gentle while mixing to keep the fruit intact. In a separate small bowl, combine one tablespoon of honey with two tablespoons of freshly squeezed lime juice. Add one teaspoon of finely grated lime zest for extra flavor. Whisk the mixture together until it is smooth and well-blended. This honey lime dressing will add a sweet and tangy flavor to your salad. Now, drizzle the honey lime dressing over the fruit. Make sure to cover every piece of fruit for the best taste. Use a gentle motion to toss the salad. This helps the dressing coat all the fruit without mashing it. Let the salad sit for about 10 minutes. This resting time allows the flavors to blend well. When ready to serve, garnish with fresh mint leaves. This adds a lovely touch to your fruit salad. Enjoy your Honey Lime Fruit Salad Delight! For a full recipe, visit the [Full Recipe]. Cutting fruit can be fun and easy. Start with a sharp knife for safety. For watermelon, slice it in half. Then, cut each half into thick wedges. Remove the rind and dice the flesh into cubes. Pineapple is best peeled and cored first. Cut the fruit into thick slices, then dice. For strawberries, remove the green tops and slice them. Keep your cuts even for a pretty look. You can add more fun to the salad. Try adding a splash of orange juice. This will give it a citrus twist. You can also mix in a pinch of cinnamon for warmth. Chopped nuts like almonds or walnuts add crunch. If you like creamy, add a dollop of yogurt. These extra flavors make the salad pop! Make your fruit salad shine with great presentation. Use a clear glass bowl to show off the colors. You can layer the fruits for a rainbow effect. Garnish with mint leaves on top for a fresh touch. A few extra blueberries scattered around add visual flair. Serve with colorful spoons for added fun. Remember, we eat with our eyes first! {{image_4}} You can switch up fruits in your Honey Lime Fruit Salad. Try using peaches or nectarines for a juicy twist. Grapes add a nice pop, and kiwi brings a tart flavor. You might also add oranges for an extra citrus kick. Mix and match based on your taste! Change your fruit salad with the seasons. In summer, use berries and stone fruits for freshness. Fall is great for apples and pears, while winter calls for citrus fruits like clementines and grapefruits. Spring gives you the chance to add strawberries and rhubarb for a bright taste. Add nuts or seeds for a crunchy texture. Almonds and walnuts are perfect options. If you prefer seeds, sprinkle in some pumpkin or sunflower seeds. These additions not only improve texture, but they also boost the nutrition of your salad. Enjoy the added flavor and health benefits! Store leftover honey lime fruit salad in an airtight container. This keeps the fruit fresh and tasty. If you can, eat it within a day or two. The longer it sits, the softer the fruit may get. I recommend using glass or plastic containers with tight-fitting lids. These help lock in moisture and prevent spills. If you have smaller portions, use smaller containers for easy access. The salad stays fresh for about two days in the fridge. Keep it away from foods with strong odors. To refresh the taste, add a little more honey or lime juice before serving. If you notice any browning, remove those pieces before enjoying. For the full recipe, make sure to check the main article! Yes, you can make Honey Lime Fruit Salad a few hours ahead. However, I recommend serving it fresh. If you prepare it too early, the fruit may get soft and lose its crunch. If you decide to make it ahead, store it in the fridge. This keeps it cool and fresh. Just remember to add the dressing right before serving to keep the fruit juicy. The best fruits for Honey Lime Fruit Salad are those that are ripe and sweet. I love using: - Watermelon - Pineapple - Mango - Strawberries - Blueberries These fruits blend well together, creating a vibrant and tasty mix. You can also try using kiwi or grapes for extra flavor. The key is to choose fruits that you enjoy and that are in season. Yes, you can use another sweetener if you prefer. Options include agave syrup or maple syrup. These sweeteners work great in the dressing. Just keep in mind that the flavor may change slightly. I suggest starting with the same amount as the honey. You can always adjust it to your taste. For a sugar-free option, consider using a sugar substitute that you like. In this blog post, we explored how to make a tasty Honey Lime Fruit Salad. We discussed the key ingredients, tips for selecting fresh fruits, and the nutritional benefits they offer. You learned step-by-step instructions for preparation, dressing, and serving. We also shared tips for cutting fruits and enhancing flavor. Plus, variations for using different fruits and tips for storage were provided. Creating this salad is simple and rewarding. Enjoy it yourself or share it with friends. It’s a fun and healthy treat everyone will love.](https://dishtreats.com/wp-content/uploads/2025/07/a7fe8aa9-0619-4c4c-8a63-94d099c8a4d2-768x768.webp)