
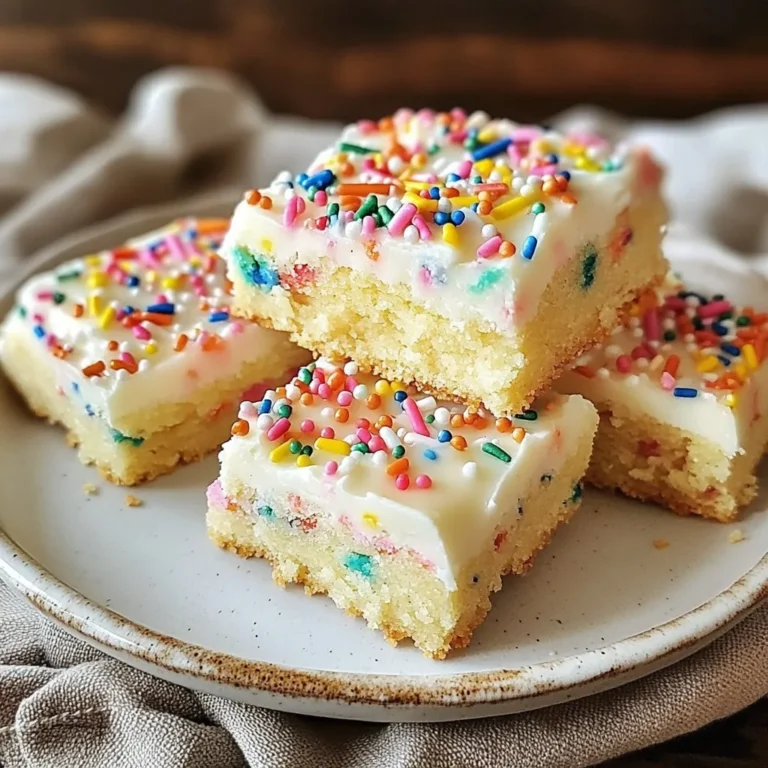
White Chocolate Raspberry Blondies Delectable Dessert Treat

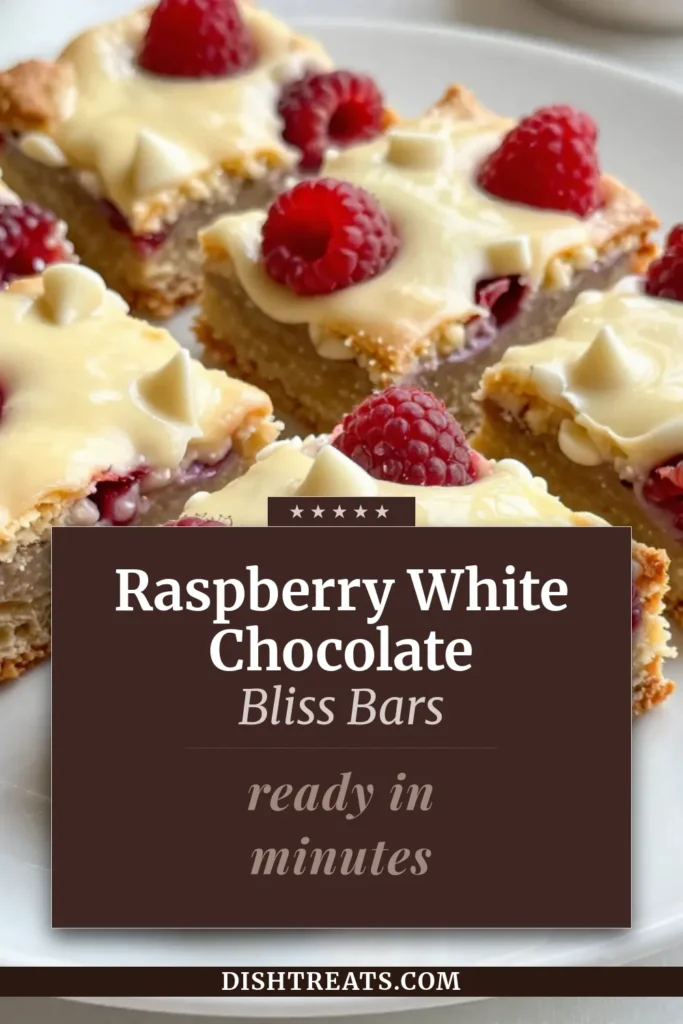
If you love sweet treats that are easy to make, you’ll adore these White Chocolate Raspberry Blondies! This delightful dessert combines the rich flavors of white chocolate and tangy raspberries. I’ll guide you through simple steps, ingredient tips, and clever variations. Get ready to impress your friends and family with this delectable dessert that’s truly a crowd-pleaser. Let’s dive into the recipe and create something amazing together!
Why I Love This Recipe
- Irresistible Flavor Combination: The creamy white chocolate paired with the tartness of fresh raspberries creates a delightful balance that’s hard to resist.
- Easy to Make: This recipe comes together quickly, making it perfect for both novice and experienced bakers looking for a sweet treat.
- Perfect for Any Occasion: Whether it’s a family gathering, a potluck, or just a cozy night at home, these blondies are a hit with everyone.
- Visual Appeal: The vibrant raspberries against the rich blondie base make for a stunning dessert that looks as good as it tastes.
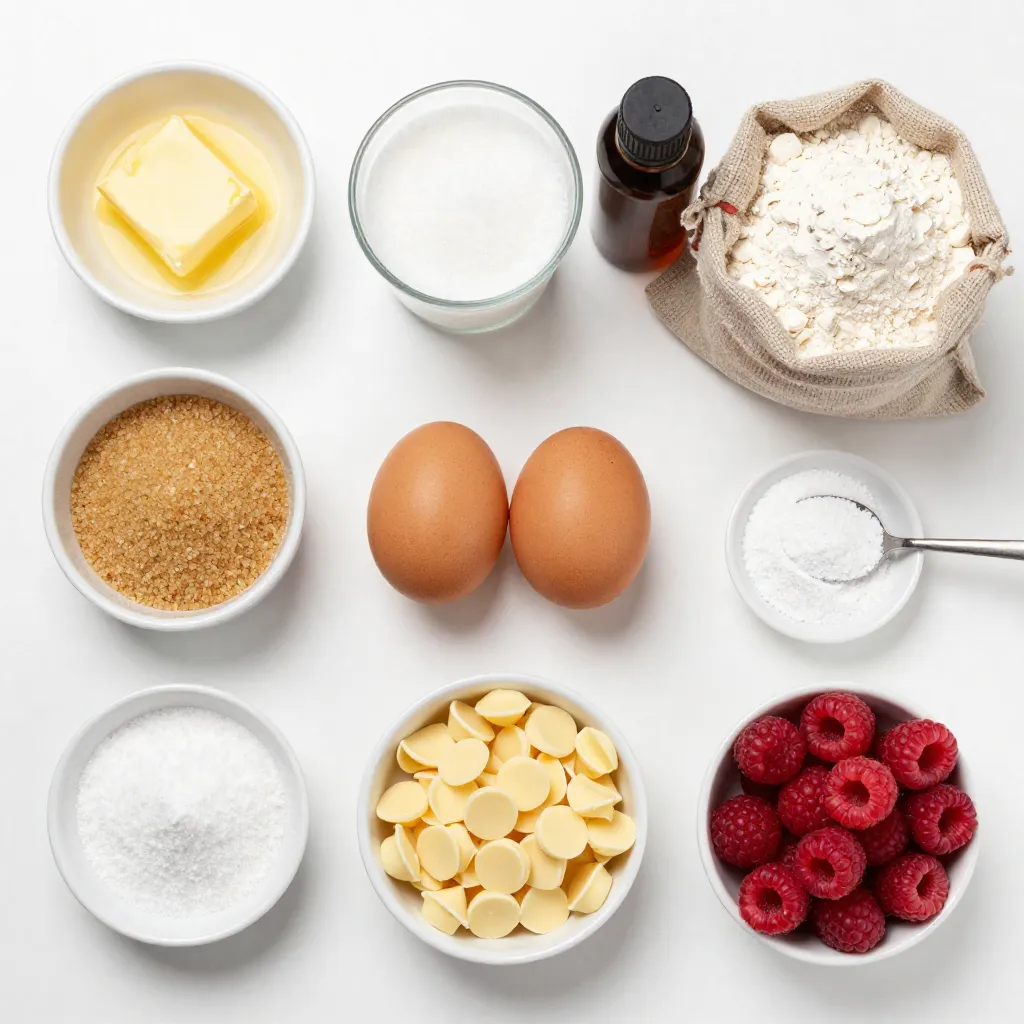
Ingredients
List of Ingredients
- 1 cup unsalted butter, melted
- 1 cup packed brown sugar
- 1/2 cup granulated sugar
- 2 large eggs
- 2 teaspoons vanilla extract
- 2 cups all-purpose flour
- 1 teaspoon baking powder
- 1/2 teaspoon salt
- 1 cup white chocolate chips
- 1 cup fresh raspberries
Measurement Details
You need precise amounts for each ingredient to get the best results. Here are the measurements:
- 1 cup unsalted butter (melted)
- 1 cup packed brown sugar
- 1/2 cup granulated sugar
- 2 large eggs
- 2 teaspoons vanilla extract
- 2 cups all-purpose flour
- 1 teaspoon baking powder
- 1/2 teaspoon salt
- 1 cup white chocolate chips
- 1 cup fresh raspberries
Ingredient Substitutions
You can swap some ingredients if needed. For butter, use coconut oil or margarine. For sugar, try coconut sugar or honey. If you cannot find fresh raspberries, frozen ones work too. Just make sure to thaw and drain them well before adding. This way, you can still enjoy these blondies!
Step-by-Step Instructions
Preparation Steps
First, you need to preheat your oven to 350°F (175°C). This step is key to getting that perfect bake. Next, grab an 8×8-inch square baking pan. You can grease it lightly or line it with parchment paper. This helps with easy removal later.
Mixing Instructions
In a large mixing bowl, combine the melted butter, packed brown sugar, and granulated sugar. Use a whisk to blend them until smooth and creamy. Add the eggs, one by one. Mix well after each egg. Then stir in the vanilla extract. This adds a nice flavor.
In another bowl, sift together the all-purpose flour, baking powder, and salt. Gradually add this dry mix to your wet mix. Stir gently until just combined; do not overmix. You want a thick batter.
Now, gently fold in the white chocolate chips and fresh raspberries. Be careful not to break the raspberries too much. You want some whole pieces for bursts of flavor.
Baking Process
Pour the batter into the prepared baking pan. Use a spatula to spread it evenly. Place the pan in your preheated oven. Bake for 25-30 minutes. The edges should turn lightly golden. A toothpick inserted in the center should come out with a few moist crumbs.
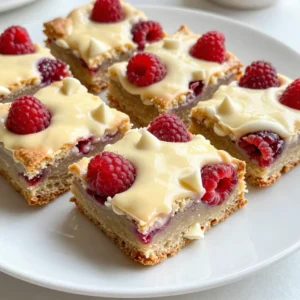
Once baked, remove the pan from the oven. Let the blondies cool in the pan for about 10 minutes. This helps them set before you take them out. Carefully lift them out using the parchment paper if you used it. Place them on a wire rack to cool completely.
After they cool, cut into squares of your desired size. Enjoy these delicious treats!
Tips & Tricks
Baking Tips
To get the best texture for your blondies, start with room temperature ingredients. This helps them mix well. Be careful not to overmix the batter. Stir until it is just combined. A thick batter gives a great chewy texture. Bake until the edges are golden. Use a toothpick to check; it should come out with a few moist crumbs.
Storage Tips
Store your blondies in an airtight container. This keeps them fresh for up to a week. If you want them to last longer, consider freezing them. Wrap each blondie in plastic wrap. Then, place them in a freezer bag. They can stay good for up to three months when frozen.
Serving Suggestions
For a lovely presentation, dust the blondies with powdered sugar. You can also add a scoop of vanilla ice cream. Whipped cream on the side makes it even better. Serve with fresh raspberries for a colorful touch. This adds a nice pop of flavor and color to your dessert spread.
Pro Tips
- Use Room Temperature Eggs: Allow your eggs to come to room temperature before adding them to the batter. This helps achieve a smoother blend and better rise in your blondies.
- Don’t Overmix the Batter: Gently fold the dry ingredients into the wet mixture until just combined. Overmixing can lead to dense blondies, so be careful!
- Try Different Mix-Ins: Feel free to experiment by adding nuts, coconut, or different types of chocolate chips. Customize your blondies to suit your taste!
- Cool Completely Before Cutting: Allow the blondies to cool completely before slicing. This ensures cleaner cuts and helps the blondies set properly.
Variations
Flavor Variations
You can change the taste of your blondies easily. Adding nuts adds a nice crunch. Try chopped walnuts or pecans for a rich flavor. You can also swap raspberries for other fruits. Cherries or blueberries work well too. They will give a new twist to the recipe.
Dietary Variations
If you need gluten-free blondies, use gluten-free flour. It works just like all-purpose flour. For a vegan option, replace the eggs with flax eggs. Mix one tablespoon of flaxseed meal with three tablespoons of water. Let it sit for five minutes to thicken. You can also use coconut oil instead of butter.
Seasonal Variations
Seasonal fruits can change the vibe of your blondies. In spring, use strawberries or fresh peaches. In fall, add pumpkin puree or apples for warmth. Top them with crushed candy canes in winter for a festive touch. These variations keep your blondies fresh and fun!
Storage Info
Recommended Storage Conditions
To keep your white chocolate raspberry blondies fresh, store them in an airtight container. This method locks in moisture and flavor. Place parchment paper between layers if stacking. Keep them at room temperature for the best taste and texture. Avoid placing them in direct sunlight or near heat sources.
Freezing Instructions
If you want to save some for later, freezing is a great option. First, let the blondies cool completely. Then, cut them into squares. Wrap each piece tightly in plastic wrap. Place the wrapped blondies in a freezer-safe bag or container. Label the bag with the date. They can last in the freezer for up to three months.
Shelf Life
At room temperature, blondies stay fresh for about 3-4 days. If you refrigerate them, they can last up to a week. Just remember that refrigeration can change their texture, making them a bit denser. Enjoy them at room temperature for the best experience!
FAQs
Common Questions
What can I substitute for white chocolate?
If you don’t have white chocolate, you can use butterscotch chips or vanilla chips. These options give a sweet flavor similar to white chocolate. You can also use a mix of milk chocolate and vanilla extract for a twist. Just remember, the taste will change slightly, but they will still be delicious!
Baking Queries
How do I know when the blondies are done?
You will know the blondies are ready when the edges turn lightly golden. A toothpick inserted in the center should come out with a few moist crumbs. If it comes out clean, they may be overdone. Keep an eye on them, as ovens can vary in heat!
Ingredient-Specific Questions
Can I use frozen raspberries?
Yes, you can use frozen raspberries in your blondies. Just be sure to add them straight from the freezer. If they thaw too much, they may break apart and turn the batter pink. The flavor will still be great, so don’t worry!
This blog explained how to make delicious blondies. We covered every ingredient, from butter to sugar, and gave you measurement details. I shared helpful tips for mixing and baking to get the best texture. You learned how to store them properly and even freeze them for later. Plus, we explored fun variations and answered common questions. Remember, you can always switch ingredients or try new flavors. Baking blondies is a fun adventure, and with these steps, you can enjoy tasty treats anytim
White Chocolate Raspberry Blondies
Ingredients
- 1 cup unsalted butter, melted
- 1 cup packed brown sugar
- 1 2 granulated sugar
- 2 large eggs
- 2 teaspoons vanilla extract
- 2 cups all-purpose flour
- 1 teaspoon baking powder
- 1 2 salt
- 1 cup white chocolate chips
- 1 cup fresh raspberries
Instructions
- Begin by preheating your oven to 350°F (175°C). Prepare an 8x8-inch square baking pan by greasing it lightly or lining it with parchment paper, which will help with easy removal later.
- In a large mixing bowl, combine the melted butter, packed brown sugar, and granulated sugar. Use a whisk to blend these ingredients together until the mixture is smooth and creamy.
- Add the eggs to the bowl, one at a time, making sure to mix well after each addition. Once incorporated, stir in the vanilla extract until the mixture is evenly combined.
- In a separate bowl, sift together the all-purpose flour, baking powder, and salt. Gradually add this dry mixture to your wet ingredients, stirring gently until just combined. Be careful not to overmix; you want a thick batter.
- Next, gently fold in the white chocolate chips and raspberries into the batter. Take care to avoid breaking the raspberries too much; a few intact pieces will add a nice burst of fruitiness.
- Pour the batter into your prepared baking pan. Use a spatula to spread it evenly across the pan.
- Place the pan in your preheated oven and bake for 25-30 minutes. The blondies are ready when the edges are lightly golden and a toothpick inserted into the center comes out with a few moist crumbs attached.
- Once baked, remove the pan from the oven and let the blondies cool in the pan for about 10 minutes. This cooling period helps them set before transferring.
- Carefully lift the blondies out of the pan using the parchment paper (if used), and place them on a wire rack to cool completely.
- Once fully cooled, cut into squares of your desired size, serve, and enjoy these delectable treats!


![To make a tasty and moist chocolate zucchini bread, gather these simple ingredients: - 1 medium zucchini, finely grated - 1 cup whole wheat flour - 1/2 cup unsweetened cocoa powder - 1/2 teaspoon baking soda - 1/2 teaspoon baking powder - 1/4 teaspoon salt - 1/2 cup pure maple syrup or honey - 1/4 cup unsweetened applesauce - 2 large eggs - 1 tablespoon vanilla extract - 1/2 cup dark chocolate chips (optional) - 1/4 cup chopped walnuts or pecans (optional) These ingredients help create a rich flavor and moist texture. The grated zucchini adds moisture without a strong taste. Whole wheat flour makes the bread hearty and healthy. Cocoa powder gives it that delicious chocolate flavor. Sweeteners like maple syrup or honey ensure the bread stays moist and sweet. Applesauce also adds moisture while cutting down on fat. The eggs help bind everything together. Optional items like dark chocolate chips can add extra richness. Walnuts or pecans bring a nice crunch. You can adjust the recipe to suit your taste. For the full recipe, refer to [Full Recipe]. 1. Preheat your oven to 350°F (175°C). Prepare a 9x5-inch loaf pan. You can grease it lightly or line it with parchment paper. This will help with easy removal once it’s baked. 2. In a large mixing bowl, combine the finely grated zucchini, maple syrup (or honey), unsweetened applesauce, eggs, and vanilla extract. Whisk them together until blended. 3. In a separate bowl, gently whisk the whole wheat flour, cocoa powder, baking soda, baking powder, and salt. Make sure they mix well to avoid clumps. 1. Gradually add the dry ingredients into the wet mixture. Stir just until combined. Avoid over mixing to keep the bread light and fluffy. 2. If you like, gently fold in dark chocolate chips and chopped walnuts or pecans. These add a nice crunch and rich flavor. 3. Carefully pour the batter into the prepared loaf pan. Use a spatula to smooth the top for an even bake. 1. Bake in the preheated oven for 45-50 minutes. Test doneness by inserting a toothpick into the center. It should come out clean or with a few moist crumbs. 2. Once baked, remove the bread from the oven. Let it cool in the pan for about 10 minutes. Then, transfer it to a wire rack to cool completely. For the full recipe, check out the details provided earlier. Enjoy your baking! To make your chocolate zucchini bread perfect, mix well but don’t overdo it. Overmixing can lead to a tough loaf. Stir the batter until just combined. This keeps the bread soft and moist. Accurate measurements matter too. Use a kitchen scale for the best results if you have one. If not, make sure to level off your measuring cups. If you want to switch up the flour, try using almond flour. It gives a nice flavor and works well in this recipe. For sweeteners, you can use agave syrup or coconut sugar. Both options keep the bread tasty and healthy. Just use the same amount as maple syrup or honey. Serve your zucchini bread warm for the best taste. Slice it and dust with powdered sugar for a pretty look. You can also spread nut butter on top for a yummy twist. Pair it with a glass of milk or a cup of tea. These drinks enhance the rich flavors of the bread. For the full recipe, check out the earlier section. {{image_4}} For those with dietary needs, you can easily adapt this recipe. - Gluten-free options: Use a gluten-free flour blend. It works well in this recipe. Just make sure it has a good mix of starch and protein. - Vegan alternatives: Replace the eggs with flax eggs. Mix one tablespoon of ground flaxseed with three tablespoons of water. Let it sit for five minutes until it thickens. You can also switch the honey with agave syrup or another plant-based sweetener. These changes keep the bread tasty while meeting different needs. You can enhance the flavor of your chocolate zucchini bread. - Adding spices like cinnamon or nutmeg: A teaspoon of cinnamon or nutmeg brings warmth. These spices pair well with chocolate and add depth to the flavor. - Incorporating other mix-ins like dried fruit: Try adding dried cherries, cranberries, or even raisins. They add sweetness and chewiness. Mix in about half a cup for the best results. These variations make your bread unique and fun! For the full recipe, check out the details above. To keep your chocolate zucchini bread fresh, store it correctly. Wrap the cooled bread tightly in plastic wrap or aluminum foil. This keeps moisture in and prevents it from drying out. Place it in an airtight container for extra protection. You can store it at room temperature for about three days. If you want to keep it longer, freezing works great. To freeze chocolate zucchini bread, slice it first. Wrap each slice in plastic wrap. Then, place the wrapped slices in a freezer-safe bag. This way, you can grab a slice whenever you want a treat. It can stay fresh in the freezer for up to three months. When you’re ready to enjoy your chocolate zucchini bread, warming it up adds to the taste. The best way to heat it is in the microwave. Place a slice on a microwave-safe plate, cover it with a paper towel, and heat for 15-20 seconds. This keeps the bread moist. You can also reheat it in the oven. Preheat the oven to 350°F (175°C). Wrap the bread in foil to prevent it from getting dry. Heat for about 10-15 minutes. This method helps keep the texture soft and warm. For the best taste, enjoy your chocolate zucchini bread within three days if stored at room temperature. If frozen, try to eat it within three months for the best flavor. To keep zucchini bread moist, use fresh zucchini. Grate it finely to release its juice. Adding unsweetened applesauce or pure maple syrup also helps boost moisture. - Bake at the right temperature. Too high can dry it out. - Don’t overmix the batter. This keeps the bread tender. - Cover the bread with foil if it browns too fast. Yes, you can use frozen zucchini. Just let it thaw and drain excess water first. Frozen zucchini works well but may change the texture slightly. - Fresh zucchini offers the best flavor and moisture. - If you have frozen, make sure to squeeze out the water. - Using frozen is a great way to reduce waste. Check for doneness with a toothpick. Insert it into the center of the bread. If it comes out clean or with a few moist crumbs, it’s done. - The edges will pull away from the pan slightly. - The top should look set and spring back when you touch it. - Baking time is usually 45-50 minutes, but ovens vary. For the complete method to make this treat, check out the Full Recipe! You’ve learned how to make delicious chocolate zucchini bread. We covered the main ingredients, step-by-step instructions, and helpful tips. Remember, precise measurements and mixing are key to success. You can also explore variations to match your tastes and dietary needs. Store your bread properly for long-lasting freshness. With these insights, you’ll enjoy baking and sharing this treat. Dive in and enjoy the process!](https://dishtreats.com/wp-content/uploads/2025/06/124341aa-b5ba-4a17-ada7-3bb78900324d-768x768.webp)