Cranberry Almond Energy Bites Healthy Snack Option

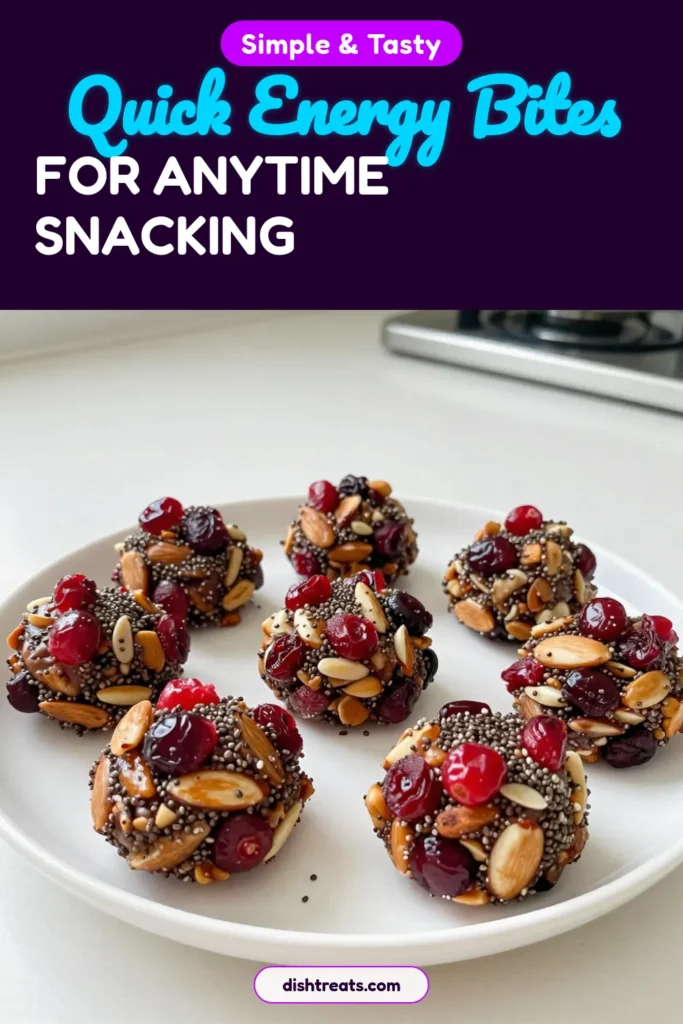
Looking for a quick, healthy snack? Cranberry Almond Energy Bites are the perfect choice! Packed with oats, almond butter, and cranberries, these tasty bites provide energy without the guilt. Plus, they’re super easy to make! Whether you need a pick-me-up for your workout or a treat for your kids after school, this recipe checks all the boxes. Dive in to discover how to make them and enjoy delicious goodness anytime!
Why I Love This Recipe
- Nutritious Snack: These energy bites are packed with wholesome ingredients like oats, almond butter, and chia seeds, making them a great source of fiber and protein.
- Easy to Make: With just a few simple steps, you can whip up a batch of these delicious bites in no time, perfect for busy lifestyles.
- Customizable: You can easily swap out the nuts or dried fruit to suit your taste preferences, making this recipe versatile for everyone.
- Perfect for Meal Prep: These energy bites store well in the fridge, allowing you to prepare healthy snacks for the week ahead.
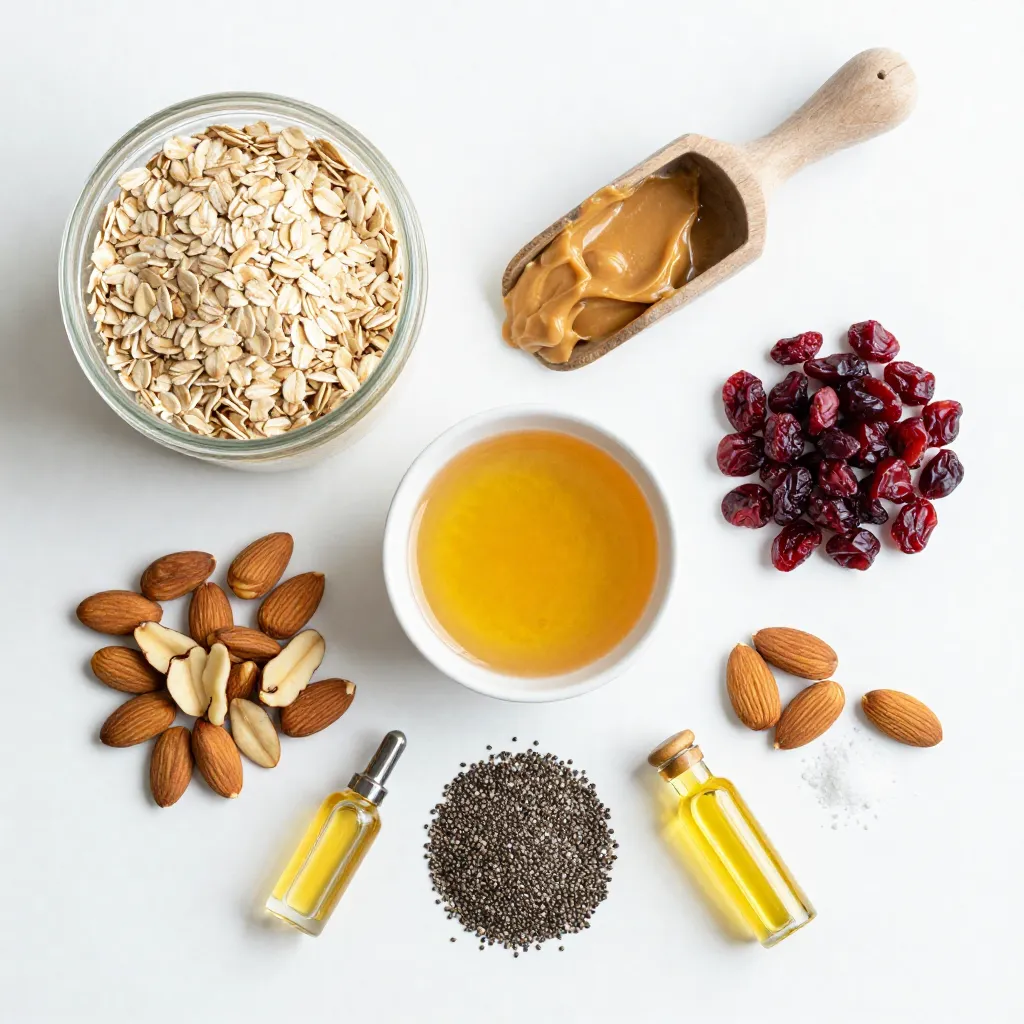
Ingredients
To make the Cranberry Almond Energy Bites, you will need a few simple items. Here’s the list:
- 1 cup rolled oats
- ½ cup almond butter
- ⅓ cup honey or maple syrup
- ½ cup dried cranberries, chopped
- ½ cup slivered almonds
- 2 tablespoons chia seeds
- 1 teaspoon vanilla extract
- A pinch of salt
Each ingredient adds its own flavor and benefits. Rolled oats provide fiber. Almond butter gives healthy fats and protein. Honey or maple syrup adds natural sweetness. Dried cranberries bring a tart flavor. Slivered almonds add crunch. Chia seeds offer omega-3s. Vanilla extract enhances the taste. A pinch of salt balances all these flavors.
You can easily find these ingredients at your local grocery store. Make sure to choose high-quality products for the best taste. For example, opt for natural almond butter without added sugar. This simple recipe brings together these wholesome ingredients for a tasty, easy snack.
Step-by-Step Instructions
Preparation of the Mixture
To start, grab a medium mixing bowl. Add 1 cup of rolled oats. Next, scoop in ½ cup of almond butter. Then, pour in ⅓ cup of honey or maple syrup. Finally, add 1 teaspoon of vanilla extract. Mix these ingredients together well. You want a sticky paste-like consistency for the next steps.
Adding Additional Ingredients
Now it’s time to make your mixture even more exciting. Chop ½ cup of dried cranberries and add them to your bowl. Then, sprinkle in ½ cup of slivered almonds. Don’t forget to add 2 tablespoons of chia seeds and a pinch of salt. Stir everything thoroughly. This ensures every bite has a great mix of flavors and textures.
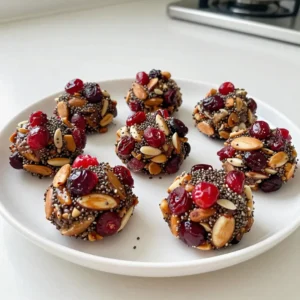
Forming the Energy Bites
With clean hands, take about a tablespoon of the mixture. Shape it into a round ball. Place each energy bite onto a parchment-lined baking sheet. Keep going until all the mixture is rolled into bites. This step is fun! You can make them as big or small as you like.
Chilling and Storing
After forming the bites, transfer them to the refrigerator. Let them chill for at least 30 minutes. This helps them firm up nicely. Once chilled, store your energy bites in an airtight container. They will stay fresh in the fridge for up to one week. Enjoy these tasty snacks anytime you need a boost!
Tips & Tricks
Perfecting Texture
To get the best texture for your energy bites, mix well. Combine rolled oats, almond butter, honey, and vanilla extract. You want a thick paste that holds together. If it feels too dry, add a bit more almond butter. If too wet, add more oats. The right consistency helps shape perfect bites.
Presentation Ideas
Make your energy bites look great! Roll them in extra chia seeds or chopped nuts. This adds a nice crunch and makes them more appealing. Serve them in a colorful bowl. A bright bowl makes the bites look inviting and fun.
Serving Suggestions
Pair your energy bites with yogurt or fresh fruit. They taste great with a cup of tea or coffee. You can also enjoy them as a quick breakfast or snack on the go. These bites are flexible and fit many meal times.
Pro Tips
- Use Fresh Ingredients: Always opt for fresh, high-quality dried cranberries and almonds for the best flavor and texture in your energy bites.
- Customize Your Mix-Ins: Feel free to experiment with different nuts, seeds, or dried fruits to suit your taste preferences and nutritional needs.
- Perfect Portioning: Use a cookie scoop for uniform energy bites, ensuring that each one is the same size for consistent nutrition and easy snacking.
- Storage Tips: For longer shelf life, you can freeze the energy bites. Just layer them in an airtight container with parchment paper in between each layer.
Variations
Ingredient Substitutions
You can easily swap out the almond butter for other nut butters. Try peanut butter, cashew butter, or sunflower seed butter for a nut-free option. Each choice gives a unique flavor to your energy bites. For sweeteners, use agave syrup or coconut nectar instead of honey or maple syrup. These alternatives keep the bites tasty and sweet.
Flavor Additions
Want to spice up your energy bites? Add seeds like pumpkin or sunflower seeds for a crunch. You can also mix in other dried fruits, like apricots or raisins. These options bring different flavors and textures. Experimenting with spices, like cinnamon or nutmeg, can add warmth and depth to the bites.
Dietary Adaptations
Making your energy bites gluten-free is simple. Just ensure your oats are certified gluten-free. For vegan bites, swap the honey for maple syrup. This change keeps your snacks plant-based. You can also use vegan chocolate chips for an extra treat. These adjustments help everyone enjoy these energy bites.
Storage Info
Best Storage Practices
Store your Cranberry Almond Energy Bites in an airtight container. This keeps them fresh and prevents them from drying out. I recommend using glass or BPA-free plastic containers. These materials help maintain the taste and texture of the bites.
Shelf Life
These energy bites stay fresh for up to one week in the fridge. If you keep them sealed well, you will enjoy their chewy texture and sweet taste. After a week, they might lose some flavor but will still be safe to eat.
Freezing Tips
For long-term storage, you can freeze your energy bites. Place them in a single layer on a baking sheet. Freeze them for about two hours until firm, then transfer them to a freezer bag. They can last up to three months in the freezer. When you’re ready to eat, just thaw them in the fridge overnight. Enjoy your healthy snack anytime!
FAQs
Can I use rolled oats instead of quick oats?
Yes, you can use rolled oats. Rolled oats are thicker and provide a chewy texture. Quick oats are finer and blend faster. The energy bites will still hold together well with rolled oats. If you prefer a softer bite, use quick oats.
How long can I store Cranberry Almond Energy Bites?
You can store these bites for up to one week. Keep them in an airtight container in the fridge. They will stay fresh and tasty this way. For longer freshness, consider freezing them. Just thaw them before eating.
Are these energy bites suitable for children?
Yes, these energy bites are great for kids. They contain healthy fats, fiber, and natural sugars. The dried cranberries add sweetness and vitamins. These bites can provide energy for playtime or school. Just watch for any nut allergies.
Can I make this recipe nut-free?
Absolutely! You can swap almond butter for sun butter or soy nut butter. These alternatives keep the texture creamy. You can also use pumpkin seeds instead of slivered almonds. Make sure to check for any allergies with these options.
These energy bites are simple to make and delicious. You mix oats, almond butter, and honey. Then, you add cranberries, almonds, chia seeds, and salt. Form the mixture into balls and chill them.
Remember, you can switch ingredients to fit your tastes or diets. Store them in an airtight container for freshness. Enjoy them as snacks for kids or yourself. These bites are packed with nutrients and energy. Try making them today for a quick and tasty trea
Cranberry Almond Energy Bites
Ingredients
- 1 cup rolled oats
- 0.5 cup almond butter
- 0.33 cup honey or maple syrup
- 0.5 cup dried cranberries, chopped
- 0.5 cup slivered almonds
- 2 tablespoons chia seeds
- 1 teaspoon vanilla extract
- a pinch salt
Instructions
- In a medium mixing bowl, add the rolled oats, almond butter, honey (or maple syrup), and vanilla extract. Mix these ingredients together vigorously until they are well combined, resulting in a sticky paste-like consistency.
- Incorporate the chopped dried cranberries, slivered almonds, chia seeds, and a pinch of salt into the bowl with the oat mixture. Stir thoroughly to ensure every ingredient is evenly dispersed throughout the mixture.
- With clean hands, take about a tablespoon of the mixture and shape it into a round ball. Place each formed energy bite onto a parchment-lined baking sheet. Continue this process until all of the mixture has been rolled into bites.
- Once all the bites are on the baking sheet, transfer them to the refrigerator. Let them chill for a minimum of 30 minutes; this will help them firm up and hold their shape.
- After chilling, store your energy bites in an airtight container. They can be kept in the refrigerator for up to one week, making them perfect for healthy snacking throughout the week.


![To make Honey Mustard Chicken Thighs, you need simple, fresh ingredients. Here’s what you will need: - 4 bone-in chicken thighs, skin-on - 1/4 cup honey - 1/4 cup Dijon mustard - 2 tablespoons olive oil - 3 cloves garlic, minced - 1 teaspoon dried thyme - 1 teaspoon paprika - Salt and black pepper to taste - Fresh parsley for garnish These ingredients bring great flavor to your meal. The honey adds sweetness, while the Dijon mustard gives it a nice tang. Olive oil keeps the chicken juicy, and garlic boosts the taste. Dried thyme and paprika add depth, making every bite delicious. Don’t forget the parsley! It makes your dish look pretty and fresh. This recipe is quick and easy, perfect for any night. For the full instructions, check the Full Recipe. First, preheat your oven to 400°F (200°C). This heat will cook your chicken just right. In a small bowl, whisk together these ingredients: - 1/4 cup honey - 1/4 cup Dijon mustard - 2 tablespoons olive oil - 3 cloves garlic, minced - 1 teaspoon dried thyme - 1 teaspoon paprika - Salt and black pepper to taste Make sure to mix well. This creates a smooth and tasty marinade. Next, take your chicken thighs and place them in a large bowl or a resealable bag. Pour the marinade over the chicken. Ensure each piece is coated well. For the best flavor, let it marinate for at least 30 minutes. If you have more time, refrigerating it overnight works wonders. Now, heat a large oven-safe skillet over medium-high heat. Once hot, add the marinated chicken thighs, skin-side down. Sear them for about 5-7 minutes until the skin is golden brown. This step gives the chicken a nice crisp. After that, flip the thighs using tongs. Transfer the skillet to your preheated oven. Bake for 25-30 minutes. Check that the internal temperature reaches 165°F (75°C). If the juices run clear, the chicken is done. Once cooked, take the skillet from the oven and let the chicken rest for 5 minutes. This helps keep it juicy. Before serving, sprinkle some fresh parsley on top for a lovely finish. For the complete recipe, don't forget to check the [Full Recipe]. To get the best flavor, marinate the chicken thighs well. Use a large bowl or a resealable plastic bag for this. After mixing the marinade, pour it over the chicken. Make sure each piece is coated. For great results, let the chicken sit in the marinade for at least 30 minutes. You can also refrigerate it overnight. This extra time helps the flavors soak in deep. Cooking chicken thighs at the right temperature is key. Preheat your oven to 400°F (200°C). This hot oven cooks the chicken evenly and keeps it juicy. After searing the chicken for 5-7 minutes on the stovetop, transfer it to the oven. Bake for 25-30 minutes. Check the chicken's internal temperature. It should reach 165°F (75°C) for safe eating. Let it rest for 5 minutes before serving, which helps keep it moist. When serving, presentation matters. Place the chicken thighs on a white platter or a wooden board. Drizzle any leftover marinade over the top for added flavor. Garnish with fresh parsley for a pop of color. This simple touch makes the dish look more inviting. You can pair the chicken with roasted veggies or a fresh salad. These sides complement the sweet and tangy flavors of the honey mustard. For the full recipe, check out the details above. {{image_4}} You can change the sauce to fit your taste. Try using maple syrup instead of honey. This gives a unique sweetness. You can also mix in some soy sauce for a savory twist. If you like heat, add a dash of hot sauce or cayenne pepper. For a tangy flavor, consider apple cider vinegar. Each option adds a new layer to the dish. While chicken thighs are great, you can also use chicken breasts. They cook faster but stay moist if cooked right. Drumsticks are another option. They have lots of flavor and a nice crisp skin. You can even use a whole chicken, just adjust cooking time. Each cut brings its own charm to the recipe. For a full meal, add vegetables. Root veggies like carrots and potatoes roast well. Toss them in the marinade for extra flavor. You can also use green beans or broccoli. Place them in the skillet with the chicken. They will soak up the sauce and cook perfectly. This way, you have a tasty one-pan meal that's easy to serve. For the full recipe, check out the previous section. After cooking, let the chicken cool down. Place the chicken thighs in an airtight container. Store them in the fridge for up to three days. Make sure the temperature stays below 40°F (4°C). This keeps your chicken safe and tasty. If you want to store the chicken longer, freezing is a great option. Wrap each thigh tightly in plastic wrap. Then put them in a freezer-safe bag. You can freeze them for up to three months. Remember to label the bag with the date. When you are ready to enjoy leftovers, preheat your oven to 350°F (175°C). Place the chicken in a baking dish. Cover it with foil to keep it moist. Heat for about 20-25 minutes. You can also use a microwave, but it may dry the chicken out. For the best taste, the oven is the way to go. Enjoy your meal again! You should marinate honey mustard chicken thighs for at least 30 minutes. This allows the flavors to soak into the meat. If you have time, marinating overnight works even better. It deepens the taste and makes the chicken more tender. Yes, you can use boneless chicken thighs. They cook faster than bone-in thighs. Adjust the cooking time to about 20-25 minutes in the oven. Always check that the internal temperature reaches 165°F (75°C) for safety. Honey mustard chicken thighs pair well with many sides. Here are some ideas: - Steamed vegetables: Broccoli or green beans add color. - Rice or quinoa: Both soak up the sauce nicely. - Salad: A fresh green salad balances the meal. - Mashed potatoes: Creamy potatoes are a great comfort food option. You can find the full recipe to help you create this delicious meal. In this post, I shared ingredients and steps for making honey mustard chicken thighs. I provided tips for marinating and cooking this dish to enhance its flavor. You learned about variations and how to store leftovers properly. Remember, simple changes can make a big impact on taste. I encourage you to try these ideas for yourself. Enjoy cooking and delight in every bite!](https://dishtreats.com/wp-content/uploads/2025/06/0b4fb8df-5400-4b6b-9acb-490ad2d6fca7-768x768.webp)