
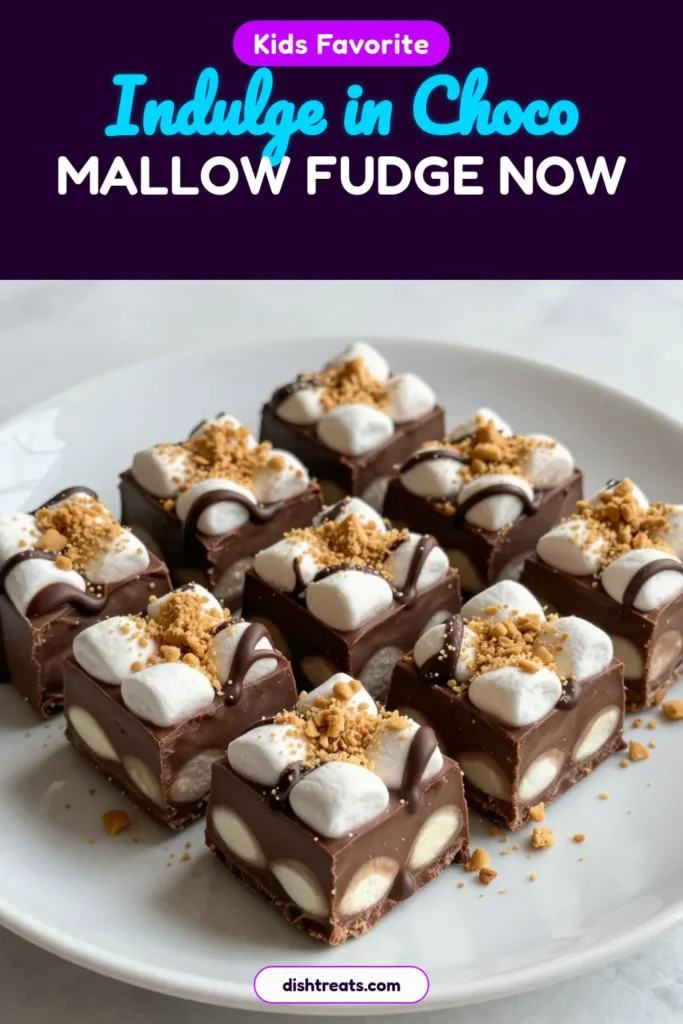
Chocolate Marshmallow Fudge Delightful Sweet Treat
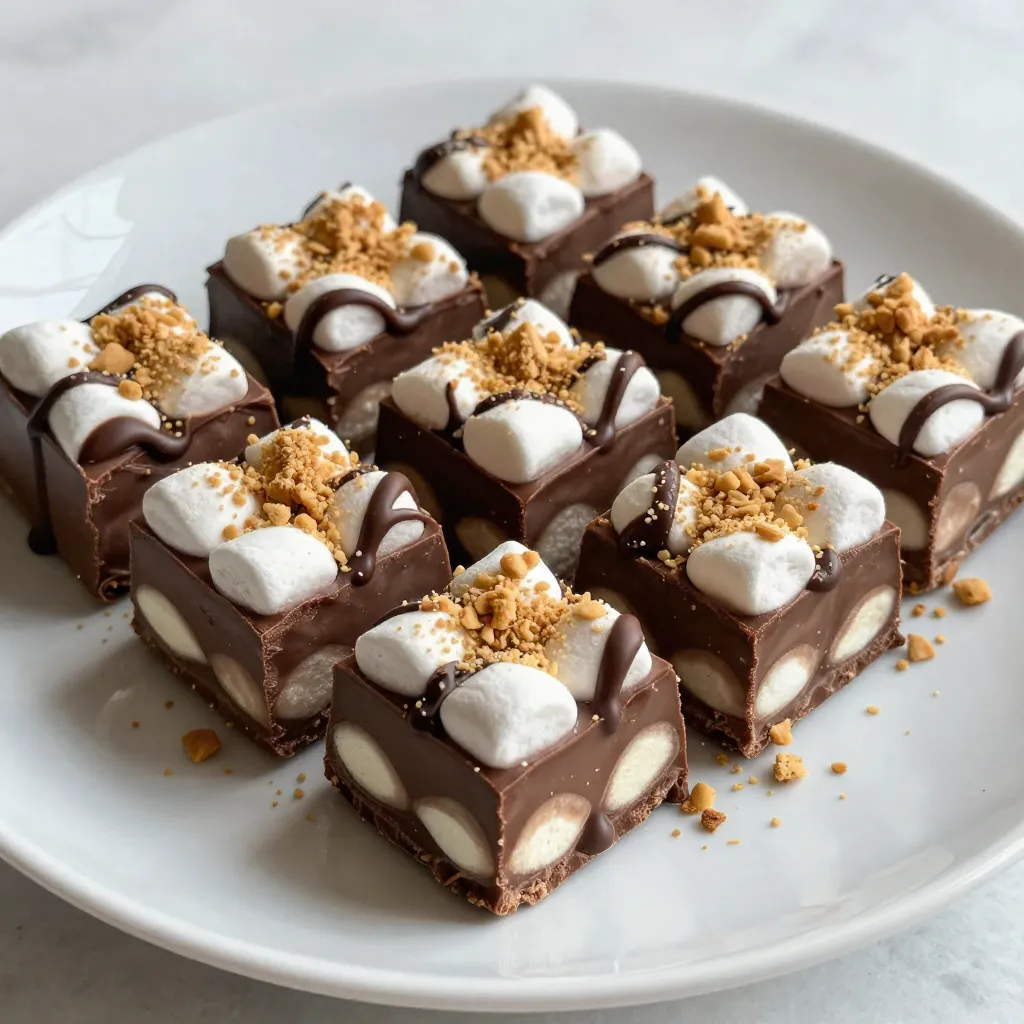
Looking for a sweet treat that brings joy with every bite? You’ve come to the right place! In this post, I’ll show you how to make Chocolate Marshmallow Fudge—an easy and delicious dessert that impresses everyone. With a perfect mix of creamy chocolate and fluffy marshmallows, this treat is hard to resist. Get ready to satisfy your sweet tooth as we dive into the delightful world of fudge!
Why I Love This Recipe
- Decadent Flavor: The combination of semi-sweet chocolate and marshmallows creates a rich, satisfying treat that’s hard to resist.
- Easy to Make: This fudge requires minimal effort and time, making it a perfect dessert for any occasion.
- Customizable: Add your favorite nuts or experiment with different flavors to create a unique fudge tailored to your tastes.
- Perfect for Sharing: Cut into squares, this fudge is great for parties, gatherings, or as a thoughtful homemade gift.
Ingredients
List of Ingredients
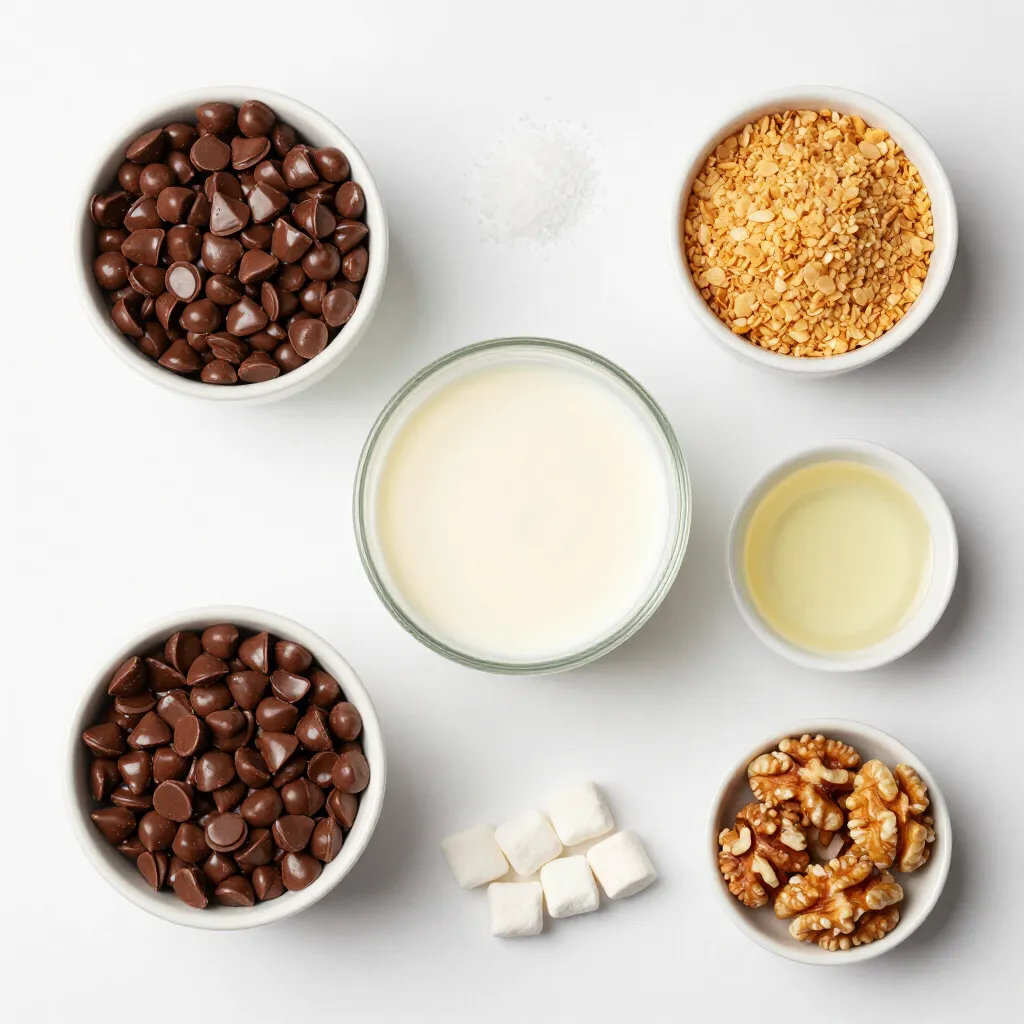
To make Chocolate Marshmallow Fudge, you will need:
- 2 cups semi-sweet chocolate chips
- 1 cup sweetened condensed milk
- 1 cup mini marshmallows
- ½ cup crushed graham crackers
- 1 teaspoon vanilla extract
- ¼ teaspoon salt
Optional Ingredients
You can add extra flavor and crunch with these:
- ½ cup chopped nuts (such as walnuts or almonds)
Ingredient Substitutions
If you don’t have something on hand, here are some swaps:
- Use dark chocolate chips for a richer taste.
- Try evaporated milk instead of sweetened condensed milk for a lighter fudge.
- You can replace mini marshmallows with regular marshmallows, just cut them smaller.
- Swap graham crackers with crushed cookies for a fun twist.
Step-by-Step Instructions
Preparation Steps
- First, line an 8×8-inch baking dish with parchment paper.
- Leave an overhang on two sides. This helps you lift the fudge later.
Cooking Process
- In a medium saucepan, mix the semi-sweet chocolate chips and sweetened condensed milk.
- Place the saucepan on medium-low heat. Stir continuously with a spatula.
- Wait until the chocolate chips melt and the mix looks smooth and glossy.
- Remove the saucepan from heat. Stir in the vanilla extract and salt.
- Fold in the mini marshmallows and crushed graham crackers.
- If you want nuts, add them now. Mix gently until all is combined.
- Pour the fudge mix into the lined baking dish.
- Use a spatula to spread it evenly, filling all corners.
- Chill in the fridge for at least 3 hours. It should feel firm when done.
- Once set, lift the fudge out using the parchment paper.
- Cut it into 16 squares or your preferred size.
Tips for Achieving the Perfect Texture
- Stir continuously while melting. This helps prevent burning and ensures a smooth mix.
- Use mini marshmallows for the best texture. They blend well and give a nice bite.
- Chill the fudge long enough to set; this helps it hold its shape.
- For a lovely finish, sprinkle extra crushed graham crackers on top before serving.
- Drizzling melted chocolate over the fudge adds flair and taste.
Tips & Tricks
Common Mistakes to Avoid
When making chocolate marshmallow fudge, avoid these common mistakes:
- Don’t rush the melting process. Heat the chocolate slowly.
- Stir continuously while melting to prevent burning.
- Make sure to fold in the marshmallows gently. This keeps them whole.
- Don’t skip lining the baking dish. It helps with easy removal.
- Allow the fudge to set fully in the fridge. This ensures the right texture.
Serving Suggestions
Serving your fudge can be fun and creative. Try these ideas:
- Cut the fudge into fun shapes with cookie cutters.
- Arrange squares on a colorful plate for a festive look.
- Add a sprinkle of crushed graham crackers on top. This adds texture and flair.
- Serve with a scoop of vanilla ice cream for a treat.
- Drizzle melted chocolate over the fudge before serving. It looks amazing!
How to Store Leftover Fudge
Storing leftover fudge is easy. Follow these steps:
- Place fudge squares in an airtight container. This keeps them fresh.
- You can store it at room temperature for up to a week.
- For longer storage, put the fudge in the fridge. It lasts up to two weeks there.
- If you want to keep it longer, freeze the fudge. Wrap each piece in plastic wrap first.
- To enjoy frozen fudge, let it thaw in the fridge overnight.
Pro Tips
- Use Quality Chocolate: The flavor of your fudge heavily relies on the quality of the chocolate chips. Opting for high-quality semi-sweet chocolate will enhance the overall taste and texture.
- Chill Properly: For the best texture, ensure the fudge is chilled for the full 3 hours. This allows it to set properly, making it easier to cut into perfect squares.
- Customize Your Nuts: Feel free to experiment with different types of nuts, like pecans or hazelnuts, to add unique flavors and textures to your fudge.
- Presentation Matters: Enhance the visual appeal by garnishing with a sprinkle of crushed graham crackers or a drizzle of melted chocolate before serving.
Variations
Nutty Chocolate Marshmallow Fudge
You can add a crunchy twist to your fudge. Simply mix in ½ cup of chopped nuts. I love using walnuts or almonds. They add great texture and flavor. Just fold them in after melting the chocolate. This nutty touch makes each bite even more delightful!
Using Different Types of Chocolate
Feel free to switch up the chocolate types. You can use dark chocolate for a richer taste. Milk chocolate offers a sweeter flavor. Or try white chocolate for a fun twist. Just keep the same amount of chocolate chips. Each type brings a new flavor to your fudge!
Adding Flavor Enhancements
You can boost the taste of your fudge with simple changes. Try adding a splash of peppermint extract for a minty kick. A dash of espresso powder gives a coffee flavor that pairs well with chocolate. You can also mix in a bit of orange zest for a citrusy note. These enhancements will surprise your taste buds!
Storage Info
Short-term Storage Methods
Store your chocolate marshmallow fudge in an airtight container. This helps keep it fresh. You can place it in the fridge for up to one week. If you prefer, cut the fudge into squares before storing. This makes it easy to grab a piece whenever you crave a sweet treat.
Long-term Freezing Tips
To freeze fudge, first wrap it tightly in plastic wrap. Then, place it in a freezer-safe bag or container. This extra layer protects it from freezer burn. You can freeze the fudge for up to three months. When you’re ready to enjoy it, let it thaw in the fridge overnight.
How to Revive Stale Fudge
If your fudge becomes stale, don’t worry! You can soften it. Place the fudge in a microwave-safe bowl. Heat it in short bursts, about 10 seconds at a time. Stir in between bursts until it’s soft again. You can also add a bit of sweetened condensed milk to help it regain a creamy texture.
FAQs
How do I know when the fudge has set?
You can tell if the fudge is set by gently pressing it. If it feels firm and holds its shape, it is ready. After chilling for at least 3 hours, you can also check the edges. They should pull away from the sides of the pan slightly. This is a good sign that your fudge is ready to be cut.
Can I use regular marshmallows instead of mini?
Yes, you can use regular marshmallows. Just cut them into smaller pieces. This will help them mix better into the fudge. Keep in mind that mini marshmallows melt quickly and blend smoothly. So, the texture may change a bit when using regular marshmallows.
How do I cut fudge neatly?
To cut fudge neatly, first, make sure it is fully set. Lift the fudge out using the parchment paper. Use a sharp knife that has been warmed in hot water. This makes cutting easier. Wipe the knife after each cut for clean edges. This way, you’ll get perfect squares every time.
You learned about fudge ingredients, step-by-step cooking, and storage tips. We covered common mistakes and how to make tasty variations. With these insights, you can create perfect fudge every time. Remember to experiment with flavors and store your fudge properly. Keep practicing to master your fudge-making skills. Enjoy sharing your sweet creations with friends and famil

Choco-Mallow Dream Fudge
Ingredients
- 2 cups semi-sweet chocolate chips
- 1 cup sweetened condensed milk
- 1 cup mini marshmallows
- 0.5 cup crushed graham crackers
- 1 teaspoon vanilla extract
- 0.25 teaspoon salt
- 0.5 cup chopped nuts (optional)
Instructions
- Begin by lining an 8x8-inch square baking dish with parchment paper, ensuring there’s an overhang on two sides for easy lifting once the fudge sets.
- In a medium-sized saucepan, combine the semi-sweet chocolate chips and sweetened condensed milk. Place the saucepan over medium-low heat. Stir the mixture continuously with a spatula until the chocolate chips have fully melted and the mixture becomes smooth and glossy.
- Once melted, remove the saucepan from the heat. Stir in the vanilla extract and salt, mixing until evenly incorporated into the chocolate mixture.
- Carefully fold in the mini marshmallows and crushed graham crackers. If you're using nuts, add them in at this stage. Gently mix until the marshmallows and crackers are evenly distributed throughout the chocolate mixture.
- Pour the fudge mixture into the prepared baking dish. Use a spatula to spread it out evenly, ensuring that it fills all corners of the dish.
- Place the baking dish in the refrigerator and let the fudge chill for at least 3 hours or until it is firm to the touch.
- After the fudge has set, lift it out of the baking dish using the parchment paper overhang. Cut it into 16 squares or your desired size and serve.
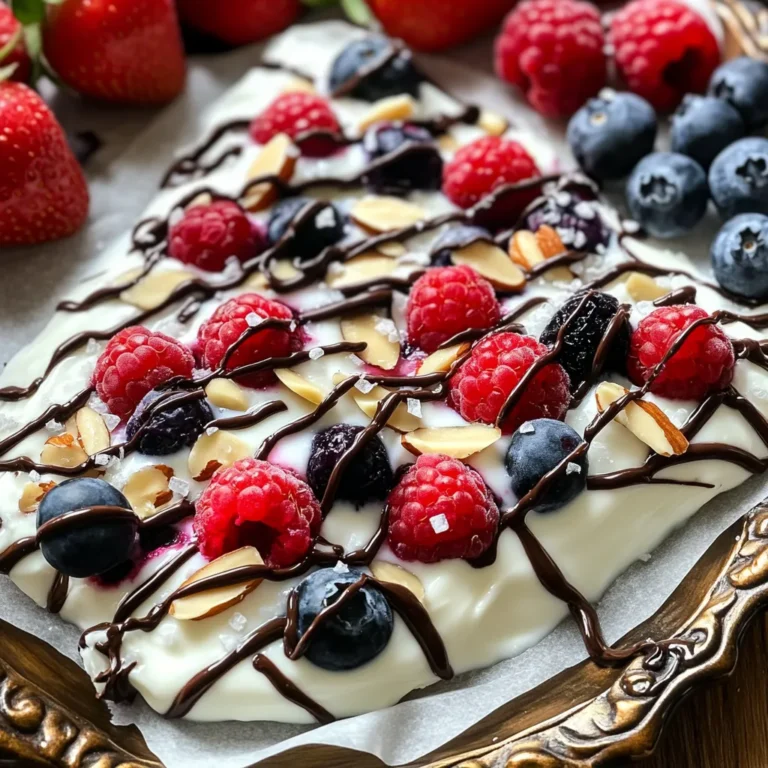
![- 1 cup rolled oats - 1/2 cup canned pumpkin puree - 1/4 cup almond butter (or your choice of nut butter) - 1/4 cup honey or maple syrup - 1/2 teaspoon vanilla extract - 1 teaspoon pumpkin pie spice - Pinch of salt - 1/4 cup chopped nuts (walnuts or pecans) - 1/4 cup mini chocolate chips or raisins - Calories per serving: About 100 - Protein content: 2 grams - Fiber content: 3 grams When you gather these ingredients, you set the stage for a tasty treat. Rolled oats serve as the base, giving each bite a hearty texture. Canned pumpkin puree brings moisture and a rich flavor that screams fall. Almond butter adds creaminess and healthy fats, while honey or maple syrup sweetens the mix. The vanilla extract rounds out the flavors, and pumpkin pie spice makes everything feel festive. Optional ingredients like chopped nuts and chocolate chips offer extra crunch and sweetness. You can mix and match to fit your taste. In terms of nutrition, these bites pack a punch. Each serving gives you about 100 calories, 2 grams of protein, and 3 grams of fiber. This makes them a great snack for energy and fullness. For the complete recipe, you can check out the Full Recipe section. - In a large mixing bowl, combine: - 1 cup rolled oats - 1/2 cup canned pumpkin puree - 1/4 cup almond butter (or your choice of nut butter) - 1/4 cup honey or maple syrup - 1/2 teaspoon vanilla extract - 1 teaspoon pumpkin pie spice - Pinch of salt Mix these ingredients well. Use a spatula to ensure everything blends together. You want a sticky dough. This sticky texture helps the bites hold their shape later. If you like, fold in some extras: - 1/4 cup chopped nuts (like walnuts or pecans) - 1/4 cup mini chocolate chips or raisins Make sure to distribute these evenly. This adds crunch and sweetness. The more you mix, the better the flavors combine. Now, it’s time to shape the bites. - Scoop small portions of the mixture. - Roll each portion into 1-inch balls. Place the balls on a plate or parchment paper. Leave space between them. After shaping, refrigerate the bites for at least 30 minutes. This helps them firm up. Enjoy these tasty bites chilled or at room temperature as a quick snack! For the full recipe, check out the details above. To make great energy bites, size matters. Aim for about 1 inch for each bite. This helps them cook evenly. Use a light touch when mixing the dough. Overworking it can make them tough. Gently blend the ingredients until they come together. Want more flavor? Try making your own pumpkin pie spice. Combine cinnamon, nutmeg, and ginger to find your perfect mix. You can also adjust sweetness. Use honey or maple syrup to make them sweeter or less sweet. Taste as you go! When it's time to serve, make it pretty! Arrange your energy bites on a decorative plate. This makes them look special. Add a sprinkle of pumpkin pie spice on top for a nice touch. It looks great and adds extra flavor. For the full recipe, check out [Full Recipe]. {{image_4}} You can make your pumpkin pie energy bites even more fun with flavor twists. Try adding toasted coconut for a tropical vibe. The sweet and crunchy texture makes each bite delightful. You can also switch your nut butter. Use peanut or cashew butter instead of almond butter. Each nut brings its own taste, making the bites unique. If you need a gluten-free snack, use gluten-free oats in your mix. This small change keeps the bites delicious and safe for those with gluten sensitivities. For a vegan option, swap honey with agave nectar. This keeps your bites sweet while fitting a plant-based diet. You can tailor these bites to fit the seasons. For fall, mix in some spiced apple or cider. This adds a warm, cozy flavor that feels like autumn. For summer, a hint of citrus zest can brighten the bites. It gives them a fresh burst that’s perfect for hot days. For the full recipe, check the details above and make your own tasty energy bites! Store your pumpkin pie energy bites in an airtight container in the refrigerator. This keeps them fresh and tasty. If you plan to eat them soon, you can keep them at room temperature for short durations. Just remember, they may not last as long outside the fridge. These energy bites can last up to one week in the fridge. If you want to keep them longer, freeze them. They can stay fresh for up to three months in the freezer. Just make sure to label the container with the date you froze them. You can enjoy these bites chilled or at room temperature. They make a great snack either way! For a delightful treat, pair them with a cup of tea or coffee. The warm drink complements the tasty flavors of the bites perfectly. If you want to try a fun twist, serve them at a party on a festive plate. You can find the full recipe to make these delicious bites. To make pumpkin pie energy bites, follow these steps: 1. In a large bowl, mix rolled oats, canned pumpkin puree, almond butter, and honey. 2. Add vanilla extract, pumpkin pie spice, and a pinch of salt. 3. Stir until the mixture becomes a sticky dough. 4. Fold in chopped nuts and chocolate chips or raisins. 5. Scoop out small portions and roll them into balls, about 1 inch wide. 6. Place the bites on a plate with space between them. 7. Refrigerate for at least 30 minutes to firm up. Enjoy your tasty and healthy snack! For more details, check the Full Recipe. Yes, you can freeze these energy bites. To do this, place the bites on a baking sheet. Freeze them for about an hour until solid. Then, transfer them to a freezer bag or an airtight container. Label the bag with the date. These bites can last up to three months in the freezer. When you’re ready to eat them, just let them thaw in the fridge. Pumpkin pie energy bites have many health benefits. They are rich in fiber from the oats and pumpkin. Fiber helps with digestion and keeps you full. Almond butter provides healthy fats and protein. Honey or maple syrup adds natural sweetness without refined sugar. Pumpkin is packed with vitamins A and C, which support your immune system. Overall, these bites are a nutritious snack option. Yes, these energy bites are safe and nutritious for kids. They contain wholesome ingredients that provide energy without added sugar. Kids love the sweet taste and chewy texture. You can also let your children help make them. This way, they learn about healthy snacks. Just remember to check for any nut allergies before serving. These pumpkin pie energy bites are easy to make and fun to eat. You mix simple main ingredients like oats, pumpkin, and nut butter. Add some nuts or chocolate chips for a tasty twist. Remember to store them well to enjoy later. Whether for a snack, dessert, or lunchbox treat, these bites pack nutrition in every bite. Get creative with flavors and enjoy the flexible recipes. Healthy eating can be delicious and effortless. Make these energy bites today and see for yourself!](https://dishtreats.com/wp-content/uploads/2025/07/b18c9eee-ac7a-43cf-8a14-33dd9ccff863-768x768.webp)