Greek Chicken Gyro Bowls Flavorful and Simple Recipe

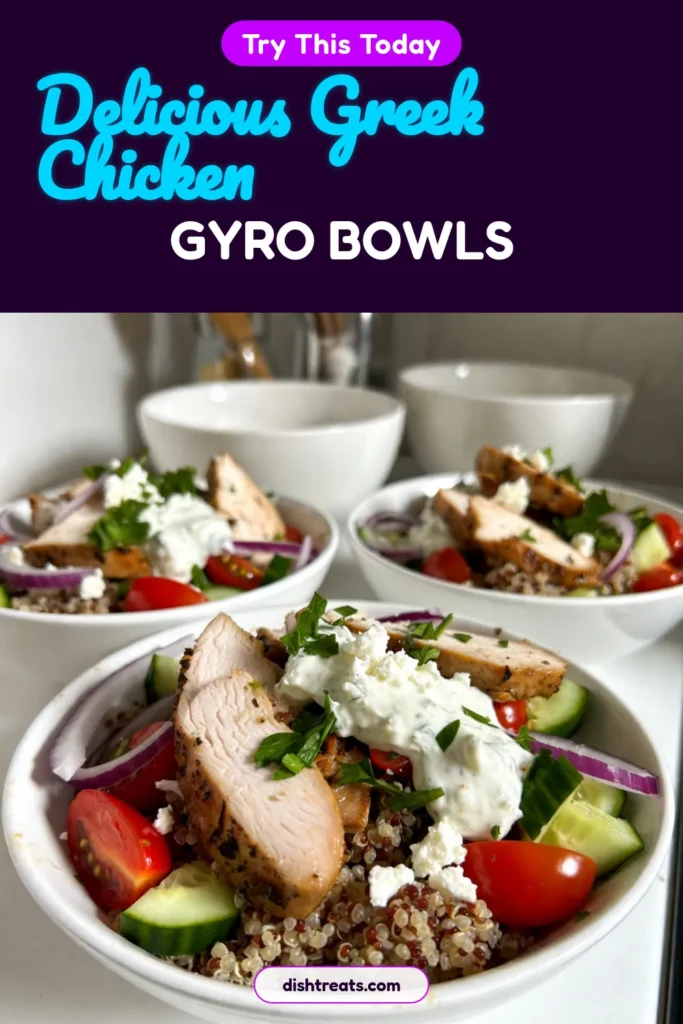
Are you craving a fresh and tasty meal? Look no further than Greek Chicken Gyro Bowls! This dish combines juicy marinated chicken, fluffy grains, and various toppings for a flavor explosion. Plus, it’s easy to make at home. In this recipe, I’ll guide you step-by-step so you can enjoy a delicious bowl any day of the week. Ready to dive in? Let’s get cooking!
Why I Love This Recipe
- Fresh Ingredients: This recipe uses vibrant, fresh vegetables and herbs that brighten up the dish and add essential nutrients.
- Flavorful Marinade: The marinade for the chicken is packed with bold flavors from garlic, lemon, and spices, ensuring a juicy and delicious protein.
- Customizable Bowl: Each bowl can be customized with your favorite toppings, making it versatile for different tastes and dietary preferences.
- Quick and Easy: With a total time of only 40 minutes, this recipe is perfect for busy weeknights or meal prep.
Ingredients
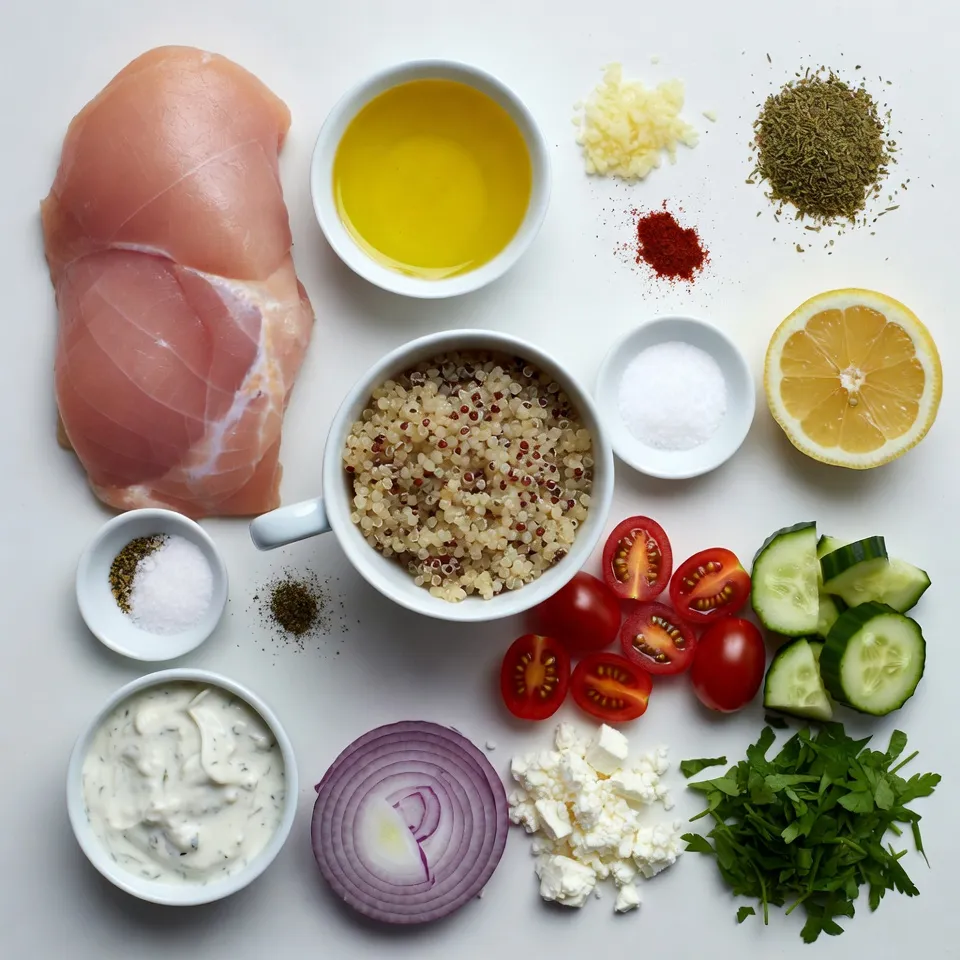
List of Ingredients
- Chicken and Marinade Ingredients
- 2 boneless, skinless chicken breasts
- 3 tablespoons extra virgin olive oil
- 3 cloves garlic, finely minced
- 1 tablespoon dried oregano
- 1 teaspoon smoked paprika
- Juice of 1 lemon
- Salt and black pepper to taste
- Base Ingredients
- 1 cup cooked quinoa or brown rice
- Toppings and Garnishes
- 1 cup cherry tomatoes, halved
- 1 cucumber, diced into bite-sized pieces
- 1/2 red onion, thinly sliced
- 1/2 cup feta cheese, crumbled
- 1/4 cup tzatziki sauce (store-bought or homemade)
- Fresh parsley, chopped (for garnish)
These ingredients create a tasty and colorful Greek Chicken Gyro Bowl. The chicken marinated in olive oil, garlic, and spices gives it great flavor. The base of quinoa or brown rice adds a nice texture. Fresh veggies like tomatoes and cucumber make your bowl bright and healthy. Crumbled feta and tzatziki sauce tie everything together with rich, creamy goodness. Enjoy each bite of this well-balanced meal!
Step-by-Step Instructions
Marinate the Chicken
To start, combine the marinade ingredients. In a large zip-top bag, whisk together:
- 3 tablespoons extra virgin olive oil
- 3 cloves garlic, finely minced
- 1 tablespoon dried oregano
- 1 teaspoon smoked paprika
- Juice of 1 lemon
- Salt and black pepper to taste
Add the chicken breasts to this mix. Make sure they are well coated. Seal the bag or cover the dish. Place it in the fridge for at least 30 minutes. If you have time, marinate overnight for even better flavor.
Cook the Chicken
Next, cook the chicken. Preheat your grill or a stovetop grill pan to medium-high heat. Take the chicken from the marinade and let any excess drip off. Grill each breast for about 6-7 minutes on each side. You want the internal temperature to reach 165°F (75°C). When done, transfer the chicken to a cutting board. Allow it to rest for a few minutes before slicing it thinly.
Prepare the Base
While the chicken grills, prepare your base. Cook 1 cup of quinoa or brown rice according to the package instructions. After cooking, fluff the grains with a fork. Let them cool slightly before using.
Assemble the Bowls
Now it’s time to assemble the bowls. In individual serving bowls, start with a generous scoop of cooked quinoa or brown rice. Next, arrange the sliced grilled chicken on top. Add a colorful mix of:
- Halved cherry tomatoes
- Diced cucumber
- Thinly sliced red onion
This will create a vibrant and appealing presentation.
Add the Toppings
Next, sprinkle crumbled feta cheese over the bowls. This adds a rich, tangy flavor. Top each bowl with a dollop of tzatziki sauce for creaminess. If you like, drizzle a bit of extra olive oil for richness.
Garnish and Serve
Finish your bowls with a sprinkle of chopped parsley. This adds color and freshness. Serve the Greek Chicken Gyro Bowls right away. Enjoy the delicious blend of flavors in each bite!
Tips & Tricks
Perfecting the Chicken
To get the best chicken for your gyro bowls, marination is key. You want to mix olive oil, garlic, oregano, smoked paprika, lemon juice, salt, and pepper. Use a large zip-top bag or shallow dish to blend these well. Add the chicken, making sure it is fully coated. Seal the bag or cover the dish. Let it chill in the fridge for at least 30 minutes, or overnight if you can. This makes the chicken flavorful and tender.
When cooking, the goal is juiciness. Preheat your grill or stovetop pan to medium-high heat. Take the chicken out of the marinade and let the extra drip off. Grill for about 6-7 minutes on each side. You want the chicken’s internal temperature to reach 165°F (75°C). This ensures it is safe to eat and not pink inside. After cooking, let the chicken rest for a few minutes before slicing. This helps keep the juices in.
Alternative Cooking Methods
You can cook chicken in different ways. Grilling gives a nice smoky flavor. If you prefer, use a stovetop grill pan or skillet. Both work great. For oven cooking, preheat to 400°F (200°C). Place the marinated chicken on a baking sheet. Bake for about 20-25 minutes, or until done. All methods give tasty results.
Customizing Your Bowls
Feel free to swap ingredients based on your needs. If you want a vegetarian option, try chickpeas or grilled veggies instead of chicken. For gluten-free options, use quinoa or brown rice as your base. You can also change up the seasonings. Add cumin or coriander for a different taste. Experiment with herbs like dill or parsley for extra flavor. This recipe is easy to make your own!
Pro Tips
- Marinate Longer for More Flavor: For the best flavor, marinate the chicken for at least 2-4 hours, or even overnight. This allows the spices and lemon juice to penetrate the meat thoroughly.
- Perfectly Grill the Chicken: Ensure your grill is preheated to medium-high heat before adding the chicken. This helps to achieve a nice sear and prevents the chicken from sticking.
- Customize Your Toppings: Feel free to add or substitute toppings based on your preference. Olives, bell peppers, or even avocado can add unique flavors and textures to your gyro bowls.
- Serve with Fresh Herbs: Adding fresh herbs like dill or mint can elevate the flavors and give your gyro bowls a fresh, vibrant taste that complements the other ingredients.

Variations
Vegetarian Option
For a vegetarian twist, you can swap out the chicken. Here are some great substitutes:
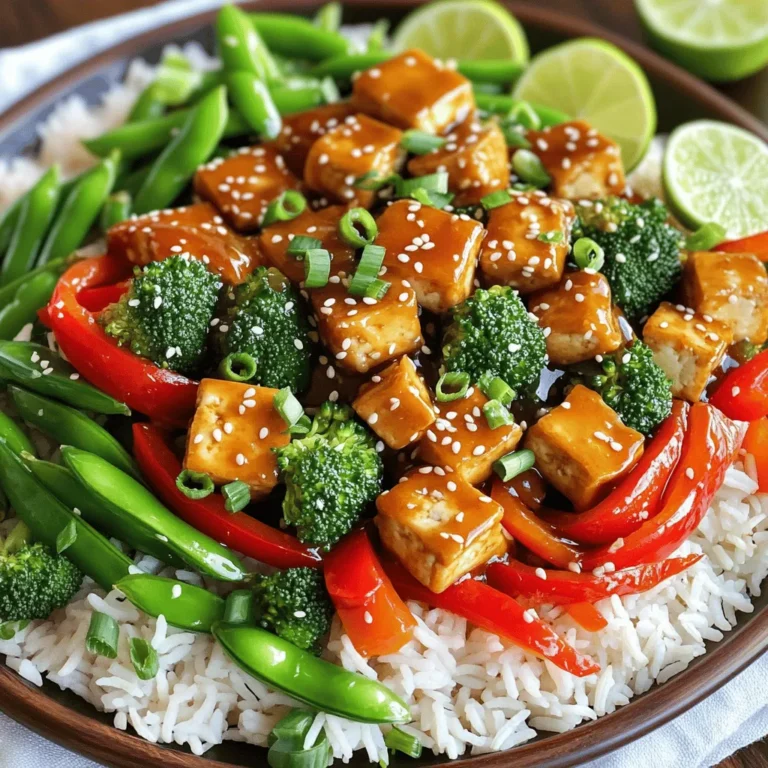
- Grilled eggplant slices
- Marinated tofu cubes
- Chickpeas, roasted for crunch
These options give you tasty protein alternatives. I like using marinated tofu. It soaks up flavor well.
Mediterranean Additions
To enhance your Greek Chicken Gyro Bowls, add extra ingredients. These can boost flavor and nutrition:
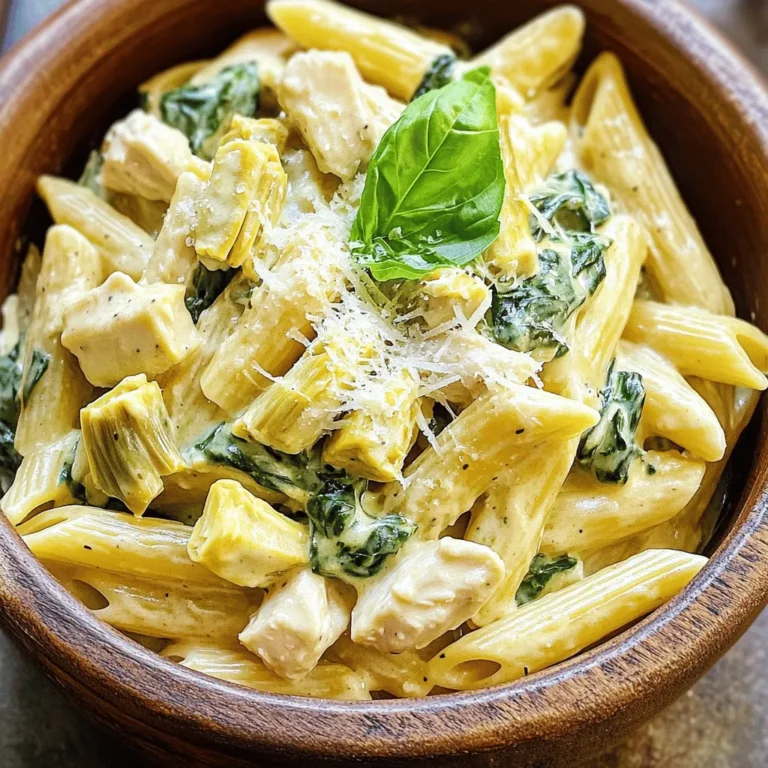
- Artichoke hearts
- Kalamata olives
- Roasted red peppers
Try seasonal vegetables to keep it fresh. Some suggestions include:
- Zucchini in summer
- Butternut squash in fall
- Spinach in spring
These ingredients bring a burst of color and taste.
Serving Style Variations
You can also change how you serve your meal. Wraps or pitas are great for a fun twist. Here are some ideas:
- Fill a pita with your gyro bowl ingredients.
- Use large lettuce leaves for a low-carb option.
You can switch the base too. Instead of quinoa or brown rice, try:
- Farro for a nutty taste
- Couscous for lightness
These variations keep the meal exciting and delicious!
Storage Info
Refrigeration Guidelines
- How Long It Lasts in the Fridge
You can keep Greek Chicken Gyro Bowls in the fridge for about 3 to 4 days. This allows you to enjoy the flavors throughout the week.
- Best Practices for Storage
Store each component separately. Use airtight containers for chicken, veggies, and grains. This helps each ingredient hold its taste and texture longer.
Freezing Instructions
- Freezing Method and Duration
You can freeze the chicken and grains. Place them in freezer bags or containers. They last well for up to 3 months. Just remember to label them with the date.
- Thawing and Reheating Tips
To thaw, place the frozen items in the fridge overnight. Once thawed, reheat chicken in a skillet or microwave until hot. Make sure it reaches 165°F for safe eating.
Meal Prep Ideas
- Preparing Ingredients Ahead of Time
You can marinate the chicken a day before. Chop veggies and store them in the fridge. Cook quinoa or rice ahead of time for quick meals.
- Assembling for Quick Meals
When you’re ready to eat, just grab the prepped ingredients. Layer them in a bowl for a fast, tasty meal. This makes dinner a breeze on busy nights!
FAQs
How do I make tzatziki sauce?
To make tzatziki sauce, you need a few simple ingredients. Combine 1 cup of plain yogurt, 1/2 a cucumber (grated and drained), 2 cloves of minced garlic, 1 tablespoon of olive oil, and 1 tablespoon of lemon juice. Add salt and pepper to taste. Mix well, and let it chill in the fridge. This sauce adds a cool flavor to your gyro bowls.
Can I use chicken thighs instead of breasts?
Yes, you can use chicken thighs. They are often juicier and more flavorful. If you choose thighs, you may need to adjust cooking time. Thighs usually take about 8-10 minutes per side on the grill. Always check for an internal temperature of 165°F to ensure they are safe to eat.
What can I serve with Greek Chicken Gyro Bowls?
You can serve many tasty sides with your gyro bowls. Consider adding a Greek salad, roasted veggies, or pita bread. Hummus is also a great dip for a fresh crunch. Each side brings its own flavor to your meal.
Is this recipe gluten-free?
Yes, this recipe can be gluten-free. Just ensure that your tzatziki sauce and toppings do not contain gluten. Use quinoa or brown rice as a base, as they are both gluten-free. Always check labels to avoid any hidden gluten in sauces or pre-packaged ingredients.
This article covered how to make delicious Greek chicken gyro bowls. We discussed the needed ingredients, marinating tips, and cooking methods. You learned how to prepare a tasty base and layer toppings for a stunning meal. I shared storage tips and meal prep ideas for convenience.
With these steps, you can create a vibrant dish that fits various diets. Enjoy the process, and feel free to get creative with your own flavors. Your kitchen will be filled with great tastes and smile

Greek Chicken Gyro Bowls
Ingredients
- 2 pieces boneless, skinless chicken breasts
- 3 tablespoons extra virgin olive oil
- 3 cloves garlic, finely minced
- 1 tablespoon dried oregano
- 1 teaspoon smoked paprika
- 1 piece Juice of 1 lemon
- to taste Salt and black pepper
- 1 cup cooked quinoa or brown rice
- 1 cup cherry tomatoes, halved
- 1 piece cucumber, diced into bite-sized pieces
- 1 2 red onion, thinly sliced
- 1 2 feta cheese, crumbled
- 1 4 tzatziki sauce (store-bought or homemade)
- for garnish Fresh parsley, chopped
Instructions
- In a large zip-top bag or a shallow dish, whisk together the olive oil, minced garlic, oregano, smoked paprika, lemon juice, and a generous pinch of salt and black pepper. Add the chicken breasts to this marinade, ensuring they are well coated. Seal the bag or cover the dish and refrigerate for at least 30 minutes, or for up to overnight for enhanced flavor.
- Preheat your grill or a stovetop grill pan to medium-high heat. Remove the chicken breasts from the marinade, allowing any excess marinade to drip off. Grill the chicken for about 6-7 minutes on each side, or until the internal temperature reaches 165°F (75°C), and the meat is no longer pink in the center. Once cooked, transfer to a cutting board and let the chicken rest for a few minutes before slicing it thinly.
- While the chicken is grilling, cook your quinoa or brown rice according to the package instructions. Once cooked, fluff with a fork and allow it to cool slightly.
- In individual serving bowls, start with a generous scoop of the cooked quinoa or brown rice as the base. Next, arrange the sliced grilled chicken on top, followed by a colorful array of halved cherry tomatoes, diced cucumber, and thinly sliced red onion to create a vibrant presentation.
- Sprinkle crumbled feta cheese over the entire bowl for a rich, tangy flavor. Top each bowl with a dollop of tzatziki sauce for added creaminess, and if desired, drizzle with a little extra olive oil for richness.
- Finish your bowls with a fresh sprinkle of chopped parsley for a pop of color and freshness. Serve the Greek Chicken Gyro Bowls immediately, and delight in the delicious blend of flavors!

![To make Blueberry Lemon Breakfast Quinoa, you will need the following ingredients: - 1 cup quinoa, thoroughly rinsed - 2 cups almond milk (or your preferred milk) - 1 cup fresh blueberries (or frozen if fresh are not available) - Zest of 1 lemon - Juice of 1 large lemon - 2 tablespoons pure maple syrup (or honey for sweetness) - 1 teaspoon pure vanilla extract - 1/2 teaspoon ground cinnamon - A pinch of salt - Optional toppings: sliced almonds, extra blueberries, or a generous dollop of Greek yogurt Choose bright blueberries with no wrinkles. Look for firm berries, as they taste best. For lemons, pick ones that feel heavy. They should have a smooth, shiny skin. This shows they are juicy. When choosing quinoa, look for a grain that is clean and free of debris. If you need a non-dairy milk, try oat milk or coconut milk. Both have nice flavors. For sweeteners, you can use agave syrup or brown sugar. Adjust the amount to your taste. If you want to skip the sweetener, ripe bananas work great too. You can mash them and mix them in! Start by rinsing 1 cup of quinoa under cold water. This helps remove any bitter taste. Use a fine mesh sieve for best results. This step is key for a great flavor. Next, gather a medium saucepan. Add the rinsed quinoa to the saucepan. Pour in 2 cups of almond milk and a pinch of salt. This combination makes the quinoa creamy and rich. Place the saucepan over medium heat. Bring the mixture to a gentle boil. Watch it carefully; it can boil over quickly. Once it boils, reduce the heat to low. Cover the saucepan with a lid. Let it simmer for about 15 minutes. The quinoa will absorb most of the liquid during this time. When the quinoa is tender, remove it from heat. Allow it to sit for 5 more minutes. This helps steam the quinoa and makes it fluffy. After 5 minutes, uncover the saucepan. Use a fork to fluff the quinoa gently. This step adds air and lightness. Now, it’s time to mix in the flavors. Add the lemon zest and juice. Pour in 2 tablespoons of maple syrup, 1 teaspoon of vanilla extract, and 1/2 teaspoon of cinnamon. Stir well to combine everything. Finally, fold in the blueberries gently. Reserve some blueberries for garnishing if you like. Serve warm in bowls, and enjoy your Blueberry Lemon Breakfast Quinoa! For the full recipe, check out the details above. To get the best quinoa texture, rinse it well before cooking. This removes the bitter coating called saponin. Use two cups of liquid for every cup of quinoa. This ratio helps the quinoa absorb enough moisture. Cook it on low heat after boiling. Let it simmer for about 15 minutes. After that, let it steam for 5 more minutes. This step makes the quinoa fluffy and light. Fluff it gently with a fork at the end. This adds air and prevents clumping. Adding lemon zest brings a bright flavor. You can also try a pinch of nutmeg for warmth. Cinnamon adds a lovely spice that pairs well with blueberries. If you want more sweetness, add a little more maple syrup. For a kick, a dash of ginger powder can elevate the taste. Don’t hesitate to experiment with these flavors. Each adds its unique touch to your breakfast. This recipe serves four people. Each person gets a warm bowl full of deliciousness. For presentation, use colorful bowls that catch the eye. Top with fresh blueberries and sliced almonds. A dollop of Greek yogurt adds creaminess and visual appeal. You can also drizzle extra maple syrup for shine. Garnish with lemon wedges and mint for a refreshing look. This makes breakfast not only tasty but also beautiful. {{image_4}} You can mix in other fruits to change the flavor. Try strawberries, raspberries, or bananas. Each fruit adds its own taste. For a tropical twist, add diced mango or pineapple. These fruits work well with the lemon and blueberry. You can even use dried fruits like cranberries or apricots for a chewy texture. Just remember to adjust the sweetener if needed. Adding nuts or seeds makes the dish crunchy. Try sliced almonds, walnuts, or pecans. They add a nice contrast to the soft quinoa. You can also use seeds like chia or flaxseeds. These seeds give extra fiber and healthy fats. Toss them in right before serving for a fresh crunch. This recipe is already vegan if you use plant-based milk. To ensure it’s gluten-free, check the quinoa package. Some brands process quinoa with gluten grains. Always read labels closely. You can substitute maple syrup with agave nectar for a different sweet flavor. This breakfast fits many dietary needs, making it a great choice for everyone. For the Full Recipe, refer to earlier sections. To keep your Blueberry Lemon Breakfast Quinoa fresh, store it in an airtight container. Let the quinoa cool to room temperature before sealing it. This helps prevent moisture build-up. Place it in the fridge if you plan to eat it within a few days. When you’re ready to enjoy your quinoa again, reheat it on the stove or in the microwave. If using the stove, add a splash of almond milk to keep it moist. Stir often over low heat until warmed through. In the microwave, heat it in short bursts, stirring in between, to avoid hot spots. Your quinoa can last up to five days in the fridge. For meal prep, consider making a larger batch. You can portion it out for quick breakfasts. Store portions in single-serving containers for easy grab-and-go meals. This way, you always have a tasty and healthy breakfast on hand. For the full recipe, check out the [Full Recipe]. Yes, quinoa is a very healthy choice for breakfast. It has lots of protein and fiber. This helps keep you full longer. Quinoa also has vitamins and minerals like magnesium and iron. These nutrients are great for your body. Eating quinoa can boost your energy and help you stay focused all morning. Yes, you can use frozen blueberries. They work well in your breakfast quinoa. Frozen blueberries are picked at their peak ripeness, so they still have great flavor. Just add them straight to your cooked quinoa. There is no need to thaw them first. This makes preparation easier and faster. You can easily prepare this dish ahead of time. Cook the quinoa and mix in the other ingredients. Let it cool and then store it in an airtight container. Keep it in the fridge for up to four days. When you are ready to eat, just reheat it in the microwave. You may want to add a splash of milk to keep it creamy. For the full recipe, check out the details above. In this blog post, I covered the key ingredients for making Blueberry Lemon Breakfast Quinoa. You learned how to select fresh items and swap non-dairy options. I guided you through easy preparation and cooking steps for perfect quinoa. Remember the tips to enhance flavor with spices and zest. Explore variations by adding your favorite fruits and toppings. Lastly, I shared storage tips for leftovers to keep your meals fresh. Now you can enjoy a healthy, delicious breakfast with ease.](https://dishtreats.com/wp-content/uploads/2025/07/a7a4f1ef-75d1-48e3-91fc-d5884226b8fe-768x768.webp)