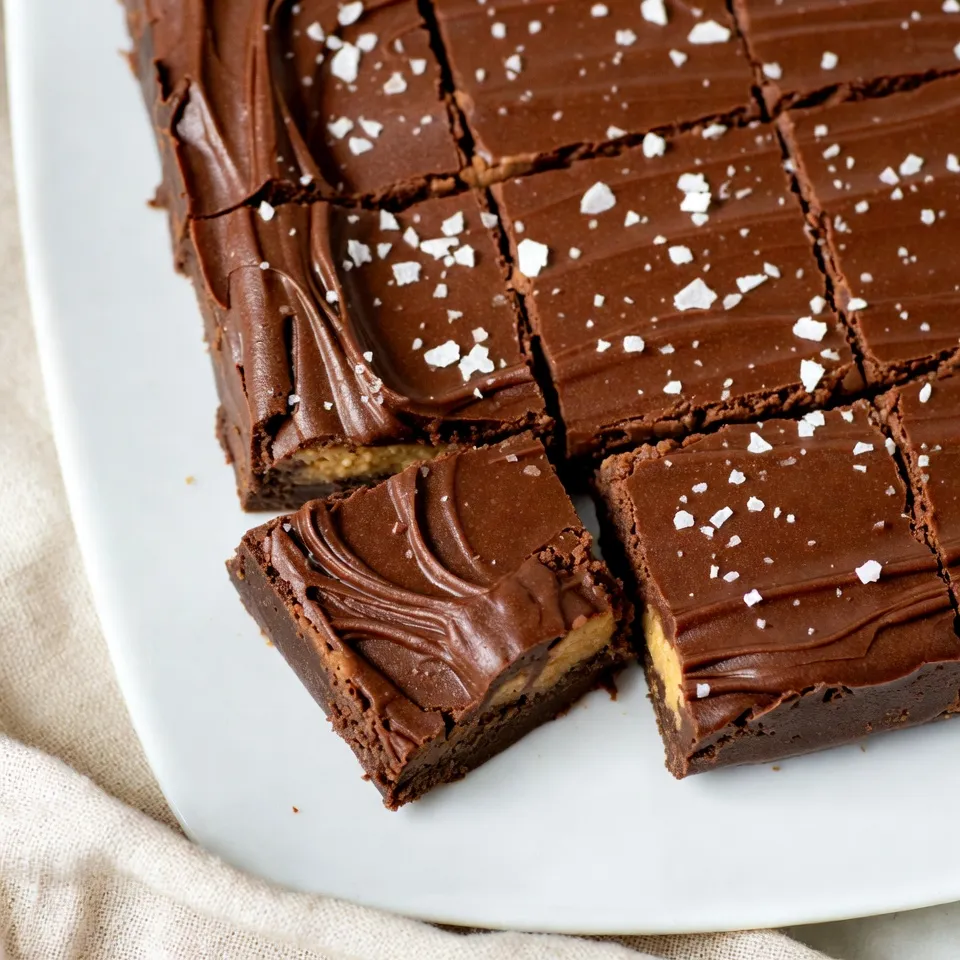
Chocolate Peanut Butter Fudge Irresistible Sweet Treat

Are you ready to satisfy your sweet tooth? This Chocolate Peanut Butter Fudge combines creamy peanut butter and rich chocolate for a truly irresistible treat. With just a few simple ingredients and easy steps, you can whip up this dessert in no time. I’ll guide you through the process, share helpful tips, and offer delicious variations. Let’s dive into this sweet adventure together!
Why I Love This Recipe
- Indulgent Flavor: This fudge combines the rich taste of chocolate with the creamy texture of peanut butter, creating a decadent treat that satisfies any sweet tooth.
- Easy to Make: With just a few simple ingredients and minimal cooking time, this recipe is perfect for bakers of all skill levels.
- Versatile Treat: You can customize the fudge with your favorite nuts or even add toppings like sprinkles or drizzles to make it your own.
- Perfect for Gifting: Wrapped in colorful foil, these fudge squares make a thoughtful and delicious gift for friends and family.
Ingredients
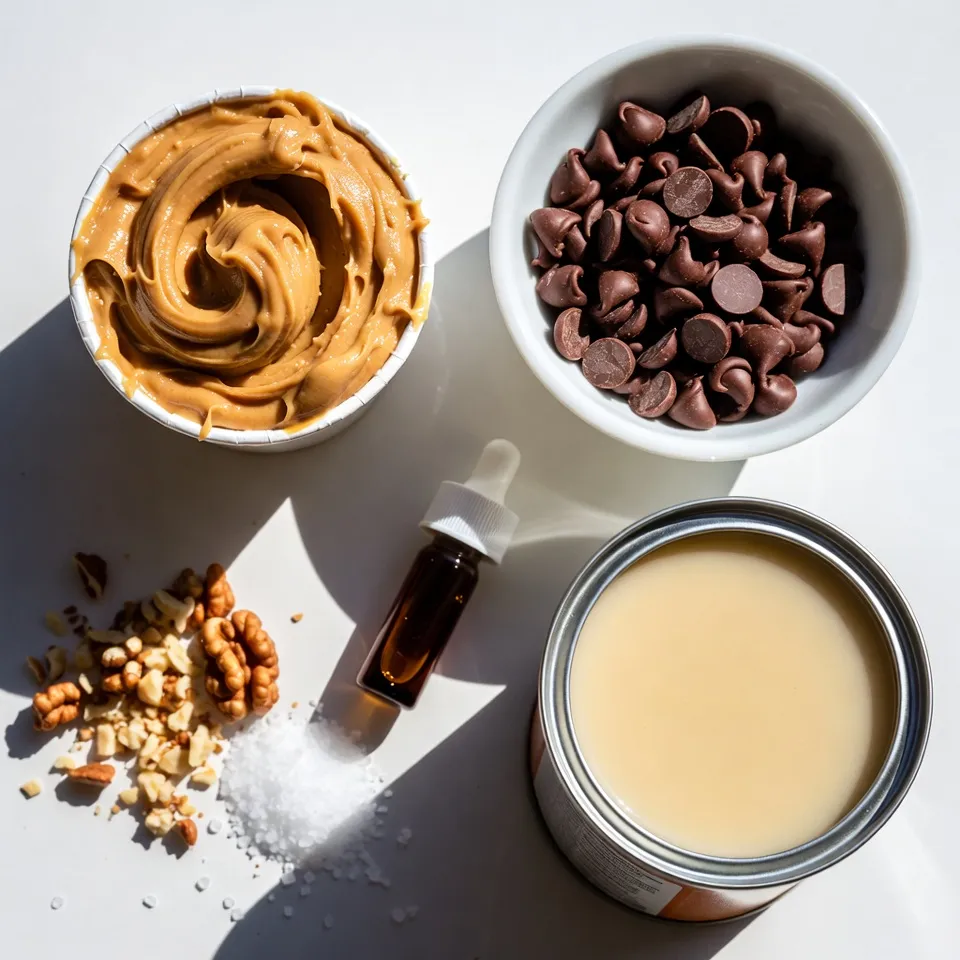
To make this chocolate peanut butter fudge, you need a few simple items. Here’s the list:
- 1 cup creamy peanut butter
- 1 cup semi-sweet chocolate chips
- 1 can (14 oz) sweetened condensed milk
- 1 teaspoon vanilla extract
- 1/4 teaspoon salt
- Optional: 1/2 cup chopped nuts for added crunch
- Optional: Sea salt flakes for garnish
Each ingredient plays a key role in making the fudge rich and tasty. The creamy peanut butter gives it that smooth and nutty flavor that blends perfectly with the chocolate. The semi-sweet chocolate chips melt down to create a luscious base. Sweetened condensed milk adds sweetness and a creamy texture.
Vanilla extract brings warmth, while a pinch of salt enhances all the flavors. If you want extra crunch, toss in some chopped nuts. A sprinkle of sea salt flakes on top adds a delightful contrast. This fudge is not just a treat; it’s a true delight that satisfies any sweet craving!
Step-by-Step Instructions
Preparation of the Baking Pan
Start by getting your baking pan ready. Line an 8×8 inch square dish with parchment paper. Make sure the paper hangs over the sides. This helps you lift the fudge out easily later.
Melting the Chocolate and Milk
Next, grab a medium saucepan. Set it over low heat. Add the semi-sweet chocolate chips and the sweetened condensed milk. Stir the mixture often. You want the chocolate to melt evenly. It should only take a few minutes. When it’s smooth, you can take it off the heat.
Incorporating Peanut Butter and Other Ingredients
Once the chocolate has melted, add the creamy peanut butter. Stir it in well. Mix until it looks smooth and blended. Then, add the vanilla extract and salt. These will boost the flavor. If you like a crunch, now’s the time to fold in the chopped nuts. Make sure they spread out evenly in the fudge.
Pouring and Setting the Fudge
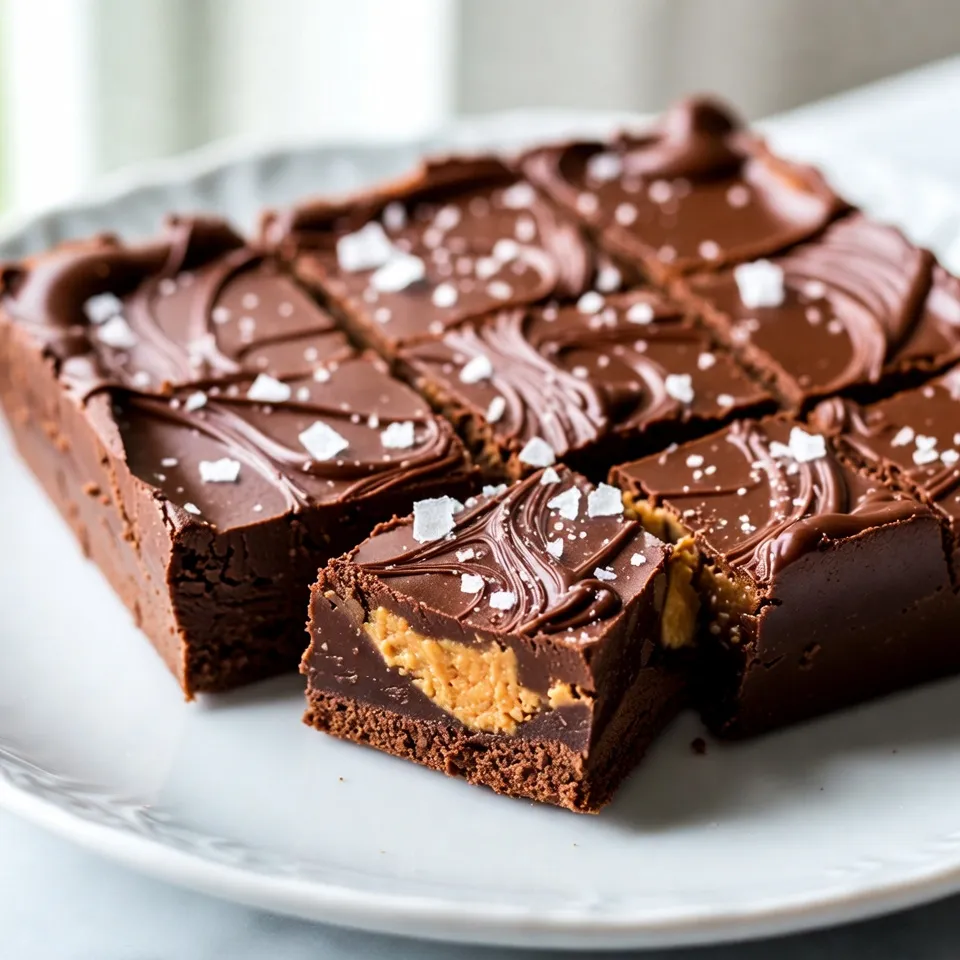
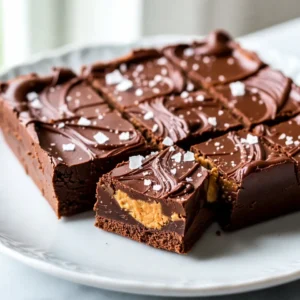
Carefully pour the fudge mixture into your prepared baking pan. Use a spatula to spread it out evenly. Smooth the top for a nice finish. For a tasty touch, sprinkle some sea salt flakes on top before it sets. Place the pan in the fridge. Let it chill for at least 2 hours. This will help it firm up. Once it’s set, lift the fudge out using the parchment paper. Place it on a cutting board and slice it into squares. Sixteen squares is a great size!
Tips & Tricks
Achieving the Perfect Texture
To get the best texture for your fudge, follow a few key steps. First, always use creamy peanut butter. It mixes well and gives a smooth finish. When melting chocolate, keep the heat low. This helps avoid burning. Stir the chocolate and milk until smooth. If you want a firmer fudge, chill it longer. The fudge should feel set but still soft.
Avoiding Common Mistakes
Many people make small mistakes when making fudge. One common error is not lining the pan. If you skip this step, it’s hard to lift the fudge out later. Another issue is rushing the melting process. Always melt the chocolate slowly. If you add cold peanut butter, it can seize the chocolate. Mix it in while the chocolate is still warm. Lastly, don’t forget to sprinkle the sea salt before chilling. It adds a nice touch!
Presentation Tips for Serving
Presentation matters when serving fudge. Cut the fudge into even squares for a neat look. Use a sharp knife for clean cuts. You can place the fudge on a nice plate or a wooden board. For a fun twist, wrap each piece in colorful foil. This makes a lovely gift or party treat. Adding a few whole nuts on top can also make your fudge look fancy.
Pro Tips
- Use Quality Ingredients: The flavor of your fudge will greatly depend on the quality of the chocolate and peanut butter. Opt for high-quality semi-sweet chocolate chips and creamy peanut butter for the best taste.
- Let it Cool Gradually: After melting the chocolate and peanut butter mixture, allow it to cool slightly before pouring it into the pan. This helps to maintain a smooth texture and prevents it from being too soft when setting.
- Experiment with Flavors: Feel free to customize your fudge by adding different ingredients like a swirl of caramel, crushed cookies, or flavored extracts to enhance the taste and presentation.
- Storage Tips: Store your fudge in an airtight container in the refrigerator for up to two weeks. For longer storage, you can freeze it for up to three months. Just be sure to wrap it well to avoid freezer burn.
Variations
Different Types of Chocolate (Dark, Milk, etc.)
You can change the type of chocolate to fit your taste. Dark chocolate gives a rich and bold flavor. It makes your fudge taste more intense. Milk chocolate is sweeter and creamier. This choice works well for kids. You can even mix different chocolates. For example, blend semi-sweet and dark chocolate. This mix gives a nice balance of flavors and sweetness.
Adding Flavor Enhancements (Mint, Coconut, etc.)
Want to spice up your fudge? Try adding flavors like mint or coconut. A few drops of mint extract can bring a fresh taste. You can also mix in shredded coconut for a tropical twist. This adds a chewy texture. Another option is to use coffee. A little espresso powder can deepen the chocolate taste. Experiment with different flavors to find your favorite!
Nuts and Other Crunchy Add-ins
If you love crunch, add nuts to your fudge. Chopped peanuts, walnuts, or pecans work great. They give texture and extra flavor. You can also try different crunchy add-ins. Crispy rice cereal or crushed pretzels can add fun and a salty kick. These add-ins make your fudge even more special. Don’t be afraid to mix and match!
Storage Info
Best Storage Methods
Store your chocolate peanut butter fudge in an airtight container. Use parchment paper between layers to avoid sticking. This keeps the fudge fresh and easy to grab.
Shelf Life and Freezing Options
When stored well, the fudge lasts up to two weeks at room temperature. You can also freeze it for up to three months. Just cut it into squares before freezing. Wrap each piece in plastic wrap, then place them in a freezer bag.
How to Reheat or Restore Texture
If your fudge gets too hard, you can soften it. Simply let it sit at room temperature for 30 minutes. For a quick fix, microwave it for 10 seconds. Check it often to avoid melting it too much. Enjoy your sweet treat!
FAQs
How Long Does It Take to Set?
The fudge needs at least 2 hours to set. I recommend chilling it in the fridge. This time helps the fudge firm up nicely. If you want a firmer texture, let it chill longer. Just be sure to keep it in the fridge until you’re ready to enjoy it.
Can I Use Natural Peanut Butter?
Yes, you can use natural peanut butter. However, it may change the texture a bit. Natural peanut butter has oil that can separate. This might make the fudge less smooth. If you want a creamy texture, stick with the regular creamy peanut butter.
What Can I Substitute for Sweetened Condensed Milk?
You can substitute sweetened condensed milk with coconut milk and sugar. Mix these to get a creamy base. You can also use evaporated milk with added sugar. Another option is to make your own by cooking milk and sugar down. Just be aware that these changes may affect flavor and texture.
You learned how to make delicious fudge with simple ingredients like peanut butter and chocolate. We covered each step from melting to setting. Remember to avoid common mistakes for the best texture. Try different flavors or nuts to make it unique. Store your fudge properly to keep it fresh. Enjoy sharing this treat with friends and family. Make every batch a hit, and have fun with i
Decadent Chocolate Peanut Butter Fudge
Ingredients
- 1 cup creamy peanut butter
- 1 cup semi-sweet chocolate chips
- 14 oz sweetened condensed milk
- 1 teaspoon vanilla extract
- 0.25 teaspoon salt
- 0.5 cup chopped nuts (optional, for added crunch)
- to taste sea salt flakes (for garnish)
Instructions
- Begin by preparing your baking pan. Line an 8x8 inch square baking dish with parchment paper, ensuring there is enough overhang on the sides to help you lift the fudge out easily later.
- In a medium saucepan, set over low heat, combine the semi-sweet chocolate chips and the sweetened condensed milk. Stir the mixture frequently to ensure all the chocolate melts evenly and becomes a smooth mixture—this should take just a few minutes.
- Once the chocolate has completely melted and is smooth, remove the saucepan from heat. Add the creamy peanut butter to the warm chocolate mixture, stirring continuously until it is fully blended and homogenous.
- Next, incorporate the vanilla extract and salt, mixing thoroughly to combine all flavors harmoniously. If you decide to add a crunch, gently fold in the chopped nuts at this stage, ensuring they are evenly distributed throughout the fudge.
- Carefully pour the fudge mixture into the prepared baking pan. Use a spatula to spread the mixture evenly across the pan, smoothing the top for a polished finish.
- For a delightful contrast in flavor, sprinkle sea salt flakes generously over the top of the fudge before it sets.
- Place the baking pan in the refrigerator and allow the fudge to chill for at least 2 hours or until it becomes firm and fully set.
- After chilling, use the overhanging parchment paper to lift the fudge out of the pan. Transfer it to a cutting board and slice it into squares of your desired size—16 squares is a great standard size!

. First, preheat your oven to 400°F (200°C). This sets the perfect baking temp for our scones. While the oven heats up, line a baking sheet with parchment paper. This keeps the scones from sticking and makes cleanup easy. In a large bowl, mix the dry ingredients. Add 2 cups of flour, 1/3 cup of sugar, 1 tablespoon of baking powder, and 1/2 teaspoon of salt. Whisk these together until they are well blended. Next, add in 1/2 cup of cold, diced butter. Use your fingers or a pastry cutter to mix the butter in until it looks like coarse crumbs. Now, add 1 cup of blueberries and the zest of 1 lemon. Gently fold these into the mix without squishing the berries. In another bowl, prepare the wet ingredients. Whisk together 1/4 cup of heavy cream, 1 large egg, 1 teaspoon of vanilla extract, and 1 tablespoon of fresh lemon juice. Once mixed, pour this into the dry mix. Stir gently until the dough just comes together. It should feel a bit sticky. Turn the dough out onto a floured surface. Knead it gently a few times, just until it holds together. Pat the dough into a round shape about 1 inch thick. Use a sharp knife to cut the dough into 8 wedges. Place these on your lined baking sheet, leaving space between them. Now, they are ready for the oven. For the full recipe, check the details provided above. Enjoy making your lemon blueberry scones! To make your scones fluffy and flaky, keep your butter cold. When you mix the butter with the dry ingredients, it should stay in small chunks. This creates pockets of steam while baking, giving you that perfect texture. Also, avoid overmixing the dough. Mix just until everything comes together. A little stickiness is okay. One common mistake is using warm butter. Always use chilled butter for best results. Another mistake is overworking the dough. If you knead too much, your scones may become tough. Lastly, don’t skip chilling the dough before baking. This helps the scones hold their shape. You can boost the flavor of your scones easily. Try adding a pinch of cinnamon for warmth. Diced strawberries or raspberries can replace some blueberries for a twist. For more zing, add a teaspoon of lemon zest to the wet mix. You can also mix in some chopped nuts for crunch. These small changes can elevate your Lemon Blueberry scones and make them even more delightful. For the complete recipe, check out the Full Recipe section. {{image_4}} You can change the flavor by using other fruits. Raspberries, strawberries, or blackberries work well. Just swap them for the blueberries in the recipe. Each fruit adds a unique twist. For a mixed berry scone, combine different berries together. This gives you a colorful and tasty treat. If you need a gluten-free option, use a 1:1 gluten-free flour blend. Make sure it has xanthan gum for the right texture. The process stays the same, and you can enjoy scones that fit your diet. The taste will still be delightful and fresh. You can also spice things up with flavors. A pinch of cinnamon or nutmeg adds warmth to your scones. If you like nuts, try adding chopped walnuts or pecans. These add a nice crunch and depth of flavor. Mix these ingredients in when you add the blueberries and lemon zest. For more ideas, check the Full Recipe to explore how you can make these scones your own! To keep your leftover scones fresh, place them in an airtight container. This helps them stay soft and moist. You can add a slice of bread to the container. The bread helps keep the scones from drying out. If you want to freeze your scones, wrap each one tightly in plastic wrap. Then, place them in a freezer bag. Press out any extra air before sealing the bag. You can freeze them for up to three months. When you're ready to eat them, just thaw them in the fridge overnight. To reheat your scones, preheat your oven to 350°F (175°C). Place the scones on a baking sheet and warm them for about 5 to 10 minutes. This makes them soft and fresh again. You can also use a microwave. Heat them for about 15 to 20 seconds. Enjoy your warm lemon blueberry scones with a cup of tea! For the full recipe, check out the earlier section. Fluffy scones come from the right balance of dry and wet ingredients. You need to use cold butter and avoid overmixing. The butter creates air pockets as it melts, which helps the scones rise. Baking powder also plays a key role. It gives the scones lift during baking, making them light and airy. Yes, you can make these scones ahead. Prepare the dough and cut it into wedges. Then, wrap them well and place them in the fridge for up to 24 hours. When you're ready to bake, just pop them in the oven. If you want to freeze them, wrap the unbaked scones tightly and store them for up to three months. Bake straight from the freezer; they may need a few extra minutes. Serve these scones warm for the best taste. You can add a drizzle of glaze made with powdered sugar and lemon juice. Pair them with butter or clotted cream for a rich flavor. For a fun twist, enjoy them with fresh fruit or a dollop of jam. These scones shine as a breakfast treat or afternoon snack. Scones come from the UK, with roots in Scotland. People often served them with tea. The lemon blueberry version is a modern twist that adds bright flavor. This combination reflects a love for fresh fruit and citrus in baked goods. Now, you can find these scones in cafes and bakeries worldwide, making them a beloved treat for many. This blog post covers all you need for perfect lemon blueberry scones. We discussed ingredients, offering substitutes when needed. I shared steps for mixing and shaping your dough, plus tips for a flaky texture. You learned how to store and reheat your scones. Enjoy the flexibility of variations and try different fruits or gluten-free options. Baking should be fun, so don’t stress about mistakes. With practice, you’ll create sunny, delicious scones every time. Now, gather your ingredients and get baking!](https://dishtreats.com/wp-content/uploads/2025/06/d51723ca-834e-49ab-95e6-d1b73b522f9f-768x768.webp)