Skip to content
About
Contact
Cookie Policy
Copyright Policy
Disclaimer
Search
Home
Dinner
Appetizer
Desserts
Drinks
About
Contact
Privacy Policy
Toggle Menu
Home
/
NO-ING-IMG
- Page 73
NO-ING-IMG
Sesame Ginger Chicken Stir-Fry Easy Dinner Recipe
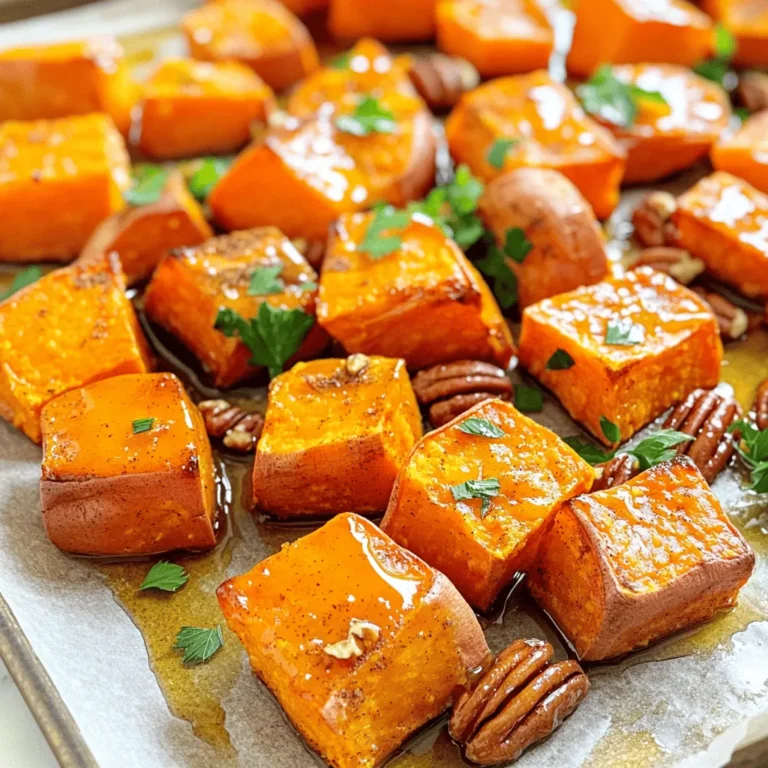
Maple Cinnamon Roasted Sweet Potatoes Delightful Dish
Berry Smoothie Bowl Refreshing and Nutritious Recipe
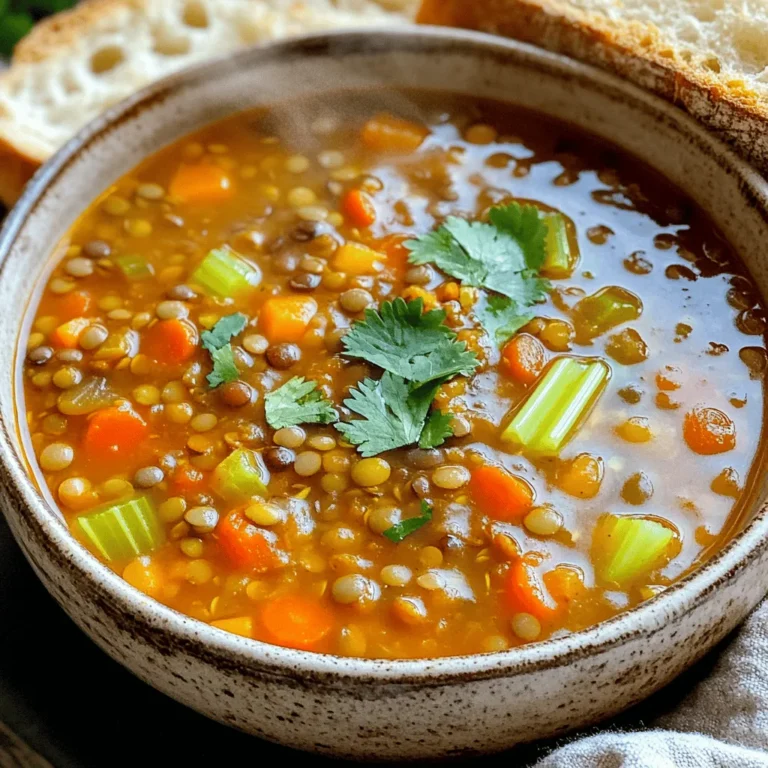
Spicy Lentil Soup Flavorful and Hearty Recipe
Butternut Squash Risotto Simple and Creamy Recipe
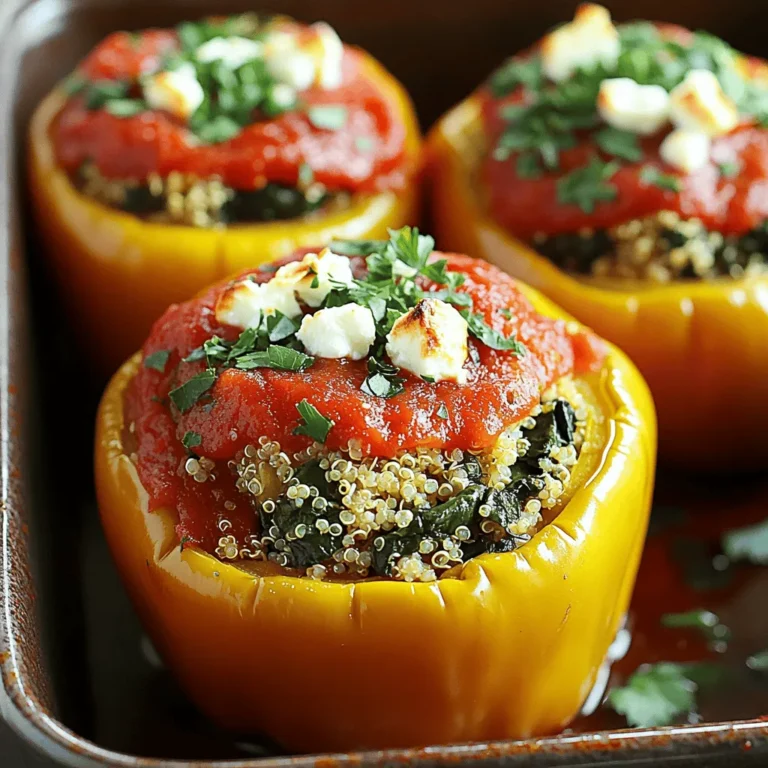
Spinach and Feta Stuffed Peppers Savory Delight
Thai Basil Chicken Stir-Fry Simple and Flavorful Meal
BBQ Pulled Pork Sandwiches Simple and Savory Delight
Pumpkin Spice Muffins Irresistible Fall Treats
Teriyaki Salmon with Broccoli Flavorful and Healthy Dish
Page navigation
Previous Page
Previous
1
…
71
72
73
74
75
…
81
Next Page
Next
Home
Dinner
Appetizer
Desserts
Drinks
About
Contact
Privacy Policy
Toggle Menu Close
Search for:
Search

![- 1 lb boneless, skinless chicken breast, thinly sliced - 1 large bell pepper (red or yellow), sliced into strips - 1 cup broccoli florets, cut into bite-sized pieces - 1 cup snap peas, trimmed - 1 medium carrot, julienned - 1/4 cup low-sodium soy sauce - 1 tablespoon honey - 1 tablespoon rice vinegar - 2 tablespoons sesame oil, divided - 3 cloves garlic, finely minced - 1 tablespoon fresh ginger, finely minced - Sesame seeds for garnish - 3 green onions, chopped (white and green parts kept separate) Using these ingredients, you can create a dish that bursts with flavor. Each element adds its own unique taste. The chicken breast serves as a great protein base. Bell peppers and broccoli contribute crunch and color. Snap peas and carrots add sweetness and texture. When you use sesame oil, garlic, and ginger, you create a rich aroma. These cooking essentials infuse the dish with depth. Finally, the sesame seeds and green onions provide a delightful finish. They enhance the dish's look and add a touch of brightness. For the full recipe, check the detailed instructions. Heat a large skillet or wok over medium-high heat. Add 1 tablespoon of sesame oil. When the oil shimmers, add the thinly sliced chicken. Season it with salt and pepper. Cook the chicken for 5-7 minutes. Stir it often until golden brown and fully cooked. Once done, remove the chicken from the skillet and set it aside. In the same skillet, add the second tablespoon of sesame oil. Let it heat up. Then, add the minced ginger and garlic. Sauté these for about 30 seconds. This step helps unlock their amazing flavors. Now, add the sliced bell pepper, broccoli florets, snap peas, and julienned carrot to the skillet. Stir-fry the vegetables for 4-5 minutes. You want them tender but still crisp. This keeps the dish colorful and crunchy. Return the cooked chicken to the skillet with the vegetables. In a separate small bowl, mix the soy sauce, honey, and rice vinegar. Whisk these until they blend well. Pour this sauce evenly over the chicken and veggies in the skillet. Stir everything together gently. Bring the mixture to a simmer over medium heat. This helps combine all the flavors and makes the dish more delicious. Next, slowly add the cornstarch slurry to the stir-fry. Stir constantly as you add it. Cook for 1-2 more minutes until the sauce thickens to your liking. This gives the dish a nice glossy finish. Remove the skillet from the heat. Add the chopped green tops of the green onions. Toss everything gently to combine. Serve the stir-fry on plates. Sprinkle sesame seeds on top for extra crunch. Enjoy this delightful meal! For the full recipe, you can refer to the earlier sections. For the best chicken stir-fry, use boneless, skinless chicken breast. Thinly slice it for quick cooking. This cut stays tender and soaks up flavors well. Heat your skillet over medium-high heat. This helps sear the chicken quickly, locking in moisture. Want to spice things up? Try adding a dash of red pepper flakes for heat. You can also mix in a splash of hoisin sauce for extra sweetness. Serve this stir-fry with jasmine rice or noodles. Both options soak up the sauce nicely. To plate your dish, start with a mound of rice in the center. Arrange the chicken and veggies around it. This creates a beautiful, colorful display. For garnish, sprinkle sesame seeds and chopped green onions on top. This adds a nice crunch and fresh flavor. For the full recipe, click here: [Full Recipe]. {{image_4}} You can easily change the protein in this dish. If you don’t like chicken, try these options: - Pork: Thinly sliced pork loin works well. - Beef: Flank steak adds great flavor. - Tofu: Firm tofu is perfect for a vegetarian option. - Shrimp: Quick-cooking shrimp gives a seafood twist. For vegetarian or vegan options, stick with tofu or tempeh. These protein sources soak up flavors well and add a nice texture. If you use tofu, press it to remove excess water for better frying. You can swap vegetables based on what’s in season or what you like best. Here are some great choices: - Zucchini: Adds a nice crunch and color. - Mushrooms: They bring an earthy flavor. - Asparagus: Great for spring dishes. - Cauliflower: A fun way to add some fiber. Mixing different veggies can also create a more colorful dish. Try to use at least three different kinds for variety. Adjust the sauce to match your taste. If you like it sweeter, add more honey. For a spicier kick, toss in some red pepper flakes. You can also switch vinegars. Here are some options: - Apple cider vinegar: It gives a fruity flavor. - Balsamic vinegar: Adds depth and sweetness. - White vinegar: For a sharper taste. Experimenting with these changes makes the dish your own. Don’t be afraid to try new flavors! For the full recipe, check the original instructions. To store leftovers, let the stir-fry cool down first. Place it in an airtight container. This keeps it fresh for up to three days in the fridge. When you're ready to eat, just take out the portion you want. If you want to freeze the stir-fry, use a freezer-safe bag or container. Remove as much air as possible to prevent freezer burn. You can freeze it for up to three months. Remember, some veggies may lose crunch when thawed, so choose your mix carefully. To reheat, the best method is on the stovetop. Add a splash of water or broth to keep it moist. Heat it over medium until hot. If you prefer the microwave, use a microwave-safe dish. Cover it with a damp paper towel to keep steam in. This helps maintain the texture and flavor. You can make this dish your own by adding personal touches. Try using different vegetables like zucchini or bok choy. You can also swap chicken for shrimp or tofu. Add your favorite nuts for a crunchy texture. Experiment with spicy sauces to kick up the heat. Each change can give you a new dish! Yes, frozen vegetables work well in this stir-fry. They save time and are easy to use. However, keep in mind that they may cook faster than fresh ones. You might need to adjust your cooking time. Aim for 3-4 minutes instead of 4-5 minutes for the veggies to stay crisp. Stir-fry goes great with several side dishes. Serve it with steamed jasmine rice for a classic touch. You can also pair it with brown rice for a healthier option. Noodles, like soba or rice noodles, also work well. Add a simple side salad for freshness and extra crunch. Absolutely! This sesame ginger chicken stir-fry is perfect for meal prep. Cook a big batch and divide it into containers. It stores well in the fridge for up to three days. To reheat, use a microwave or skillet. Just be sure to add a splash of water to keep it moist. To make this dish healthier, try a few simple swaps. Use less oil, or replace it with cooking spray. Choose low-sodium soy sauce to cut down on salt. Add more vegetables to increase fiber and nutrients. You can also cut back on honey for fewer calories. This blog post covered how to make a tasty Sesame Ginger Chicken Stir-Fry. We discussed key ingredients like chicken, fresh veggies, and flavorful sauces. I shared step-by-step cooking instructions, along with tips to enhance flavor and presentation. We also explored variations for dietary needs and the best ways to store leftovers. In summary, stir-fry is easy, fun, and flexible. You can customize it to suit your tastes. Enjoy making this dish your own, and share it with friends and family!](https://dishtreats.com/wp-content/uploads/2025/06/887f9040-7330-4bb7-a0e7-766c5efe9124-768x768.webp)
![- 1 cup frozen mixed berries (e.g., strawberries, blueberries, raspberries) - 1 ripe banana, peeled and sliced - 1/2 cup unsweetened almond milk (or preferred milk alternative) - 1 tablespoon chia seeds - Honey or maple syrup (to adjust sweetness) - Sliced fresh fruits (kiwi, strawberries) - Granola - Shredded coconut - Edible flowers for garnish For this berry smoothie bowl, I love using these main ingredients. The frozen mixed berries give a great flavor and color. The banana adds natural sweetness and creaminess. The almond milk brings it all together. If you want to boost nutrition, I suggest adding chia seeds. They are small but packed with nutrients. You can also add honey or maple syrup to sweeten your bowl. I often skip this step, as the fruits are sweet enough for me. Toppings are where you can really get creative. Fresh sliced fruits like kiwi or strawberries make it pop. Granola adds a nice crunch, while shredded coconut gives a fun texture. For a fancy touch, edible flowers look beautiful on top. Using this [Full Recipe], you can easily whip up a berry smoothie bowl that is both tasty and healthy. - Step 1: Combine ingredients in a blender. Add 1 cup of frozen mixed berries, 1 ripe banana, 1/2 cup of almond milk, and 1 tablespoon of chia seeds. This mix brings great taste and nutrition. - Step 2: Blend until smooth and creamy. Start on a low speed and then increase to high. Stop occasionally to scrape the sides. You want a thick, creamy blend. - Step 3: Adjust thickness with almond milk if needed. If it's too thick, add more almond milk slowly. Blend again until you reach your perfect texture. - Step 4: Pour smoothie into a bowl. Use a spoon to spread it evenly across the base. This makes a nice canvas for your toppings. - Step 5: Arrange toppings artistically. Layer your sliced fruits, sprinkle granola, and add shredded coconut. Be creative! Place a few edible flowers for a pop of color. - Step 6: Drizzle with honey or syrup if desired. This adds a lovely touch of sweetness. Enjoy every spoonful of your berry bliss smoothie bowl, a treat that's both refreshing and nutritious. For the full recipe, check out the Berry Bliss Smoothie Bowl. To make your smoothie bowl creamy, blend the ingredients well. Start with frozen mixed berries. They give a nice thick base. Add your ripe banana for extra creaminess. Blend on high speed. Stop to scrape down the sides with a spatula as needed. If the mix is too thick, slowly add almond milk. This helps you find your perfect texture. How you present your smoothie bowl matters. Use a wide, shallow bowl for a lovely look. Pour in your smoothie and spread it evenly. Get creative with toppings! You can layer sliced fruits in a fun pattern. Add granola for a nice crunch, and sprinkle shredded coconut on top. Edible flowers can make it pop. You can also serve it in a glass for a different vibe. Berries are packed with vitamins and antioxidants. They help keep your heart healthy and improve your skin. Chia seeds are tiny but mighty! They add fiber and omega-3 fatty acids. This helps with digestion and keeps you full. Both ingredients make your smoothie bowl tasty and good for you. Check out the Full Recipe for more delicious details. {{image_4}} You can switch up the berries for a fun twist. Try adding pineapple and mango for a tropical vibe. This mix adds sweetness and a bright flavor. You can also include spinach or kale. These greens boost the nutrition and keep the color vibrant. If you want a creamier texture, substitute almond milk with coconut milk. This adds a rich flavor and silkiness. Another great option is oat milk. It gives a smooth feel and works well with fruity flavors. For an extra layer of taste, add a splash of vanilla extract. This small change can make your bowl feel gourmet. You can also enhance it with nut butter. Almond or peanut butter gives a nutty taste and adds protein. Feel free to explore these variations to make your berry smoothie bowl your own. For the complete recipe, check out the full recipe. After enjoying your berry smoothie bowl, you might have leftovers. Store them in an airtight container in the fridge. Make sure to cover the bowl well. This keeps the smoothie fresh for up to 24 hours. To prevent browning, squeeze a little lemon juice on top. The acid helps keep the colors bright. You can freeze smoothie bowls for longer storage. Pour your extra smoothie into ice cube trays. Once frozen, transfer the cubes to a freezer bag. When you want to enjoy it again, just take out a few cubes. Let them thaw in the fridge overnight or blend them with a splash of milk for a quick treat. Preparing your smoothie ingredients ahead saves time. You can make smoothie packs by placing all the fruit in bags. Just add almond milk and blend when you’re ready. For batch-making, mix your berries and banana in a large bowl. Divide into smaller containers for easy access. This way, you can enjoy your berry bliss smoothie bowl anytime! For the full recipe, check out the Berry Bliss Smoothie Bowl section. To thicken your smoothie bowl, use frozen fruits. Frozen berries or bananas work best. You can also add less liquid. If you want more creaminess, add a scoop of Greek yogurt. Another trick is to use a small amount of oats or chia seeds. They absorb liquid and add thickness. Yes, you can use fresh fruits, but the texture changes. Fresh fruits make the smoothie thinner. Frozen fruits give a nice, thick texture. Plus, frozen fruits are often picked at peak ripeness. This means they can be sweeter and more flavorful. If you use fresh fruits, add ice to help thicken. For protein-rich toppings, try Greek yogurt or nut butter. You can also sprinkle on hemp seeds or chia seeds. Other great options include sliced almonds or granola with protein. These toppings not only add protein but also give extra flavor and crunch. To make your smoothie bowl vegan, swap dairy milk for almond milk or coconut milk. Use maple syrup instead of honey for sweetness. You can also add silken tofu for extra creaminess and protein. These swaps keep your smoothie bowl delicious and plant-based. Cleaning your blender is simple! Fill it halfway with warm water. Add a drop of dish soap. Blend for 30 seconds, then rinse. If there are tough spots, use a sponge to scrub them. Always unplug it before cleaning for safety. Regular cleaning keeps your blender fresh for every use. By blending frozen berries, banana, and almond milk, you craft a delicious smoothie bowl. Optional chia seeds add health benefits, while a mix of fresh toppings makes it visually appealing. Remember to adjust your blend for perfect creaminess and arrange your toppings artfully. In the end, a smoothie bowl offers both flavor and nutrition. Whether you add unique fruits or non-dairy milk, there are endless ways to make it your own. Enjoy the process and your tasty creation!](https://dishtreats.com/wp-content/uploads/2025/06/ca3318a7-4b20-4fec-bf86-7164735c42c6-768x768.webp)

![- 1 lb (450g) chicken breast, thinly sliced - 1 cup fresh Thai basil leaves, packed - 3 cloves garlic, minced - 2 red Thai chili peppers, thinly sliced (adjust based on your spice preference) For this dish, I prefer chicken breast. It cooks quickly and stays juicy. Fresh Thai basil gives this meal its unique flavor. Garlic adds a nice aroma, and Thai chili peppers bring heat. You can control the spice by adding more or less chili. - 2 tablespoons soy sauce - 1 tablespoon oyster sauce (or substitute with mushroom sauce for vegetarian) - 1 tablespoon fish sauce (or an extra tablespoon of soy sauce for vegetarian) - 1 teaspoon sugar (to balance flavors) - 1 tablespoon vegetable oil (for frying) These sauces are key to great taste. Soy sauce offers saltiness, while oyster and fish sauces add depth. Sugar balances the salty flavors, making everything taste better. - 1 bell pepper, sliced (your choice of color for visual appeal) - 1 small onion, sliced into thin wedges - Optional: other vegetables for added nutrition I like using bell pepper and onion for color and crunch. You can add other veggies like carrots or snap peas. They bring more nutrition and flavor, making the dish more vibrant. For the full recipe, refer to the [Full Recipe]. To start, you need to combine the chicken with the sauces. In a medium bowl, add the sliced chicken breast, soy sauce, oyster sauce, fish sauce, and sugar. Mix these ingredients well so the chicken gets all the flavor. Let it marinate for 15 minutes. This short time helps the chicken absorb the tasty sauces. Next, heat the vegetable oil in a large skillet or wok over medium-high heat. You want the oil to shimmer before adding anything. Then, add the minced garlic and sliced Thai chili peppers. Stir-fry them for about 30 seconds until they smell amazing. Be careful not to burn the garlic. Now, add the marinated chicken to the pan. Spread it out evenly for even cooking. Stir-fry for about 5 to 7 minutes. Cook until the chicken is no longer pink and has a nice brown color. After that, toss in the sliced bell pepper and onion. Stir-fry for another 3 to 4 minutes. This will make the vegetables tender but still crisp. Once the chicken and veggies are done, take the skillet off the heat. Gently fold in the fresh Thai basil leaves. They will wilt quickly from the heat and add a lovely aroma. Serve the dish hot, over a bed of fluffy jasmine rice. This rice complements the stir-fry well. Enjoy your Thai Basil Chicken Stir-Fry! For the full recipe, check out the details above. Using fresh ingredients makes a big difference. Fresh Thai basil gives a sweet and fragrant flavor to the dish. Always choose bright green basil leaves. They should smell strong and sweet. The chicken should be fresh, too. This keeps your stir-fry tasty and safe to eat. For the best flavor, cook on high heat. A hot pan helps to sear the chicken. This adds a nice caramel color and enhances the taste. When you add garlic and chili, cook them quickly. This brings out their strong flavors without burning them. You can change the heat level easily. If you want it milder, remove the seeds from the chili peppers. You can also use fewer peppers or substitute with sweet bell peppers. If you like a kick but want it less spicy, try adding sugar. It balances the heat. You can also use a bit of honey for sweetness without heat. Pair your Thai basil chicken stir-fry with jasmine rice. The rice absorbs the sauce well. You can also add a side of steamed veggies for extra nutrition. For garnishes, consider adding lime wedges or crushed peanuts. They add color and crunch. Fresh cilantro or extra basil leaves also make it pop. Enjoy your meal with these simple touches! For the full recipe, check out the details above. {{image_4}} For a vegetarian or vegan version, you can swap chicken for tofu or tempeh. These options give a nice texture. Use mushroom sauce instead of oyster sauce. It brings depth and umami flavor. For the fish sauce, simply add an extra tablespoon of soy sauce. This keeps the taste bold. To maintain flavor, marinate the tofu or tempeh just like chicken. Allow it to soak up the sauces. When cooking, make sure to press out excess moisture. This helps achieve that nice, crispy texture we all love. If you want to try something new, switch the chicken for shrimp or beef. Shrimp cooks quickly, so cut down the cooking time to about 3-4 minutes. Beef takes longer. Slice it thin and cook it for about 6-8 minutes. Remember, cooking times change based on what protein you use. Always make sure your protein is fully cooked before adding in the veggies. Want to shake things up? Add sauces like teriyaki or sriracha for an exciting twist. Teriyaki gives a sweet flavor, while sriracha adds heat. You can even mix both for a sweet and spicy kick. Feel free to experiment with herbs and spices too. Adding cilantro or mint can brighten the dish. Try a sprinkle of lime juice for an extra zest. These tiny changes can create a whole new taste experience. For the full recipe, check the section above. Enjoy cooking! To keep your Thai basil chicken stir-fry fresh, store it in an airtight container. Refrigerate the leftovers within two hours of cooking. If you want to save it longer, freeze the stir-fry. Make sure to cool it completely before freezing. This method helps retain flavor and texture. When you reheat your stir-fry, use a skillet for the best results. Heat it over medium warmth and stir often. This keeps the chicken juicy and prevents it from drying out. For rice, add a splash of water and cover it. This helps the rice steam and become fluffy again. In the fridge, your Thai basil chicken stir-fry lasts up to four days. If frozen, it can last for about three months. Always check for off smells or changes in color. If you see these, it's best to discard it for safety. Thai Basil Chicken Stir-Fry has roots in Thai street food. This dish reflects the vibrant flavors of Thai cuisine. It showcases fresh herbs, bold spices, and simple cooking techniques. Thai basil, known for its unique flavor, is key to this dish. It adds a sweet and slightly spicy note that enhances the chicken. This meal represents the balance of sweet, salty, and spicy tastes typical in Thai dishes. Each bite transports you to bustling markets in Thailand. Yes, you can prepare Thai basil chicken stir-fry in advance. Cook and store it in the fridge for up to three days. To keep it fresh, store it in an airtight container. When you are ready to eat, simply reheat it on the stove. This dish tastes even better the next day as flavors meld. Serve it over freshly cooked jasmine rice for a quick meal. If you cannot find Thai basil, you have options. Sweet basil or holy basil works well as a substitute. Sweet basil offers a milder flavor, while holy basil is spicier. You can also mix in a bit of mint for a fresh twist. While these substitutes change the taste slightly, they still create a tasty dish. Just remember, the flavor will differ from the original recipe. The spice level of Thai Basil Chicken Stir-Fry can vary. It depends on the number of Thai chili peppers you use. Typically, this dish has a mild to medium heat. If you prefer a milder dish, use fewer chilis or remove the seeds. For those who love heat, add extra chilis or a dash of hot sauce. Adjusting spice levels allows everyone to enjoy this flavorful meal. Thai Basil Chicken Stir-Fry is a simple yet flavorful dish. You learned about the key ingredients, like fresh basil and chicken. The step-by-step instructions make cooking easy, even for beginners. We explored tips to enhance flavor and adjust spice levels to suit your taste. You can even try fun variations with different proteins or herbs. Enjoy making it your own, and savor the fresh flavors. Every bite will bring joy to your table.](https://dishtreats.com/wp-content/uploads/2025/06/20a2f9de-1755-4b6a-ade1-393123d10e24-768x768.webp)
![- 2 cans young green jackfruit - 1 tablespoon olive oil - 1 medium onion, finely chopped - 1 teaspoon smoked paprika - 1 teaspoon ground cumin - 1 teaspoon chili powder - 1/2 teaspoon black pepper - 1/2 teaspoon cayenne pepper (adjust to taste) - 4 sturdy sandwich rolls - Coleslaw (optional, for topping) When making BBQ pulled pork sandwiches, the ingredients are key. Young green jackfruit is the star. It has a texture similar to pulled pork and absorbs flavors well. Use two cans for four servings, and don’t forget to rinse and drain them! For the base flavor, olive oil and onion work wonders. The oil helps to sauté the onion, which adds sweetness and depth. A finely chopped onion is best for even cooking and flavor distribution. Spices bring the dish to life. Smoked paprika adds a lovely smokiness, and ground cumin gives it warmth. Chili powder adds a kick, while black and cayenne pepper let you control the heat. For the sandwich, sturdy rolls hold up best. Choose your favorite type. Optional coleslaw adds crunch and creaminess. It’s a nice touch that balances the rich BBQ flavor. For the full recipe, follow the steps to create your BBQ pulled pork sandwiches that are simple and tasty! To start, you need to shred the jackfruit. Grab two cans of young green jackfruit, and drain them well. Rinse the jackfruit under cool water. With clean hands or two forks, pull apart the jackfruit into thin strands. Aim for a texture that mimics pulled pork. Set the shredded jackfruit aside for later use. Now, let’s sauté the onions and garlic. Heat one tablespoon of olive oil in a large skillet over medium heat. Add one finely chopped medium onion. Stir occasionally until the onion turns soft and translucent, about five minutes. Next, add minced garlic. Use four cloves for a nice kick. Sauté for another minute. You want the garlic fragrant, not browned. It’s time to bring it all together! Add the shredded jackfruit to the skillet. Mix well to coat the jackfruit with the onion and garlic. Now, it’s spice time! Incorporate one teaspoon of smoked paprika, one teaspoon of ground cumin, and one teaspoon of chili powder. Add half a teaspoon of black pepper and half a teaspoon of cayenne pepper. Stir everything together for a minute to let the flavors meld. Next, pour in one cup of BBQ sauce. You can use store-bought or homemade, depending on your preference. Mix until all the jackfruit strands are covered in sauce. Lower the heat and cover the skillet. Let it simmer for 20 to 25 minutes. Stir occasionally, adding a splash of water if it looks dry. Taste and season with salt as needed. Now, while the jackfruit simmers, you can toast the sandwich rolls. Preheat your oven or a skillet. Lightly toast the rolls until golden brown. This step adds a nice crunch. Once the jackfruit is ready, it’s time to assemble your sandwiches. Grab a toasted roll, spoon a good amount of BBQ jackfruit onto the bottom half. If you want, add some coleslaw for extra crunch. Top with the other half of the roll, and enjoy your smoky sweet BBQ pulled jackfruit sandwich! For the full recipe details, check [Full Recipe]. To get the best taste, adjust the spices to fit your likes. Start with the base spices: smoked paprika, ground cumin, and chili powder. These give the jackfruit a deep, rich flavor. If you like it spicy, add more cayenne pepper. Remember, you can always add more spice, but you can’t take it away! Toasting the rolls makes a big difference. Use a skillet or an oven. If using a skillet, heat it over medium heat. Place the rolls cut-side down and toast until golden brown. If you choose the oven, set it to 375°F (190°C). Bake the rolls for about 5-7 minutes. This adds a nice crunch that pairs well with the soft jackfruit. When serving BBQ pulled pork sandwiches, make it fun! Use a wooden board for a rustic look. Place the sandwiches on it and add a small bowl of BBQ sauce for dipping. You can also add extra coleslaw on the side for a pop of color and crunch. This makes your meal look inviting and delicious. For the full recipe, check out the recipe section! {{image_4}} Using a slow cooker makes this dish simple and hands-off. Start by shredding the jackfruit as before. Place it in the slow cooker with olive oil, chopped onion, and minced garlic. Stir in the spices: smoked paprika, ground cumin, chili powder, and black pepper. Pour in your BBQ sauce. Cover and cook on low for 6 to 8 hours. The jackfruit will absorb all the flavors and become tender. You’ll love how easy this method is! Different areas have their own special takes on BBQ pulled pork. In the South, you might try adding vinegar-based sauces for a tangy twist. In Texas, a smoky chipotle sauce can add a kick. Up North, you might find a sweeter sauce with apple cider. Feel free to explore these local flavors. Your sandwiches will reflect your own region's tastes! If you want to switch things up, there are other great options. You can use mushrooms or lentils. Both provide a hearty texture. For a lighter option, consider using shredded zucchini or eggplant. They soak up flavors well too. Just remember to adjust your spices to match. Enjoy the creativity in your kitchen! To keep your leftover sandwiches tasty, store them in an airtight container. Make sure to separate the jackfruit mixture from the rolls. This helps prevent sogginess. Leftover jackfruit can last in the fridge for about three to four days. If you plan to eat them soon, add some extra BBQ sauce to keep them moist. If you want to save the jackfruit mixture for later, freezing works well. First, let the jackfruit cool completely. Then, place it in a freezer-safe container or bag. Make sure to remove any air. This helps avoid freezer burn. The mixture can stay fresh for about three months. Just remember to label the container with the date. When you’re ready to enjoy your pulled pork sandwiches, reheating is key. For the best results, use the stovetop. Place the jackfruit in a skillet over low heat. Add a splash of water or BBQ sauce to keep it moist. Stir until heated through. If you prefer the oven, preheat it to 350°F (175°C). Cover the jackfruit in a baking dish with foil. Heat for about 15 minutes. Enjoy your delicious BBQ pulled pork sandwiches! Yes, you can make BBQ pulled pork sandwiches ahead of time. This dish is perfect for meal prep. I suggest cooking the jackfruit and storing it in the fridge. It stays fresh for about 3 to 5 days. When you're ready to eat, just reheat it on the stove. You can also toast the rolls just before serving. This way, the sandwiches taste fresh and warm. The best BBQ sauce is one that fits your taste. If you like sweet, try a honey BBQ sauce. If you prefer spicy, go for a chipotle sauce. There are many great store-bought options, like Sweet Baby Ray's or Stubb's. You can also make your own. A mix of ketchup, vinegar, and spices creates a great flavor. To make jackfruit taste like pulled pork, focus on flavor. Start by shredding the jackfruit into thin strands. Cook it with onions, garlic, and spices like smoked paprika and cumin. These add depth to the dish. The BBQ sauce is key too. It coats the jackfruit and infuses it with rich flavor. Let it simmer for a while to soak up all those tasty notes. This article covered how to make BBQ pulled jackfruit sandwiches. You learned about the main ingredients, spices, and how to prepare each component. I shared step-by-step instructions to help you shred, sauté, and combine ingredients. You also received tips for perfecting flavor, toasting rolls, and creative presentations. Lastly, we explored variations, storage info, and frequently asked questions. Enjoy cooking this tasty dish that’s both fun and simple to make!](https://dishtreats.com/wp-content/uploads/2025/06/394fc23c-fade-4441-b59c-acd30966e9f2-768x768.webp)
![To make the best pumpkin spice muffins, you need the following key ingredients: - 1 cup pumpkin puree - 1/2 cup brown sugar - 1/2 cup granulated sugar - 1/3 cup vegetable oil - 2 large eggs - 1 teaspoon vanilla extract - 1 1/2 cups all-purpose flour - 1 teaspoon baking soda - 1 teaspoon baking powder - 2 teaspoons pumpkin pie spice - 1/2 teaspoon salt These ingredients create a fluffy, moist muffin that bursts with autumn flavor. The pumpkin puree adds natural sweetness and moisture. Brown sugar gives a rich, caramel taste, while the spices bring warmth and comfort to each bite. You can make your muffins even better with these optional ingredients: - 1/2 cup chopped walnuts or pecans - 1/2 cup chocolate chips Adding nuts gives a nice crunch, while chocolate chips add sweetness. Feel free to mix and match based on your taste. You can even leave them out for a classic muffin. Accurate measurement is key to great baking. Here’s how to measure your ingredients correctly: - Flour: Use a spoon to fill your measuring cup, then level it off with a knife. - Brown Sugar: Pack it firmly into the cup for proper measurement. - Liquid Ingredients: Use a liquid measuring cup and check at eye level for accuracy. Following these tips ensures your muffins turn out perfectly every time. For the full recipe, check out the details above and get ready to bake your delicious pumpkin spice muffins! Start by preheating your oven to 350°F (175°C). This step is key for even baking. Next, prepare a standard muffin tin. You can use paper liners or spray each cup with non-stick spray. This will make it easy to remove the muffins later. In a large bowl, combine the pumpkin puree, brown sugar, granulated sugar, and vegetable oil. Add in the eggs and vanilla extract. Whisk these together until smooth. Make sure there are no lumps. This mix gives your muffins their rich flavor. In another bowl, sift together the all-purpose flour, baking soda, baking powder, pumpkin pie spice, and salt. Sifting helps to mix and aerate the flour. It makes for a lighter muffin. This mix is important for texture. If you want to add some extra texture, gently fold in chopped walnuts or pecans. You can also add chocolate chips for a sweet touch. Be careful not to overmix; just combine until they’re evenly spread in the batter. Now, spoon the muffin batter into the prepared tin. Fill each cup about 3/4 full. This allows room for the muffins to rise. Bake for 18-20 minutes. Check if they’re ready by inserting a toothpick in the center. If it comes out clean, they’re done! Let them cool in the tin for 5 minutes before moving them to a wire rack. This cooling step is essential for the best texture. For the complete recipe, check out the [Full Recipe]. To keep muffins light and fluffy, don’t overmix the batter. When you combine wet and dry ingredients, mix just until you see no dry flour. A few lumps are okay. Overmixing makes muffins tough. Also, ensure your baking powder and baking soda are fresh. Old leavening agents won't help the muffins rise. Store your pumpkin spice muffins in an airtight container. This keeps them soft and moist. You can keep them at room temperature for up to three days. For longer storage, place them in the fridge for a week. If you want to save them for later, freeze them. Wrap each muffin in plastic wrap before placing them in a freezer-safe bag. They can last for up to three months in the freezer. Presentation makes any dish more inviting. For a lovely touch, sprinkle powdered sugar on top of each muffin. Serve them on a pretty platter. You can also add a small bowl of softened butter for easy spreading. This makes your muffins look even more delicious and inviting. {{image_4}} You can make gluten-free pumpkin spice muffins easily. To do this, swap regular flour with gluten-free flour. Look for blends that work well in baking. These blends often include almond flour or coconut flour. Check the package to ensure it has a good flavor. The muffins will still taste great! The texture may vary slightly, but they will remain soft and delicious. If you want vegan muffins, you can make some simple changes. Replace eggs with flax eggs. To make a flax egg, mix 1 tablespoon of ground flaxseed with 2.5 tablespoons of water. Let it sit for about 5 minutes until it thickens. Use plant-based oil instead of vegetable oil. You can also use almond milk or another plant-based milk instead of regular milk. These muffins will be light and fluffy, just like the classic recipe. You can jazz up your pumpkin spice muffins with extra flavors. Try adding maple syrup for a sweet twist. Just reduce the sugar a little to balance it out. You can also add orange zest for a fresh, bright taste. A teaspoon of orange zest will give the muffins a nice citrus kick. Feel free to get creative! You can mix and match these flavors to find your favorite combination. These variations can make your pumpkin spice muffins even more special. Check out the full recipe to get started! To keep your pumpkin spice muffins fresh, store them in an airtight container. Place a paper towel in the container to absorb moisture. This helps prevent sogginess. Store them at room temperature for up to three days. If you want to keep them longer, consider freezing. Freezing is a great way to save your muffins. Start by letting them cool completely. Then, wrap each muffin in plastic wrap. Place the wrapped muffins in a freezer-safe bag. Label the bag with the date. You can freeze them for up to three months. To enjoy your muffins warm, reheat them in the oven. Preheat your oven to 350°F (175°C). Place the muffins on a baking sheet. Heat for 10 to 15 minutes. You can also use a microwave for quick reheating. Just warm them for 15 to 20 seconds. Enjoy your pumpkin spice muffins fresh! Yes, you can use canned pumpkin. It saves time and gives great flavor. Make sure to choose 100% pure pumpkin, not pumpkin pie filling. This keeps the taste just right. Canned pumpkin is often smoother, which helps in mixing. It also has a longer shelf life. So, if you have a can, use it! For eggs, you can use several substitutes. Common options include: - 1/4 cup unsweetened applesauce - 1/4 cup mashed banana - 1 tablespoon ground flaxseed mixed with 2.5 tablespoons water These options keep your muffins moist and fluffy. They also add a hint of flavor. Choose what fits your taste best! Check your muffins after 18 minutes. Insert a toothpick into the center. If it comes out clean or with a few crumbs, they are done. If the toothpick is wet, bake for 1-2 more minutes. Keep an eye on them to avoid overbaking. Perfect muffins should be soft and lightly golden. Absolutely! To make mini muffins, use a mini muffin tin. Fill each cup about halfway. Bake them for 10-12 minutes. Keep checking with a toothpick until they are done. Mini muffins are great for snacks and sharing. They are just as tasty and fun! For the full recipe, check out the details above. In this post, we explored how to make delicious pumpkin spice muffins. I covered the essential and optional ingredients, along with measuring them for great results. The step-by-step instructions guide you through prepping, mixing, and baking. I also shared tips for light muffins and ways to store them well. Finally, I offered tasty variations like gluten-free and vegan options. Now you’re ready to enjoy these warm, flavorful treats any time! Your perfect pumpkin spice muffin awaits.](https://dishtreats.com/wp-content/uploads/2025/06/e45c4b1d-a4d2-42b5-b442-a33a757785ba-768x768.webp)