Spicy Garlic Shrimp Tacos Flavorful and Easy Recipe

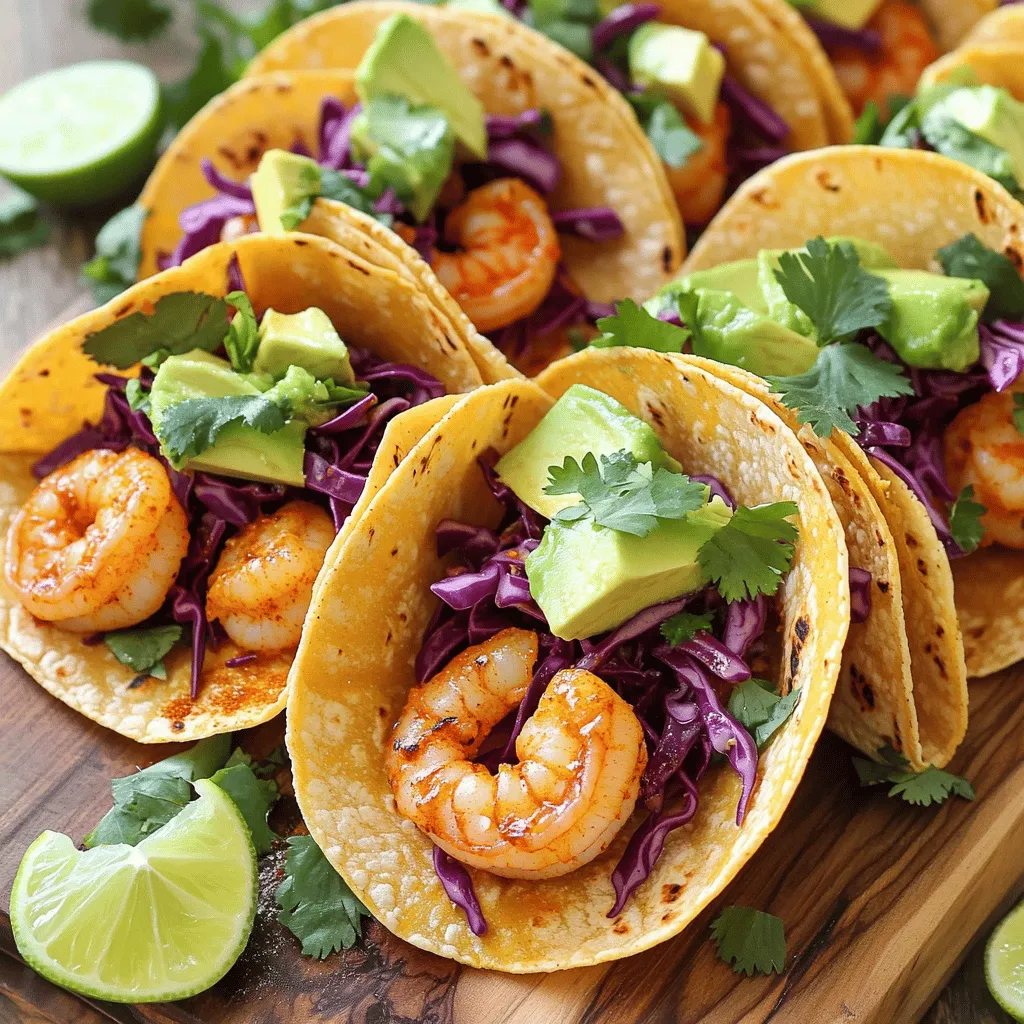
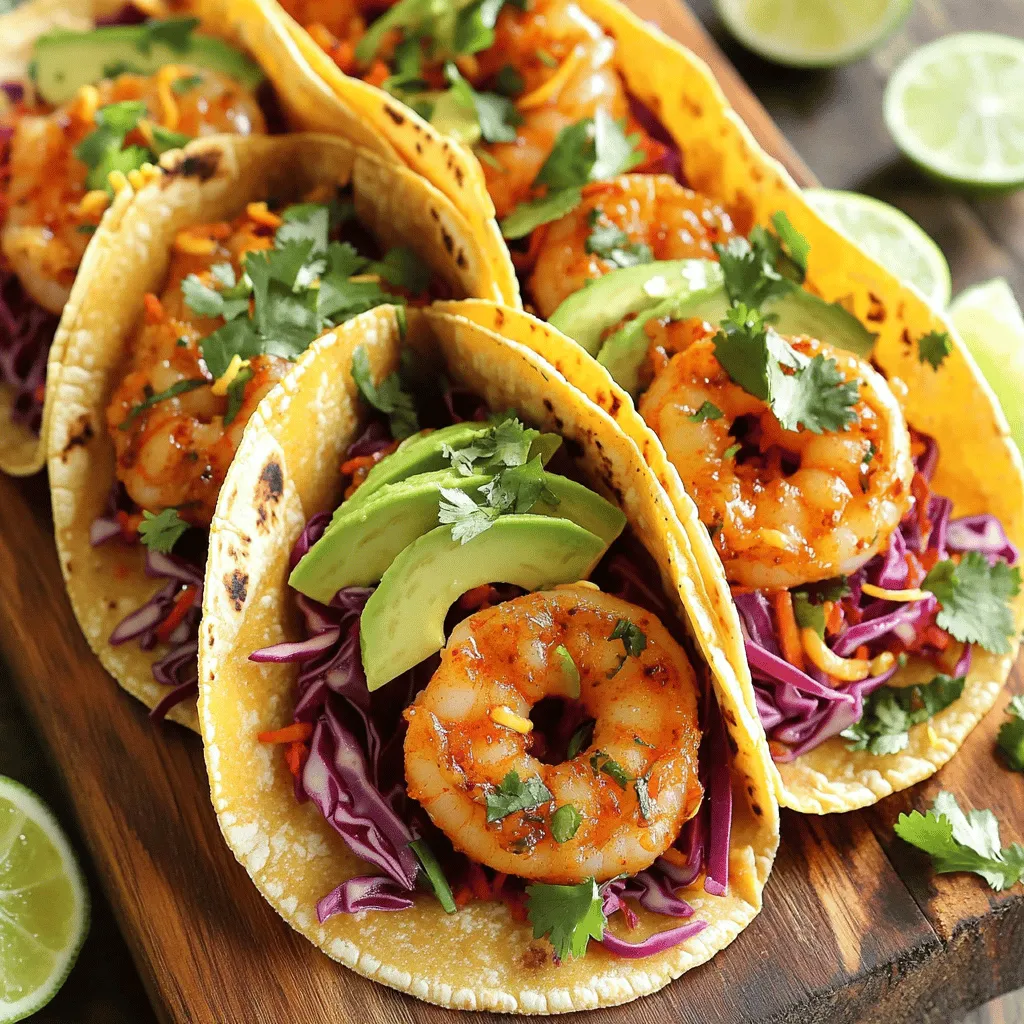
Are you ready for a taste explosion? My Spicy Garlic Shrimp Tacos are flavorful, easy, and perfect for any taco night! Fresh shrimp soaked in spicy garlic marinade combine with your favorite toppings, all wrapped in warm tortillas. Whether you’re a cooking novice or a seasoned chef, this quick recipe will delight your taste buds. Let’s dive into the simple steps to create these scrumptious tacos that everyone will love!
Ingredients
Essential Ingredients
- Fresh shrimp: 1 lb, peeled and deveined
- Garlic: 3 cloves, finely minced
- Spices: chili powder, smoked paprika, cayenne pepper
- Tortillas: 8 small corn tortillas
Optional Ingredients
- Toppings: red cabbage, cilantro, avocado
- Condiments: lime wedges, hot sauce
Cooking Oil
- Type of oil used: extra-virgin olive oil
When I make spicy garlic shrimp tacos, I focus on fresh ingredients. Fresh shrimp is key. It brings a sweet flavor and a nice texture. I use 1 pound of shrimp, peeled and deveined, to keep it simple and quick.
Garlic adds a punch. I finely mince 3 cloves for a strong taste. The spices are what make this dish exciting. I mix chili powder, smoked paprika, and cayenne pepper to create a warm kick. Adjust the cayenne based on how spicy you like your food.
Corn tortillas are my favorite. I use 8 small ones. They are soft and great for holding all the flavors.
For optional toppings, I like to add red cabbage, fresh cilantro, and creamy avocado. These add crunch, color, and creaminess. Lastly, I serve lime wedges and hot sauce on the side. They add a zesty touch.
For cooking, I always choose extra-virgin olive oil. It has a rich flavor and works well with my spices.
Step-by-Step Instructions
Marinating the Shrimp
To start, I mix the spices and oil for the marinade. In a bowl, I combine 3 cloves of minced garlic, 2 teaspoons of chili powder, 1 teaspoon of smoked paprika, and 1/2 teaspoon of cayenne pepper. I drizzle in 2 tablespoons of extra-virgin olive oil. Next, I add a pinch of sea salt and black pepper. This mix creates a fragrant marinade.
After that, I add 1 pound of fresh shrimp to the bowl. I toss the shrimp gently to coat them evenly. I let them marinate for about 15 minutes. This step lets the shrimp soak up all the great flavors.
Preparing the Toppings
While the shrimp marinates, I prepare the toppings. First, I grab a sharp knife to shred 1 cup of red cabbage. The crunch of cabbage adds great texture to the tacos. Then, I chop 1/2 cup of fresh cilantro. I also slice 1 ripe avocado into wedges. I set these toppings aside for later.
Cooking the Shrimp
I heat a large skillet over medium-high heat. Once the pan is hot, I add the marinated shrimp in a single layer. I make sure not to overcrowd them. I cook the shrimp for about 2-3 minutes on each side. They turn a lovely pink color and become opaque. It’s important not to overcook them, or they can get rubbery.
Assembling the Tacos
Now for the fun part—assembling the tacos! I warm 8 small corn tortillas in a separate skillet for a few seconds on each side. This makes them soft and easy to fold. In the center of each tortilla, I layer a generous serving of shrimp. Then I top them with the shredded cabbage, avocado slices, and a sprinkle of fresh cilantro.
To serve, I place lime wedges on the side for squeezing. If you like heat, add some hot sauce on top. Enjoy your Spicy Garlic Shrimp Tacos!
Tips & Tricks
Cooking Tips
- Avoid overcooking shrimp: Cook shrimp for just 2-3 minutes on each side. They should turn pink and opaque. Overcooked shrimp can be tough and rubbery. Keep an eye on them to ensure they stay tender.
- Best practices for warming tortillas: Warm tortillas in a pan for a few seconds on each side. This makes them soft and tasty. You can also warm them over a gentle flame for added flavor.
Flavor Enhancements
- Adding spices or herbs: Feel free to mix in herbs like oregano or cilantro. You can also try adding a dash of lime juice for brightness. Adjust the spices to match your taste.
- Suggestions for extra toppings: Consider adding diced tomatoes, pickled onions, or a sprinkle of cheese. These toppings add color and texture. They make your tacos even more delicious!
Presentation Tips
- Creative ways to serve tacos: Try serving tacos on a colorful platter. Stack them neatly or arrange them in a line. You can also serve them in taco holders for a fun look.
- Using garnishes for visual appeal: Add lime wedges and cilantro sprigs for garnish. This not only looks great but also adds fresh flavors. A sprinkle of chili flakes can also enhance the look and taste of your tacos.

Variations
Ingredient Swaps
You can switch the shrimp for other proteins. Chicken, fish, or tofu all work great. Each option brings its own taste and texture. Try marinating them the same way as the shrimp. Tortillas can also change the game. Use flour, whole wheat, or even lettuce wraps for a low-carb choice. Each type adds a different flavor and feel to your tacos.
Flavor Variations
You can play with spice levels. If you want spicy, keep the cayenne. For mild, reduce or skip it. You can also add fruity elements. Diced mango or pineapple adds sweetness. These fruits balance the heat and make your tacos pop with flavor. Experimenting with different spices can also create new flavor profiles. Don’t hesitate to get creative!
Serving Suggestions
Pair your tacos with tasty sides. Rice, beans, or fresh salads make great companions. They add variety to your meal. Toppings can be fun, too. Try adding pickled onions, diced tomatoes, or even jalapeños for extra flavor. Each topping adds its own twist, making every bite unique.
Storage Info
Storing Leftovers
To keep your spicy garlic shrimp tacos fresh, store them in an airtight container. This helps prevent them from drying out. I recommend placing the shrimp and toppings in separate containers. This way, your tortillas stay soft and fresh. You can keep the leftovers in the fridge for up to three days.
Reheating Tips
When reheating shrimp, the best method is to use a skillet. Heat it on medium-low and add a bit of olive oil. Cook the shrimp for just a few minutes until they are hot. Avoid using the microwave, as it can make the shrimp rubbery. For the tortillas, warm them in a skillet for a few seconds on each side. This keeps them soft and tasty.
Freezing Options
Yes, you can freeze shrimp tacos! However, I suggest freezing the shrimp separately from the tortillas. Place the shrimp in a freezer-safe bag or container. They can last up to three months in the freezer. When ready to eat, thaw the shrimp in the fridge overnight. Reheat in a skillet as mentioned earlier. Warm the tortillas on a hot skillet just before serving for the best taste.
FAQs
How to Make Spicy Garlic Shrimp Tacos?
To make spicy garlic shrimp tacos, follow these steps:
1. Make the Marinade: In a bowl, mix garlic, chili powder, smoked paprika, cayenne, olive oil, salt, and pepper.
2. Marinate the Shrimp: Add shrimp to the marinade. Toss gently to coat evenly. Let it sit for 15 minutes.
3. Prepare Toppings: Shred red cabbage, chop cilantro, and slice the avocado.
4. Cook the Shrimp: Heat a skillet over medium-high heat. Cook the shrimp for 2-3 minutes on each side until pink.
5. Warm the Tortillas: In another pan, warm the corn tortillas until soft.
6. Assemble Tacos: Place shrimp in tortillas, add cabbage, avocado, and cilantro.
7. Serve: Enjoy with lime wedges and optional hot sauce.
This simple recipe is full of flavor and takes just 30 minutes to prepare.
What are the best sides to serve with shrimp tacos?
Great sides for shrimp tacos include:
- Mexican Rice: Fluffy rice with spices.
- Black Beans: Simple and tasty.
- Corn Salad: Fresh and crunchy mix.
- Guacamole: Creamy and rich dip.
- Pico de Gallo: Fresh salsa adds zest.
These sides complement the shrimp tacos well. They enhance the overall meal and add variety.
Can I use frozen shrimp for this recipe?
Yes, you can use frozen shrimp. Here are tips for using them:
- Thaw First: Place the shrimp in the fridge overnight or run them under cold water for a quick thaw.
- Pat Dry: Make sure to dry the shrimp before marinating. This helps the marinade stick better.
- Cook Time: Frozen shrimp may need an extra minute or two to cook through.
Using frozen shrimp is convenient and still yields tasty tacos!
This blog post covers how to create delicious shrimp tacos. You learned about key ingredients like fresh shrimp and spices. I shared step-by-step instructions for marinating, cooking, and assembling the tacos. You also discovered helpful tips for cooking and storing. Feel free to adapt the recipe with your favorite toppings or ingredients. Remember, making shrimp tacos is simple and fun. Enjoy the process, and get creative in your kitchen!


![To make spicy chickpea tacos, you need some key items. Here is what you will need: - 1 can (15 oz) chickpeas, thoroughly drained and rinsed - 2 tablespoons extra virgin olive oil - 1 teaspoon ground chili powder - 1 teaspoon ground cumin - 1/2 teaspoon smoked paprika - 1/4 teaspoon cayenne pepper - Sea salt and freshly cracked black pepper to taste - 8 small corn or flour tortillas - 1 ripe avocado, sliced into thin pieces - 1 cup finely shredded purple cabbage - Fresh cilantro leaves for garnish - Lime wedges for serving These ingredients create a tasty and spicy base for your tacos. The spices bring warmth and depth, while the chickpeas offer a great source of protein and fiber. You can add some unique touches to your tacos. Here are some ideas: - Diced tomatoes for freshness - Sliced jalapeños for extra heat - A dollop of sour cream or yogurt for creaminess - Shredded cheese for richness - Corn or black beans for more texture Feel free to mix and match these extras. They can elevate your tacos to a whole new level. Chickpeas are not just tasty; they are also very healthy. Here are some benefits: - High in protein, which helps build muscle - Rich in fiber, aiding in digestion - Contain vitamins and minerals like iron and magnesium - Low in fat, making them a great choice for heart health Including chickpeas in your diet can support your overall health. They are a smart ingredient in any meal. For the full recipe, check the [Full Recipe]. Start by opening a can of chickpeas. Drain and rinse them well. In a bowl, use a fork or potato masher to gently mash the chickpeas. Leave some chunks for texture. You want them slightly broken but not a paste. This will help them stay firm while cooking. Heat 2 tablespoons of extra virgin olive oil in a skillet over medium heat. Once the oil shimmers, add the mashed chickpeas. Sprinkle in the spices: 1 teaspoon of chili powder, 1 teaspoon of cumin, 1/2 teaspoon of smoked paprika, and 1/4 teaspoon of cayenne pepper. Add sea salt and black pepper to taste. Stir well to coat all the chickpeas. Cook for about 5 to 7 minutes. This will make the spices fragrant and the chickpeas slightly crispy. While the chickpeas cook, warm the tortillas in another skillet for about 30 seconds on each side. You can also heat them in the oven. Once the chickpeas are ready, spoon a generous amount onto each tortilla. Top with sliced avocado, shredded purple cabbage, and fresh cilantro. Serve with lime wedges on the side. This adds a zesty touch just before eating. For the full recipe, check out the complete guide! To make your spicy chickpea tacos pop, use a mix of spices. I love pairing chili powder with cumin for a warm base. Adding smoked paprika brings a nice depth. If you want more heat, cayenne pepper is the way to go. You can also try adding garlic powder or onion powder for extra flavor. Experiment until you find your favorite blend. Warming your tortillas is key to a great taco. You can heat them in a skillet, about 30 seconds on each side. This keeps them soft and pliable. Alternatively, stack them, wrap in foil, and warm in the oven. If you prefer a crispy texture, try frying them lightly in oil. Just be careful not to overcook them! Serving matters! Place your tacos on a large platter. Add lime wedges and fresh cilantro for color. You can even include cherry tomatoes or sliced radishes for a vibrant touch. This not only looks great but also invites your guests to dig in. For a fun twist, serve with a side of salsa or guacamole to enhance the flavor. Enjoy the Full Recipe for more tips! {{image_4}} You can turn your spicy chickpea tacos into a taco bowl. Start with a base of rice or quinoa. Then, add your chickpea mixture on top. Pile on shredded cabbage, avocado, and cilantro. This bowl offers a fun twist on the classic taco. You could also add salsa or hot sauce for extra flavor. Feel free to mix in different proteins or veggies. You can add cooked chicken, beef, or shrimp if you want. For a veggie boost, try bell peppers, corn, or zucchini. These options add variety and nutrition to your meal. You can also swap chickpeas for black beans or lentils for a new taste. Making this dish gluten-free is easy. Just use corn tortillas instead of flour ones. They are tasty and safe for those with gluten issues. This recipe is already vegan, so you can enjoy it as is. To enhance flavors, add avocado or a vegan sour cream. These small changes can make a big difference in taste and texture. For the full recipe, check out the earlier sections. To store leftover chickpeas, place them in a clean, airtight container. Make sure the lid seals tightly. You can keep them in the fridge for up to three days. If you want to store them for longer, freeze the chickpeas. They will last for about three months in the freezer. Just remember to label your container with the date. This helps you keep track of freshness. Reheating your tacos is easy! You can microwave them for about 30 seconds. Make sure to cover them with a damp paper towel. This keeps the tortillas soft. If you prefer a crispier taco, reheat them in a skillet. Heat the skillet on medium and warm each taco for about one minute on each side. This way, you keep that delicious crunch! For storing your ingredients, glass containers are best. They are safe, durable, and help keep food fresh. You can also use plastic containers, but make sure they are BPA-free. Small jars work well for spices and herbs. Label each container so you can find what you need quickly. Keep everything in a cool, dry place for the best results. For a full recipe, check the Spicy Chickpea Tacos section. You can make chickpea tacos spicier by adding more cayenne pepper. Start with 1/2 teaspoon and adjust to your heat level. You can also use hot sauce for an extra kick. Another idea is to add chopped jalapeños or serrano peppers. These fresh peppers bring heat and flavor. If you love smoky flavors, try adding chipotle powder. This will give your tacos a nice depth. Yes, you can prepare chickpea tacos in advance. I suggest cooking the chickpeas and storing them in an airtight container. Keep the tortillas and toppings separate until ready to serve. This way, everything stays fresh. You can store the chickpea mixture in the fridge for up to three days. Just reheat it before serving. Fresh toppings like avocado and cilantro should be added last. Spicy chickpea tacos pair well with many sides. You could serve them with rice or quinoa for a filling meal. A fresh salad adds brightness and crunch. Try a simple cabbage slaw or a corn salad. You might also enjoy salsa or guacamole on the side. For drinks, consider a refreshing limeade or a cold beer. This will balance the spice and add flavor. For the full recipe, check out the detailed instructions above. In this post, we covered how to make spicy chickpea tacos. We explored essential ingredients and their health benefits. You learned step-by-step instructions for preparing and cooking chickpeas, assembling tacos, and customizing them. We shared tips for seasoning, tortilla methods, and serving ideas. Variations included taco bowls and gluten-free options. Finally, we discussed how to store leftovers effectively. These tacos are fun, tasty, and good for you. Ready to enjoy your homemade spicy chickpea tacos?](https://dishtreats.com/wp-content/uploads/2025/06/78aca89b-dca0-4457-a4a9-555278ab1264-768x768.webp)

![- 1 block firm tofu, thoroughly drained and pressed - 1 cup jasmine rice - 2 tablespoons Sriracha sauce The firm tofu acts as the main protein. It absorbs flavors well and provides a hearty bite. Jasmine rice, with its fluffy texture, makes a great base. Sriracha sauce adds the spicy kick, balancing heat and taste. - 1 cup broccoli florets, fresh or frozen - 1 red bell pepper, thinly sliced - ½ cup carrots, julienned or matchstick-cut Broccoli florets add crunch and color. The red bell pepper brings sweetness and a pop of color. Carrots add a nice crunch and a bit of earthiness. Together, they create a vibrant mix that enhances the dish. - 1 tablespoon soy sauce (preferably low-sodium) - 1 tablespoon sesame oil - Fresh cilantro, for garnish Soy sauce brings umami depth. Sesame oil adds a nutty flavor that complements the spice. Fresh cilantro brightens the dish, giving it a fresh finish. This combo of flavors makes each bite exciting. For the full recipe, check out the complete guide. To start, cut the pressed tofu into 1-inch cubes. This size helps the tofu cook evenly. Next, toss the cubes in a bowl with cornstarch. Make sure every piece is coated. This coating is key for a crispy finish when you cook it. Pressing the tofu is vital. It removes excess water, allowing better flavor absorption and texture. Bring vegetable broth to a boil in a medium saucepan. Add the jasmine rice and stir it once. Cover the pan, reduce the heat, and let it simmer for about 15 minutes. This method infuses flavor into the rice. Once the liquid absorbs, fluff the rice with a fork. This step keeps the rice light and airy, which balances the dish. Heat vegetable oil in a large skillet over medium-high heat. Carefully add the cornstarch-coated tofu cubes in a single layer. Fry them for about 8-10 minutes, turning occasionally. You want all sides to turn golden brown and crispy. Once done, transfer the tofu to a plate lined with paper towels. This helps absorb any excess oil. In the same skillet, add the broccoli, red bell pepper, and carrots. Stir-fry the veggies for 4-5 minutes. You want them tender but still bright and colorful. This keeps their nutrients intact. Add the sliced green onions for the last minute. Their fresh taste adds a nice crunch to the mix. In a small bowl, whisk together the Sriracha sauce, soy sauce, sesame oil, and honey (or maple syrup). Mix until well blended. This sauce brings all the flavors together. If you like it spicier, add more Sriracha. For a milder version, reduce the amount. Now, it’s time to put it all together! Divide the fluffy jasmine rice into bowls. Top it with the spicy tofu and vegetable mix. For a polished finish, sprinkle sesame seeds and fresh cilantro on top. This adds flavor and a pop of color to your bowl. For the full recipe, refer back to the main section. Enjoy your Spicy Sriracha Tofu Bowl! To make crispy tofu, you need to press it well. Start by wrapping the block of firm tofu in a clean kitchen towel. Place a heavy object, like a cast iron pan, on top for about 20-30 minutes. This helps remove excess moisture. Next, coat the tofu cubes with cornstarch. Use about 2 tablespoons, ensuring each piece is covered. This coating creates a crunchy texture when cooked. Not everyone enjoys the same heat. If you want less spice, use only 1 tablespoon of Sriracha. You can also mix Sriracha with a bit of honey or ketchup to mellow the heat. For a different flavor, try other sauces. Chili garlic sauce or sweet chili sauce can work well too. Experiment with these options to find what you like best. To save time, prep your ingredients ahead of time. You can chop the vegetables and store them in the fridge for up to three days. Cook the rice and tofu in advance, too. Store them separately in airtight containers. This way, you can quickly assemble your Spicy Sriracha Tofu Bowl when you’re ready to eat. Enjoy the convenience of quick meals without sacrificing taste! For the full recipe, check out the Spicy Sriracha Tofu Bowl. {{image_4}} You can switch the tofu for other protein sources. Tempeh is a great choice. It has a nutty flavor and holds up well in stir-fries. Seitan is another tasty option. It mimics the texture of meat nicely. If you prefer meat, chicken or shrimp work well too. Chicken adds a mild taste, while shrimp brings a sweet, briny flavor. Both cook quickly, making your meal even faster. Feel free to change the vegetables based on the season. In spring, try snap peas or asparagus. In summer, zucchini and bell peppers shine. Winter vegetables like Brussels sprouts and kale add heartiness. You can also use frozen veggies. They save time and are often just as nutritious as fresh ones. Just make sure to thaw and drain excess water before cooking. If you need a gluten-free option, swap soy sauce for tamari. Tamari has a similar flavor but is gluten-free. For the rice, try quinoa or cauliflower rice. Both options are nutritious and add a unique texture to your bowl. Quinoa is protein-rich, while cauliflower rice is low in carbs and calories. These swaps ensure everyone can enjoy this spicy dish! For the complete recipe, check the [Full Recipe]. To keep your spicy Sriracha tofu bowl fresh, store leftovers in an airtight container. Place the bowl in the fridge within two hours of cooking. This helps keep the food safe. Your leftovers can last for up to four days in the fridge. To reheat the tofu without losing its crispness, use an oven or a skillet. If using an oven, preheat it to 350°F (175°C). Place the tofu on a baking sheet for about 10-15 minutes. If using a skillet, heat over medium heat for about 5-7 minutes, turning the tofu occasionally. This keeps it crispy and delicious. You can freeze cooked bowls if you want to save some for later. Place the cooled bowl in a freezer-safe container. It can stay frozen for up to three months. To thaw, move the bowl to the fridge overnight. Reheat it in the oven or a skillet as mentioned above. This way, you can enjoy your spicy Sriracha tofu bowl anytime! For the full recipe, check the earlier sections. To make the Spicy Sriracha Tofu Bowl vegan, swap honey for maple syrup. This simple change keeps the dish sweet and plant-based. Also, check that all products you use are vegan-friendly. For example, ensure your soy sauce is made without animal products. Yes, you can use brown rice. However, remember that brown rice takes longer to cook. It usually needs about 40-50 minutes, while jasmine rice only takes around 15 minutes. Brown rice has a nuttier taste and chewier texture. So, it can change the feel of your bowl. If you don’t have Sriracha, several substitutes work well. You can use chili garlic sauce or sambal oelek for a similar heat. You can also make a homemade version by mixing hot sauce, garlic, and a bit of sugar. This gives you control over the flavor. The spice level of this dish depends on the amount of Sriracha you use. One tablespoon adds mild heat, while two tablespoons ramp up the spice. To adjust heat to your taste, start with less and add more if you like it spicier. Always taste as you go. You can serve this bowl with a side of edamame or a fresh salad. They add nice contrast and extra crunch. For more flavor, drizzle extra Sriracha or sesame oil on top. You can also add lime juice for a zesty touch. Enjoy your meal! For the full recipe, check out the Spicy Sriracha Tofu Bowl details above. You learned how to make a tasty Spicy Sriracha Tofu Bowl. We covered each ingredient and how to prepare them. From cooking the rice to achieving crispy tofu, each step matters. Remember to adjust spices to suit your taste. Feel free to swap in different proteins or veggies to keep it fresh. Store leftovers well to enjoy later. This bowl is not just good; it’s fun to make and share. Enjoy your cooking adventure!](https://dishtreats.com/wp-content/uploads/2025/07/ee3e23f0-fb80-42df-ace0-60219f206871-768x768.webp)


