Spicy Chicken Pad Thai Bold and Flavorful Delight

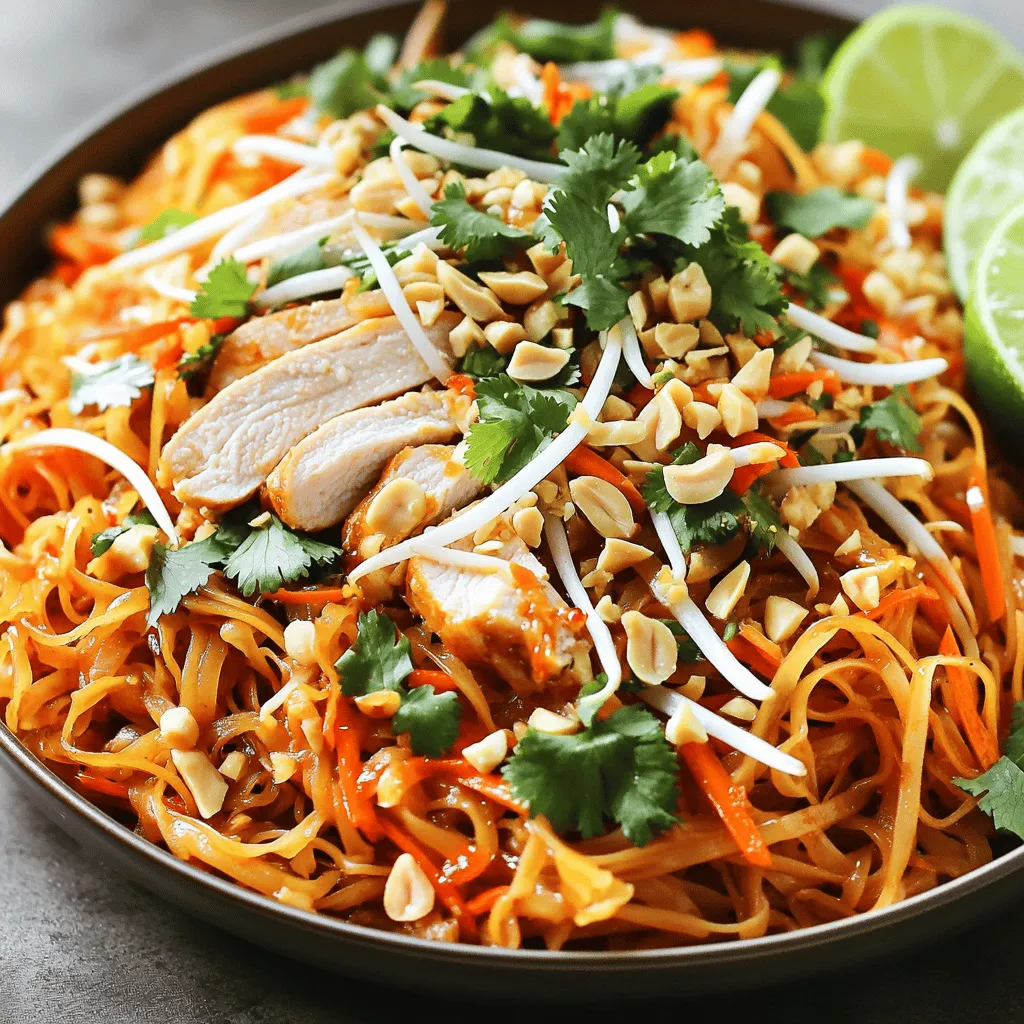
Are you ready to spice up your dinner table? My Spicy Chicken Pad Thai is bold and packed with flavor. In just a few easy steps, you’ll learn how to create this crowd-pleaser at home. With simple ingredients like rice noodles, fresh veggies, and mouthwatering sauce, you’ll enjoy a dish that is both satisfying and vibrant. Let’s dive into how you can master this Thai classic!
Ingredients
Main Ingredients
- 8 oz rice noodles
- 1 pound chicken breast, thinly sliced
Flavor Enhancers
- Fish sauce
- Tamarind paste
- Sriracha
Vegetables and Garnishes
- Bean sprouts
- Green onions
- Fresh cilantro
When making Spicy Chicken Pad Thai, the right ingredients make all the difference. I love using fresh rice noodles. They cook quickly and soak up flavors well. The chicken breast adds protein and a nice texture. It’s crucial to slice it thinly. This way, it cooks evenly.
Next, the flavor enhancers bring magic to the dish. Fish sauce adds depth. Tamarind paste gives a sweet and sour kick. And, of course, sriracha brings heat. Adjust the sriracha to match your spice level. If you like it hot, add more!
For the veggies, I always include bean sprouts. They add crunch and freshness. Green onions give a mild onion taste. And fresh cilantro adds a bright touch. These elements make the dish colorful and lively.Enjoy the process and get ready for a burst of flavor!
Step-by-Step Instructions
Preparing the Noodles
Start by soaking the rice noodles. Place them in a large bowl filled with hot water. Let them soak for 15-20 minutes. They should become soft and flexible. After soaking, drain the noodles and set them aside.
Cooking the Chicken
Next, heat vegetable oil in a large skillet or wok over medium-high heat. Add the thinly sliced chicken to the pan. Cook it for about 5-7 minutes. The chicken should turn golden and no longer be pink. Season the chicken with salt and pepper for extra flavor.
Combining Ingredients
Now, add minced garlic to the skillet. Sauté it for about 30 seconds until it smells great. Push the chicken to one side of the skillet. Pour in the beaten eggs on the other side. Scramble the eggs until fully set, then mix them with the chicken.
Introduce the soaked rice noodles to the skillet. Add fish sauce, tamarind paste, brown sugar, and sriracha. Toss everything together gently with tongs or a spatula. Make sure the noodles are coated well with the sauce.
Fold in the bean sprouts, julienned carrots, and chopped green onions. Stir-fry for 2-3 more minutes. This allows everything to heat through and the flavors to blend nicely.
Finish by mixing in chopped peanuts and cilantro. Taste the dish and add more salt, pepper, or sriracha if you like. Serve the spicy chicken pad thai hot, garnished with fresh lime wedges on the side.
Tips & Tricks
Achieving the Perfect Spice Level
To make your Spicy Chicken Pad Thai just right, adjust the sriracha to your taste. Start with the recipe’s amount, then add more if you want extra heat. You can also try other spicy sauces like chili paste or sambal oelek. These options can give your dish a different kick.
Cooking Techniques
Stir-frying is key for great Pad Thai. Use a large skillet or wok for best results. Make sure your pan is hot before adding the oil. High heat cooks the chicken quickly and keeps it juicy. Stir often to avoid burning and ensure even cooking.
Presentation Tips
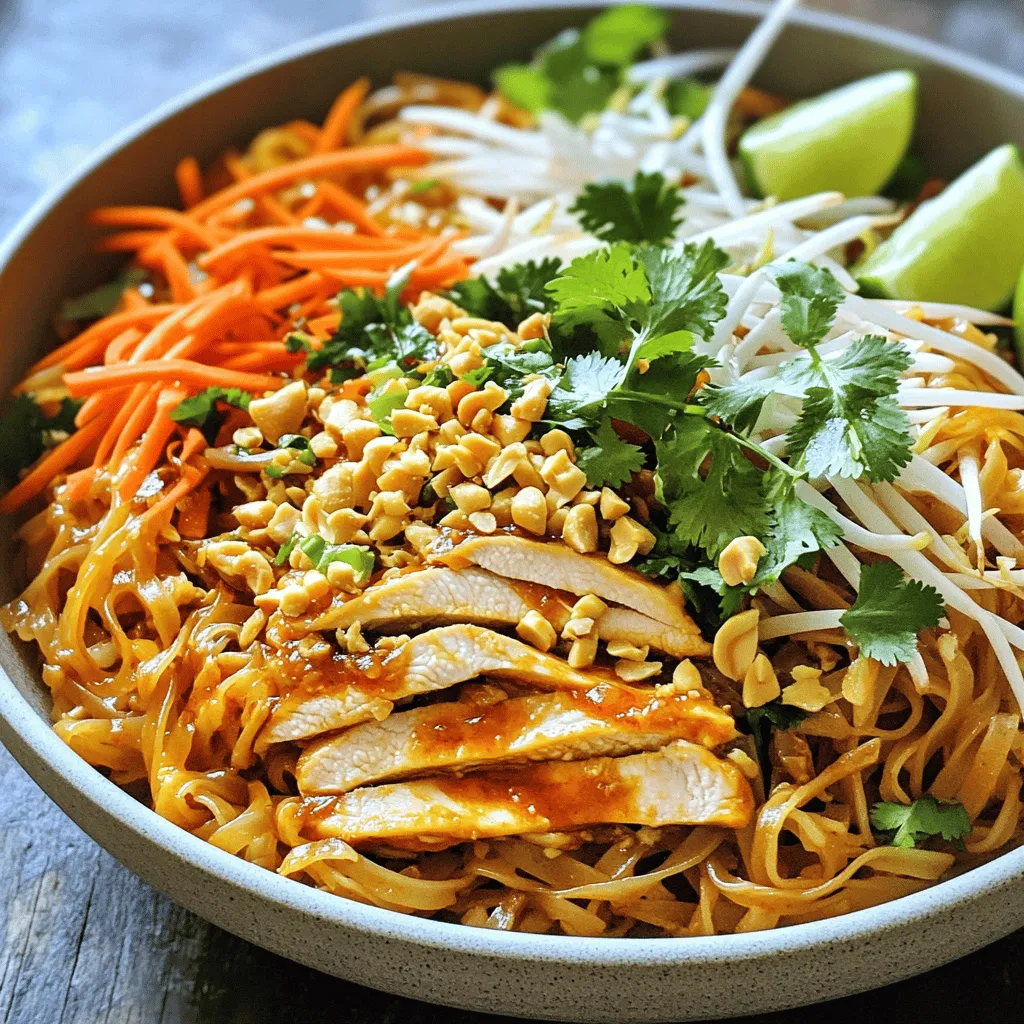
For a stunning plate, serve the Pad Thai in wide bowls. This allows for a nice view of all the bright colors. Garnish with lime wedges and chopped peanuts for extra flair. The lime adds a fresh touch. It also lets diners add their own zing to the dish.

Variations
Alternative Proteins
You can change the chicken in this dish. Shrimp works well for a seafood twist. Just cook it until it turns pink. Tofu is a great choice for a meat-free option. Use firm tofu and cube it up. Sauté it until golden for a nice texture.
Vegetable Add-ins
Adding more veggies boosts nutrition and flavor. Try bell peppers, zucchini, or snap peas. These add color and crunch. Seasonal veggies can also spice things up. In summer, use fresh corn or cherry tomatoes. In fall, try roasting butternut squash for a sweet touch.
Noodle Alternatives
If you need gluten-free noodles, rice noodles are your best bet. They soak up flavors well. Egg noodles can add a different taste and texture. Whole wheat noodles offer a healthier twist. They give a nutty flavor and extra fiber. Each option brings its own charm to your spicy chicken pad Thai.
Storage Info
Storing Leftovers
To keep your Spicy Chicken Pad Thai fresh, store it in an airtight container. This helps prevent drying out. Place it in the fridge within two hours of cooking. It stays good for about 3 to 4 days. Always check for any strange smells or changes in color before eating.
Reheating Instructions
When reheating, use a microwave or a skillet. If you choose the microwave, heat in short bursts. This prevents overcooking. Stir the pad thai between intervals for even heating. If using a skillet, add a splash of water or oil. This keeps the noodles moist and tasty.
Freezing the Dish
You can freeze Spicy Chicken Pad Thai for later use. Cool it completely before packing. Use freezer bags or airtight containers. It will last about 2 to 3 months in the freezer. To thaw, place it in the fridge overnight. For quick thawing, use the microwave. Reheat gently to avoid mushy noodles.
FAQs
What is the best way to serve Spicy Chicken Pad Thai?
Serve Spicy Chicken Pad Thai hot. Use large shallow bowls for a great look. Add lime wedges for a fresh taste. You can include extra sriracha for those who want more heat. Peanuts and cilantro on top add crunch and color. This dish pairs well with a light salad or spring rolls on the side.
Can I make Pad Thai ahead of time?
Yes, you can prepare Pad Thai in advance. Cook the chicken and noodles ahead of time. Store them in separate containers. When ready to eat, reheat them gently in a pan. Add a splash of water to keep it moist. Stir in the veggies just before serving for the best taste.
How can I customize my Pad Thai?
You can adjust flavors easily. Add more sriracha for extra spice. If you like it sweeter, put in more brown sugar. For a lighter dish, use less oil. You can swap chicken for shrimp or tofu. Adding more vegetables like bell peppers or broccoli makes it healthier too.
In this blog post, we explored how to make Spicy Chicken Pad Thai. We covered essential ingredients, cooking techniques, and tips for perfecting your dish. You learned how to store leftovers and customize your meal to suit your taste.
Remember, cooking is all about creativity. Don’t hesitate to experiment with flavors and ingredients. Each variation can lead to a new favorite dish. Enjoy your time in the kitchen and savor every bite!


![To make this tasty dish, gather these simple ingredients: - 1 pound Brussels sprouts, trimmed and halved - 3 tablespoons extra virgin olive oil - 1/4 cup pure maple syrup - 2 tablespoons balsamic vinegar - 1 teaspoon Dijon mustard - 1/2 teaspoon fine sea salt - 1/4 teaspoon freshly ground black pepper - 1/4 cup pecans, roughly chopped for added crunch - 1/4 cup dried cranberries for a touch of sweetness - Fresh thyme leaves for an aromatic garnish (optional) You can easily adjust ingredient amounts based on what you need. Here are some quick conversions: - If you want to make more, use 2 pounds of sprouts and double the glaze. - For less, cut the amounts in half. This still keeps the taste great. - In a pinch, you can swap the pecans for walnuts or almonds. This dish not only tastes good but is also good for you. Here’s a quick look at what’s inside: - Calories: About 200 per serving - Fat: 12 grams (mostly healthy fats from olive oil and nuts) - Carbohydrates: 24 grams (includes natural sugars from maple syrup) - Fiber: 5 grams (great for digestion from Brussels sprouts) - Protein: 3 grams (from nuts and sprouts) This breakdown helps you see the benefits of each ingredient. Enjoy making this dish with fresh, seasonal produce for the best flavor and health benefits. For the complete recipe, check out the Full Recipe. Start by preheating your oven to 400°F (200°C). This step is key for getting perfect crispness. While the oven warms up, clear your kitchen counter. Gather all your tools and ingredients. Having everything ready makes cooking much easier. Take 1 pound of Brussels sprouts. Trim off the ends and cut them in half. Place the halved sprouts in a large mixing bowl. Add 3 tablespoons of extra virgin olive oil and 1/2 teaspoon of fine sea salt. Sprinkle in 1/4 teaspoon of freshly ground black pepper. Toss the sprouts until they are well coated. This ensures each sprout gets flavor. Spread the seasoned Brussels sprouts on a baking sheet. Make sure the cut sides face down. This helps them brown nicely. Place the baking sheet in your preheated oven. Roast for 20-25 minutes. They should be crispy and golden. While they roast, make the maple glaze. In a small saucepan, mix 1/4 cup of pure maple syrup, 2 tablespoons of balsamic vinegar, and 1 teaspoon of Dijon mustard. Heat over medium heat but do not let it boil. Once the sprouts are ready, drizzle the glaze over them. Toss gently to coat. Return the glazed sprouts to the oven for 5 more minutes. This step caramelizes the glaze, making it rich and tasty. After that, take them out and add 1/4 cup of roughly chopped pecans and 1/4 cup of dried cranberries. These add crunch and sweetness. If you want, garnish with fresh thyme leaves for even more flavor. For the full details, check the Full Recipe. When you pick Brussels sprouts, look for bright green ones. They should feel firm and heavy in your hand. Avoid any that have yellow leaves or feel soft. The size matters too; smaller sprouts are sweeter and more tender. If you can, buy them on the stalk. They stay fresh longer that way. Caramelization makes Brussels sprouts sweet and tasty. To get it right, roast them cut-side down. This lets them get nice and brown. Make sure they have space on the baking sheet. If they are too close together, they will steam instead of roast. Use high heat, about 400°F, for best results. Check them halfway through and give them a stir for even cooking. One big mistake is overcooking the sprouts. They should be tender but still have a bit of crunch. Avoid using too much glaze; it can make them soggy. Always glaze right after roasting, then caramelize them for just a few minutes. This step adds flavor without losing the sprout's crispness. Lastly, don’t skip the nuts and cranberries; they add great texture and taste. For the full recipe, check the [Full Recipe]. {{image_4}} You can change the taste of maple glazed Brussels sprouts by adding different nuts or seeds. Try walnuts for a rich flavor or sunflower seeds for a crunch. Almonds also work well; they add a nice texture and nutty taste. Each option gives a new twist to your dish. Just sprinkle them on top after roasting for the best crunch and flavor. If you need to adjust for dietary needs, it’s easy. Use agave syrup instead of maple syrup for a vegan option. For a nut-free dish, skip the pecans and use pumpkin seeds. You can also swap balsamic vinegar with apple cider vinegar for a light zing. These swaps keep the dish tasty while meeting your needs. Brussels sprouts shine in fall and winter, but you can adapt them year-round. In spring, add fresh herbs like basil or parsley for brightness. In summer, pair with grilled corn for a sweet twist. You can also mix in seasonal veggies like carrots or sweet potatoes for color and taste. This way, your dish stays fresh and exciting no matter the season. For the full recipe, check out the Maple Glazed Brussels Sprouts Delight. After enjoying your maple glazed Brussels sprouts, store leftovers right. Place them in an airtight container. They will stay fresh for about three days in the fridge. Keep them away from strong-smelling foods. This helps maintain their flavor. When you reheat, aim to keep the sprouts crispy. Use your oven for the best results. Preheat it to 350°F (175°C). Spread the sprouts on a baking sheet. Heat them for about 10-15 minutes. This method helps keep them crunchy and flavorful. You can also microwave them for quick reheating, but they may not stay as crispy. If you want to enjoy these sprouts later, freezing works too. First, let them cool completely. Spread them on a baking sheet in a single layer. Freeze until solid, then transfer to a zip-top bag. They can last up to three months in the freezer. When ready to eat, thaw them overnight in the fridge. Reheat using the oven for the best taste. Enjoy your tasty treat again! Yes, you can prepare these Brussels sprouts ahead of time. After roasting them, let them cool. Store them in an airtight container in the fridge. They stay fresh for up to three days. When you're ready to serve, just reheat them in the oven. This keeps them crispy and tasty. These Brussels sprouts pair well with many dishes. Serve them alongside roasted chicken or grilled salmon for a complete meal. They also shine as a side dish for holiday dinners. You can even enjoy them with a grain salad or pasta for a light lunch. The sweet glaze adds a nice touch to any plate. You can easily change the sweetness of the glaze. If you want it sweeter, add more maple syrup. Start with an extra tablespoon and taste as you go. For a less sweet glaze, reduce the maple syrup. You can add more balsamic vinegar to balance the flavor. Adjust it to match your taste! We explored how to make Maple Glazed Brussels Sprouts from start to finish. You learned about ingredients, cooking steps, and storage tips. I shared helpful tricks to avoid mistakes and ensure a tasty outcome. You can now customize your dish with variations and serve it with confidence. Remember, fresh ingredients and careful roasting lead to the best flavors. Enjoy making this dish and impress your family and friends. With practice, your skills will grow. Happy cooking!](https://dishtreats.com/wp-content/uploads/2025/07/6c550e47-e99c-4554-a6d4-422f3e5f831a-768x768.webp)


