Spicy Black Bean Burgers Packed with Flavorful Goodness

Looking for a tasty and hearty meal? My Spicy Black Bean Burgers are packed with flavor and perfect for any occasion. Whether you’re a meat lover or a plant-based eater, these burgers offer a satisfying bite with simple ingredients. I’ll share easy steps for making the perfect patty, along with tips to boost taste and texture. Get ready to enjoy a delicious meal that’s also good for you!
Ingredients
Essential Ingredients for Spicy Black Bean Burgers
To make spicy black bean burgers, you need a few key ingredients. These ingredients bring rich flavor and texture to the dish. Here’s what you will need:
- 1 can (15 oz) black beans, thoroughly rinsed and drained
- 1/2 cup cooked quinoa, cooled
- 1/2 cup breadcrumbs (or substitute with oat flour for a gluten-free option)
- 1/4 cup red onion, finely diced
- 1/4 cup bell pepper, finely diced (choose any vibrant color)
- 2 cloves garlic, minced or pressed
- 1 tablespoon chili powder
- 1 teaspoon ground cumin
- 1/2 teaspoon smoked paprika
- 1/2 teaspoon sea salt
- 1/4 teaspoon freshly ground black pepper
- 1 tablespoon lime juice (freshly squeezed is best)
- 1 tablespoon olive oil (for cooking)
Each ingredient plays a vital role in creating a balanced flavor. The black beans provide protein and a creamy texture. Quinoa adds heartiness, while spices give that spicy kick.
Optional Toppings to Enhance Flavor
Once your burgers are cooked, you can elevate their taste with toppings. Here are some great options to consider:
- Creamy avocado slices
- Crisp lettuce
- Juicy tomato slices
- Zesty spicy mayo
These toppings add freshness and extra flavor. Feel free to mix and match based on your preferences.
Ingredient Substitutions for Dietary Needs
If you have specific dietary needs, you can still enjoy these burgers. Here are some smart substitutions:
- For gluten-free, use oat flour instead of breadcrumbs.
- If you need a vegan option, skip the spicy mayo or use a plant-based version.
- Want to cut down on carbs? Use lettuce leaves instead of buns.
These swaps keep the burgers tasty while accommodating different diets.
Step-by-Step Instructions
Preparing the Black Bean Mixture
Start by taking a large bowl. Open a can of black beans and drain them well. Rinse the beans under cold water. Use a fork or a potato masher to mash the beans. You want them mostly smooth, but keep some chunks for texture. Add cooked and cooled quinoa to the bowl. Then, mix in breadcrumbs or oat flour for a gluten-free option.
Next, finely chop red onion and bell pepper. Add these to the bowl, along with minced garlic, chili powder, ground cumin, smoked paprika, sea salt, black pepper, and lime juice. Now, mix everything well. If the mixture feels too wet, add more breadcrumbs or oat flour. This will help it hold together later.
Shaping the Patties
Once the mixture is ready, divide it into four equal parts. Take one part and shape it into a round patty. Make each patty about ½-inch thick. This thickness helps them cook evenly. Repeat this step until all patties are shaped. Place them on a plate while you heat up your cooking oil.
Cooking Method for Perfectly Crispy Burgers
Heat olive oil in a non-stick skillet over medium heat. Wait until the oil shimmers. Carefully place the patties in the skillet. Cook them for about 4-5 minutes on each side. You want them golden brown and heated through. Once cooked, remove them from the skillet. Now, it’s time to assemble your burgers!
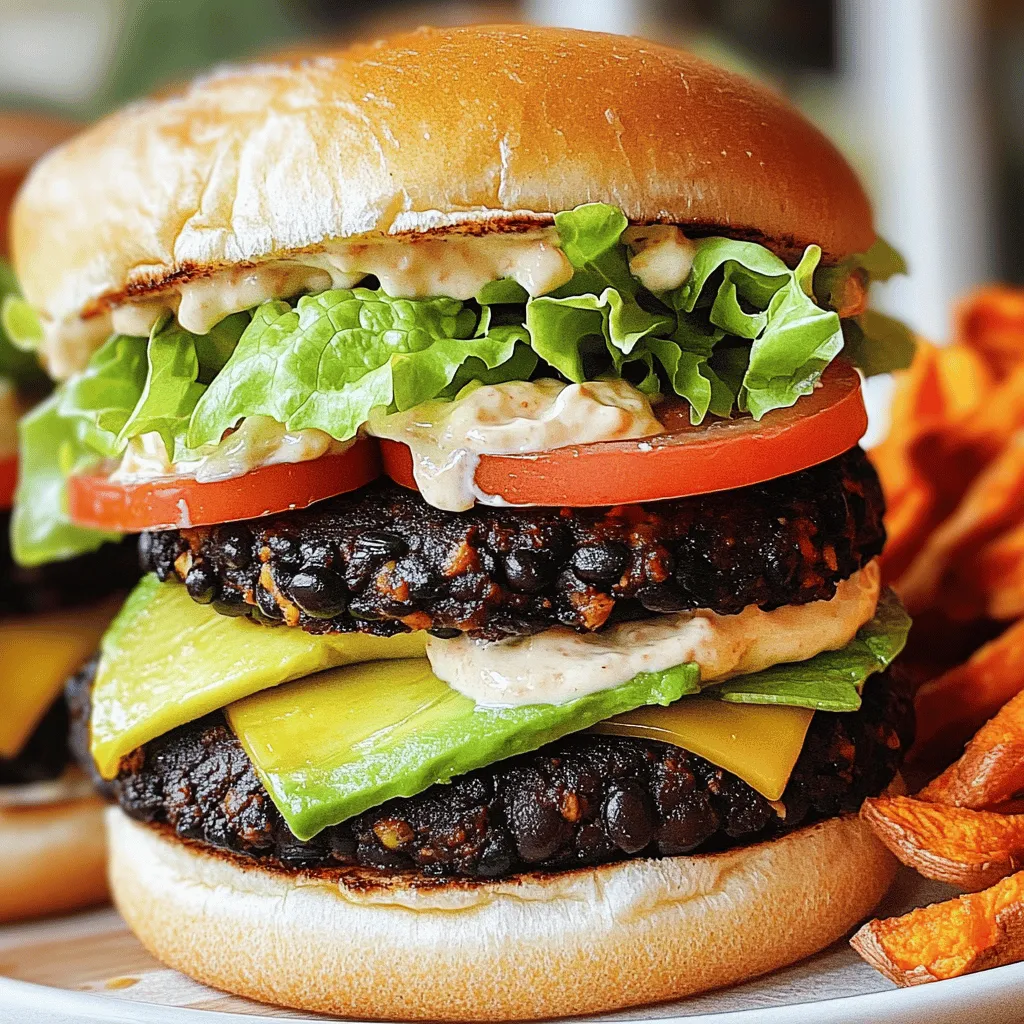
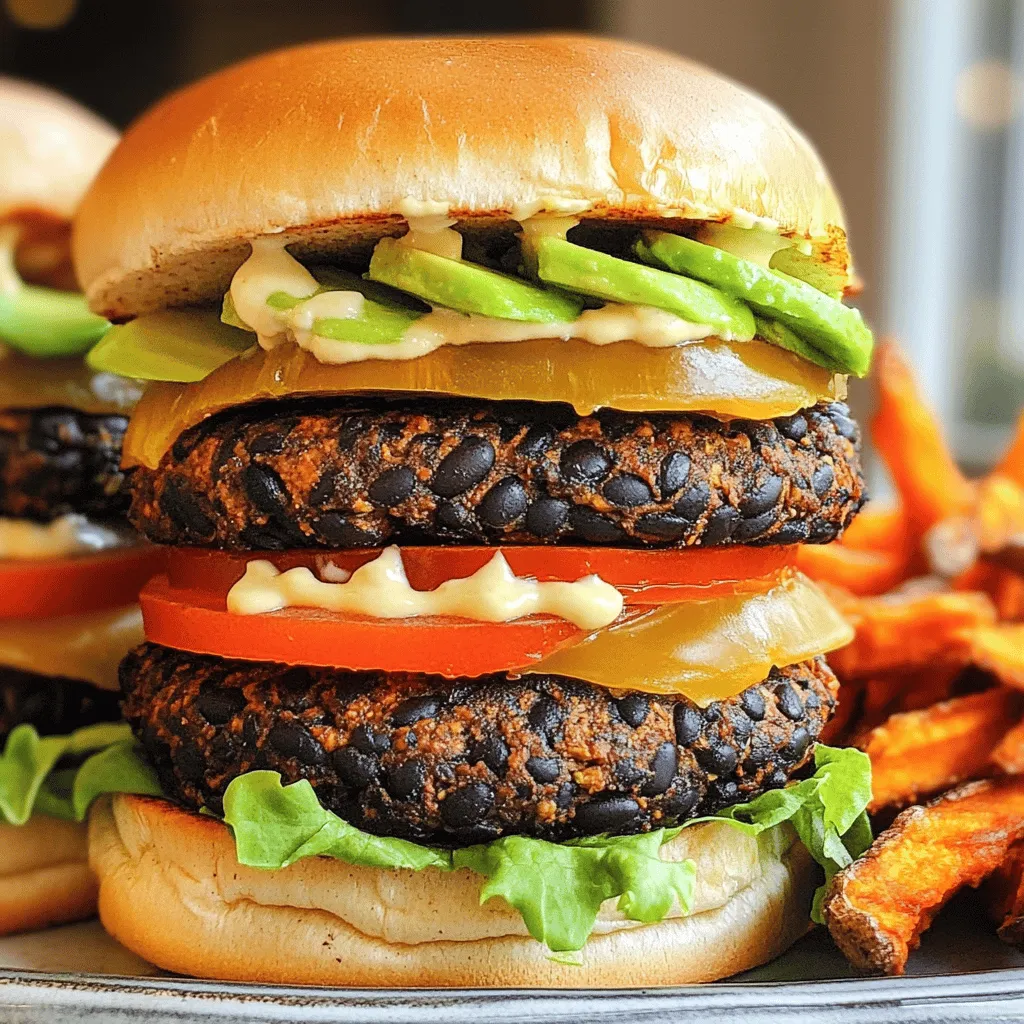
Grab your favorite hamburger buns and place a patty on each. Top with creamy avocado slices, crunchy lettuce, fresh tomato, and a drizzle of spicy mayo. Enjoy the flavorful goodness of your spicy black bean burgers!
Tips & Tricks
How to Improve Flavor and Texture
To boost the flavor of your spicy black bean burgers, use fresh herbs. Chopped cilantro or parsley adds a bright taste. You can also mix in some diced jalapeños for extra heat. For better texture, try adding grated carrots or zucchini. These veggies add moisture and nutrition without changing the taste too much.
Cooking Tips for Optimal Results
When cooking your burgers, make sure the skillet is hot. This helps create a nice crust on each patty. Don’t overcrowd the pan, as this can lower the heat. Cook only a few at a time. Flip the burgers gently with a spatula to keep them intact. If they feel too soft, they may need a bit more binding agent like breadcrumbs.
Serving Suggestions for the Ultimate Meal Experience
For a delicious meal, serve the burgers on toasted buns. Top them with creamy avocado slices, crunchy lettuce, and juicy tomatoes. A drizzle of spicy mayo adds a nice kick. Pair your burgers with sweet potato fries or a fresh salad. This combination makes for a colorful and tasty plate.

Variations
Vegetarian Alternatives and Additions
You can get creative with your spicy black bean burgers. Add cooked lentils or chickpeas for more protein. You can also mix in grated carrots or zucchini for extra veggies. These options keep the burgers tasty and healthy. Try using different beans, like pinto or kidney, for a new twist. You can even add chopped spinach for a burst of color.
Spice Level Adjustments
If you like more heat, add diced jalapeños or crushed red pepper flakes. These ingredients will kick up the flavor. For less spice, use mild chili powder or omit any hot peppers. You can also serve the burgers with a cooling yogurt sauce to balance the heat. Adjusting the spice level makes the burgers fun for everyone.
Serving Styles (Wraps, Salads, etc.)
You don’t have to stick with traditional burger buns. Try wrapping the patties in lettuce leaves for a low-carb option. You can also serve them atop a fresh salad with mixed greens. Adding a dollop of spicy mayo or guacamole enhances the flavor and keeps it unique. These serving styles make the meal exciting and versatile.
Storage Info
Best Practices for Storing Leftovers
To keep your spicy black bean burgers fresh, store them in an airtight container. Make sure they cool down first. Place parchment paper between layers to avoid sticking. You can store them in the fridge for up to three days. This way, you can enjoy them again without losing that great flavor.
Freezing Instructions for Meal Prep
If you want to save some for later, freezing works well. Shape the patties and place them on a baking sheet. Freeze them for about an hour until firm. Then, transfer the patties to a freezer bag. They can stay in the freezer for up to three months. Just remember to label the bag with the date!
Reheating Tips to Maintain Flavor
When you’re ready to eat, reheating is easy. For the best taste, use a skillet. Heat a little olive oil over medium heat. Cook the patties for about five minutes on each side. This keeps them crispy. You can also use a microwave, but it may make them a bit soggy. Enjoy your meal with fresh toppings after reheating!
FAQs
What are the health benefits of black beans?
Black beans are a powerhouse of nutrition. They are rich in protein and fiber. This helps keep you full and supports digestion. Black beans also contain iron, which is important for blood health. Plus, they have antioxidants that fight free radicals. Eating black beans can lower cholesterol and reduce the risk of heart disease. Overall, they are a smart choice for a healthy diet.
Can I make these burgers ahead of time?
Yes, you can make these burgers ahead of time. Prepare the patties and store them in the fridge. They stay fresh for up to two days. You can also freeze them for longer storage. Just make sure to wrap them well. When ready to eat, simply cook them from frozen or thaw them in the fridge overnight.
What sides pair well with spicy black bean burgers?
There are many tasty sides you can serve with these burgers. Sweet potato fries add a sweet crunch. A fresh salad with colorful veggies is also great. You can try coleslaw for a creamy contrast. Grilled corn on the cob brings a fun summer vibe. Choose sides that balance the spice of the burgers.
How can I make these burgers gluten-free?
To make these burgers gluten-free, use oat flour instead of breadcrumbs. Oat flour binds the mixture just as well. Make sure to check that your oats are certified gluten-free. This keeps the recipe safe for those with gluten sensitivities.Follow the detailed steps to create this delicious dish. Enjoy the flavorful goodness packed in every bite!
Spicy black bean burgers are tasty and fun to make. We covered key ingredients and how to shape, cook, and store them. You can add toppings, swap ingredients, and try different serving styles to make it your own. Remember to store extras for later. Enjoy experimenting with flavors and textures. Let your creativity shine in every bite.


![- 8 oz. spaghetti or pasta of your choice - 1 cup cherry tomatoes, halved - 1 cup zucchini, sliced into half-moons - 1 cup mixed bell peppers, sliced - 1 cup broccoli florets - 1 cup fresh spinach - 2 tablespoons extra virgin olive oil - 3 cloves garlic, finely minced - Zest and juice from 1 medium-sized lemon - 1 teaspoon dried oregano - Salt and freshly ground black pepper, to taste - Fresh basil leaves and grated Parmesan cheese (optional) When I craft my Pasta Primavera, I focus on fresh and vibrant veggies. The cherry tomatoes burst with flavor, giving a sweet touch. Zucchini adds a nice crunch, while bell peppers bring color. Broccoli florets add a delightful bite, and fresh spinach wilts perfectly into the mix. I love using extra virgin olive oil for its rich taste. Garlic gives it a fragrant kick. The zest and juice of the lemon brighten the dish and enhance all the flavors. Dried oregano is my go-to herb here, adding warmth and depth. A pinch of salt and pepper brings it all together. For a finishing touch, I often sprinkle fresh basil on top. You can also add grated Parmesan cheese for creaminess. This recipe is simple yet packed with flavor, perfect for any meal. To see the full recipe, check out the details above. - Fill a large pot with salted water. - Bring to a boil and cook pasta until al dente. - Reserve pasta water and drain. To cook the pasta, I fill a big pot with water and add a good amount of salt. This helps to flavor the pasta. Once the water boils, I add my spaghetti or whatever pasta I choose. I cook it until it is al dente, which means it is firm but cooked. Before draining, I set aside about one cup of the pasta water. This water is full of starch and will help make my sauce creamy later. - Heat olive oil in a skillet. - Sauté minced garlic for fragrance. - Add broccoli and mixed bell peppers, sauté for 3-4 minutes. Next, I heat some olive oil in a large skillet over medium heat. Once the oil is hot, I add minced garlic and sauté it for about 30 seconds. The smell is amazing! I have to be careful not to burn it. After that, I toss in the broccoli and mixed bell peppers. I sauté these for 3-4 minutes until they soften a bit but still have some crunch. - Incorporate zucchini and cherry tomatoes. - Add reserved pasta water and seasonings. - Let simmer to create sauce. Now, I add my zucchini and cherry tomatoes to the skillet. I stir everything for about three minutes. The tomatoes will start to release their juices, making the dish juicy. I then pour in the reserved pasta water, followed by the lemon juice and zest, and dried oregano. This creates a light sauce. I let it simmer for two minutes to blend the flavors. - Add drained pasta and fresh spinach. - Toss until well mixed. - Season to taste and plate with garnishes. Finally, I gently add the drained pasta to the skillet along with fresh spinach. I toss everything well so the pasta gets coated in the sauce. The heat wilts the spinach just right. I taste the dish and season it with salt and black pepper. To serve, I plate the pasta in deep bowls and garnish with fresh basil and a sprinkle of Parmesan cheese if I want. This dish looks and tastes great. You can find the full recipe for this delightful dish to enjoy! To achieve al dente pasta, you need to watch the clock. Start checking your pasta a minute before the package time. It should be firm but not hard. The texture is key! Reserving pasta water is a must. Always save about one cup before you drain it. This water is starchy and helps create a silky sauce later. It can make your dish creamy without adding heavy cream. To boost flavor, think about adding fresh herbs like parsley or thyme. You can also sprinkle in some red pepper flakes for heat. These add extra layers of taste and excitement. When sautéing vegetables, keep the heat high but don’t overcook them. Stir them quickly to keep their crunch. A short cooking time keeps veggies bright and fresh. For a beautiful presentation, use deep bowls for serving. This allows the colors to pop. A splash of lemon zest on top adds brightness, too. Garnishing can elevate your dish. Scatter fresh basil leaves over the top. A sprinkle of grated Parmesan cheese adds a nice touch. It makes your dish look like it came from a restaurant! For the full recipe, check out the detailed instructions above. Enjoy your cooking adventure! {{image_4}} You can change up the veggies in your Pasta Primavera with Lemon. Seasonal veggies work best. Try using asparagus, snap peas, or carrots. These will add color and flavor. If fresh veggies aren't available, frozen ones are a great option too. Just remember to thaw them and drain any excess water before cooking. This keeps your dish from getting soggy. Want to make your Pasta Primavera heartier? You can add protein! Chicken, shrimp, or tofu are great choices. If you use chicken, cook it in the skillet first, and then add the veggies. For shrimp, toss them in when the veggies are almost done. They only need a few minutes to cook. If you prefer tofu, press it to remove moisture, then cube and sauté until golden before adding it to the mix. Pasta Primavera is very flexible with pasta types. You can choose gluten-free pasta if you need it. Options like brown rice or quinoa pasta work well. Whole grain pasta is another healthy choice, adding fiber to your meal. If you want something unique, try legume-based pasta made from lentils or chickpeas. These add a nice twist and extra protein. For the full recipe, check out the [Full Recipe]. To keep your Pasta Primavera fresh, refrigerate it right after cooling. Place it in airtight containers. This helps lock in flavors and keeps it safe to eat. Always store leftovers within two hours of cooking. The pasta will taste great for up to three days in the fridge. When you reheat your pasta, use a stove or microwave. For the stove, add a splash of water or olive oil. Stir gently to heat evenly. If using a microwave, cover it to keep moisture in. Avoid overheating to prevent soggy pasta. Heat just until warm. To freeze Pasta Primavera, let it cool first. Transfer it to freezer-safe containers, leaving space for expansion. This dish can be frozen for up to three months. When ready to eat, thaw it overnight in the fridge. Reheat it on the stove or microwave, adding a bit of water to help it steam. Enjoy your flavorful veggie delight later! For the full recipe, check out the details above. Pasta Primavera lasts about 3 to 5 days in the fridge. To keep it fresh, store it in an airtight container. It’s best to let the pasta cool before sealing. This helps prevent moisture buildup, which can make it soggy. Yes, you can make Pasta Primavera ahead of time. To prepare, cook the pasta and veggies as usual. Let everything cool completely before storing. When you are ready to eat, just reheat it in a skillet over low heat. Add a splash of water or extra olive oil to keep it moist. If you need a lemon substitute, try lime juice or vinegar. Use the same amount, about 2 tablespoons. You can also use orange juice for a sweeter flavor. Adjust to your taste, as different fruits can change the dish's profile. Pasta Primavera is healthy and full of nutrients. It has lots of veggies like broccoli, spinach, and bell peppers. These provide vitamins and fiber. The olive oil adds healthy fats. Overall, this dish is low in calories and high in flavor, making it a great choice. Pasta Primavera is a simple and tasty dish. We discussed the essential ingredients, like pasta, fresh vegetables, and seasonings. I shared step-by-step instructions for cooking and combining ingredients. You can enhance flavors with herbs and spices while following tips for perfect presentation. Consider variations with protein and different pasta types for more options. Lastly, I covered storage and reheating to keep leftovers fresh. This dish is not only delicious but also healthy, making it a great meal for everyone. Enjoy experimenting with it!](https://dishtreats.com/wp-content/uploads/2025/05/1202f33f-9285-4746-af91-946a78d77e80-768x768.webp)


![To make this dish, you need a few key items. These ingredients work together for great flavor. Here’s what you will need: - 4 chicken thighs, bone-in and skin-on - 1/4 cup honey - 1/4 cup low-sodium soy sauce - 4 cloves garlic, finely minced - 1 tablespoon fresh ginger, grated - 1 teaspoon sesame oil - 1 tablespoon olive oil - Salt and freshly ground black pepper to taste While the main ingredients shine, you can add optional items for extra flavor. Try using these to enhance your dish: - A splash of rice vinegar for acidity - A pinch of red pepper flakes for heat - Fresh herbs like cilantro or parsley for freshness Presentation matters when serving food! Beautiful garnishes make a dish pop. Here’s what to top your chicken with: - 2 green onions, finely sliced - Sesame seeds for a crunchy finish First, grab a medium mixing bowl. Add 1/4 cup honey, 1/4 cup low-sodium soy sauce, 4 minced garlic cloves, 1 tablespoon of grated ginger, and 1 teaspoon of sesame oil. Whisk them together until mixed well. This sweet and savory blend will become your marinade and glaze. It infuses the chicken thighs with tasty flavor. Next, season the chicken thighs. Use salt and freshly ground black pepper on both sides. Heat 1 tablespoon of olive oil in a large skillet over medium-high heat. Once hot, place the chicken thighs skin-side down. Let them sear for about 6-8 minutes. You want that skin golden brown and crispy. This step adds great texture and taste. After searing, flip the chicken thighs. Pour the honey garlic mixture over them. Let it simmer gently, coating the chicken in flavor. Cover the skillet and reduce the heat. Cook for 15-20 minutes until the chicken reaches 165°F (75°C) inside. When the chicken is ready, remove the lid. Turn the heat back up to medium-high. Let the sauce simmer for 5 minutes, stirring often. This will thicken the sauce, helping it stick to the chicken. Once thickened, take the skillet off the heat. Allow the chicken to rest for a few minutes. This lets the juices settle, keeping the meat tender. Serve the chicken on a platter, drizzling the sauce over the top. Add a sprinkle of sliced green onions and sesame seeds for a bright finish. Enjoy your Honey Garlic Chicken Thighs! For the full recipe, refer to [Full Recipe]. To get crispy skin, start with bone-in, skin-on chicken thighs. Pat the skin dry with paper towels. This step removes moisture and helps the skin crisp up nicely. Heat olive oil in a hot skillet before adding the chicken. Sear it skin-side down for 6-8 minutes. Resist the urge to move the chicken too much. Let it cook undisturbed for a golden crust. For tender chicken, season it well with salt and pepper. This enhances flavor and locks in moisture. When cooking, keep an eye on the internal temperature. Aim for 165°F (75°C) to ensure it’s fully cooked. Let the chicken rest after cooking. This lets the juices settle back in, making each bite juicy and satisfying. Honey garlic chicken pairs well with several sides. Try serving it with steamed rice for a classic combo. The rice soaks up the tasty sauce. You can also serve it with a fresh green salad. The crunch of the veggies complements the soft chicken perfectly. Roasted vegetables add color and flavor, making for a well-rounded meal. For the full recipe, check out [Full Recipe]. {{image_4}} You can change the taste of honey garlic chicken thighs by swapping some ingredients. For a fruitier twist, try using maple syrup instead of honey. This will give your dish a rich, deep flavor. You can also replace soy sauce with coconut aminos for a gluten-free option. If you like citrus, add some fresh orange juice to the marinade. It brightens the flavor and adds a zesty note. While chicken thighs are juicy, you can use other cuts too. Chicken breasts work well if you prefer leaner meat. Just remember, they may dry out faster, so watch the cooking time. Drumsticks are another tasty option. They are fun to eat and stay moist during cooking. Whichever cut you choose, make sure it is about the same size for even cooking. Want some heat? It's easy to spice things up! Add red pepper flakes or sriracha to the marinade for a kick. You can also use fresh jalapeños or chili paste for a bolder flavor. Adjust the amount based on your heat tolerance. If you love spicy food, this will make your honey garlic chicken thighs truly exciting. For the full recipe, check out the [Full Recipe]. Store your honey garlic chicken thighs in an airtight container. Make sure to let them cool to room temperature first. They will stay fresh in the fridge for up to 3 days. This keeps the flavors intact and ensures the chicken remains juicy. To reheat, place the chicken thighs in a skillet over low heat. Cover the skillet to keep moisture in. Heat until warmed through, about 5-10 minutes. You can also microwave them, but cover the dish to prevent drying out. You can freeze the chicken thighs for later use. Wrap each thigh in plastic wrap, then place them in a freezer bag. They will last for about 2-3 months in the freezer. Thaw them in the fridge overnight before reheating. This method keeps the chicken tasty and tender. For the full recipe, refer to the section above. You should cook chicken thighs for about 20-25 minutes. Start by searing them for 6-8 minutes on the skin side. Then, flip them over and pour the sauce on top. Cover the skillet and let them simmer for 15-20 minutes. This method helps keep the meat juicy and full of flavor. Yes, you can use boneless chicken thighs. They will cook faster than bone-in thighs. Sear them for about 5-7 minutes on each side. Make sure to check their internal temperature. It should reach 165°F (75°C) to be safe to eat. The best way to check if the chicken is done is with a meat thermometer. Insert it into the thickest part of the thigh. When it reads 165°F (75°C), the chicken is ready. You can also cut into the meat. If the juices run clear, it’s cooked. To adjust the sweetness, add more honey for a sweeter taste. If you want it less sweet, add more soy sauce or a splash of vinegar. Taste the sauce as you go. This way, you can find the perfect balance for your dish. For the full recipe, please check the [Full Recipe]. Honey garlic chicken thighs are simple and tasty. We covered the key ingredients and optional marinades. You learned how to prepare the marinade and cook the chicken. I shared tips for crispy skin, tender meat, and delicious sides. We also explored variations and storage tips to keep your meals fresh. When you try this recipe, it will impress your family and friends. Enjoy the rich flavors and make it your own!](https://dishtreats.com/wp-content/uploads/2025/06/32d13aa5-8be9-48e3-be5a-1699ade8ce81-768x768.webp)