Are you ready to impress your taste buds with homemade Chicken Shawarma Wraps? This dish packs a punch of flavor and is simple to make. I’ll show you how to marinate the chicken, grill it just right, and wrap it all up with tasty toppings. Whether you’re hosting friends or just treating yourself, these wraps are sure to become a favorite. Let’s get started and create something amazing together!
Ingredients
Essential Ingredients for Chicken Shawarma Wraps
To make tasty chicken shawarma wraps, gather these core ingredients:
– 1.5 lbs boneless skinless chicken thighs
– 3 tablespoons olive oil
– 2 tablespoons plain yogurt
– 4 cloves garlic, finely minced
– 2 teaspoons ground cumin
– 2 teaspoons sweet paprika
– 1 teaspoon ground turmeric
– 1 teaspoon ground coriander
– 1 teaspoon ground cinnamon
– 1 teaspoon cayenne pepper (adjust based on your spice preference)
– Salt and freshly cracked black pepper to taste
– 4 large pita bread or flatbreads
Marinade Components
The marinade is key for flavor. You need:
– Olive oil for moisture
– Yogurt for tanginess
– Garlic for depth
– Cumin and paprika for warmth
– Turmeric for color
– Coriander, cinnamon, and cayenne for spice
– Salt and pepper to enhance all flavors
Mix these well to create a smooth marinade. This will coat your chicken and bring it to life.
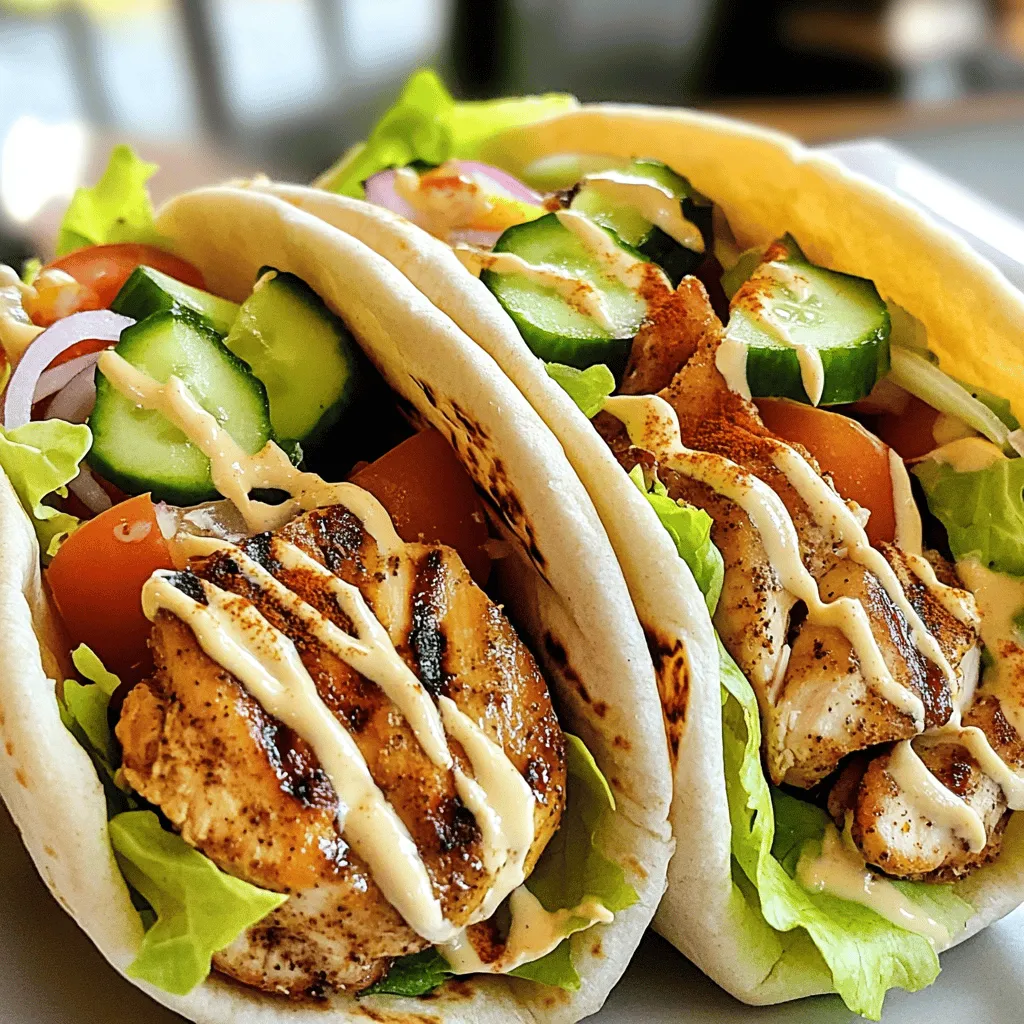
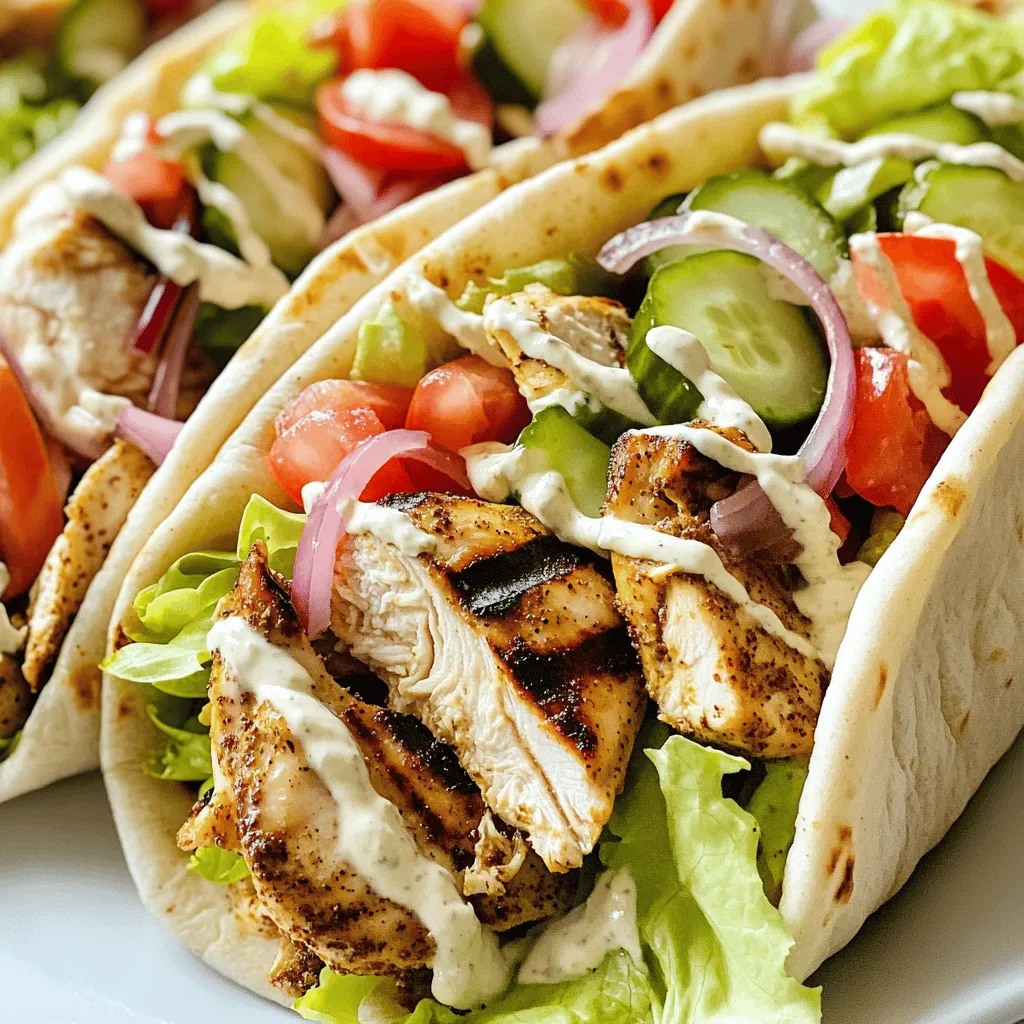
Toppings and Accompaniments
Fresh toppings make your wraps pop. Use:
– 1 cup romaine lettuce, shredded
– 1 medium ripe tomato, diced
– 1/2 cucumber, thinly sliced
– 1/4 red onion, paper-thin sliced
– 1/2 cup tahini sauce or garlic sauce for drizzling
These add freshness and crunch. They also balance the rich chicken. Enjoy the colorful mix as you layer your wraps.
Step-by-Step Instructions
Preparing the Marinade
Start by gathering your ingredients. In a bowl, mix together:
– 3 tablespoons olive oil
– 2 tablespoons plain yogurt
– 4 cloves garlic, finely minced
– 2 teaspoons ground cumin
– 2 teaspoons sweet paprika
– 1 teaspoon ground turmeric
– 1 teaspoon ground coriander
– 1 teaspoon ground cinnamon
– 1 teaspoon cayenne pepper
– Salt and freshly cracked black pepper to taste
Whisk these items until you have a smooth mix. This marinade gives the chicken its bold flavor.
Marinating the Chicken
Next, take 1.5 lbs of boneless skinless chicken thighs. Add them to the bowl with the marinade. Make sure every piece is well coated. Cover the bowl with plastic wrap. Refrigerate it for at least 1 hour. If you have time, letting it sit overnight will boost the flavor even more.
Grilling the Chicken
When you’re ready to cook, preheat your grill or grill pan over medium-high heat. Remove the chicken from the fridge. Discard any leftover marinade. Grill the chicken thighs for about 6-7 minutes on each side. They should look golden-brown and reach an internal temperature of 165°F (75°C).
Assembling the Wraps
After grilling, let the chicken rest for about 5 minutes. This helps keep it juicy. Slice it thinly against the grain. Take 4 large pita bread or flatbreads. On each, place a good amount of the sliced chicken.
Next, add your toppings:
– 1 cup romaine lettuce, shredded
– 1 medium ripe tomato, diced
– 1/2 cucumber, thinly sliced
– 1/4 red onion, paper-thin sliced
Drizzle with 1/2 cup tahini sauce or garlic sauce for a tasty finish.
Optional: Grilling the Wrapped Shawarmas
If you want a crispy wrap, roll each pita tightly. Fold in the sides to secure the filling. Grill the wrapped shawarmas on medium heat for 1-2 minutes. Turn until they are golden brown. This step adds a nice crunch.
Tips & Tricks
Perfecting the Marinade
To make the best chicken shawarma, focus on the marinade. A great marinade adds flavor and moisture. Combine olive oil, yogurt, and spices in a bowl. This mix should coat the chicken well. Let the chicken marinate for at least one hour. For more flavor, try marinating overnight. The longer you marinate, the better it tastes.
Cooking Techniques for Juicy Chicken
Grilling gives the chicken a nice char and flavor. Preheat your grill or grill pan to medium-high heat. This step is key for cooking the chicken evenly. Grill each piece for about 6-7 minutes on both sides. Look for a golden-brown color. Use a meat thermometer to check if it’s done. It should reach 165°F (75°C). After grilling, let the chicken rest for about 5 minutes. This helps keep the juices inside.
Storing and Reheating Leftovers
If you have extra chicken, store it in an airtight container. Keep it in the fridge for up to three days. To reheat, place it in a pan over low heat. This method keeps it tender. You can also warm it in the microwave. Just be careful not to overcook it. This can make the chicken dry. Enjoy your leftovers in wraps or salads!
Variations
Vegetarian Shawarma Options
You can make a delicious vegetarian shawarma using plant-based proteins. Try using marinated mushrooms or eggplant. Both absorb flavors well and grill nicely. You can also use chickpeas for a hearty option. Just toss them in the same marinade as the chicken. This creates a tasty and filling wrap.
Different Sauces and Toppings
Sauces can change the whole wrap experience. Tahini sauce is a classic, but you might love garlic sauce. For a spicy kick, use harissa or sriracha. Don’t forget to add toppings like pickles, olives, or feta cheese. These can add a burst of flavor to your wrap.
Alternative Wraps and Breads
While pita bread is great, you can experiment with other wraps. Try using lavash, tortillas, or even lettuce leaves for a low-carb option. Each type of bread adds a unique taste and texture to your shawarma. It’s fun to find your favorite combination.
Storage Info
Storing Marinade and Chicken
To keep your chicken fresh, store the marinade in a sealed container in the fridge. It lasts up to 3 days. For the chicken, after marinating, keep it in an airtight container. Use it within 2 days for the best flavor. If you plan to use the chicken later, prepare the marinade and chicken in advance. It makes meal prep easy and tasty.
Best Practices for Wrap Storage
If you have leftover wraps, wrap them in foil or plastic. This method helps keep them fresh. Store the wraps in the fridge for up to 2 days. If the wrap feels soggy, you can reheat it in a skillet. This way, it gets crispy again. Be sure to separate the sauces if you want to keep the wrap crisp.
Freezing Chicken Shawarma
You can freeze the marinated chicken before cooking. Place it in a freezer bag, squeeze out the air, and seal it tight. It stays good for up to 3 months. When ready to use, thaw it overnight in the fridge. Cook it as usual for a quick, tasty meal. You can also freeze cooked chicken. Slice it before freezing for easy use in wraps later. Just reheat it when you are ready to eat.
FAQs
What is Shawarma?
Shawarma is a Middle Eastern dish. It features marinated meat cooked on a vertical rotisserie. The meat is thinly sliced and often served in a wrap or pita. Shawarma is known for its rich spices and flavors. You can find different types, like chicken, beef, and lamb. Each type has unique marinades and toppings.
Can I use chicken breasts instead of thighs?
Yes, you can use chicken breasts. However, chicken thighs are juicier and more flavorful. If you choose breasts, be careful not to overcook them. They can dry out quickly. Marinade the breasts just like you would the thighs for better taste.
How do I make a gluten-free version?
To make a gluten-free version, use gluten-free wraps or lettuce instead of pita. Many brands offer gluten-free flatbreads. Always check labels to ensure they are gluten-free. You can also serve the chicken over rice or salad for a tasty option.
What can I serve with Chicken Shawarma Wraps?
You can serve Shawarma wraps with various sides. Here are some ideas:
– Hummus
– Tabbouleh
– Grilled vegetables
– Rice pilaf
– Pickles
These sides add color and flavor to your meal.
How long can I store leftovers?
You can store leftovers in the fridge for up to three days. Keep the chicken and wraps separate for best taste. Use airtight containers to maintain freshness. Reheat the chicken in a pan or microwave before serving.
In this blog post, I covered all key parts of making Chicken Shawarma Wraps. We discussed the essential ingredients, from the marinade to tasty toppings. I shared step-by-step instructions to help you grill juicy chicken and assemble wraps. You also learned useful tips for perfecting your recipe and variations for different diets.
Finally, remember, making shawarma at home can be fun and rewarding. Enjoy experimenting with flavors and ingredients. You can impress your family or friends with your skills!


