Savory 17. Sweet Potato and Black Bean Enchiladas

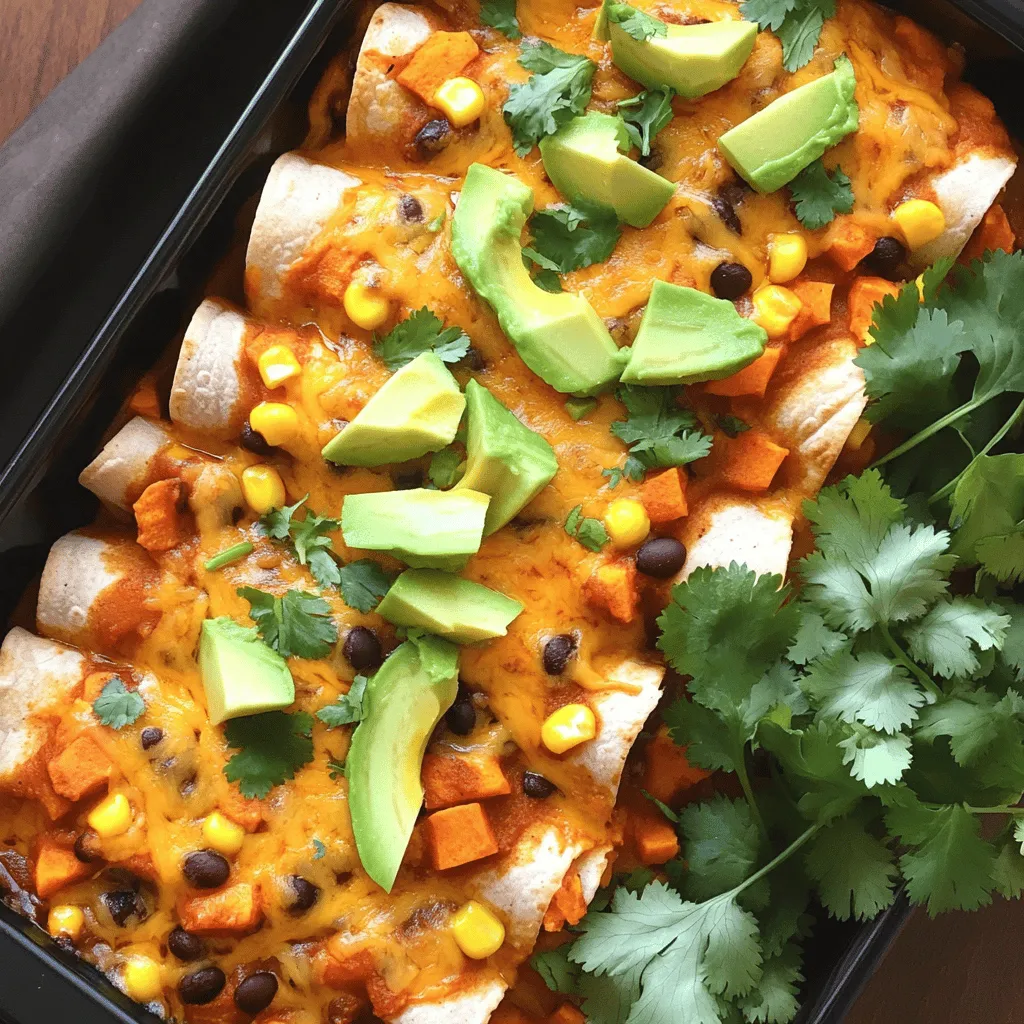
Are you ready to spice up your dinner routine? These Savory Sweet Potato and Black Bean Enchiladas deliver flavor and nutrition in one neat package. Packed with sweet potatoes and hearty black beans, this dish is perfect for weeknight meals or impressing guests. Follow my simple steps and tips to create a wholesome meal that your family will love. Let’s get cooking and dive into these tasty enchiladas!
Ingredients
Complete List of Ingredients
- 2 medium sweet potatoes, peeled and diced
- 1 can (15 oz) black beans, rinsed and drained
- 1 cup corn kernels (fresh, frozen, or canned)
- 1 teaspoon ground cumin
- 1 teaspoon smoked paprika
- ½ teaspoon chili powder
- Salt and freshly ground black pepper to taste
- 1 cup shredded cheddar cheese (use vegan cheese if needed)
- 8 large tortillas (corn or flour)
- 1 cup enchilada sauce (ready-made or homemade)
- 2 tablespoons olive oil
- Fresh cilantro and avocado slices for garnish
Sweet potatoes bring a soft, sweet taste. Black beans add protein and fiber. Corn gives a nice crunch. You can swap sweet potatoes for regular potatoes or use quinoa instead of black beans. If you prefer a spicier kick, add jalapeños or a dash of hot sauce to the filling. Enjoy the tasty mix of flavors in every bite!
Step-by-Step Instructions
Preparing the Sweet Potato Filling
To start, you need to cook the sweet potatoes. Boil water in a pot. Add the diced sweet potatoes and cook for about 10 minutes. They should be soft enough to mash. Drain the sweet potatoes and mash them with a fork. Leave some chunks for texture.
Next, mix the filling ingredients. In a large bowl, combine the mashed sweet potatoes, rinsed black beans, and corn. Add ground cumin, smoked paprika, chili powder, and some salt and pepper. Stir everything well until mixed. This blend creates a tasty filling.
Assembling the Enchiladas
Now, let’s assemble the enchiladas. Spread half a cup of enchilada sauce in the bottom of a 9×13 inch baking dish. This helps the enchiladas not stick.
Take a tortilla and put about a quarter cup of the sweet potato mixture down the center. Add a sprinkle of shredded cheese on top of the filling. Roll up the tortilla tightly and place it seam-side down in the dish. Repeat this with the remaining tortillas and filling until your dish is full.
Baking Procedure
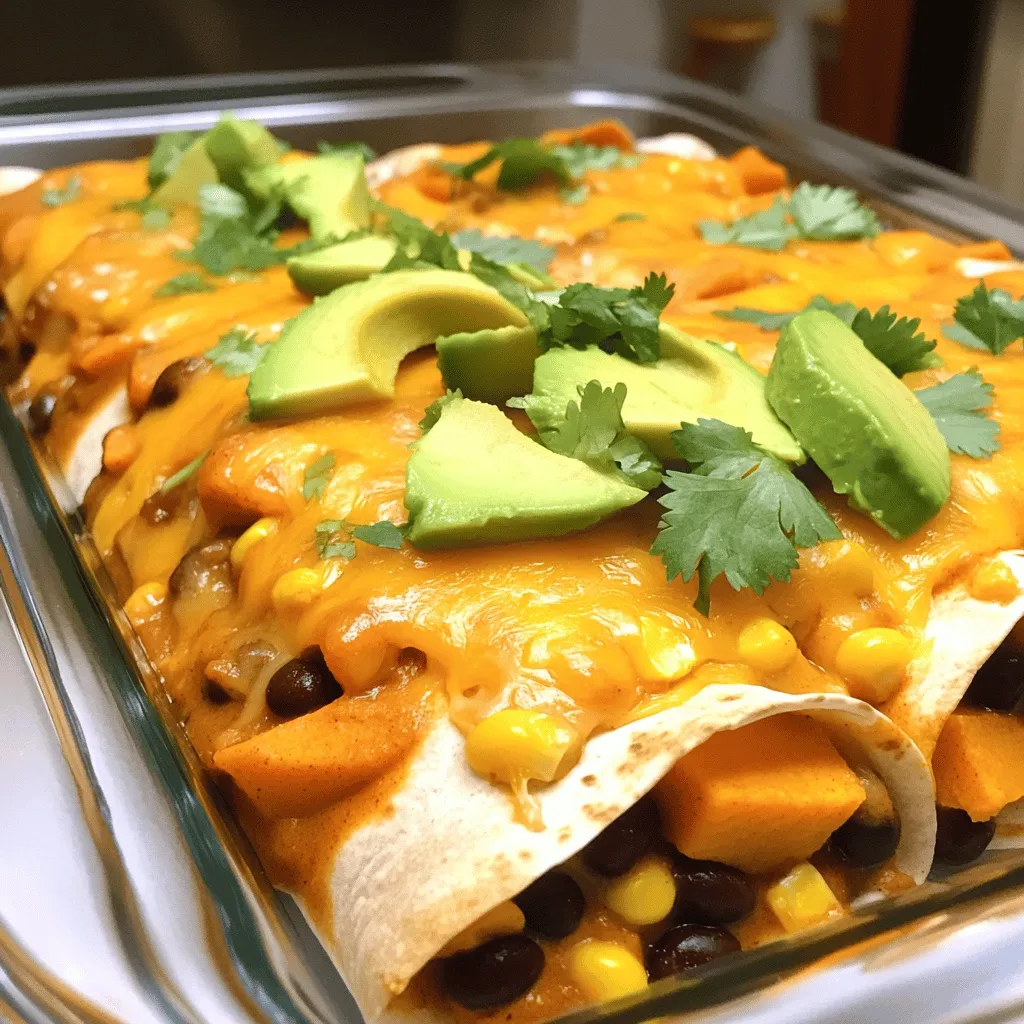
For baking, cover the dish with aluminum foil to keep moisture in. Bake in your preheated oven at 375°F for 20 minutes. After this, remove the foil and bake for another 10 minutes until the cheese is bubbly and golden.
For the best cheese melt, ensure that the cheese evenly covers the sauce. This creates that delicious, gooey texture we all love. Enjoy the aroma as your enchiladas bake!
Tips & Tricks
How to Customize Your Enchiladas
You can easily make these enchiladas vegan by using plant-based cheese. For gluten-free options, use corn tortillas instead of flour. Try adding toppings like sour cream, sliced jalapeños, or diced tomatoes. Fresh lime juice can add a nice zing!
Essential Cooking Tips
To cook sweet potatoes, peel and dice them first. Boil them until fork-tender, about ten minutes. When rolling tortillas, warm them slightly. This helps prevent breaking. If you find them too stiff, a quick zap in the microwave can help.
Pairing Suggestions
Serve these enchiladas with a fresh salad or a side of Mexican rice. A simple corn salad adds crunch and freshness. For drinks, pair them with a citrusy lemonade or a light beer. These beverages balance the flavors perfectly.

Variations
Additional Ingredients to Consider
You can switch out black beans for pinto beans or kidney beans. Chickpeas also work well for a different twist. Quinoa or brown rice can add fiber and texture to your enchiladas too. For veggies, consider adding bell peppers, spinach, or zucchini. These will not only boost nutrition but also add color and flavor.
Sauces and Seasonings
Making your own enchilada sauce is easy and rewarding. Combine 1 can of tomatoes, 2 tablespoons of chili powder, and garlic powder to taste. Simmer for about 15 minutes to develop flavors. For a spicy kick, add jalapeños or hot sauce. For a smoky flavor, try adding chipotle peppers or smoked paprika.
Serving Styles
You can serve enchiladas rolled or stacked. Stacking them gives a fun layered look and makes it easier to share. For a family-style meal, use a large platter, and drizzle extra sauce on top. Garnish with fresh cilantro and avocado slices for a beautiful presentation. These details make your meal look as good as it tastes.
Storage Info
Storing Leftover Enchiladas
To keep your enchiladas fresh, let them cool first. Then, wrap them tightly in plastic wrap. Place them in an airtight container or a resealable bag. This helps keep moisture in and prevents freezer burn. You can store them in the fridge for up to four days. If you want to keep them longer, freeze them for up to three months.
For reheating, preheat your oven to 350°F (175°C). Place the enchiladas in a baking dish and cover them with foil. Bake for about 20 minutes. This method helps keep the enchiladas moist. If you prefer, you can also microwave them. Just cover the plate with a damp paper towel to keep them from drying out.
Shelf Life
In the fridge, enchiladas last about four days. In the freezer, they can last up to three months. Always check for signs of spoilage before eating. If the enchiladas smell off or show mold, throw them away. Also, if the texture seems too mushy or dry, they may not be good anymore. Keeping an eye on these signs helps ensure your meals are fresh and tasty.
FAQs
What can I substitute for black beans in this recipe?
You can use other beans like pinto or kidney beans. Lentils also work well. If you want more protein, try shredded chicken or tofu. Each option gives a unique taste and texture. Choose what you like best!
Can I make sweet potato and black bean enchiladas in advance?
Yes, you can prep these enchiladas ahead of time. Assemble them and cover tightly. Store in the fridge for up to two days. For longer storage, freeze them before baking. Just thaw overnight in the fridge before baking. This makes meal prep easy!
How do I make this recipe spicier?
To add heat, use spicy chili powder or diced jalapeños in the filling. You can also drizzle hot sauce on top before serving. Another option is to add cayenne pepper to the enchilada sauce. Adjust the spice level to fit your taste!
In this blog post, we explored a tasty sweet potato and black bean enchilada recipe. You learned about the key ingredients and their amounts. I provided step-by-step instructions for filling and baking. You also discovered tips for making custom variations and pairing ideas. Finally, I shared storage know-how and answered common questions.
Creating these enchiladas brings joy and flavor to your table. I hope you enjoy making them as much as I do!


![- 1 package (15.35 oz) Oreo cookies - 8 oz cream cheese, softened to room temperature - 1 cup semisweet chocolate chips - 1 tablespoon coconut oil (optional, for smoother melting) - Sprinkles or crushed Oreos for decoration I love using classic Oreo cookies for this recipe. They add rich flavor and crunch. The cream cheese makes the truffles creamy and smooth. When mixed with crushed Oreos, it creates a perfect dough. Next, I melt semisweet chocolate chips for coating. This chocolate is rich and adds sweetness. If you want a smoother coat, add coconut oil. It helps the chocolate melt better. Finally, I enjoy decorating the truffles. You can use colorful sprinkles or crushed Oreos. This adds a fun look and extra flavor. You can find the complete recipe [Full Recipe]. - Using flavored cream cheese (e.g., vanilla or chocolate) - Alternative chocolate types (dark chocolate, white chocolate) - Various toppings (nuts, colorful candy sprinkles) Feel free to get creative with your ingredients. Flavored cream cheese can add a twist. Imagine using chocolate cream cheese for an even richer taste. You can also play with chocolate types. Dark chocolate gives a bold flavor. White chocolate adds sweetness and a nice contrast. For toppings, you can use nuts or different sprinkles. This makes your truffles unique and fun! To start, you need to crush the Oreos. You can use a food processor for this task. Just place the cookies in and pulse until they are fine crumbs. If you want a more hands-on method, put the Oreos in a zip-lock bag. Then, use a rolling pin to crush them until they are finely broken. Either way works great! Next, mix the crushed Oreos with cream cheese. In a large bowl, add the Oreo crumbs to softened cream cheese. Use a spatula or your hands to mix it well. You want it to be uniform and dough-like. This will be the base of your truffles. Now, let’s shape the truffles. Take a tablespoon-sized portion of the Oreo mixture. Roll it into a smooth ball with your hands. Place each ball on a baking sheet lined with parchment paper. This makes it easy to lift them later. After shaping, it's time to chill them. Put the baking sheet with the truffles in the refrigerator for about 30 minutes. This step helps the truffles firm up, making them easier to dip in chocolate later. Next, let's melt the chocolate. In a microwave-safe bowl, combine semisweet chocolate chips with coconut oil if you want a smoother mix. Heat the mixture in the microwave in 30-second intervals. Stir between each interval until the chocolate is fully melted and smooth. After the chocolate is ready, it's time to dip the truffles. Take each chilled truffle and use a fork to dip it into the melted chocolate. Make sure it is fully coated. Then, gently tap the fork against the bowl to remove any extra chocolate. While the chocolate coating is still wet, you can decorate the truffles. Add some crushed Oreos or colorful sprinkles on top. This makes your truffles look festive and fun. Get creative! You can also use different toppings for special occasions. For more detailed steps, check out the Full Recipe. To make your chocolate smooth, add a tablespoon of coconut oil when melting. This small addition keeps the chocolate creamy and easy to dip. Mixing the crushed Oreos with cream cheese is key. Make sure to blend them well, so you get a nice, even dough. You want every bite to be rich and flavorful. Yes, you can prepare these truffles in advance. This makes them a great treat for parties. Once you form the truffles, chill them for about 30 minutes. After that, store them in the fridge or freezer. If you freeze them, let them sit out for a few minutes before serving. This helps bring back that perfect texture. When serving your truffles, presentation counts. Arrange them on a stylish platter or in a decorative box. You can also use colorful cupcake liners for a fun touch. Pair these treats with beverages like coffee or a glass of cold milk. The flavors blend nicely and make each bite even more enjoyable. For more ideas, check out the Full Recipe. {{image_4}} You can easily change the flavor of your truffles. Adding flavor extracts gives a nice twist. A drop of mint, vanilla, or almond extract can boost the taste. You can also try different Oreo flavors. Peanut butter or red velvet Oreos add a fun spin. Each flavor brings a new experience to your truffles. If you need gluten-free treats, use gluten-free Oreos. They work just like regular Oreos. For vegan options, switch to dairy-free cream cheese and chocolate. This way, everyone can enjoy these tasty treats without worry. Decorating can make your truffles stand out. Use white chocolate or colored melts for a fun look. You can also create themed truffles for holidays. Think about red and green for Christmas or pastel colors for Easter. The right decorations can make your truffles fit any occasion. To keep your chocolate covered Oreo truffles fresh, store them in the fridge. Place them in an airtight container. This helps to prevent them from drying out. If you plan to eat them soon, this method is best. For longer storage, you can freeze the truffles. First, place them in a single layer on a baking sheet. Freeze them for about one hour until they are firm. Then, transfer them to a freezer-safe bag or container. This will help them last longer without losing flavor. In the fridge, these truffles can last about one week. They taste best within the first few days. In the freezer, they can last up to three months. The flavor and texture stay good if stored properly. Always label your containers with the date to track how long they have been stored. To keep your truffles fresh, use airtight containers. This stops moisture from getting in. Moisture can make the chocolate lose its nice shine and texture. If you freeze your truffles, let them thaw in the fridge. This helps them regain their creamy texture. Avoid thawing them at room temperature, which can make them too soft. Once they are thawed, enjoy them cold or let them sit out for a few minutes for a softer bite. For the full recipe, check the previous section. Yes, you can use low-fat cream cheese. However, it may change the flavor and texture. Low-fat cream cheese can make truffles less rich and creamy. The truffles might be a bit drier too. For the best taste, I recommend using regular cream cheese. These truffles take about 30 minutes to set in the fridge. This chilling time helps the truffles hold their shape. After you dip them in chocolate, place them back on the baking sheet. Leave them in the fridge until the chocolate hardens. You can use store-bought truffles, but homemade ones are better. Homemade truffles taste fresher and let you pick flavors. You can customize them to your liking. Plus, making them yourself is a fun activity! You can use many cookies for truffles. Some great options include: - Chocolate chip cookies - Peanut butter cookies - Vanilla wafers - Graham crackers Feel free to mix and match flavors! This allows for fun and unique treats. For the full recipe, check out the details above. You can make delicious chocolate-covered Oreo truffles at home. This blog showed you the key ingredients and easy steps needed to prepare, shape, dip, and decorate them. Remember, the fun lies in customizing flavors and toppings to your taste. Use the tips provided for great texture and storage. These bites are perfect for parties or a sweet treat at home. Enjoy making these truffles, and delight in sharing them with friends and family!](https://dishtreats.com/wp-content/uploads/2025/07/b12a751c-54f3-4358-8f8e-2195b80955c3-768x768.webp)
![- 1 cup rolled oats - 2 cups almond milk (or your preferred milk) - 1 medium sweet apple, diced (suggestions: Fuji or Gala) - 1 teaspoon ground cinnamon - 2 tablespoons maple syrup (or honey if you prefer) - 1/2 teaspoon vanilla extract - 1/4 cup plain Greek yogurt (optional) - Pinch of salt - Chopped nuts for topping - Extra apple slices and cinnamon for garnish Apple cinnamon overnight oats are easy to make and full of flavor. The oats soak overnight, making them creamy and delicious. You can customize this recipe based on your taste. For the base, I use rolled oats and almond milk, but feel free to pick any milk you like. The diced apple brings sweetness and crunch. I suggest using Fuji or Gala apples since they are sweet and juicy. Ground cinnamon adds warmth and a cozy touch. Maple syrup gives the oats a natural sweetness. If you want a little creaminess, add Greek yogurt. Don’t forget the pinch of salt; it enhances all the flavors. Chopped nuts add a nice crunch on top. You can use walnuts, pecans, or any nuts you enjoy. Finally, garnish with extra apple slices and a dusting of cinnamon for a pretty finish. - Different types of milk (coconut, oat, etc.) - Sweeteners (agave syrup, stevia, etc.) - Additional fruit (berries, bananas, etc.) If you want to try something different, there are many options. Swap almond milk for coconut or oat milk if you prefer. You can change sweeteners too; agave syrup or stevia work well. Add in more fruits like berries or sliced bananas for extra flavor. This makes each serving unique and fun. The best part? You can make it just how you like it! For the full recipe, check out Apple Cinnamon Overnight Oats Delight. - Step 1: Combine rolled oats with milk and yogurt. In a large bowl, mix 1 cup of rolled oats with 2 cups of almond milk. If you like, add 1/4 cup of Greek yogurt for creaminess. Stir until mixed well. - Step 2: Add apples, cinnamon, sweetener, vanilla, and salt. Fold in 1 diced apple, 1 teaspoon of ground cinnamon, and 2 tablespoons of maple syrup. Add 1/2 teaspoon of vanilla extract and a pinch of salt. Mix until everything is evenly distributed. - Step 3: Transfer mixture into jars and refrigerate. Spoon the oat mix into jars. Make sure each jar has some apple pieces. Close the lids and place them in the fridge overnight. - Evenly distribute diced apples among jars. This ensures each jar has the same amount of apple flavor. - Layer ingredients for visual appeal. Create a pretty look by layering oats and apples. This makes your breakfast even more inviting. - Stir before serving and adjust consistency. When you take the jars out, give them a good stir. If they feel too thick, add a splash of milk. - Top with nuts and additional apple slices. Finish with a sprinkle of chopped nuts and a few apple slices for crunch. A dash of cinnamon adds warmth and flavor. For full details, check the [Full Recipe]. To get the best texture, always use rolled oats. They soak up the liquid well. Steel-cut oats take longer to soften. You might want to avoid them for overnight oats. Adjust the sweetness by adding more or less maple syrup. Taste as you mix to find your perfect balance. Make a big batch of oats for quick breakfasts. You can prepare up to five jars at once. Store them in the refrigerator for up to five days. This way, you’ll have a quick meal ready on busy mornings. Feel free to experiment with spices like nutmeg or cardamom. Just a pinch can add a warm kick. You can also add seeds like chia or flaxseed. These add fiber and make your oats even better for you. {{image_4}} You can easily make apple cinnamon overnight oats vegan. Just swap the Greek yogurt for a plant-based yogurt. Use almond, coconut, or oat milk for a creamy base. These changes keep the flavor rich and tasty while being dairy-free. If you need gluten-free options, choose certified gluten-free oats. Many brands offer oats that are safe for those with gluten sensitivities. This way, you can enjoy your oats without worry. You can mix in other fruits to change the taste. Try berries like strawberries or blueberries for a fresh twist. Bananas also work well, adding sweetness and creaminess. For toppings, nuts and seeds add crunch. Chopped almonds, walnuts, or sunflower seeds all taste great. You can also sprinkle chia seeds for extra fiber and health benefits. In fall, add pumpkin spice to your oats for a cozy taste. Just mix in a teaspoon or two for that warm, spiced flavor. It pairs perfectly with apples. In summer, think about fresh fruits like peaches or mangoes. These fruits add a bright, juicy flavor. You can mix them in or use them as a topping for a colorful and tasty breakfast. For the complete recipe, check out the [Full Recipe]. To keep your apple cinnamon overnight oats fresh, use jars or airtight containers. Glass jars work great. They seal well and let you see the yummy layers. Make sure to refrigerate them right after you prepare them. This keeps the oats safe to eat. You can freeze individual servings of overnight oats. First, pour the oats into freezer-safe containers or jars. Leave some space at the top, as they will expand. To enjoy later, thaw them in the fridge overnight. Once thawed, stir well. You might want to add a splash of milk to make them creamy again. Apple cinnamon overnight oats can stay fresh in the fridge for up to five days. Check for any signs of spoilage before eating. If the oats smell sour or have a strange color, throw them away. Always trust your nose and eyes! For the best taste, enjoy them within the first few days. Apple cinnamon overnight oats are a tasty breakfast. They combine oats, milk, apples, and cinnamon. The mixture sits in the fridge overnight. This soaking makes the oats soft and creamy. You get a nice blend of flavors. It’s a quick way to enjoy a healthy meal. Yes, you can use quick oats. However, they have a different texture. Quick oats cook faster and become mushy. If you use them, soak for less time. Rolled oats keep a firmer bite and work better for overnight oats. Overnight oats last about 5 days in the fridge. Store them in airtight jars or containers. Check for bad smells or changes in texture. If they look or smell off, toss them out. Yes, kids love apple cinnamon overnight oats! They are sweet and fun to eat. Serve in small jars for a cute look. You can also add toppings like nuts or more fruit for variety. This makes it a family-friendly dish everyone can enjoy. Apple cinnamon overnight oats offer a delightful and easy breakfast option. You can prepare them quickly with just a few simple steps. This meal not only fills you up but also lets you customize flavors to your taste. Experiment with different fruits, sweeteners, and spices to keep it fun. Remember to store your oats correctly for freshness. Enjoy this nutritious dish throughout the week! Your mornings can be bright and delicious with this recipe.](https://dishtreats.com/wp-content/uploads/2025/06/6eb7544b-1d16-4ecc-8a32-decb7f29ee21-768x768.webp)
