
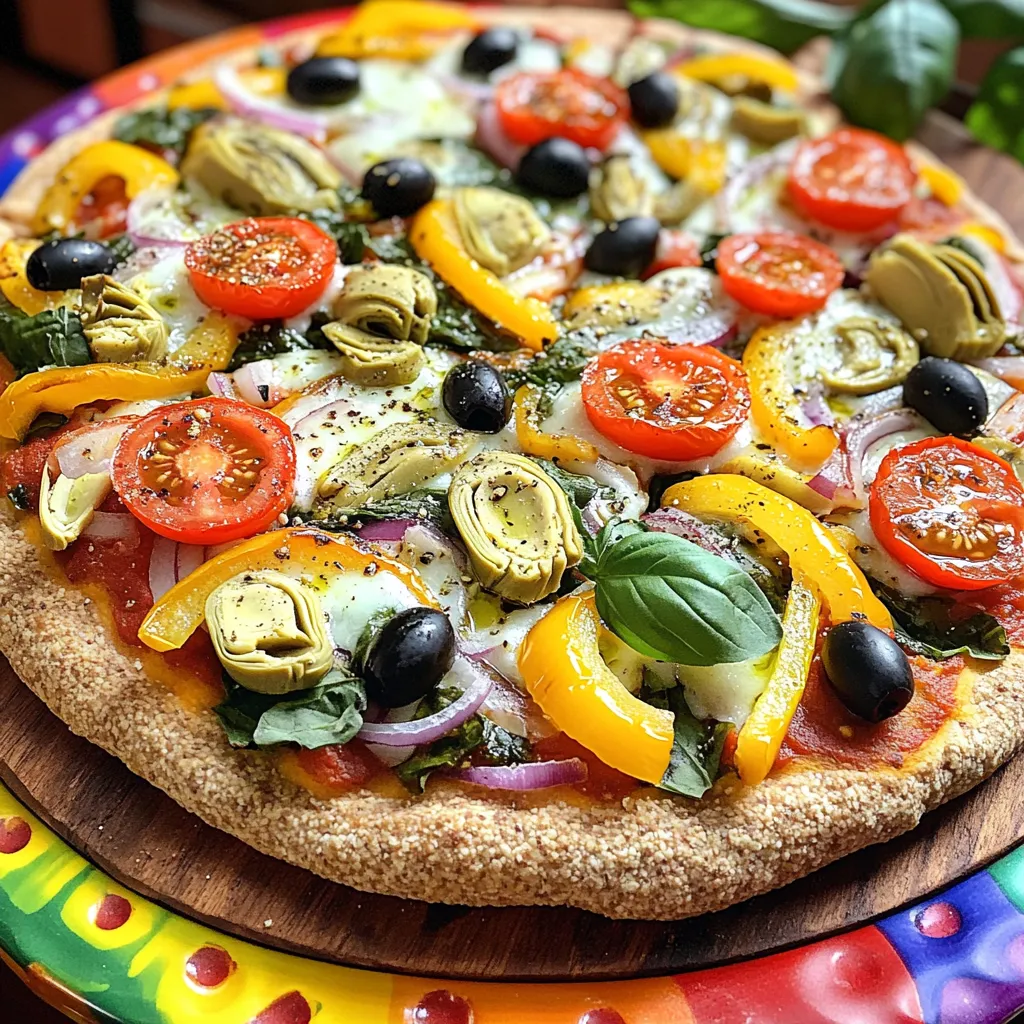
Looking for a fun and healthy meal option? This Rainbow Veggie Pizza is not just a feast for the eyes; it’s packed with nutrients! I’m excited to share a simple guide that will help you create a colorful and tasty pizza everyone will love. From the fresh ingredients to easy instructions, this recipe is perfect for any cook. Let’s dive into the delicious world of veggie pizza together!
Ingredients
Complete List of Ingredients
– 1 pre-made whole wheat pizza crust
– 1/2 cup rich pizza sauce
– 1 cup shredded mozzarella cheese
– 1/2 cup assorted bell peppers (red, yellow, and green), thinly sliced
– 1/2 cup cherry tomatoes, halved
– 1/2 cup red onion, thinly sliced
– 1/2 cup fresh spinach leaves
– 1/4 cup black olives, sliced
– 1/4 cup artichoke hearts, coarsely chopped
– 1 tablespoon extra virgin olive oil
– 1 teaspoon dried oregano
– Salt and freshly cracked pepper to taste
Nutritional Benefits of Each Ingredient
Each ingredient adds flavor and nutrition to your pizza. Whole wheat crust gives fiber for good digestion. Pizza sauce offers vitamins from tomatoes and antioxidants. Mozzarella cheese provides protein and calcium for strong bones. Bell peppers are high in vitamins A and C, boosting your immune system. Cherry tomatoes bring lycopene, which may help heart health. Red onions add quercetin, known for its anti-inflammatory properties. Spinach is rich in iron, supporting healthy blood. Black olives offer healthy fats, while artichoke hearts are high in fiber and antioxidants. Olive oil contains healthy fats and may support heart health. Oregano has antioxidants that can help fight bacteria. Salt and pepper enhance flavor but should be used in moderation.
Suggested Substitutions for Dietary Preferences
You can easily swap ingredients to fit your needs. For a gluten-free option, use a gluten-free crust. If you want a vegan pizza, replace mozzarella with vegan cheese. You can also try different veggies, like zucchini or mushrooms, for a new taste. If you dislike olives, leave them out and add more spinach or artichokes. Want less fat? Use less cheese or skip the olive oil. These simple swaps can create a pizza that suits your taste and dietary needs while still being delicious.
Step-by-Step Instructions
Prepping the Oven and Crust
First, set your oven to 475°F (245°C). This heat makes the crust crispy. While it warms up, grab your pre-made whole wheat pizza crust. Lay it flat on a baking sheet or pizza stone. This helps the crust cook evenly.
Assembling the Pizza
Now it’s time to build your pizza. Start by spreading 1/2 cup of rich pizza sauce on the crust. Use a spatula or a spoon for this. Leave a small edge for the crust. Next, sprinkle 1 cup of shredded mozzarella cheese evenly over the sauce.
For a colorful look, arrange 1/2 cup of sliced bell peppers, 1/2 cup of halved cherry tomatoes, and 1/2 cup of thinly sliced red onion in circles on top of the cheese. Then, add 1/2 cup of fresh spinach leaves on top. Finish with 1/4 cup of sliced black olives and 1/4 cup of coarsely chopped artichoke hearts.
Drizzle 1 tablespoon of extra virgin olive oil over everything. Sprinkle 1 teaspoon of dried oregano, and season with salt and pepper according to your taste.
Baking the Pizza
Carefully place the pizza in your preheated oven. Bake it for 12-15 minutes. Look for bubbly cheese and a golden-brown crust. Once it’s ready, take it out and let it cool for a few minutes. After that, slice it into wedges and enjoy!
Tips & Tricks
How to Achieve a Crispy Crust
To get a crispy crust, start with a hot oven. Preheat your oven to 475°F (245°C). This heat will help the crust become nice and crunchy. If you use a pizza stone, heat it as well. Place the crust flat on the stone or a baking sheet. This way, the bottom cooks evenly. Avoid thick crusts; they tend to get soggy. A thinner whole wheat crust is perfect for this recipe.
Expert Seasoning Suggestions
Seasoning makes your pizza extra tasty. Use a drizzle of extra virgin olive oil on top before baking. This adds flavor and helps the veggies cook well. Sprinkle on some dried oregano for that classic Italian taste. Fresh herbs like basil can also add a fresh kick. For a bit of heat, add some crushed red pepper flakes. Remember, salt and pepper are key. Just a pinch of each enhances all the flavors.
Presentation Tips for Serving
A beautiful pizza looks great on the table. After baking, slice it into colorful wedges. Use a bright platter to showcase the rainbow of veggies. For an extra touch, add fresh basil leaves on top. A sprinkle of chili flakes can add color and flair. This makes your pizza not just tasty but also pretty. Your family and friends will love the look and taste of your rainbow veggie pizza!
Variations
Alternative Veggie Combinations
You can mix up the veggies for your Rainbow Veggie Pizza. Try using zucchini, mushrooms, or carrots for a new twist. Cauliflower or broccoli work well too. These options add different flavors and textures. Experiment with seasonal vegetables to enjoy fresh, local produce. A colorful mix makes your pizza even more appealing.
Vegan and Gluten-Free Options
If you want a vegan version, skip the mozzarella cheese. Use a vegan cheese alternative or nutritional yeast for a cheesy taste. For gluten-free choices, select a gluten-free pizza crust. Many stores sell these now. You can also make one from cauliflower or chickpea flour.
Creative Topping Ideas
Get creative with your toppings! Add fresh herbs like basil, cilantro, or parsley for added flavor. You can also sprinkle seeds, like sunflower or pumpkin, for a crunch. For a kick, try jalapeños or red pepper flakes. A drizzle of balsamic glaze before serving adds a sweet touch.
Storage Info
How to Store Leftover Pizza
To store leftover Rainbow Veggie Pizza, first let it cool. Wrap each slice tightly in plastic wrap. You can also use aluminum foil. Place the wrapped slices in an airtight container. This helps keep the pizza fresh. Store it in the fridge for up to three days.
Reheating Tips for Optimal Flavor
When you’re ready to eat the pizza, reheating it is key. Preheat your oven to 375°F (190°C). Place the slices on a baking sheet. Heat for about 10 minutes. This helps the crust stay crisp. You can also use a skillet. Heat it over medium heat and cover it with a lid. This keeps the cheese gooey and delicious.
Freezing Rainbow Veggie Pizza
If you want to save pizza for later, freezing is a great option. Wrap each slice in plastic wrap tightly, then place in a freezer bag. Squeeze out as much air as you can. This prevents freezer burn. You can freeze it for up to two months. To reheat, let it thaw in the fridge overnight. Then, use the oven method to bring back that fresh taste.
FAQs
What is the best pizza crust to use?
The best pizza crust is a pre-made whole wheat crust. It gives a nice, nutty flavor. Whole wheat crusts are also healthier than white flour crusts. You can also try a thin crust if you want something crispier. For a classic taste, traditional pizza dough works well too. Always choose a crust that you enjoy the most.
Can I use frozen vegetables for this recipe?
Yes, you can use frozen vegetables for this pizza. They save time and add great flavor. Just make sure to thaw and drain them first. This step keeps the pizza from getting soggy. Frozen bell peppers and spinach work well. They are easy to use and still healthy.
How do I make the pizza gluten-free?
To make the pizza gluten-free, use a gluten-free pizza crust. There are many good options available in stores. You can also make your own crust using gluten-free flour. Just follow your favorite gluten-free recipe. This way, everyone can enjoy the pizza without worry. For a fun twist, try using a cauliflower crust for a veggie-packed base.
We covered how to make a tasty Rainbow Veggie Pizza. You learned about the ingredients, their benefits, and substitutions. The step-by-step guide helped you prepare, assemble, and bake your pizza. I shared tips for a crispy crust, seasoning, and serving. You also explored variations and storage tips, plus answered common questions.
Now, you can enjoy a delicious pizza that fits your needs and taste! Get cooking!


