Peach Cream Pie Delight Easy and Tasty Recipe

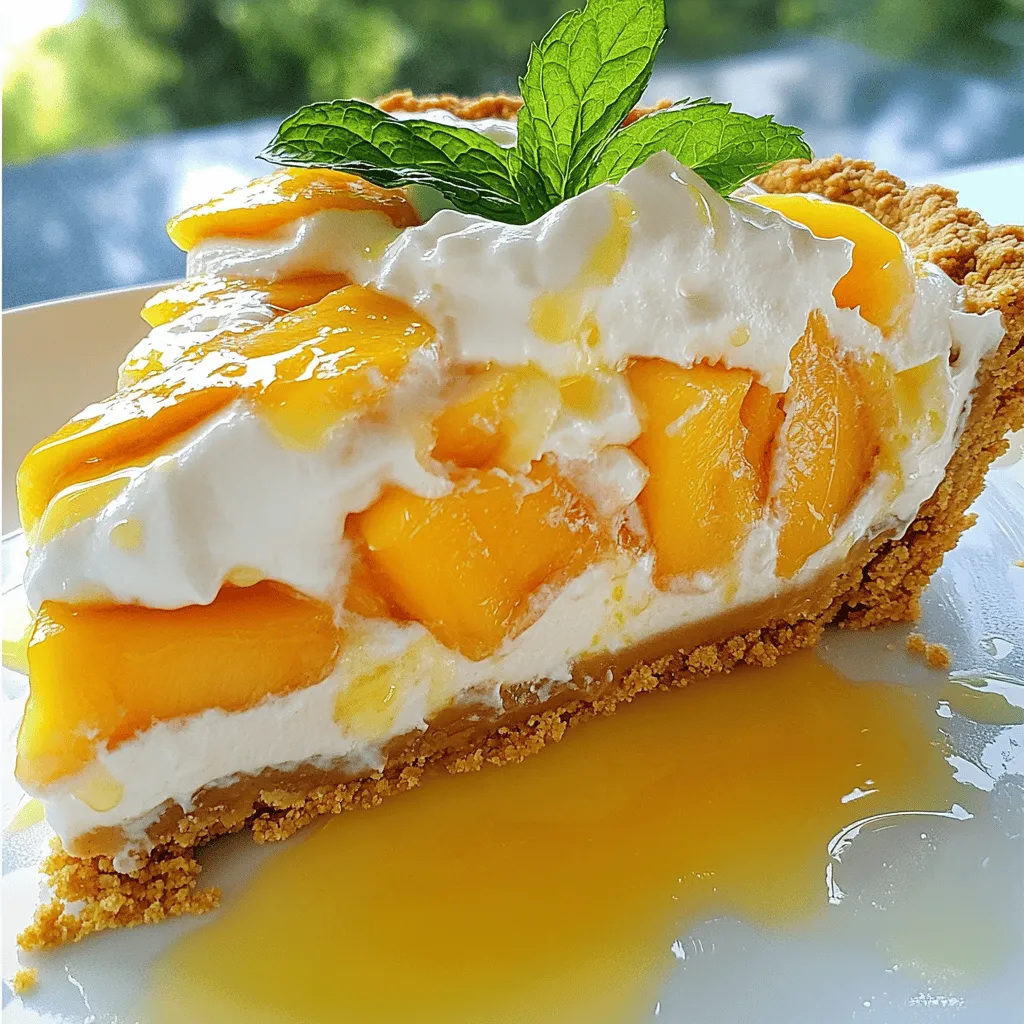
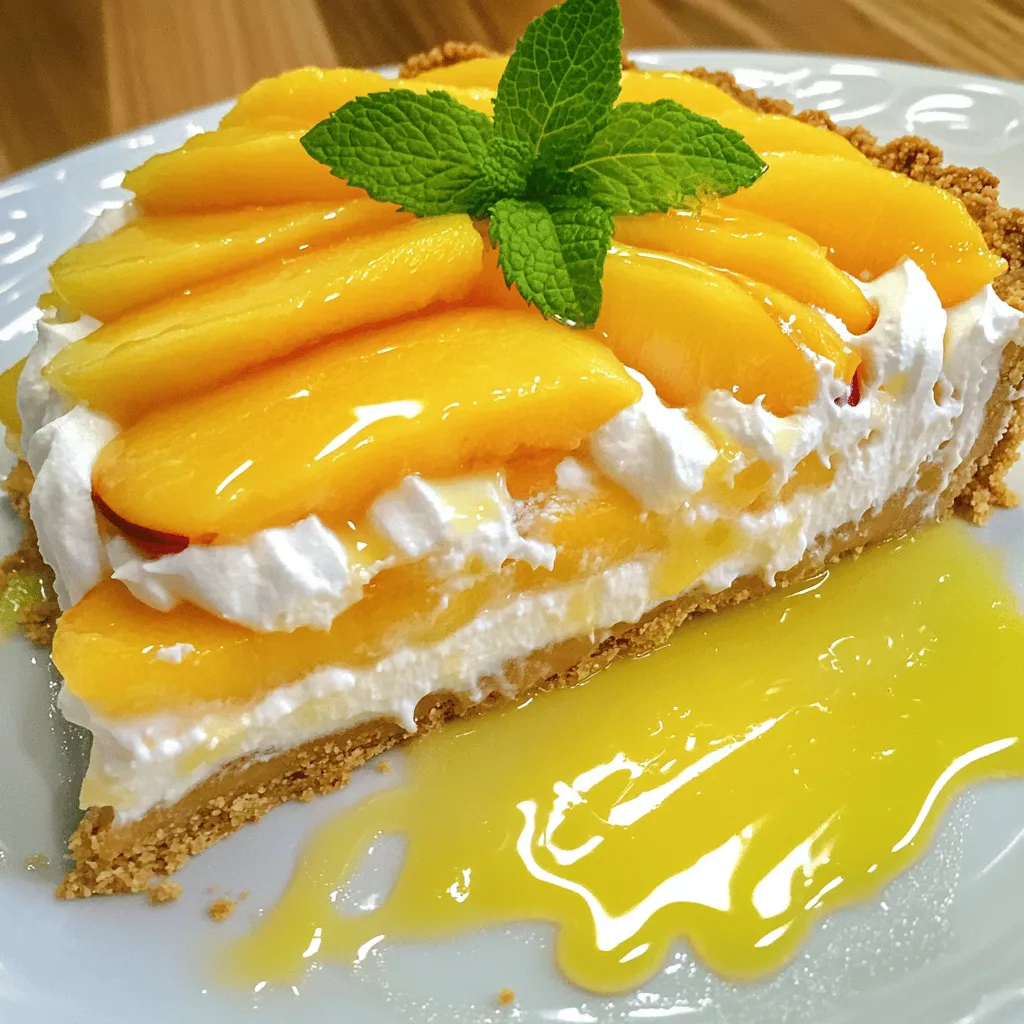
Craving a sweet treat that’s both easy and delightful? Look no further than my Peach Cream Pie! With fresh peaches, creamy layers, and a buttery crust, this recipe is sure to satisfy your taste buds. In this article, I’ll guide you through the simple steps to create your own dessert masterpiece. Get ready to impress friends and family with this delicious treat that’s perfect for any occasion!
Ingredients
Main Ingredients
- 2 cups fresh peaches, peeled and elegantly sliced
- 1 cup heavy cream, chilled
- 1 cup cream cheese, softened to room temperature
- 1/2 cup powdered sugar, sifted
- 1 teaspoon pure vanilla extract
- 1 pre-made graham cracker pie crust
- 1 tablespoon freshly squeezed lemon juice
- 1 tablespoon cornstarch
You need fresh peaches for this pie. They bring sweetness and flavor. Choose ripe peaches with nice color. The heavy cream gives a rich texture. It whips up to a light and fluffy state. Cream cheese makes the pie creamy and smooth. Powdered sugar adds sweetness without grittiness. Vanilla extract gives a lovely aroma and taste.
The graham cracker pie crust serves as a perfect base. It adds crunch and flavor. Lemon juice brightens the peaches. Cornstarch thickens the peach filling. This step keeps the pie from being too runny.
Optional Garnishes
- Fresh mint leaves
- Whipped cream
Garnishes make the pie look fancy and fun. Fresh mint leaves add color and a fresh taste. Whipped cream gives extra sweetness and creaminess. You can add these right before serving. They make your Peachy Paradise Cream Pie even more delightful.
Step-by-Step Instructions
Preparing the Peach Mixture
First, slice your fresh peaches and place them in a medium bowl. Toss the peaches with one tablespoon of lemon juice and one tablespoon of cornstarch. This combination helps thicken the juices and adds a bright flavor. Let the peach mixture sit for a few minutes. This allows the flavors to mix perfectly.
Whipping the Cream
Next, grab a large mixing bowl. Pour in one cup of chilled heavy cream. Use a whisk or an electric mixer to whip the cream. Whip until you see soft peaks forming. This should take about three minutes. Then, slowly add half a cup of sifted powdered sugar and one teaspoon of vanilla extract. Keep whipping until you reach medium peaks. The cream should be fluffy and light.
Blending the Cream Cheese
In another bowl, beat one cup of softened cream cheese. Mix until it’s smooth and creamy, with no lumps. Now, gently fold in the whipped cream. Use a rubber spatula for this step. Be careful not to deflate the cream. You want to keep the mixture light and airy.
Assembling the Pie
Take your pre-made graham cracker pie crust. Spoon the peach mixture into the crust, spreading it evenly. This creates a nice base for the pie. Next, pour the cream cheese mixture over the peaches. Use a spatula to smooth the top. Make sure it looks neat and inviting.
Chilling the Pie
Cover the pie with plastic wrap. Place it in the refrigerator for at least four hours. This chilling time is key for the pie to set properly.
Presentation Techniques
When you are ready to serve, slice the pie carefully. Use chilled dessert plates for a lovely presentation. Drizzle some peach juice from the filling around each slice for color. Top each piece with a dollop of whipped cream. You can also add fresh mint leaves for a pop of color. Enjoy your Peach Cream Pie Delight!
Tips & Tricks
Selecting the Best Peaches
To find ripe peaches, look for these signs:
- The skin should be slightly soft.
- The color should be vibrant, with a hint of blush.
- A sweet scent indicates good flavor.
If fresh peaches are not available, you can use canned or frozen peaches. Drain canned peaches well to avoid excess liquid. For frozen peaches, thaw and pat them dry before using. This keeps your pie from becoming soggy.
Making Ahead
You can prepare the pie in advance. Make it a day before serving. This allows flavors to meld beautifully. Just store it in the fridge, covered with plastic wrap.
For storing leftovers, keep the pie in the fridge. Use an airtight container to maintain freshness. The pie should stay good for about three days.
Enhancing Flavor
To add extra flavor, consider these options:
- Mix in a pinch of cinnamon for warmth.
- Add a splash of almond extract for a nutty twist.
Pairing ideas include serving the pie with vanilla ice cream or whipped cream. Fresh berries on the side also add a lovely touch. Enjoy experimenting with these ideas for your Peach Cream Pie Delight!

Variations
Flavor Combinations
You can make your Peach Cream Pie even better! Try adding fresh berries, like blueberries or raspberries. They add a nice tartness and bright color. You can also mix in other fruits, like strawberries or mango. This gives a fun twist to the classic peach flavor.
Want to spice things up? Consider adding a pinch of cinnamon or nutmeg. These spices bring warmth and depth to your pie. Just a little can elevate the taste. Experimenting with flavors keeps your pie exciting and fresh every time you make it!
Crust Alternatives
The crust makes a big difference in your pie. The traditional graham cracker crust is sweet and easy to work with. However, if you want a different texture, use a traditional pie crust. A flaky crust adds a nice crunch and goes well with the creamy filling.
If you need a gluten-free option, try a crushed almond or coconut crust. These alternatives give a unique flavor and are often healthier. You can also use gluten-free graham crackers if you prefer that style. Choose what suits your diet and taste best!
Cream Cheese Substitutes
Cream cheese gives your pie a rich and creamy texture. But if you’re looking for alternatives, you have options! Non-dairy cream cheese works well for a vegan version. It has a similar taste and texture, making it a great swap.
Another idea is to use Greek yogurt. It adds a lighter feel to your pie and is full of protein. Just remember to use plain Greek yogurt to keep the taste balanced. These substitutes allow everyone to enjoy the pie, no matter their dietary needs!
Storage Info
Refrigerating the Pie
To keep your Peachy Paradise Cream Pie fresh, always store it in the fridge. Wrap the pie tightly in plastic wrap. This helps keep air out and prevents drying. The pie stays tasty for about 3 to 4 days in the refrigerator. If you want to enjoy it later, freezing is a great option.
Freezing the Pie
If you have leftovers, you can freeze them. First, slice the pie into pieces. Wrap each slice in plastic wrap, then place them in a freezer-safe bag. This keeps the pie fresh and prevents freezer burn. To thaw, move the slices to the fridge for a few hours. This method keeps the texture nice and creamy.
Signs of Spoilage
Check your pie for signs of spoilage. If you see mold or it smells off, do not eat it. The cream may separate or the peaches can become mushy. Always trust your senses. When in doubt, throw it out. Safe consumption is key to enjoying this delicious treat!
FAQs
How long does it take for the peach cream pie to set?
The peach cream pie needs to chill for at least 4 hours. This time helps the filling set well. I recommend chilling it overnight for the best results. A longer chilling time allows the flavors to blend perfectly.
Can I use frozen peaches for this recipe?
Yes, you can use frozen peaches! Thaw them first and drain excess juice. This step helps keep the pie from getting too soggy. If using frozen peaches, adjust the cornstarch slightly for the extra moisture.
Is the Peachy Paradise Cream Pie suitable for vegan diets?
To make this pie vegan, you can use non-dairy cream cheese and whipped coconut cream. These swaps still give a creamy texture. Use maple syrup instead of powdered sugar for sweetness. These changes keep the delicious flavor while making it vegan-friendly.
What is the best way to serve peach cream pie?
Serve peach cream pie chilled on dessert plates. You can add a dollop of whipped cream on each slice. Drizzle some peach juice around the pie for a pretty touch. This adds extra flavor and makes the pie look fancy for gatherings.
In this blog post, we explored how to make a delicious Peachy Paradise Cream Pie. We covered the main ingredients and optional garnishes, and then walked through each step to create this dessert. You learned tips for selecting ripe peaches, storing leftovers, and making variations to suit your taste.
This pie is simple yet flavorful. Experimenting with different fruits or crusts allows for creative choices. Enjoy this sweet treat at your next gathering, and let the fresh flavors shine!


![- 1 lb Brussels sprouts, trimmed and halved - 3 tablespoons extra virgin olive oil - 2 tablespoons pure maple syrup - 1 tablespoon Dijon mustard - 1 teaspoon garlic powder - 1/4 cup chopped walnuts (optional for added crunch) - Fresh parsley, roughly chopped, for garnish (optional) - Salt - Freshly ground black pepper When making Maple Mustard Brussels Sprouts, the main ingredients are key to flavor. Brussels sprouts bring a nice crunch. Extra virgin olive oil adds richness, while pure maple syrup gives a sweet touch. Dijon mustard adds a tangy kick that ties it all together. You might want to add garlic powder for more flavor. If you like crunch, chopped walnuts work well. A sprinkle of fresh parsley adds color and freshness to the dish. For seasoning, salt and freshly ground black pepper enhance the taste. Be sure to adjust these to your liking. The balance of flavors makes this dish a standout! Check the [Full Recipe] for detailed steps to prepare these delightful sprouts. - Preheat your oven to 400°F (200°C). - Line a baking sheet with parchment paper. This makes cleanup easy. - In a bowl, combine olive oil, maple syrup, Dijon mustard, and garlic powder. - Season with salt and pepper. Whisk until smooth. - Add halved Brussels sprouts to the dressing. - Toss until evenly coated. Make sure every sprout gets some flavor. - Spread sprouts on the baking sheet in a single layer. - If you like, sprinkle with walnuts for crunch. - Roast for 25-30 minutes. Remember to stir halfway through for even cooking. - Check if the sprouts are fork-tender and caramelized. - Garnish with fresh parsley before serving. This adds color and freshness to your dish. For the complete recipe, check out the [Full Recipe]. To get that golden-brown color, you need to space the Brussels sprouts well on the baking sheet. If they are too close, they will steam instead of roast. Stir them halfway through cooking. This helps them cook evenly and get that nice caramelized look. You can add more flavor by mixing in balsamic vinegar for a tangy twist. This will balance the sweetness of the maple syrup. Also, try using herbs like thyme or rosemary. These herbs add a fresh taste that brightens the dish. Use a large mixing bowl when tossing your ingredients. This gives you enough space to coat the Brussels sprouts well. A high-quality baking sheet is key for even roasting. It helps them brown nicely without sticking. For the full recipe, check out the details above. {{image_4}} To make this dish vegan, swap out the Dijon mustard for a vegan option. There are many great choices available, like a chickpea or tahini-based mustard. These alternatives keep the flavor bold and rich, just like the traditional recipe. You won’t lose any taste while making it plant-based. If you need a nut-free dish, simply leave out the walnuts. The Brussels sprouts will still have a lovely texture and taste. The maple and mustard glaze adds all the flavor you want. You can enjoy this dish without any worries about allergies. For a heartier meal, consider adding protein. Roasted chickpeas or crispy tofu work great here. They pair perfectly with the sweet and tangy flavors of the Brussels sprouts. You can serve them together on the same plate for a filling and nutritious dish. This option makes it easy to create a balanced meal. For the full recipe, check out the details above! Store any leftover Maple Mustard Brussels Sprouts in an airtight container. They will stay fresh for up to 3 days. This keeps them safe and tasty for later meals. Just remember to let them cool down first before sealing them up. You can freeze roasted Brussels sprouts for up to 2 months. To do this, place them in a freezer-safe bag or container. Make sure to squeeze out as much air as possible. This helps prevent freezer burn and keeps their flavor intact. To enjoy your Brussels sprouts again, reheat them in the oven or on the stovetop. The oven gives them a nice crispy texture. If you choose the stovetop, keep the heat medium to avoid burning. Just warm them through until they are hot and ready to eat. For the full recipe, check out the [Full Recipe]. The ideal roasting time is 25-30 minutes. This time allows them to cook perfectly. You want them fork-tender and golden brown. Stir them halfway through to help them caramelize well. Yes, you can prep these sprouts a day ahead. Just mix the Brussels sprouts with the maple-mustard dressing and store them in the fridge. When you're ready to serve, simply roast them before your meal. This saves time and keeps flavors fresh. Pair them with proteins like chicken or fish. They also go great with grains like quinoa or rice. The sweet and tangy flavor of the sprouts complements many dishes well. Absolutely! Maple Mustard Brussels Sprouts store well in the fridge. You can enjoy them throughout the week. Just reheat them in the oven or on the stovetop for the best texture. For the full recipe, be sure to check the earlier sections. This blog post shared a simple and tasty recipe for Maple Mustard Brussels Sprouts. You learned about the main ingredients and optional add-ins. The step-by-step instructions ensure you roast them to perfection. I’ve also shared tips for flavor and storage, plus variations to suit your needs. These Brussels sprouts are easy to make and full of flavor. Try them with your favorite protein for a delicious meal! Enjoy experimenting with this recipe and make it your own.](https://dishtreats.com/wp-content/uploads/2025/06/4f608c6e-5907-49f6-a9cf-d865501fb0be-768x768.webp)

![To make the best pumpkin spice muffins, you need the following key ingredients: - 1 cup pumpkin puree - 1/2 cup brown sugar - 1/2 cup granulated sugar - 1/3 cup vegetable oil - 2 large eggs - 1 teaspoon vanilla extract - 1 1/2 cups all-purpose flour - 1 teaspoon baking soda - 1 teaspoon baking powder - 2 teaspoons pumpkin pie spice - 1/2 teaspoon salt These ingredients create a fluffy, moist muffin that bursts with autumn flavor. The pumpkin puree adds natural sweetness and moisture. Brown sugar gives a rich, caramel taste, while the spices bring warmth and comfort to each bite. You can make your muffins even better with these optional ingredients: - 1/2 cup chopped walnuts or pecans - 1/2 cup chocolate chips Adding nuts gives a nice crunch, while chocolate chips add sweetness. Feel free to mix and match based on your taste. You can even leave them out for a classic muffin. Accurate measurement is key to great baking. Here’s how to measure your ingredients correctly: - Flour: Use a spoon to fill your measuring cup, then level it off with a knife. - Brown Sugar: Pack it firmly into the cup for proper measurement. - Liquid Ingredients: Use a liquid measuring cup and check at eye level for accuracy. Following these tips ensures your muffins turn out perfectly every time. For the full recipe, check out the details above and get ready to bake your delicious pumpkin spice muffins! Start by preheating your oven to 350°F (175°C). This step is key for even baking. Next, prepare a standard muffin tin. You can use paper liners or spray each cup with non-stick spray. This will make it easy to remove the muffins later. In a large bowl, combine the pumpkin puree, brown sugar, granulated sugar, and vegetable oil. Add in the eggs and vanilla extract. Whisk these together until smooth. Make sure there are no lumps. This mix gives your muffins their rich flavor. In another bowl, sift together the all-purpose flour, baking soda, baking powder, pumpkin pie spice, and salt. Sifting helps to mix and aerate the flour. It makes for a lighter muffin. This mix is important for texture. If you want to add some extra texture, gently fold in chopped walnuts or pecans. You can also add chocolate chips for a sweet touch. Be careful not to overmix; just combine until they’re evenly spread in the batter. Now, spoon the muffin batter into the prepared tin. Fill each cup about 3/4 full. This allows room for the muffins to rise. Bake for 18-20 minutes. Check if they’re ready by inserting a toothpick in the center. If it comes out clean, they’re done! Let them cool in the tin for 5 minutes before moving them to a wire rack. This cooling step is essential for the best texture. For the complete recipe, check out the [Full Recipe]. To keep muffins light and fluffy, don’t overmix the batter. When you combine wet and dry ingredients, mix just until you see no dry flour. A few lumps are okay. Overmixing makes muffins tough. Also, ensure your baking powder and baking soda are fresh. Old leavening agents won't help the muffins rise. Store your pumpkin spice muffins in an airtight container. This keeps them soft and moist. You can keep them at room temperature for up to three days. For longer storage, place them in the fridge for a week. If you want to save them for later, freeze them. Wrap each muffin in plastic wrap before placing them in a freezer-safe bag. They can last for up to three months in the freezer. Presentation makes any dish more inviting. For a lovely touch, sprinkle powdered sugar on top of each muffin. Serve them on a pretty platter. You can also add a small bowl of softened butter for easy spreading. This makes your muffins look even more delicious and inviting. {{image_4}} You can make gluten-free pumpkin spice muffins easily. To do this, swap regular flour with gluten-free flour. Look for blends that work well in baking. These blends often include almond flour or coconut flour. Check the package to ensure it has a good flavor. The muffins will still taste great! The texture may vary slightly, but they will remain soft and delicious. If you want vegan muffins, you can make some simple changes. Replace eggs with flax eggs. To make a flax egg, mix 1 tablespoon of ground flaxseed with 2.5 tablespoons of water. Let it sit for about 5 minutes until it thickens. Use plant-based oil instead of vegetable oil. You can also use almond milk or another plant-based milk instead of regular milk. These muffins will be light and fluffy, just like the classic recipe. You can jazz up your pumpkin spice muffins with extra flavors. Try adding maple syrup for a sweet twist. Just reduce the sugar a little to balance it out. You can also add orange zest for a fresh, bright taste. A teaspoon of orange zest will give the muffins a nice citrus kick. Feel free to get creative! You can mix and match these flavors to find your favorite combination. These variations can make your pumpkin spice muffins even more special. Check out the full recipe to get started! To keep your pumpkin spice muffins fresh, store them in an airtight container. Place a paper towel in the container to absorb moisture. This helps prevent sogginess. Store them at room temperature for up to three days. If you want to keep them longer, consider freezing. Freezing is a great way to save your muffins. Start by letting them cool completely. Then, wrap each muffin in plastic wrap. Place the wrapped muffins in a freezer-safe bag. Label the bag with the date. You can freeze them for up to three months. To enjoy your muffins warm, reheat them in the oven. Preheat your oven to 350°F (175°C). Place the muffins on a baking sheet. Heat for 10 to 15 minutes. You can also use a microwave for quick reheating. Just warm them for 15 to 20 seconds. Enjoy your pumpkin spice muffins fresh! Yes, you can use canned pumpkin. It saves time and gives great flavor. Make sure to choose 100% pure pumpkin, not pumpkin pie filling. This keeps the taste just right. Canned pumpkin is often smoother, which helps in mixing. It also has a longer shelf life. So, if you have a can, use it! For eggs, you can use several substitutes. Common options include: - 1/4 cup unsweetened applesauce - 1/4 cup mashed banana - 1 tablespoon ground flaxseed mixed with 2.5 tablespoons water These options keep your muffins moist and fluffy. They also add a hint of flavor. Choose what fits your taste best! Check your muffins after 18 minutes. Insert a toothpick into the center. If it comes out clean or with a few crumbs, they are done. If the toothpick is wet, bake for 1-2 more minutes. Keep an eye on them to avoid overbaking. Perfect muffins should be soft and lightly golden. Absolutely! To make mini muffins, use a mini muffin tin. Fill each cup about halfway. Bake them for 10-12 minutes. Keep checking with a toothpick until they are done. Mini muffins are great for snacks and sharing. They are just as tasty and fun! For the full recipe, check out the details above. In this post, we explored how to make delicious pumpkin spice muffins. I covered the essential and optional ingredients, along with measuring them for great results. The step-by-step instructions guide you through prepping, mixing, and baking. I also shared tips for light muffins and ways to store them well. Finally, I offered tasty variations like gluten-free and vegan options. Now you’re ready to enjoy these warm, flavorful treats any time! Your perfect pumpkin spice muffin awaits.](https://dishtreats.com/wp-content/uploads/2025/06/e45c4b1d-a4d2-42b5-b442-a33a757785ba-768x768.webp)


