No Bake Lemon Cheesecake Delightfully Simple Treat
. Enjoy your delightful no bake lemon cheesecake! No Bake Lemon Cheesecake is simple and fun to make. We covered the ingredients, preparation, and storage tips. Remember to mix your filling gently for a light texture. Experiment with flavors or garnishes to make it your own. With this guide, you can impress your friends and family. Enjoy each slice and share this delightful dessert. It’s a tasty treat that everyone will love!](https://dishtreats.com/wp-content/uploads/2025/06/ce75718b-0697-4914-b5ee-7870880d7685.webp)
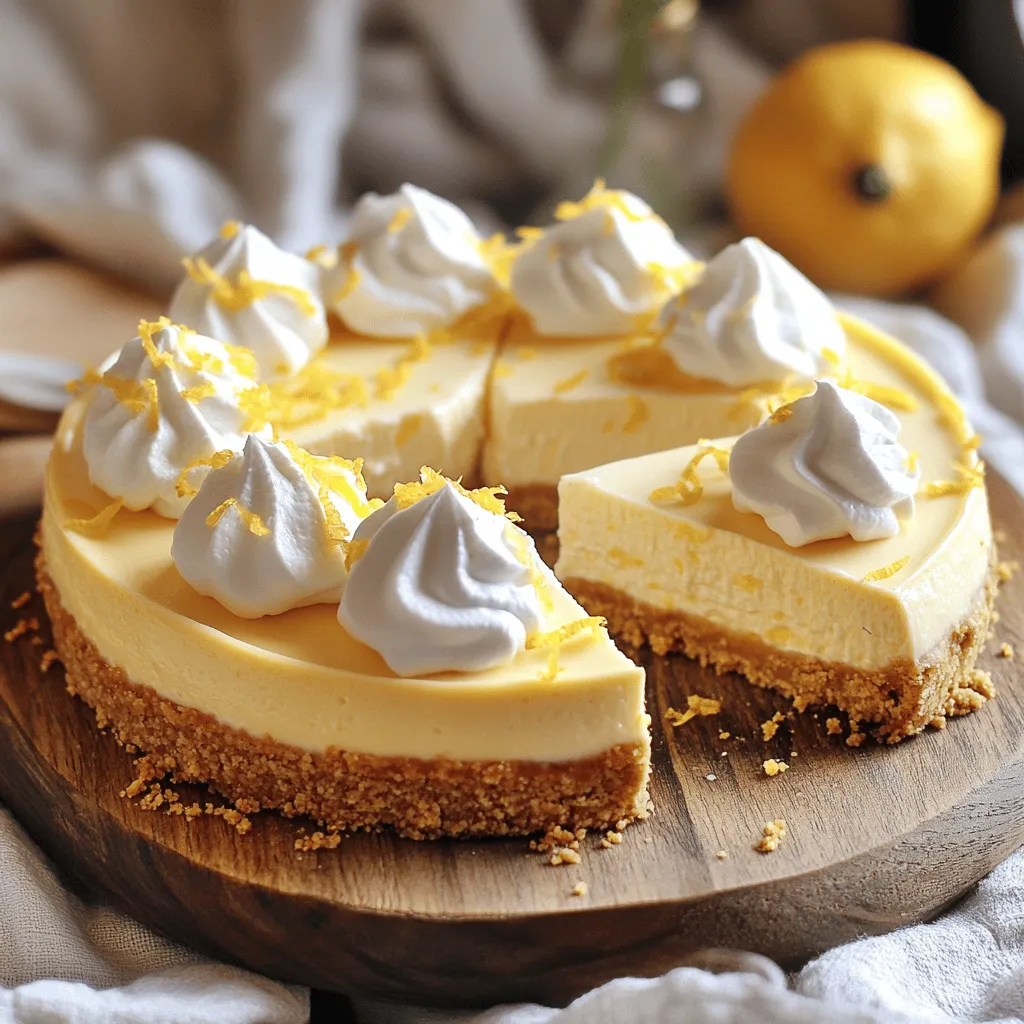
Are you ready to enjoy a burst of citrus goodness without turning on the oven? This No Bake Lemon Cheesecake is a simple, delightful treat that anyone can make. With just a handful of ingredients and easy steps, you’ll have a creamy, zesty dessert in no time. Perfect for warm days or any celebration, this cheesecake will impress your friends and family. Let’s dive into this easy recipe!
Ingredients
Core Ingredients
- 1 ½ cups graham cracker crumbs
- ½ cup unsalted butter, melted
- 2 cups cream cheese, softened to room temperature
- 1 cup powdered sugar, sifted
Flavoring Ingredients
- 1 cup heavy whipping cream, chilled
- 1/4 cup freshly squeezed lemon juice
- Zest of 2 medium lemons
- 1 teaspoon pure vanilla extract
- Pinch of fine sea salt
Step-by-Step Instructions
Preparing the Crust
First, mix the graham cracker crumbs and melted butter in a bowl. Make sure all the crumbs are coated. Next, press the crumb mixture into the bottom of a springform pan. Use your fingers or the back of a cup for even pressure. Place the pan in the fridge while you make the filling.
Making the Filling
In a large bowl, beat the cream cheese with an electric mixer until smooth. This takes about 2-3 minutes. Gradually add the sifted powdered sugar. Mix until there are no lumps. Now, add the lemon juice, zest, and vanilla. Mix on low speed until everything is well combined.
Combining the Mixtures
In a clean bowl, whip the chilled heavy cream until it forms stiff peaks. This part is key for a light texture. Carefully fold the whipped cream into the lemon mixture. Use a spatula to combine gently. You want to keep the airy texture. Pour this filling over your crust and smooth the top with a spatula.
Chilling the Cheesecake
Cover the cheesecake with plastic wrap or a lid. Refrigerate for at least 4 hours. For the best results, let it chill overnight. This helps the flavors meld together and sets the cheesecake perfectly.
When you follow these steps, you’ll create a delightful No Bake Lemon Cheesecake. Enjoy this treat with friends and family!
Tips & Tricks
Perfecting the Texture
To make a great no bake lemon cheesecake, start with room temperature cream cheese. It mixes smoothly, avoiding lumps. If your cream cheese is cold, it will be hard to blend. Set it out for about 30 minutes before you begin.
When mixing, it’s key to fold gently. Folding keeps the air in the whipped cream. This air makes your cheesecake light and fluffy. If you stir too hard, you lose that nice texture.
Serving Suggestions
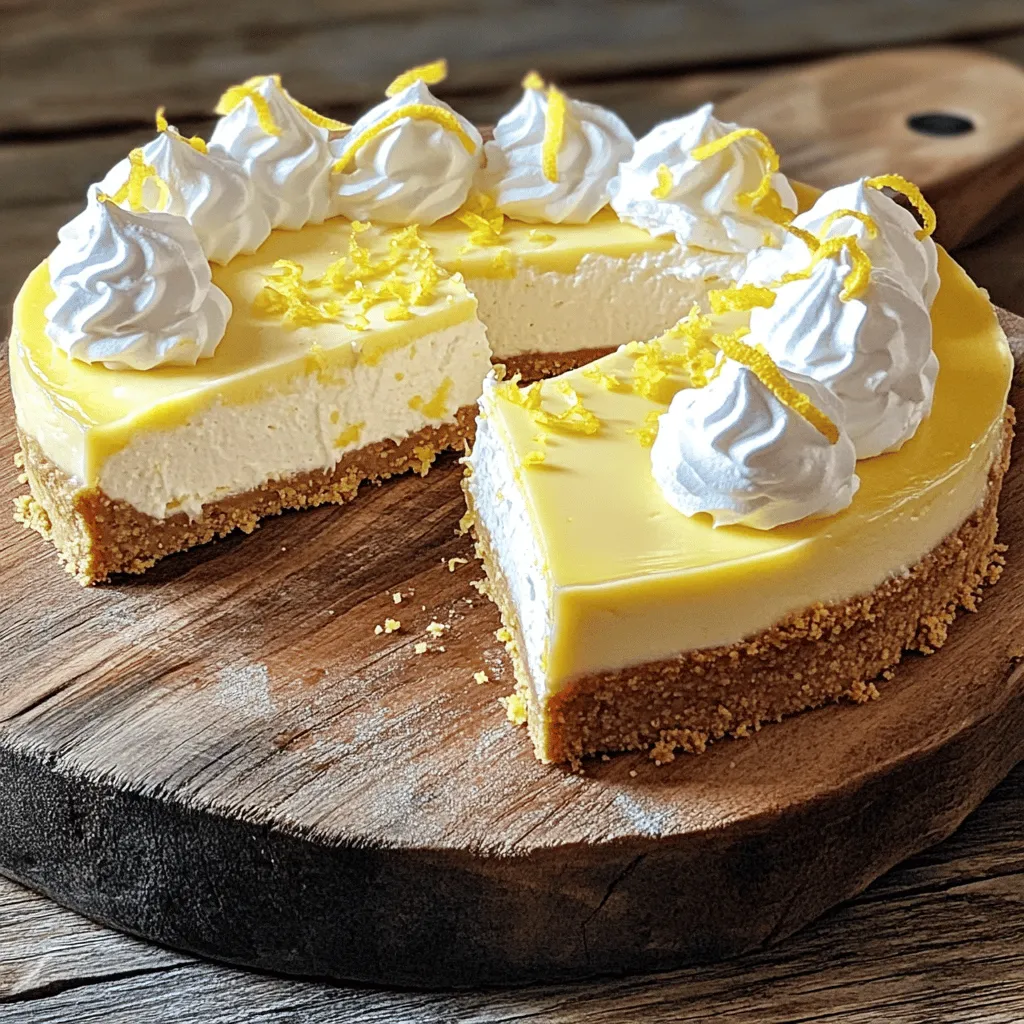
For a beautiful presentation, think about garnishing. Add a dollop of whipped cream on top of each slice. Sprinkle some lemon zest for a burst of color. Fresh lemon slices can also enhance the look and taste.
Pair your cheesecake with fresh berries. Strawberries, blueberries, or raspberries work well. They add a sweet and tart flavor that complements the lemon. You can also serve it with a cup of tea or coffee for a nice touch.
Variations
Flavor Variations
You can change the flavor of this cheesecake easily. Try adding lime or orange juice for a twist. These fruits will give a different taste while keeping it fresh.
Another fun idea is to mix in berries or chocolate swirls. Blueberries or raspberries can be folded into the filling. For chocolate lovers, add melted chocolate to the mix. This will create a rich and creamy cheesecake.
Alternative Crust Options
If you want a change from the classic crust, use Oreo or vanilla wafer cookies. Crush them and mix with butter just like the graham crackers. This gives a sweet and rich flavor.
For those needing gluten-free options, almond flour or nut-based crusts can work well. Combine almond flour with melted butter to form a tasty base. This way, everyone can enjoy your cheesecake!
Storage Info
Proper Storage Techniques
To keep your No Bake Lemon Cheesecake fresh, store it in the fridge. Use an airtight container or cover it tightly with plastic wrap. This method helps to keep the flavors intact and prevents any odors from other foods in your fridge from seeping in.
To avoid soggy crusts, make sure the crust is fully chilled before adding the filling. This step helps to create a barrier. You can also place a piece of parchment paper between the crust and the filling. This keeps the crust crisp while you enjoy your cheesecake.
Freezing Instructions
If you want to freeze your cheesecake, start by letting it set completely in the fridge. Once firm, cover it tightly with plastic wrap and then with aluminum foil. This double layer protects it from freezer burn.
When you’re ready to enjoy your cheesecake again, thaw it in the fridge overnight. Avoid thawing at room temperature, as this can lead to a watery texture. Serve it chilled for the best taste.

FAQs
How long does No Bake Lemon Cheesecake last in the fridge?
No Bake Lemon Cheesecake lasts about 5 days in the fridge. Store it in an airtight container. Look for signs of spoilage, like a change in smell or texture. If it feels slimy or has an off odor, it’s best to throw it away.
Can I make No Bake Lemon Cheesecake ahead of time?
Yes, you can make this cheesecake up to 2 days in advance. This gives the flavors time to meld. Just keep it covered in the fridge until you’re ready to serve. It will taste even better after a day or two.
What can I substitute if I don’t have lemon juice?
If you lack lemon juice, use lime juice or orange juice. Both add a nice tang but will change the flavor a bit. Lime juice will give a sharper taste, while orange juice will add sweetness. Adjust the zest accordingly for balance.
How do I achieve a firmer cheesecake?
For a firmer cheesecake, use more cream cheese and less whipped cream. You can also add a tablespoon of gelatin. Dissolve it in warm water and mix it in with the cream cheese. This will help set the cheesecake better.You only need a few ingredients to create a delicious treat. Here’s a quick look at what you will need and the steps to follow:
Ingredients:
- 1 ½ cups graham cracker crumbs
- ½ cup unsalted butter, melted
- 2 cups cream cheese, softened to room temperature
- 1 cup powdered sugar, sifted
- 1 cup heavy whipping cream, chilled
- 1/4 cup freshly squeezed lemon juice
- Zest of 2 medium lemons
- 1 teaspoon pure vanilla extract
- Pinch of fine sea salt
Steps:
1. Prepare the crust: Mix graham cracker crumbs and melted butter in a bowl.
2. Press the crust: Put the mixture into a 9-inch springform pan. Firmly press it down.
3. Make the filling: Beat the softened cream cheese in a bowl until smooth.
4. Add sweetness: Mix in the sifted powdered sugar until smooth and creamy.
5. Incorporate flavors: Add lemon juice, zest, vanilla, and salt. Mix until fluffy.
6. Whip the cream: In another bowl, whip the chilled heavy cream to stiff peaks.
7. Fold together: Carefully mix the whipped cream into the lemon mixture.
8. Transfer the filling: Pour the filling over the crust and smooth the top.
9. Chill: Cover and refrigerate for at least 4 hours, or overnight for best results.
10. Serve: Remove from the pan, slice, and serve chilled.Enjoy your delightful no bake lemon cheesecake!
No Bake Lemon Cheesecake is simple and fun to make. We covered the ingredients, preparation, and storage tips. Remember to mix your filling gently for a light texture. Experiment with flavors or garnishes to make it your own. With this guide, you can impress your friends and family. Enjoy each slice and share this delightful dessert. It’s a tasty treat that everyone will love!
. Enjoy your delightful no bake lemon cheesecake! No Bake Lemon Cheesecake is simple and fun to make. We covered the ingredients, preparation, and storage tips. Remember to mix your filling gently for a light texture. Experiment with flavors or garnishes to make it your own. With this guide, you can impress your friends and family. Enjoy each slice and share this delightful dessert. It’s a tasty treat that everyone will love!](https://dishtreats.com/wp-content/uploads/2025/06/ce75718b-0697-4914-b5ee-7870880d7685-300x300.webp)


![To make Cherry Almond Protein Muffins, you need simple and healthy ingredients. Here’s a list for you: - 1 cup almond flour - 1/2 cup rolled oats - 1/2 cup protein powder (vanilla or unflavored) - 1/4 cup honey or maple syrup - 1/2 cup plain Greek yogurt - 2 large eggs - 1/2 cup unsweetened almond milk - 1 teaspoon baking powder - 1/2 teaspoon baking soda - 1/2 teaspoon salt - 1 cup fresh or frozen cherries, pitted and halved - 1/4 cup sliced almonds (for topping) - 1 teaspoon almond extract Each ingredient plays a key role in making these muffins tasty and nutritious. Almond flour gives a nutty flavor and a great texture. Rolled oats add heartiness and health benefits. Protein powder boosts the protein content, making these muffins perfect for a snack or breakfast. Using honey or maple syrup adds sweetness, while Greek yogurt keeps the muffins moist. The eggs help bind everything together, giving structure. Almond milk keeps the muffins light and adds a hint of almond flavor. Baking powder and baking soda make the muffins rise, resulting in fluffy bites. Cherries bring a burst of color and flavor, while sliced almonds on top add a delightful crunch. The almond extract enhances the nutty taste, tying all the flavors together. You can find the full recipe in the article to guide you step by step. Happy baking! Set your oven temperature to 350°F (175°C). Line a muffin tin with paper liners or grease each cup lightly. This helps the muffins come out easily after baking. In a large bowl, combine the almond flour, rolled oats, protein powder, baking powder, baking soda, and salt. Use a whisk to stir these ingredients well. Mixing them well ensures that your muffins rise evenly. In another bowl, whisk together the honey (or maple syrup), Greek yogurt, eggs, almond milk, and almond extract. Mix until it is smooth and creamy. This step adds moisture and flavor to your muffins. Gradually add the wet mixture to the dry mixture. Stir gently with a spatula until just combined. Be careful not to overmix the batter, as this can make the muffins tough. Gently fold the halved cherries into the batter. This adds bursts of flavor throughout each muffin. Then, fill each muffin cup about two-thirds full with the batter. This allows space for the muffins to rise. Place the muffin tin in the oven and bake for 18-20 minutes. The muffins should be golden on top. You can check for doneness by inserting a toothpick in the center; it should come out clean. Let the muffins cool in the pan for 5 minutes before transferring them to a wire rack. To make the best cherry almond protein muffins, watch your baking time. I suggest checking them at the 18-minute mark. If they look golden and a toothpick comes out clean, they are ready. Overbaking can dry out the muffins, so keep a close eye on them. After baking, let the muffins cool in the pan for five minutes. This step helps them firm up and gives you the right texture. Then, move them to a wire rack to cool completely. If you don’t have almond flour, you can use oat flour or whole wheat flour. They work well and will still taste great. For protein powder, you can try using a plant-based option or even a different flavor. If you need a non-dairy version, swap Greek yogurt for coconut yogurt or silken tofu. For almond milk, you can use soy milk or oat milk. These changes will still keep your muffins tasty and nutritious. Want to kick up the flavor? You can add a pinch of cinnamon or nutmeg to the batter. Both spices pair well with the cherries and almonds. You might also try adding a splash of vanilla extract for extra sweetness. If you enjoy a hint of citrus, a bit of lemon zest can brighten the taste. These simple additions can make your muffins even more delightful. Check out the full recipe to get started on your delicious cherry almond protein muffins! {{image_4}} You can play with flavors in these muffins. Dark chocolate chips add a rich touch. You can mix in some unsweetened coconut for a tropical twist. If you want to switch up the fruit, try using blueberries or raspberries. Both fruits pair well with almonds and give a fresh taste. You can also use dried cherries for a chewiness that works great in muffins. To make these muffins vegan, swap the eggs for flax eggs. Just mix one tablespoon of ground flaxseed with three tablespoons of water and let it sit for five minutes. Use plant-based yogurt instead of Greek yogurt. Maple syrup is a good choice to keep it sweet. You can still enjoy the same tasty muffins without animal products. If you want to cut back on sugar, reduce the honey or maple syrup. You can try using mashed bananas or unsweetened applesauce. Both will keep your muffins moist and sweet. Just remember to balance the flavors so you still enjoy every bite. Use spices like cinnamon to enhance the taste without adding more sugar. For the full recipe, check out the [Full Recipe] section above! To keep your Cherry Almond Protein Muffins fresh at room temperature, place them in an airtight container. This helps to keep moisture in and air out. Store them for up to three days. If you live in a warm area, keep them in a cool, dry place. Avoid direct sunlight, as it can dry them out. These muffins taste best when fresh, so enjoy them soon after baking. For long-term storage, freezing is the best option. Allow the muffins to cool completely before freezing. Wrap each muffin tightly in plastic wrap or aluminum foil. Then, place them in a freezer-safe bag or container. This method prevents freezer burn and helps preserve flavor. You can freeze them for up to three months. When ready to eat, simply thaw them in the fridge overnight or leave them at room temperature for a few hours. To enjoy your muffins warm, you can easily reheat them. Preheat your oven to 350°F (175°C). Place the muffins on a baking sheet and warm them for about 10 minutes. This method helps restore their soft texture. You can also use the microwave for a quick fix. Heat each muffin for 15-20 seconds. Just be careful not to overheat, as that can make them dry. For the full recipe, check out the delicious Cherry Almond Protein Muffins! Yes, you can use frozen cherries. They work just as well as fresh cherries. Just make sure to thaw them first and drain any extra liquid. This keeps the batter from becoming too wet. Frozen cherries can add a nice burst of flavor, and they are often just as nutritious as fresh ones. To check if your muffins are done, look for a golden top. Insert a toothpick into the center of a muffin. If it comes out clean or with a few crumbs, the muffins are ready. They should feel firm to the touch. If they are still wet, bake them for a few more minutes. Each muffin has about 150 calories. They are rich in protein and fiber. The almond flour and Greek yogurt add healthy fats and nutrients. Plus, cherries provide antioxidants. This makes them a tasty and nutritious snack. Enjoy these muffins guilt-free, knowing they are good for you! For the complete recipe, check the Full Recipe section. This blog post covers a simple and tasty cherry almond protein muffin recipe. You learned about the key ingredients and steps to make them. I shared tips for baking success, ingredient swaps, and ways to customize the recipe. Muffins can be fun and flexible. Whether you want to make them vegan or low-sugar, it's easy! Always store them well to keep their flavor fresh. Enjoy cooking, and have fun trying different variations. Your kitchen adventures can lead to yummy treats!](https://dishtreats.com/wp-content/uploads/2025/07/36a729b1-00f1-4288-a77b-47884a3c4d33-768x768.webp)


![To make delicious zucchini chocolate chip muffins, gather these simple ingredients: - 1 medium zucchini, grated (approximately 1 cup) - 1 cup all-purpose flour - 1/2 cup whole wheat flour - 1/2 teaspoon baking soda - 1 teaspoon baking powder - 1/2 teaspoon salt - 1/2 teaspoon ground cinnamon - 2 large eggs - 1/2 cup granulated sugar - 1/4 cup packed brown sugar - 1/3 cup vegetable oil - 1 teaspoon vanilla extract - 1/2 cup semi-sweet chocolate chips - 1/4 cup walnuts or pecans, chopped (optional for extra crunch) These ingredients blend well and create a moist muffin. The grated zucchini adds moisture while keeping the muffins healthy. The mix of flours gives a great texture. The sugars balance the chocolatey goodness. You can add nuts for crunch, or leave them out if you want a smoother bite. If you want the full details on how to put this all together, check out the Full Recipe. Start by preheating your oven to 350°F (175°C). This step is key for even baking. Prepare a muffin tin by lining it with paper liners or lightly greasing each cup. In a medium mixing bowl, whisk together the following dry ingredients: - 1 cup all-purpose flour - 1/2 cup whole wheat flour - 1/2 teaspoon baking soda - 1 teaspoon baking powder - 1/2 teaspoon salt - 1/2 teaspoon ground cinnamon Mix well to ensure they are evenly combined. This helps the muffins rise properly. In a larger bowl, crack two large eggs and beat them lightly. Add: - 1/2 cup granulated sugar - 1/4 cup packed brown sugar Mix these until smooth and slightly frothy. This gives the muffins a nice texture. Slowly add in: - 1/3 cup vegetable oil - 1 teaspoon vanilla extract Stir until fully combined. Next, gently fold in 1 cup of grated zucchini. Make sure it’s evenly distributed for great flavor. Gradually add the dry mixture to the wet ingredients. Use a spatula to fold them together gently. It’s okay if there are a few lumps. Next, divide the batter evenly among the prepared muffin cups, filling each about two-thirds full. Place the muffin tin in the preheated oven and bake for 18 to 20 minutes. To check if they are done, insert a toothpick into the center. It should come out clean or with a few moist crumbs. Once done, let the muffins cool in the pan for about 5 minutes before transferring them to a wire rack. This makes them easier to remove without breaking. For the full recipe, refer to the earlier sections. To make great muffins, follow these tips closely: - Use Fresh Ingredients: Fresh baking powder and soda give the best rise. - Room Temperature Eggs: Bring your eggs to room temperature for better mixing. - Preheat the Oven: Always preheat your oven to 350°F (175°C) before baking. - Fill Muffin Cups Evenly: Fill each cup about two-thirds full for a nice dome shape. Overmixing can lead to tough muffins, which we want to avoid. Here’s how: - Mix Dry and Wet Separately: Always mix dry and wet ingredients in separate bowls first. - Fold Gently: When combining, use a spatula to fold the mixture. Stop mixing when you see a few lumps. - Don’t Worry About Lumps: A few lumps are okay; they will bake out in the oven. Presentation is important for making your muffins look as good as they taste. Try these ideas: - Serve Warm: Serve your muffins warm from the oven for a cozy feel. - Use a Basket: Place muffins in a basket lined with a cloth napkin for a rustic touch. - Garnish: Lightly dust with powdered sugar or drizzle melted chocolate on top for flair. For the full recipe of Zucchini Chocolate Chip Muffins, check the earlier section. {{image_4}} You can make these muffins gluten-free easily. Just swap the all-purpose flour with gluten-free flour blend. Make sure it has xanthan gum to help with texture. This change keeps the muffins soft and tasty. You can also mix in other fun ingredients. Dried fruits like raisins or cranberries add sweetness. Chopped nuts like walnuts or pecans give a nice crunch. You can even add seeds for more texture. Just be sure to adjust the amount of chocolate chips if you add more. If you want a lower sugar treat, you have options. Use less granulated sugar or brown sugar. You can try sugar substitutes like stevia or monk fruit sweetener. These options can help keep the muffins sweet without the extra calories. Just remember to check the package for measurements. Check out the [Full Recipe] for more details! To keep your zucchini chocolate chip muffins fresh, store them in an airtight container. You can place them on the counter. They will stay tasty for about three days. If you want to keep them longer, consider freezing. Freezing muffins is easy and smart. First, let the muffins cool completely. Then, wrap each muffin in plastic wrap or aluminum foil. Place them in a freezer-safe bag or container. These muffins can last up to three months in the freezer. When you want one, just take it out and reheat. Reheating is quick and simple. You can use a microwave or an oven. For the microwave, heat one muffin for 15 to 20 seconds. For the oven, preheat to 350°F (175°C). Place the muffin on a baking sheet and warm it for about 5 to 10 minutes. Enjoy your warm muffin with a cup of coffee or tea! To make zucchini chocolate chip muffins from scratch, follow this simple recipe. Start by preheating your oven to 350°F (175°C). Prepare your muffin tin with liners or grease it. In one bowl, mix all-purpose flour, whole wheat flour, baking soda, baking powder, salt, and cinnamon. In another bowl, beat two eggs, then add granulated and brown sugar. Mix in vegetable oil and vanilla extract. Fold in grated zucchini, then combine the wet and dry ingredients. Lastly, add chocolate chips and any nuts if you want. Fill the muffin cups and bake them for 18 to 20 minutes. For the full recipe, check the instructions above. Yes, you can use frozen zucchini in this recipe. Just make sure to thaw it first. Drain any excess water to avoid soggy muffins. Frozen zucchini works well because it retains most of its flavor. It also provides moisture, just like fresh zucchini does. This option is great if you have leftover zucchini from last season. Zucchini offers several health benefits. It is low in calories and high in fiber. This can help keep you feeling full longer. Zucchini is also packed with vitamins like A and C. These vitamins support your immune system and skin health. Plus, adding veggies to your muffins makes them more nutritious. It’s a great way to sneak in some extra greens. Zucchini muffins can last up to a week when stored properly. Keep them in an airtight container at room temperature. If you want them to last longer, you can freeze them. Just make sure they are completely cooled before freezing. They can stay fresh in the freezer for about three months. Yes, you can substitute other types of flour in this recipe. Almond flour, oat flour, or coconut flour are all good options. Each type of flour can change the texture slightly, so keep that in mind. If you use a gluten-free flour blend, make sure it has a binding agent, like xanthan gum, for the best results. You now have a clear guide for making delicious zucchini chocolate chip muffins. We covered the ingredients and step-by-step instructions needed to bake them perfectly. Plus, I shared tips on avoiding common baking mistakes and ways to store your muffins. You can also explore tasty variations to suit your taste. Remember, these muffins are not just yummy; they bring the added health benefits of zucchini. Happy baking, and enjoy these treats!](https://dishtreats.com/wp-content/uploads/2025/06/0cde25ea-110a-42a8-bcb8-b8faa9becc28-768x768.webp)
