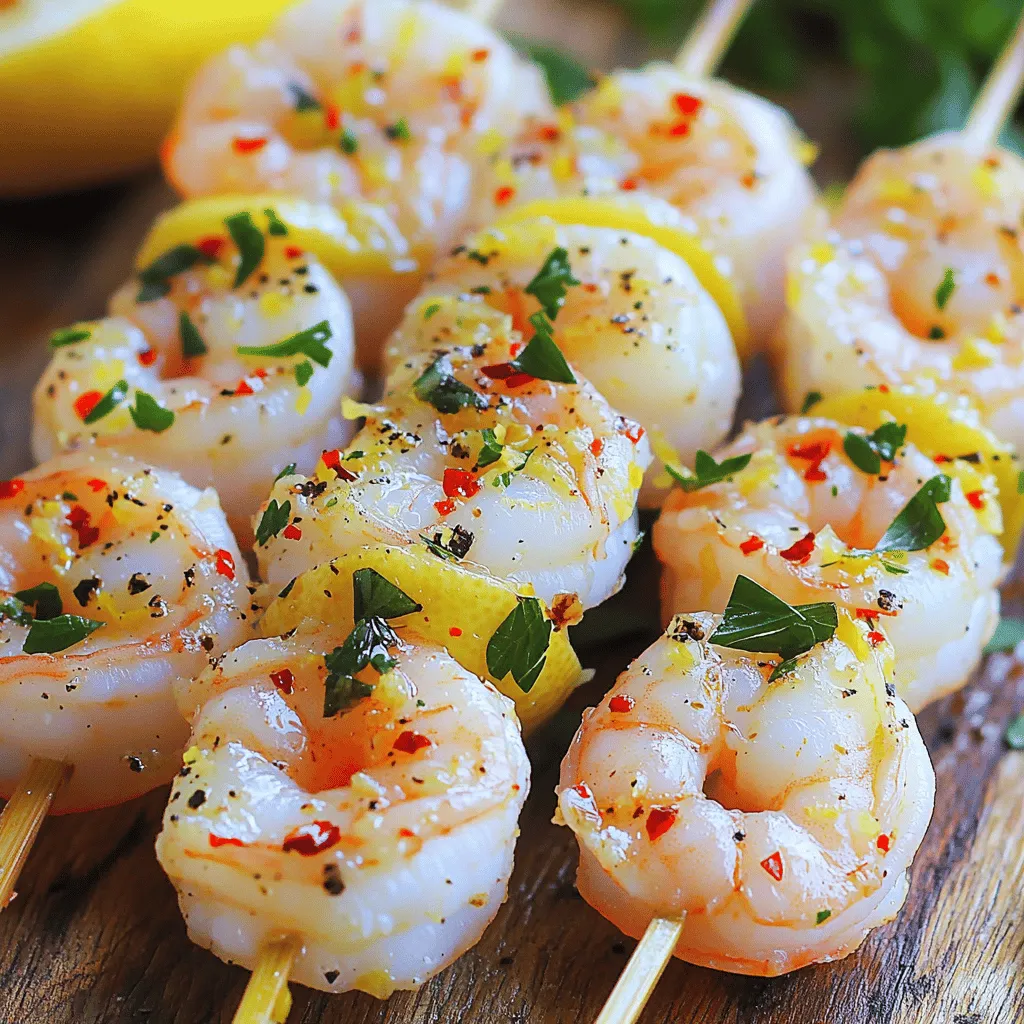
Looking for a quick and tasty dish that’s full of flavor? Let me introduce you to my Lemon Garlic Shrimp Skewers! This dish is simple to prepare and perfect for any meal, from a summer BBQ to a cozy dinner at home. With fresh shrimp, zesty lemon, and savory garlic, these skewers will delight your taste buds. Ready to learn how to make this easy recipe? Let’s dive right in!
Ingredients
Main Ingredients
– 1 lb large shrimp, peeled and deveined
– 3 tablespoons extra virgin olive oil
– Zest and juice of 2 fresh lemons
– 4 cloves garlic, finely minced
Spices and Seasonings
– 1 teaspoon red pepper flakes
– 1 teaspoon smoked paprika
– Salt and black pepper, to taste
For Garnishing
– Fresh parsley, finely chopped
– Skewers (wooden or metal, soak wooden skewers in water for at least 30 minutes)
To make these lemon garlic shrimp skewers pop, you need fresh and quality ingredients. The star of the show is the shrimp, which should be large and juicy. The olive oil brings richness and helps the flavors stick. Fresh lemons add bright zest and tang. Garlic gives a warm and savory flavor.
The spices give this dish a kick. Red pepper flakes add heat, while smoked paprika adds depth. Salt and black pepper enhance everything, making it all come together.
For a finishing touch, fresh parsley adds color and freshness. Don’t forget about the skewers! If you use wooden skewers, soaking them in water prevents burning.
Step-by-Step Instructions
Preparing the Marinade
To make the marinade, take a medium mixing bowl. In this bowl, combine:
– 3 tablespoons extra virgin olive oil
– Zest and juice of 2 fresh lemons
– 4 cloves garlic, finely minced
– 1 teaspoon red pepper flakes
– 1 teaspoon smoked paprika
– Salt and black pepper, to taste
Whisk all the ingredients well until they blend into a smooth mixture. The olive oil and lemon juice create a bright flavor that enhances the shrimp.
Marinating the Shrimp
Next, add 1 pound of peeled and deveined shrimp to the marinade. Make sure each shrimp is coated well. Use a spoon or spatula for this. Cover the bowl with plastic wrap. Place it in the fridge for at least 30 minutes. This step allows the shrimp to soak in all the zesty flavors.
Grilling Process
While the shrimp marinate, preheat your grill or grill pan to medium-high heat. This ensures that the shrimp cook evenly and get a nice char. After marinating, remove the shrimp from the fridge. Thread them onto skewers, leaving a little space between each one. This helps them to cook well without steaming.
Once your grill is hot, place the skewers on it. Grill the shrimp for about 2-3 minutes on each side. Look for a vibrant pink color and a firm texture. Avoid cooking them too long; overcooked shrimp can become tough.
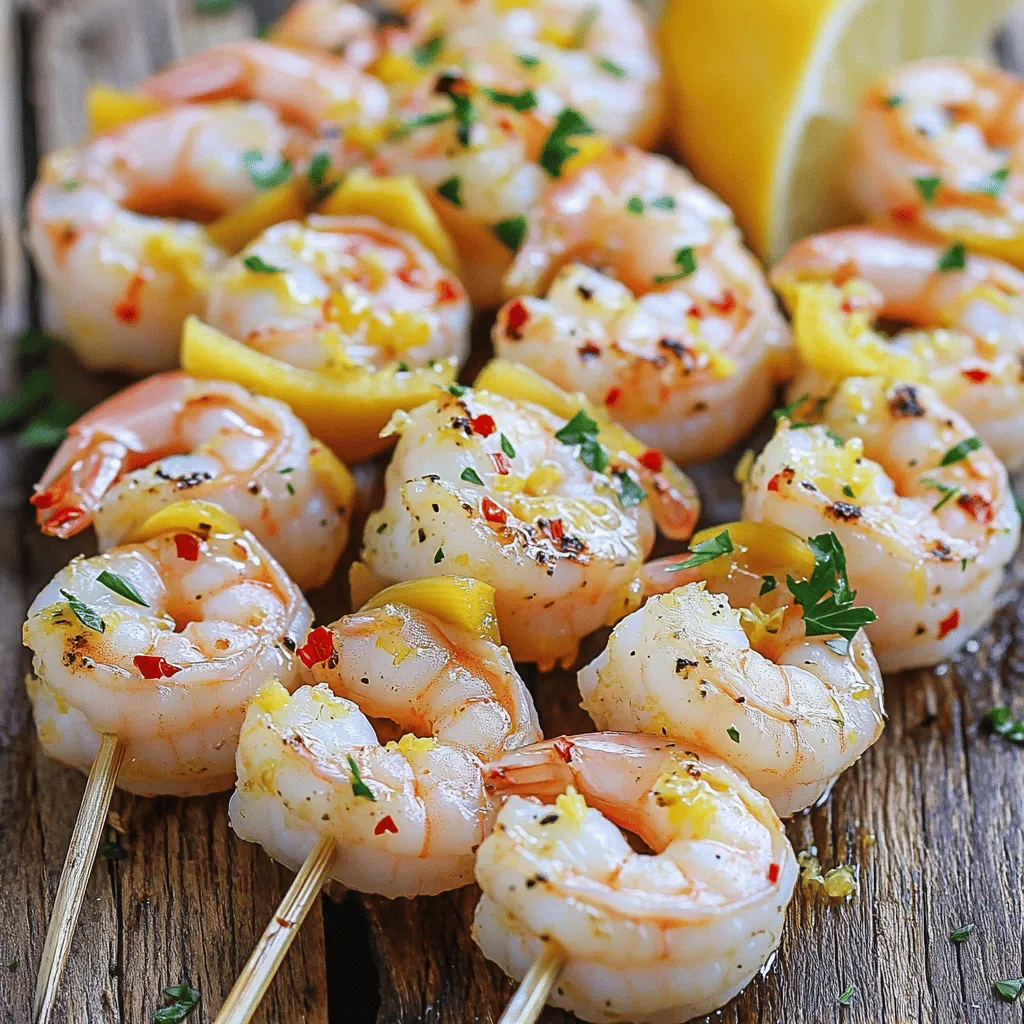
After grilling, take the skewers off the heat. Let them rest for about 1 minute. This helps the juices soak back into the shrimp. For a final touch, sprinkle with finely chopped parsley before serving.
Tips & Tricks
Cooking Tips
To prevent overcooking shrimp, watch the color closely. Shrimp turn pink when done. Cook them for just 2-3 minutes per side. If they curl tightly, they may be overcooked. Marinate your shrimp for at least 30 minutes. This lets the flavors soak in and makes them tasty. Keep your marinade cold while the shrimp soak. This keeps them fresh.
Grilling Safety
If you use wooden skewers, soak them in water for 30 minutes. This helps prevent burning on the grill. When grilling, keep your grill at medium-high heat. This ensures even cooking and a nice char. Always keep an eye on your shrimp. They can cook quickly and need your attention.
Presentation Tips
For a stunning display, serve the skewers on a large platter. Add lemon wedges for a splash of color and flavor. A small drizzle of olive oil adds shine, too. Sprinkle fresh parsley over the skewers before serving. This adds a pop of green and freshness. For an extra touch, you can arrange them in a circle or on a bed of greens to impress your guests.
Variations
Alternative Ingredients
You can swap shrimp for other proteins. Try chicken or tofu for a twist. Each option brings a unique flavor. You can even use fish like salmon. For garlic, try shallots or garlic powder. Both add nice depth without overpowering the dish.
Flavor Enhancements
Herbs can brighten this dish. Fresh basil or cilantro adds a great touch. You can also add citrus zest, like lime or orange, for a fruity kick. Flavor-infused oils work wonders too. Try using garlic or chili oil for added taste. Marinades can change the flavor game. Mix in a splash of soy sauce or honey for a sweet touch.
Serving Styles
These skewers shine in many meals. Serve them in soft tacos with fresh veggies. Toss them on a salad for a light meal. You can also serve them over rice or quinoa for a filling dish. Add a squeeze of lemon on top for extra zing! For a fun twist, serve with a dipping sauce like spicy mayo or garlic aioli.
Storage Info
Storage Directions
To store leftover shrimp skewers, let them cool first. Place them in an airtight container. Store them in the fridge for up to 2 days. For longer storage, you can freeze them. Wrap each skewer in plastic wrap and then place them in a freezer bag. This helps keep them fresh.
Reheating Suggestions
When you reheat, use a skillet or your grill. Heat a bit of oil over medium heat. Place the skewers in the pan or on the grill for about 1-2 minutes per side. This method keeps the shrimp juicy and flavorful. Avoid using the microwave, as it can make them rubbery.
Shelf Life
Shrimp skewers stay tasty for 2 days in the fridge. If you freeze them, they can last for about 3 months. However, for the best flavors, try to eat them within a month. Always check for any off smells or changes in color before eating. Enjoy your shrimp skewers fresh for the best taste!
FAQs
How do I know when shrimp are cooked?
Perfectly cooked shrimp have a few clear signs. First, they turn a bright pink color. Next, they curl into a C-shape. Lastly, they become opaque in color. If the shrimp are gray or rubbery, they are overcooked. Keep an eye on them while grilling. Cooking time is usually about 2-3 minutes per side.
Can I use frozen shrimp for this recipe?
Yes, you can use frozen shrimp. Just make sure to thaw them properly. You can do this by placing them in the fridge overnight. If you need to thaw them faster, place the shrimp in a bowl of cold water. Change the water every 30 minutes. Avoid using hot water, as it can cook the shrimp. Once thawed, rinse them under cold water before marinating.
What can I serve with lemon garlic shrimp skewers?
Lemon garlic shrimp skewers pair well with many dishes. Here are some great side options:
– Rice: Serve over white or brown rice for a filling meal.
– Salad: A fresh green salad adds crunch and balance.
– Grilled Vegetables: Seasonal veggies like zucchini and bell peppers work well.
– Pasta: Toss with olive oil and herbs for a light pasta dish.
– Bread: Serve with crusty bread to soak up the extra marinade.These sides enhance the meal and make it special!
In this blog post, we covered everything you need for lemon garlic shrimp skewers. We discussed the key ingredients, from shrimp to spices. Then, I laid out easy steps for marinating and grilling. You learned tips for cooking and presenting your skewers. We explored variations and storage options for leftovers.
Perfectly cooked shrimp should be pink and firm. With these skills, you can impress anyone. Enjoy your cooking adventures and create tasty meals!


