Homemade Cinnamon Apple Chips Crunchy and Sweet Snack

If you crave a healthy snack that’s both crunchy and sweet, homemade cinnamon apple chips are for you! I’ll share how to create this simple treat, made from your favorite apples. With the right ingredients and easy steps, you’ll enjoy this delightful snack in no time. Plus, I’ll give you tips to make them extra crispy. Get ready for a tasty adventure in your kitchen!
Ingredients
List of Ingredients
To make homemade cinnamon apple chips, gather these simple ingredients:
- 3 medium-sized apples (preferably Fuji or Honeycrisp for sweetness)
- 2 teaspoons ground cinnamon
- 1 tablespoon coconut sugar (or brown sugar for a slight caramel flavor)
- 1 teaspoon fresh lemon juice (for brightness and to prevent browning)
- Pinch of sea salt (to enhance flavors)
Recommended Apple Varieties
Choosing the right apple is key to great apple chips. I recommend these varieties:
- Fuji: Sweet and crisp with a juicy bite.
- Honeycrisp: Perfectly sweet and very crunchy.
- Granny Smith: Tart and adds a nice contrast to the sweetness.
These apples will create a delightful flavor and texture in your chips.
Alternative Sweeteners
If you want to change the sweetness, here are some options:
- Maple syrup: A natural sweetener that adds depth.
- Agave nectar: A smooth, mild sweetener for a lighter taste.
- Honey: A classic choice that offers rich flavor.
Feel free to adjust the sweetener to match your taste!
Step-by-Step Instructions
Prepping the Oven and Baking Sheets
To start, set your oven to 200°F (95°C). A low temperature helps the apples dry out without burning. Line two baking sheets with parchment paper. This step prevents the apple slices from sticking and makes cleanup easy.
Slicing the Apples
Next, wash and dry three medium-sized apples. I recommend using Fuji or Honeycrisp for their sweetness. Core each apple and slice them into thin rings, about 1/8 inch thick. A mandoline slicer works great for even slices, but a sharp knife will do too. Uniform slices bake better and turn crispier.
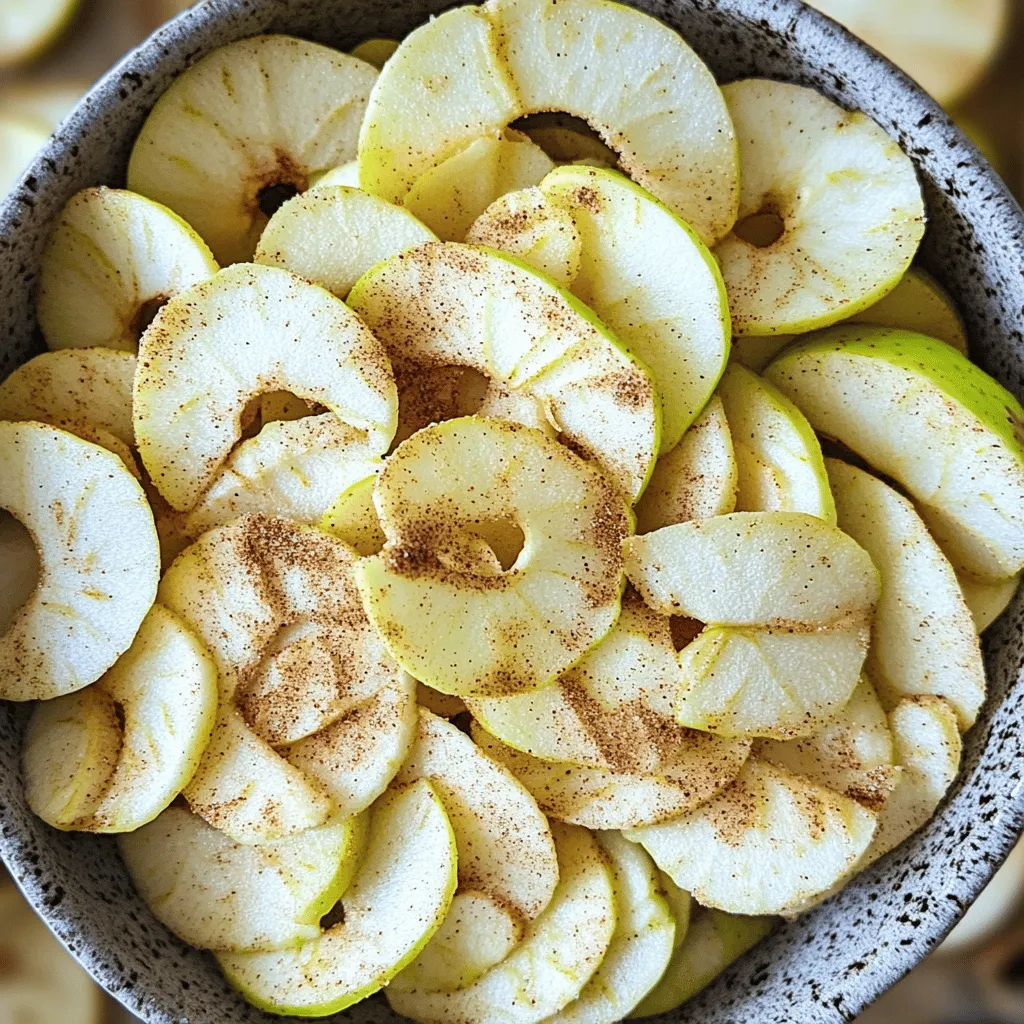
Coating the Apple Slices
In a large mixing bowl, add the apple slices. Drizzle one teaspoon of fresh lemon juice over them. Toss the slices gently to coat. This keeps the apples bright and adds a nice zing. In a small bowl, mix together two teaspoons of ground cinnamon, one tablespoon of coconut sugar, and a pinch of sea salt. Sprinkle this mixture evenly over the apple slices. Toss again to coat every slice in the sweet and spicy blend.
Now, spread the apple slices in a single layer on the baking sheets. Avoid overlapping. This helps them bake evenly. Follow these steps, and your homemade cinnamon apple chips will be a crunchy and sweet snack.
Tips & Tricks
Achieving the Perfect Crisp
To get your apple chips nice and crispy, thin slices are key. Aim for about 1/8 inch. A mandoline slicer can help. It keeps all your slices even. Even baking means better crunch. Also, baking at a low heat is essential. This slow cooking removes moisture without burning the apples. Keep an eye on them as they bake.
Flipping Techniques for Even Baking
Flipping your apple slices halfway through baking helps them crisp evenly. Use a spatula to turn them gently. This way, both sides get the same heat. You want a nice golden color on both sides. If you skip this step, some chips may end up soft or chewy.
Common Mistakes to Avoid
One big mistake is overlapping the apple slices. When they overlap, they won’t bake evenly. Make sure to space them out on the baking sheet. Another common error is not drying the apples well. Moisture can lead to soggy chips. Always dry them fully before seasoning. Lastly, don’t rush the baking process. Low and slow is the way to go for perfect chips.
Try these tips for a great snack!

Variations
Flavor Additions
You can mix in other spices for a new twist. Try adding a bit of nutmeg for warmth. Ginger adds a spicy kick that pairs well with apples. Just add about 1/4 teaspoon of either spice to your cinnamon-sugar mix. This can make your apple chips even more exciting.
Adjusting Sweetness Levels
Not everyone likes the same level of sweetness. If you prefer less sugar, cut the coconut sugar in half. You can also use a natural sweetener like stevia or monk fruit. Start with a small amount and adjust to your taste. Balance is key here, so taste as you go!
Using Different Fruits
Apple chips are great, but you can use other fruits too. Pears work well and have a soft, sweet flavor. Bananas can be sliced thin and dried for a chewy snack. Try peaches or mangoes for a tropical touch. Just remember to slice them evenly for the best results. Each fruit offers a unique taste and texture, making your snack time even more fun.
Storage Info
How to Store Apple Chips
To keep your apple chips fresh, store them in an airtight container. This will prevent moisture from softening them. A glass jar or a plastic container works well. If you have a vacuum sealer, this is even better. The less air in the container, the crisper your chips will stay.
Shelf Life and Freshness Tips
Homemade apple chips can last for about a week at room temperature. If you want them to last longer, you can refrigerate them. Just remember to let them cool completely before sealing them. Moisture can build up if they’re still warm, leading to sogginess. Keep an eye on them. If they start to lose their crunch, it’s time to re-crisp them.
Re-crisping Tips for Stale Chips
If your apple chips become soft, don’t worry! You can easily bring back their crunch. Preheat your oven to 200°F (95°C) and spread the chips out on a baking sheet. Bake them for about 10 to 15 minutes. Check them frequently to avoid burning. Once they cool, they should be crispy again!
FAQs
How do I make cinnamon apple chips crispy?
To make your cinnamon apple chips crispy, slice the apples thinly. Aim for 1/8 inch thick slices. Thinner slices will bake better and become crunchier. Bake at a low temperature, around 200°F (95°C), for about two hours. Flip the slices halfway through for even cooking. Keep an eye on them to avoid burning. Proper storage in an airtight container also helps maintain their crispiness.
Can I use a dehydrator for this recipe?
Yes, you can use a dehydrator for this recipe. A dehydrator can give you great results. Set it to 135°F (57°C) and dry the apple slices for 6 to 8 hours. Make sure to arrange the slices in a single layer. This method often results in a more even drying process. You will still want to check the chips for doneness.
What are the best apples for apple chips?
The best apples for apple chips are Fuji and Honeycrisp. These apples are sweet and crisp, making them perfect for snacks. Other good choices include Gala and Granny Smith for a tart flavor. Each type adds its own unique taste. Feel free to mix different varieties for added flavor depth.
How long do homemade apple chips last?
Homemade apple chips can last up to a week. Store them in an airtight container at room temperature. Keep them away from heat and moisture to maintain freshness. If they lose some crunch, you can re-crisp them in the oven for a few minutes. Enjoy your chips as a healthy snack any time!
Making apple chips is easy and fun. We covered the best ingredients and steps needed to create crispy apple chips. You learned about the perfect apple varieties, how to slice them, and how to store your chips.
Remember, perfecting your apple chips takes time and patience. Experiment with flavors and sweetness to make them your own. With these tips, you’ll impress everyone with your tasty homemade snacks. Enjoy your cooking and happy snacking!


![To make pumpkin spice oatmeal, gather these simple ingredients: - 1 cup rolled oats - 2 cups milk (dairy or almond) - 1/2 cup pumpkin puree - 1 teaspoon pumpkin spice blend - 1 tablespoon maple syrup or honey - 1/4 teaspoon vanilla extract - Pinch of salt - Optional add-ins: - 1/4 cup chopped walnuts - 1/4 cup dried cranberries or raisins - Fresh apple slices or banana for garnish Each ingredient plays a key role in creating a warm and comforting breakfast. The rolled oats form the base, while the pumpkin puree adds rich flavor and nutrition. Pumpkin spice blend gives that cozy fall taste, and maple syrup or honey sweetens it just right. You can customize this dish by adding walnuts for a crunchy texture or dried fruit for a hint of sweetness. Fresh fruit on top is also a great way to brighten the dish. If you follow the Full Recipe, you will have a delightful breakfast to enjoy on chilly mornings. To start, grab a medium-sized saucepan. Combine the rolled oats, milk, and a pinch of salt. Stir gently to ensure the oats mix well with the milk. Place the saucepan over medium heat. You want to bring this to a gentle simmer. Stir occasionally. This should take about five minutes until the oats soften. Once the oats are soft, it’s time to add some flavor! Carefully add the pumpkin puree, pumpkin spice blend, maple syrup, and vanilla extract to the saucepan. Stir well to combine everything. Keep cooking for another two to three minutes. This step makes the oatmeal creamy and rich. If you like some crunch, fold in chopped walnuts. For added sweetness, toss in dried cranberries or raisins if you wish. Let the oatmeal sit for one to two minutes. This resting time helps it thicken nicely before serving. Now you’re ready to enjoy your cozy pumpkin spice oatmeal! If you want the full recipe, just check the details above. To get your oatmeal just right, you can adjust its texture. If it seems too thick, add more milk. If it feels too runny, cook it a bit longer. Using fresh pumpkin spice makes a big difference in taste. The aroma and flavor become richer and more vibrant. For a lovely presentation, top your oatmeal with apple slices or banana. These fruits add sweetness and texture. You can also create decorative swirls with pumpkin puree. This not only looks nice but also adds a bit more flavor. If mornings are busy, make a large batch of oatmeal. You can easily reheat leftovers for a quick breakfast. Store it in the fridge, and it will be ready when you are. This way, you can enjoy Pumpkin Spice Oatmeal any time without the fuss. {{image_4}} You can change up the flavor of your pumpkin spice oatmeal easily. If you want a different sweetness, try using agave or brown sugar instead of maple syrup. Each sweetener brings a unique taste. For extra crunch, mix in different nuts like almonds or pecans. Seeds like chia or flax can also add a fun texture. If you follow a vegan diet, you can make this oatmeal vegan. Simply swap dairy milk for almond milk and use maple syrup for sweetness. This way, you keep all the yummy flavors while sticking to your diet. If you need a gluten-free option, just choose certified gluten-free oats. This ensures that everyone can enjoy this tasty dish. As the holidays approach, you can add cranberries or raisins for a festive twist. These fruits not only give a nice burst of sweetness but also add a pop of color. This makes your pumpkin spice oatmeal even more inviting. You can feel the warmth of the season with each bite. To explore the full potential of this recipe, check out the [Full Recipe]. Store leftovers in an airtight container for up to 3 days. This keeps your oatmeal fresh. It’s a great way to enjoy a quick breakfast later in the week. Reheat on the stovetop or in the microwave with a splash of milk. This helps restore the creamy texture. If using the stovetop, heat gently over low heat. Stir often to avoid sticking. Freeze individual servings for easy breakfasts. To enjoy, thaw overnight in the fridge. Then, reheat as usual. This method makes mornings smoother when you’re in a rush. Leftovers can be stored for up to 3 days in the fridge. Make sure to use an airtight container. This keeps the oatmeal fresh and tasty for your next breakfast. Yes, you can adjust the amount of maple syrup. You can also use an alternative sweetener if you prefer. Honey, agave, or stevia work well. Make it as sweet as you like! Simply multiply the ingredients as needed. Keep the same cooking process for best results. This way, you can feed more people or have extra for later. It is packed with fiber from oats. The pumpkin adds vitamins, making it a nourishing breakfast option. This meal supports digestion and gives you energy to start your day. Yes, it’s easy to prepare in advance. You can reheat the oatmeal quickly for busy mornings. Just store it in the fridge and warm it up when you are ready to eat. For the full recipe, check out the complete guide! This blog post explored the simple and tasty ways to make Pumpkin Spice Oatmeal. We covered the key ingredients, step-by-step cooking instructions, and helpful tips for perfecting your recipe. You can also customize it with various add-ins and flavors. This dish is not only delicious but also nutritious and great for meal prep. Enjoy a warm bowl of pumpkin spice oatmeal and kick-start your day!](https://dishtreats.com/wp-content/uploads/2025/06/a752c53c-93b7-4877-b1fd-c59ff5d6dc49-768x768.webp)

![- 1 package (15.35 oz) Oreo cookies - 8 oz cream cheese, softened to room temperature - 1 cup semisweet chocolate chips - 1 tablespoon coconut oil (optional, for smoother melting) - Sprinkles or crushed Oreos for decoration I love using classic Oreo cookies for this recipe. They add rich flavor and crunch. The cream cheese makes the truffles creamy and smooth. When mixed with crushed Oreos, it creates a perfect dough. Next, I melt semisweet chocolate chips for coating. This chocolate is rich and adds sweetness. If you want a smoother coat, add coconut oil. It helps the chocolate melt better. Finally, I enjoy decorating the truffles. You can use colorful sprinkles or crushed Oreos. This adds a fun look and extra flavor. You can find the complete recipe [Full Recipe]. - Using flavored cream cheese (e.g., vanilla or chocolate) - Alternative chocolate types (dark chocolate, white chocolate) - Various toppings (nuts, colorful candy sprinkles) Feel free to get creative with your ingredients. Flavored cream cheese can add a twist. Imagine using chocolate cream cheese for an even richer taste. You can also play with chocolate types. Dark chocolate gives a bold flavor. White chocolate adds sweetness and a nice contrast. For toppings, you can use nuts or different sprinkles. This makes your truffles unique and fun! To start, you need to crush the Oreos. You can use a food processor for this task. Just place the cookies in and pulse until they are fine crumbs. If you want a more hands-on method, put the Oreos in a zip-lock bag. Then, use a rolling pin to crush them until they are finely broken. Either way works great! Next, mix the crushed Oreos with cream cheese. In a large bowl, add the Oreo crumbs to softened cream cheese. Use a spatula or your hands to mix it well. You want it to be uniform and dough-like. This will be the base of your truffles. Now, let’s shape the truffles. Take a tablespoon-sized portion of the Oreo mixture. Roll it into a smooth ball with your hands. Place each ball on a baking sheet lined with parchment paper. This makes it easy to lift them later. After shaping, it's time to chill them. Put the baking sheet with the truffles in the refrigerator for about 30 minutes. This step helps the truffles firm up, making them easier to dip in chocolate later. Next, let's melt the chocolate. In a microwave-safe bowl, combine semisweet chocolate chips with coconut oil if you want a smoother mix. Heat the mixture in the microwave in 30-second intervals. Stir between each interval until the chocolate is fully melted and smooth. After the chocolate is ready, it's time to dip the truffles. Take each chilled truffle and use a fork to dip it into the melted chocolate. Make sure it is fully coated. Then, gently tap the fork against the bowl to remove any extra chocolate. While the chocolate coating is still wet, you can decorate the truffles. Add some crushed Oreos or colorful sprinkles on top. This makes your truffles look festive and fun. Get creative! You can also use different toppings for special occasions. For more detailed steps, check out the Full Recipe. To make your chocolate smooth, add a tablespoon of coconut oil when melting. This small addition keeps the chocolate creamy and easy to dip. Mixing the crushed Oreos with cream cheese is key. Make sure to blend them well, so you get a nice, even dough. You want every bite to be rich and flavorful. Yes, you can prepare these truffles in advance. This makes them a great treat for parties. Once you form the truffles, chill them for about 30 minutes. After that, store them in the fridge or freezer. If you freeze them, let them sit out for a few minutes before serving. This helps bring back that perfect texture. When serving your truffles, presentation counts. Arrange them on a stylish platter or in a decorative box. You can also use colorful cupcake liners for a fun touch. Pair these treats with beverages like coffee or a glass of cold milk. The flavors blend nicely and make each bite even more enjoyable. For more ideas, check out the Full Recipe. {{image_4}} You can easily change the flavor of your truffles. Adding flavor extracts gives a nice twist. A drop of mint, vanilla, or almond extract can boost the taste. You can also try different Oreo flavors. Peanut butter or red velvet Oreos add a fun spin. Each flavor brings a new experience to your truffles. If you need gluten-free treats, use gluten-free Oreos. They work just like regular Oreos. For vegan options, switch to dairy-free cream cheese and chocolate. This way, everyone can enjoy these tasty treats without worry. Decorating can make your truffles stand out. Use white chocolate or colored melts for a fun look. You can also create themed truffles for holidays. Think about red and green for Christmas or pastel colors for Easter. The right decorations can make your truffles fit any occasion. To keep your chocolate covered Oreo truffles fresh, store them in the fridge. Place them in an airtight container. This helps to prevent them from drying out. If you plan to eat them soon, this method is best. For longer storage, you can freeze the truffles. First, place them in a single layer on a baking sheet. Freeze them for about one hour until they are firm. Then, transfer them to a freezer-safe bag or container. This will help them last longer without losing flavor. In the fridge, these truffles can last about one week. They taste best within the first few days. In the freezer, they can last up to three months. The flavor and texture stay good if stored properly. Always label your containers with the date to track how long they have been stored. To keep your truffles fresh, use airtight containers. This stops moisture from getting in. Moisture can make the chocolate lose its nice shine and texture. If you freeze your truffles, let them thaw in the fridge. This helps them regain their creamy texture. Avoid thawing them at room temperature, which can make them too soft. Once they are thawed, enjoy them cold or let them sit out for a few minutes for a softer bite. For the full recipe, check the previous section. Yes, you can use low-fat cream cheese. However, it may change the flavor and texture. Low-fat cream cheese can make truffles less rich and creamy. The truffles might be a bit drier too. For the best taste, I recommend using regular cream cheese. These truffles take about 30 minutes to set in the fridge. This chilling time helps the truffles hold their shape. After you dip them in chocolate, place them back on the baking sheet. Leave them in the fridge until the chocolate hardens. You can use store-bought truffles, but homemade ones are better. Homemade truffles taste fresher and let you pick flavors. You can customize them to your liking. Plus, making them yourself is a fun activity! You can use many cookies for truffles. Some great options include: - Chocolate chip cookies - Peanut butter cookies - Vanilla wafers - Graham crackers Feel free to mix and match flavors! This allows for fun and unique treats. For the full recipe, check out the details above. You can make delicious chocolate-covered Oreo truffles at home. This blog showed you the key ingredients and easy steps needed to prepare, shape, dip, and decorate them. Remember, the fun lies in customizing flavors and toppings to your taste. Use the tips provided for great texture and storage. These bites are perfect for parties or a sweet treat at home. Enjoy making these truffles, and delight in sharing them with friends and family!](https://dishtreats.com/wp-content/uploads/2025/07/b12a751c-54f3-4358-8f8e-2195b80955c3-768x768.webp)

