Are you looking for a comforting family meal that’s both simple and delicious? Look no further than this Easy Baked Ziti recipe! With just a few key ingredients and simple steps, you can create a cheesy, hearty dish that your whole family will love. Perfect for busy weeknights, this baked ziti is sure to bring smiles and satisfaction around your dinner table. Let’s dive into the tasty details!
Ingredients
The key to a great baked ziti lies in the ingredients. Each one plays an important role in building flavor and texture. Here’s what you need for my easy baked ziti:
– 12 oz ziti pasta
– 2 cups marinara sauce (can be store-bought or homemade)
– 2 cups ricotta cheese
– 2 cups shredded mozzarella cheese
– 1 cup grated Parmesan cheese
– 1 large egg
– 1 teaspoon Italian seasoning
– 1 teaspoon garlic powder
– Salt and pepper to taste
– Fresh basil leaves for garnish (optional)
Each ingredient brings something special to the dish. The ziti pasta holds the sauce well. Marinara sauce adds rich flavor. Ricotta gives a creamy layer. Mozzarella melts beautifully, while Parmesan adds a salty kick. The egg helps bind everything together.
Feel free to customize! You can swap out marinara for a different sauce or adjust the cheeses. Just keep the core ingredients.
Step-by-Step Instructions
Preheat the Oven
First, set your oven to 375°F (190°C). Preheating helps the dish cook evenly. If you skip this step, your ziti may not bake well.
Cooking the Ziti
To cook ziti, bring a large pot of salted water to a boil. Add 12 oz of ziti pasta and cook until al dente. This means the pasta should be firm but not hard. Follow the package instructions for timing. After cooking, drain the pasta using a colander. Let it cool for a few minutes to stop the cooking process.
Preparing the Ricotta Mixture
In a large bowl, mix 2 cups of ricotta cheese, 1 large egg, 1 teaspoon of Italian seasoning, 1 teaspoon of garlic powder, and salt and pepper. Use a fork or whisk to blend these ingredients. Aim for a smooth consistency. This mixture adds creaminess to the dish.
Combining Marinara and Mozzarella
In another bowl, combine 2 cups of marinara sauce with 1 cup of shredded mozzarella cheese. Stir until the cheese is evenly mixed with the sauce. This mix will add flavor and richness to your baked ziti.
Layering the Ingredients
Now it’s time to layer. Start with the marinara and cheese mixture. Spread a layer at the bottom of your baking dish. Next, add half the cooked ziti. Spoon half of the ricotta mixture on top. Sprinkle some grated Parmesan cheese. Repeat this layering process until all ingredients are used. Make sure each layer is even for best results.
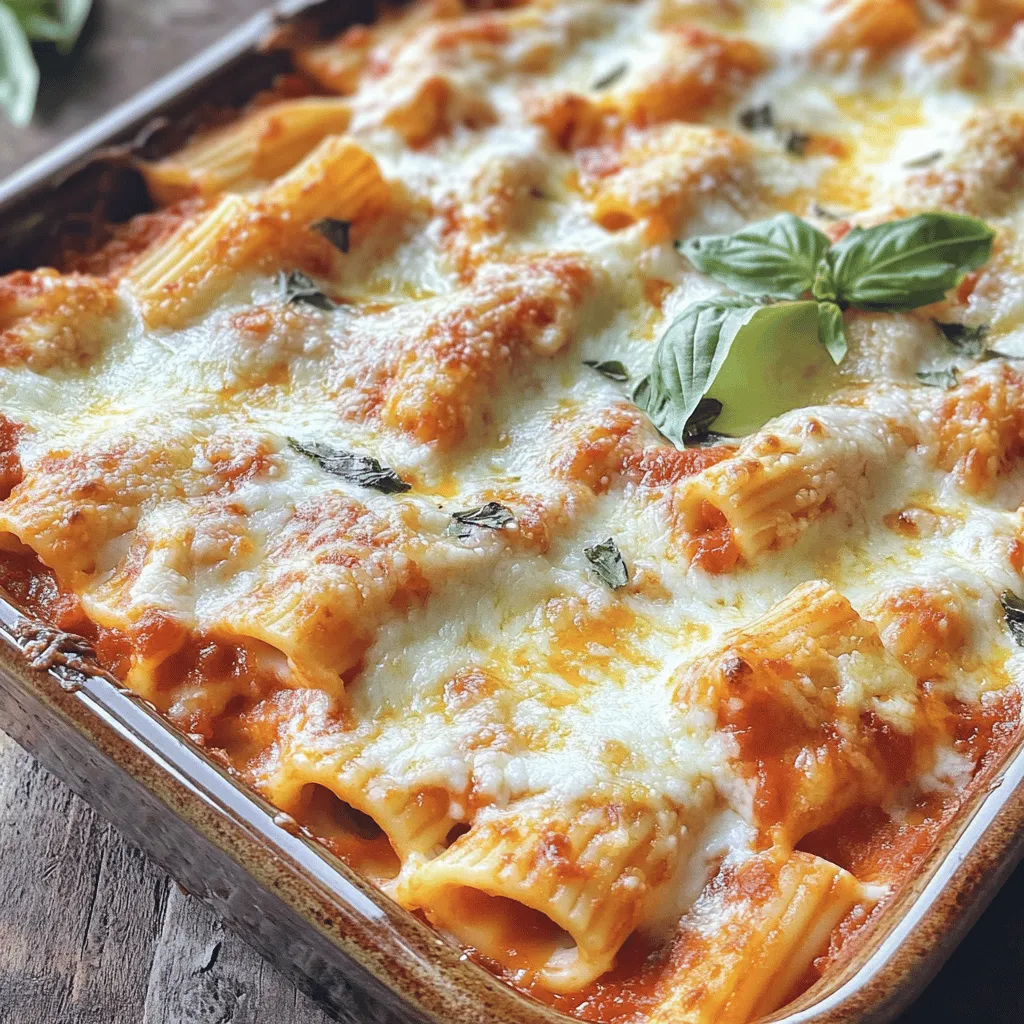
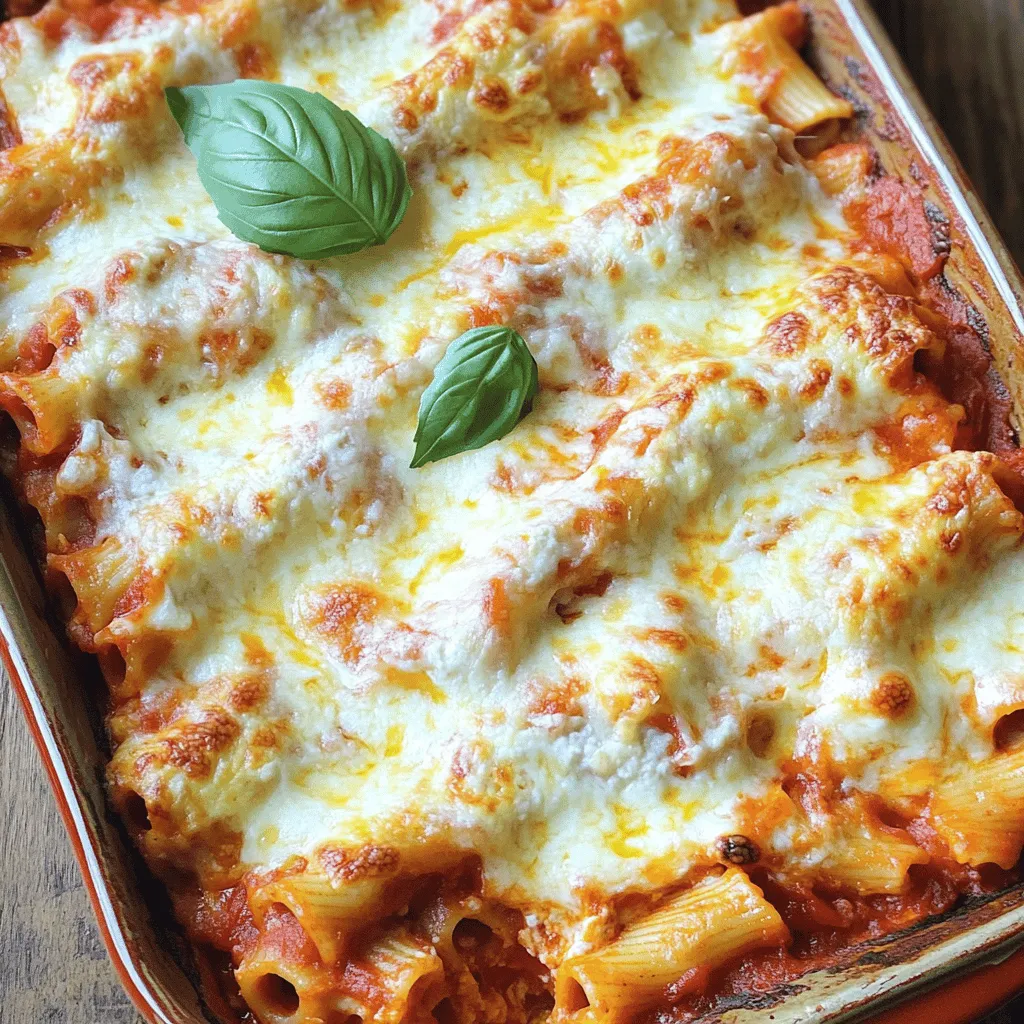
Baking and Finishing Touches
Cover your baking dish tightly with aluminum foil. Place it in the preheated oven and bake for 25 minutes. This helps the flavors come together. After 25 minutes, take off the foil and bake for another 15-20 minutes. Look for bubbling cheese and a golden top. Once done, let it cool for 5-10 minutes before serving. This resting time helps the layers set nicely.
Tips & Tricks
Perfecting Your Baked Ziti
To achieve the best cheese texture, use a mix of cheeses. I love combining mozzarella, ricotta, and Parmesan. This mix creates a creamy, stretchy feel. Make sure to spread the cheese evenly in each layer.
Resting time is key. After baking, let the dish sit for 5-10 minutes. This helps the layers set and makes serving easier. If you skip this step, your ziti may fall apart.
Serving Suggestions
Baked ziti pairs well with garlic bread. The warm, crusty bread soaks up the sauce nicely. A light salad with fresh greens is also great. Try adding a simple vinaigrette for a zesty flavor.
For a special touch, offer a side of roasted vegetables. They add color and nutrients.
Cooking Tools and Equipment
You’ll need some basic kitchen tools for this recipe. A large pot is perfect for boiling pasta. Use a mixing bowl for the ricotta mixture. A sturdy baking dish is essential for layering your ziti.
I recommend using a glass or ceramic dish. These materials cook evenly and show off your dish’s beautiful layers. Don’t forget a good spatula for serving!
Variations
Ingredient Substitutions
Dairy alternatives
If you’re lactose intolerant or vegan, use dairy-free cheese. Brands like Daiya or Follow Your Heart offer great substitutes. You can swap ricotta for tofu blended with lemon juice, giving a creamy texture without dairy.
Vegetarian options
To make a vegetarian baked ziti, skip the meat. Use extra veggies like spinach, mushrooms, or zucchini. These add flavor and nutrition. You can also choose plant-based meat crumbles for a hearty dish.
Flavor Enhancements
Spicing up your baked ziti
Add a pinch of red pepper flakes for heat. You could also mix in some fresh herbs like oregano or parsley. These spices brighten the dish and give it a fresh taste.
Adding veggies or protein
Feel free to mix in cooked sausage or ground beef for extra protein. For a veggie-packed meal, try adding bell peppers, onions, or even broccoli. Just cook these ahead of time to keep them tender and flavorful.
Creative Serving Styles
Individual servings vs. family-style
For a fun twist, serve baked ziti in individual ramekins. This makes it easy for guests to enjoy their own portion. Family-style is great for sharing and creates a warm atmosphere.
Using different pasta shapes
While ziti is traditional, you can use other pasta shapes like penne or fusilli. Each shape holds sauce differently. This gives your baked ziti a unique look and adds a fun texture.
Storage Info
Storing Leftovers
To keep your baked ziti fresh, store it in an airtight container. Let it cool first. Place it in the fridge for up to 3 to 5 days. If you want to freeze it, cut it into portions. Use freezer-safe bags or containers. Label them with the date. You can freeze it for up to 3 months. Thaw it in the fridge overnight before reheating.
Reheating Instructions
For reheating, the oven works best. Preheat your oven to 350°F (175°C). Place the ziti in an oven-safe dish. Cover it with foil to keep it moist. Bake for about 20-25 minutes. If you want to use a microwave, heat it in short bursts. Stir it every minute to keep it even. Remember to check if it’s hot all the way through. This way, you keep the flavor and texture just right.
FAQs
How long should I bake baked ziti?
Bake your ziti for a total of 40-45 minutes. Start by covering the dish with foil and bake for 25 minutes. Then, remove the foil and bake for another 15-20 minutes. This helps the cheese melt and bubble perfectly, creating a delicious crust on top.
Can I make baked ziti ahead of time?
Yes, you can prepare baked ziti in advance. Assemble the dish and cover it tightly. Store it in the fridge for up to two days before baking. If you want to freeze it, wrap it well in foil. It can last for up to three months in the freezer. Just remember to thaw it overnight in the fridge before baking.
What can I serve with baked ziti?
Baked ziti pairs well with many sides. You can serve a simple green salad. A Caesar salad works great too. Garlic bread is a classic choice. Roasted vegetables add a nice touch as well. Choose sides that balance the rich flavors of the ziti.
Is it possible to make baked ziti in a slow cooker?
Absolutely! To make baked ziti in a slow cooker, layer the ingredients in the pot. Start with sauce, then pasta, and cheese. Repeat these layers. Cook on low for about 4-6 hours. This method keeps your ziti moist and flavorful.This recipe gives you step-by-step instructions and tips for the best results.
In this post, we covered how to make a delicious baked ziti. We discussed the key ingredients, the step-by-step process, and tips for the best results. I shared ways to customize your dish and how to store leftovers. Baked ziti is simple yet tasty—perfect for any meal. Remember to enjoy the cooking process and share your creation with others. Making it your own will bring joy to your table.


