Delicious Avocado and Black Bean Salad Refreshing Meal
. How to select ripe avocados To choose ripe avocados, look for dark green skin. Gently squeeze without applying too much pressure. A ripe avocado gives slightly. Avoid any that feel too soft or have dark spots. Storing leftover salad To keep leftovers fresh, store them in an airtight container. Place a piece of plastic wrap directly on the salad before sealing. This helps keep the avocados from browning. Additional spices or herbs You can add spices like smoked paprika or cayenne for extra flavor. Fresh herbs like parsley or basil can also brighten the salad. Experiment with what you like to create your perfect mix. Adjusting the heat level If you want more heat, add more jalapeño or a splash of hot sauce. For a milder version, skip the jalapeño or remove the seeds. Adjust to your taste! Presentation ideas For a fun presentation, layer the salad in a clear bowl. This shows off all the bright colors. You can also serve it in individual bowls or mason jars for a neat look. Pairing with other dishes This salad pairs well with grilled chicken, fish, or tacos. You can also serve it as a light lunch or side dish at a barbecue. It adds a fresh touch to any meal. {{image_4}} You can easily change this salad to fit your taste. Adding protein is one great option. Grilled chicken or shrimp works well here. It adds heartiness and flavor. You can also mix in seasonal vegetables. Try diced cucumbers in summer or roasted butternut squash in fall. These add color and texture. You can make this salad vegan by skipping the feta cheese. The other ingredients are already plant-based. It still tastes great without it. If you need a gluten-free version, you’re in luck! This salad is naturally gluten-free. All the ingredients fit a gluten-free diet, so enjoy without worry. For a twist on the dressing, use a yogurt-based option. This adds creaminess without extra fat. It’s a fun change from the classic vinaigrette. You can also try different vinaigrettes. A balsamic or honey mustard vinaigrette can change the flavor. Experiment to find your favorite! For the full recipe, check out the delicious avocado and black bean salad. To keep your avocado and black bean salad fresh, store it in an airtight container. This helps prevent oxidation and keeps flavors intact. Make sure the container is clean and dry before adding the salad. You can also squeeze a little extra lime juice on top. This adds a nice flavor and helps slow browning. I do not recommend freezing this salad. The texture of avocados changes when frozen. You may end up with mushy avocados and watery beans. If you want to save some for later, consider storing the ingredients separately. You can freeze black beans or corn, but mix them fresh with avocado when serving. This salad is best served cold or at room temperature. If you must reheat it, do it gently. Place it in a microwave-safe bowl and heat in short bursts. Stir it often to avoid cooking the avocado. However, reheating is not necessary, as the flavors shine best when fresh. For more details, check the Full Recipe. To keep avocados fresh, use lemon or lime juice. The acid slows browning. Also, store cut avocados in an airtight container. You can cover them with plastic wrap, pressing it against the flesh to limit air exposure. If you leave the pit in the avocado, it helps too. Yes, you can prepare the salad ahead. However, add the avocados and dressing just before serving. This way, they stay fresh. You can chop all the other ingredients earlier. Store them in the fridge to keep them cool. If you want to switch the black beans, try chickpeas or kidney beans. They both add protein and flavor. You could also use grilled chicken or shrimp for a meaty option. If you prefer a vegan choice, lentils are great too. Yes, this salad is gluten-free. All the ingredients are safe for those with gluten issues. If you choose to add any extras, like croutons, check their labels to ensure they are gluten-free. This blog post covered a vibrant salad packed with healthy ingredients. You learned how to prepare fresh avocados, black beans, and various veggies. I shared tips for making the perfect dressing and assembling the salad without mushing the avocados. Remember, customizing the salad allows for everyone’s taste. Keep it fresh, explore new flavors, and enjoy! Healthy eating can be fun and delicious. Take these ideas and make your salad unique.](https://dishtreats.com/wp-content/uploads/2025/06/59c4ae36-0ebd-4eac-932b-d71541cf887d.webp)
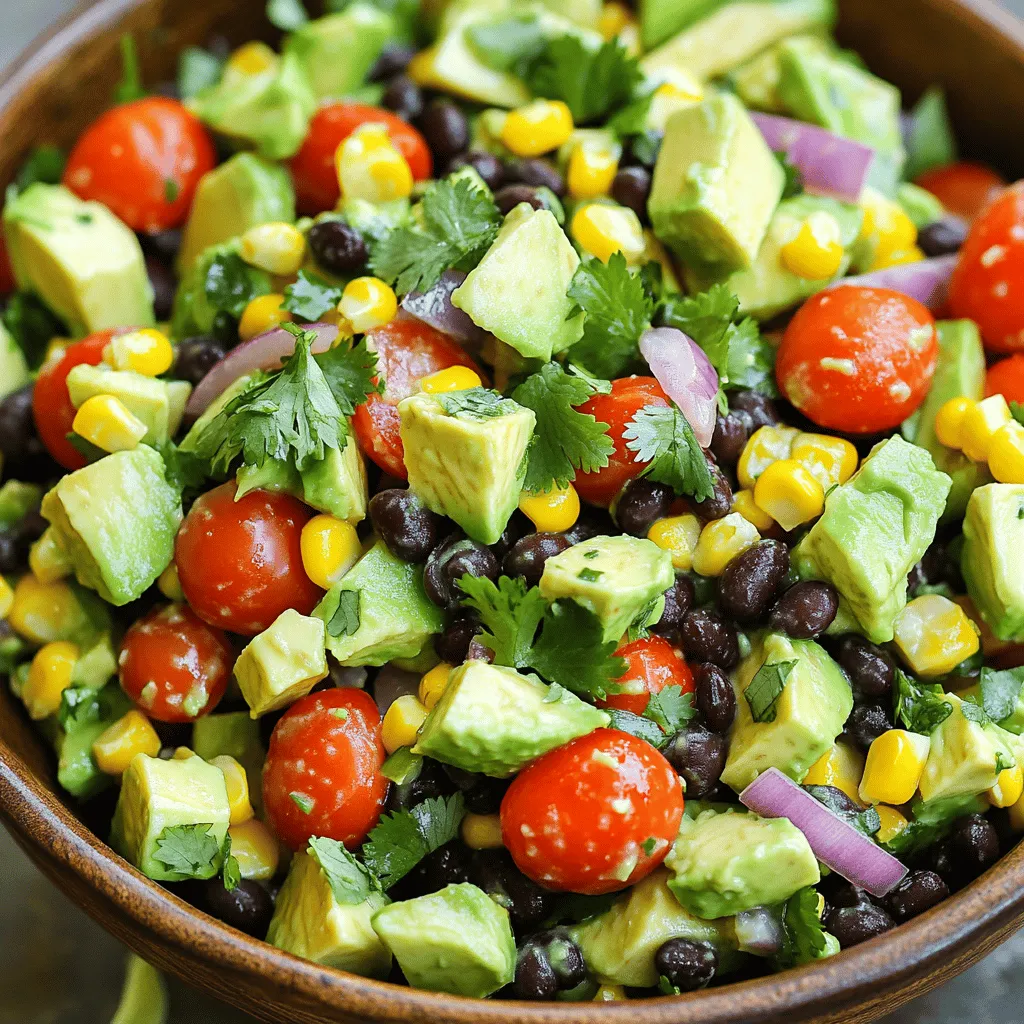
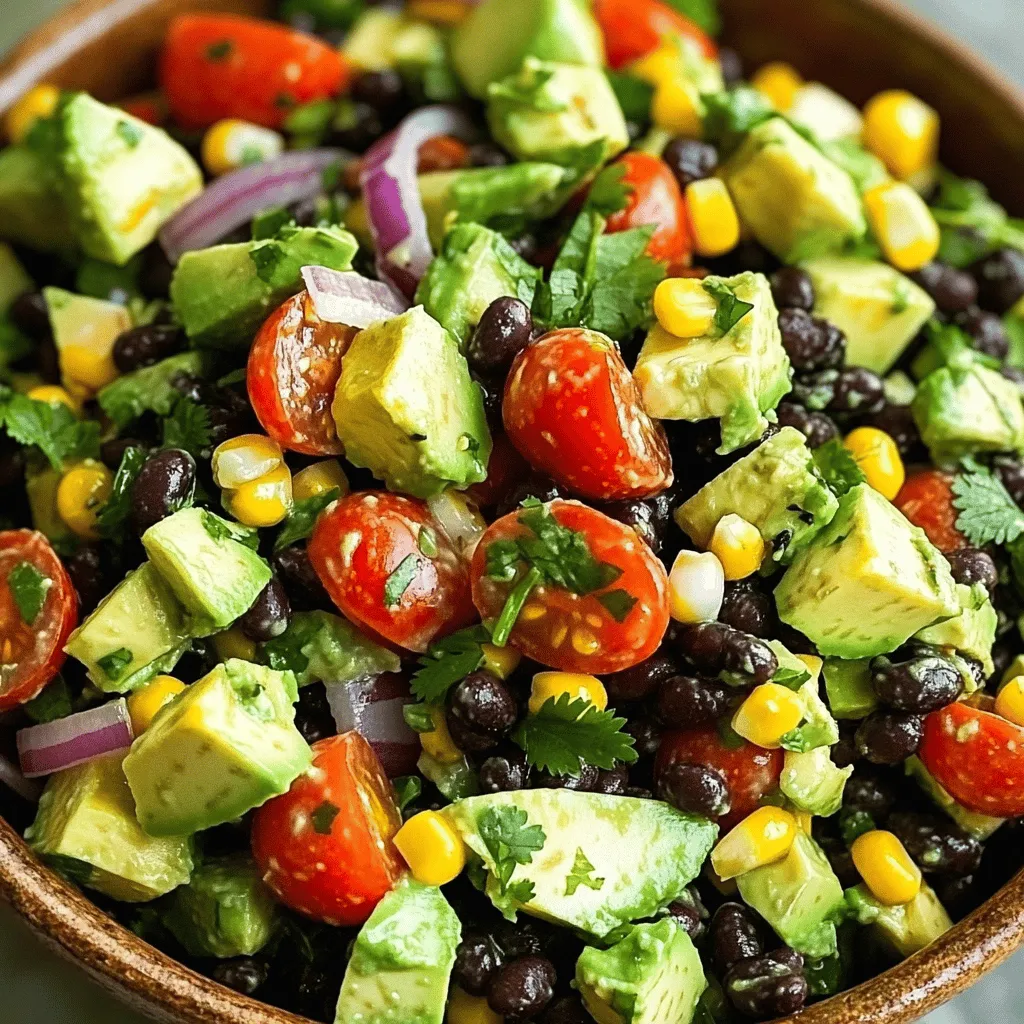
Looking for a fresh and tasty meal? This Avocado and Black Bean Salad blends smooth, creamy avocados with hearty black beans and colorful veggies. It’s not just delicious; it’s packed with nutrients too! Whether you’re a busy parent or a health-conscious foodie, I’ll walk you through the simple steps and ingredients to make this salad shine. Let’s get started on whipping up a dish that’s as good for your body as it is pleasing to your taste buds!
Ingredients
List of Ingredients
- Ripe avocados
- Canned black beans
- Cherry tomatoes
- Red onion
- Corn kernels
- Red bell pepper
- Jalapeño (optional)
- Fresh cilantro
- Lime juice
- Extra virgin olive oil
- Ground cumin
- Salt and pepper
- Feta cheese (optional)
Measurements and Substitutions
For this salad, you’ll need:
- 2 ripe avocados, diced into bite-sized pieces
- 1 can (15 oz) black beans, drained and rinsed
- 1 cup cherry tomatoes, halved
- 1 small red onion, finely chopped
- 1 cup corn kernels (fresh or thawed if frozen)
- 1 red bell pepper, diced
- 1 jalapeño, minced (optional)
- 1/4 cup fresh cilantro, chopped
- 3 tablespoons lime juice
- 2 tablespoons extra virgin olive oil
- 1 teaspoon ground cumin
- Salt and pepper to taste
- 1/4 cup feta cheese, crumbled (optional)
If you prefer, you can switch black beans for kidney beans. Use lime zest if you want extra zest. For a vegan option, skip the feta cheese.
Health Benefits
Avocados are full of healthy fats. They help your heart and keep skin glowing. Black beans are high in protein and fiber. They support digestion and keep you full.
The red onion adds antioxidants. Cherry tomatoes boost vitamin C. Corn provides sweet crunch and energy. Cilantro is fresh and may help with digestion. Lime juice is hydrating and adds zest. Overall, this salad is tasty and good for you.
Step-by-Step Instructions
Preparation of Ingredients
Start with the avocados. Cut them in half, remove the pit, and scoop out the flesh. Dice the avocados into bite-sized pieces. Place them in a large bowl to keep them fresh. Next, rinse the black beans in a strainer. This helps remove extra sodium and gives them a cleaner taste. Add the drained beans to the bowl with the avocados.
Now, chop your vegetables. Halve the cherry tomatoes to bring out their sweetness. Finely chop the red onion for a sharp flavor. Dice the red bell pepper to add color and crunch. If you like heat, use a jalapeño. Remove the seeds, mince it, and add it to the bowl. Mix all the veggies with the beans and avocados gently.
Making the Dressing
For the dressing, grab a small bowl. Squeeze fresh lime juice into it for a tangy kick. Add the extra virgin olive oil for a rich taste. Sprinkle in the ground cumin, salt, and black pepper. Whisk everything together until it is mixed well. This dressing adds flavor and ties the salad together.
Assembling the Salad
Now, pour the dressing over the salad mixture. Use a spatula to fold everything gently. Be careful not to smash the delicate avocado pieces. This keeps the salad looking beautiful. After mixing, add fresh cilantro and crumbled feta cheese, if you choose to. Fold again until everything is nicely combined.
Take a moment to taste the salad. Adjust the seasoning by adding more salt, pepper, or lime juice if needed. Let the salad rest for about 10 minutes. This helps the flavors blend. Serve it chilled or at room temperature, either in a large bowl or in individual portions.
Tips & Tricks
Ensuring Freshness
How to select ripe avocados
To choose ripe avocados, look for dark green skin. Gently squeeze without applying too much pressure. A ripe avocado gives slightly. Avoid any that feel too soft or have dark spots.
Storing leftover salad
To keep leftovers fresh, store them in an airtight container. Place a piece of plastic wrap directly on the salad before sealing. This helps keep the avocados from browning.
Flavor Enhancements
Additional spices or herbs
You can add spices like smoked paprika or cayenne for extra flavor. Fresh herbs like parsley or basil can also brighten the salad. Experiment with what you like to create your perfect mix.
Adjusting the heat level
If you want more heat, add more jalapeño or a splash of hot sauce. For a milder version, skip the jalapeño or remove the seeds. Adjust to your taste!
Serving Suggestions
Presentation ideas
For a fun presentation, layer the salad in a clear bowl. This shows off all the bright colors. You can also serve it in individual bowls or mason jars for a neat look.
Pairing with other dishes
This salad pairs well with grilled chicken, fish, or tacos. You can also serve it as a light lunch or side dish at a barbecue. It adds a fresh touch to any meal.

Variations
Customization Ideas
You can easily change this salad to fit your taste. Adding protein is one great option. Grilled chicken or shrimp works well here. It adds heartiness and flavor.
You can also mix in seasonal vegetables. Try diced cucumbers in summer or roasted butternut squash in fall. These add color and texture.
Dietary Modifications
You can make this salad vegan by skipping the feta cheese. The other ingredients are already plant-based. It still tastes great without it.
If you need a gluten-free version, you’re in luck! This salad is naturally gluten-free. All the ingredients fit a gluten-free diet, so enjoy without worry.
Dressing Alternatives
For a twist on the dressing, use a yogurt-based option. This adds creaminess without extra fat. It’s a fun change from the classic vinaigrette.
You can also try different vinaigrettes. A balsamic or honey mustard vinaigrette can change the flavor. Experiment to find your favorite!
Storage Info
Storing Leftovers
To keep your avocado and black bean salad fresh, store it in an airtight container. This helps prevent oxidation and keeps flavors intact. Make sure the container is clean and dry before adding the salad. You can also squeeze a little extra lime juice on top. This adds a nice flavor and helps slow browning.
Freezing Options
I do not recommend freezing this salad. The texture of avocados changes when frozen. You may end up with mushy avocados and watery beans. If you want to save some for later, consider storing the ingredients separately. You can freeze black beans or corn, but mix them fresh with avocado when serving.
Reheating Recommendations
This salad is best served cold or at room temperature. If you must reheat it, do it gently. Place it in a microwave-safe bowl and heat in short bursts. Stir it often to avoid cooking the avocado. However, reheating is not necessary, as the flavors shine best when fresh.
FAQs
How do you prevent avocados from browning?
To keep avocados fresh, use lemon or lime juice. The acid slows browning. Also, store cut avocados in an airtight container. You can cover them with plastic wrap, pressing it against the flesh to limit air exposure. If you leave the pit in the avocado, it helps too.
Can I make the salad ahead of time?
Yes, you can prepare the salad ahead. However, add the avocados and dressing just before serving. This way, they stay fresh. You can chop all the other ingredients earlier. Store them in the fridge to keep them cool.
What can I replace the black beans with?
If you want to switch the black beans, try chickpeas or kidney beans. They both add protein and flavor. You could also use grilled chicken or shrimp for a meaty option. If you prefer a vegan choice, lentils are great too.
Is the salad gluten-free?
Yes, this salad is gluten-free. All the ingredients are safe for those with gluten issues. If you choose to add any extras, like croutons, check their labels to ensure they are gluten-free.
This blog post covered a vibrant salad packed with healthy ingredients. You learned how to prepare fresh avocados, black beans, and various veggies. I shared tips for making the perfect dressing and assembling the salad without mushing the avocados.
Remember, customizing the salad allows for everyone’s taste. Keep it fresh, explore new flavors, and enjoy! Healthy eating can be fun and delicious. Take these ideas and make your salad unique.
. How to select ripe avocados To choose ripe avocados, look for dark green skin. Gently squeeze without applying too much pressure. A ripe avocado gives slightly. Avoid any that feel too soft or have dark spots. Storing leftover salad To keep leftovers fresh, store them in an airtight container. Place a piece of plastic wrap directly on the salad before sealing. This helps keep the avocados from browning. Additional spices or herbs You can add spices like smoked paprika or cayenne for extra flavor. Fresh herbs like parsley or basil can also brighten the salad. Experiment with what you like to create your perfect mix. Adjusting the heat level If you want more heat, add more jalapeño or a splash of hot sauce. For a milder version, skip the jalapeño or remove the seeds. Adjust to your taste! Presentation ideas For a fun presentation, layer the salad in a clear bowl. This shows off all the bright colors. You can also serve it in individual bowls or mason jars for a neat look. Pairing with other dishes This salad pairs well with grilled chicken, fish, or tacos. You can also serve it as a light lunch or side dish at a barbecue. It adds a fresh touch to any meal. {{image_4}} You can easily change this salad to fit your taste. Adding protein is one great option. Grilled chicken or shrimp works well here. It adds heartiness and flavor. You can also mix in seasonal vegetables. Try diced cucumbers in summer or roasted butternut squash in fall. These add color and texture. You can make this salad vegan by skipping the feta cheese. The other ingredients are already plant-based. It still tastes great without it. If you need a gluten-free version, you’re in luck! This salad is naturally gluten-free. All the ingredients fit a gluten-free diet, so enjoy without worry. For a twist on the dressing, use a yogurt-based option. This adds creaminess without extra fat. It’s a fun change from the classic vinaigrette. You can also try different vinaigrettes. A balsamic or honey mustard vinaigrette can change the flavor. Experiment to find your favorite! For the full recipe, check out the delicious avocado and black bean salad. To keep your avocado and black bean salad fresh, store it in an airtight container. This helps prevent oxidation and keeps flavors intact. Make sure the container is clean and dry before adding the salad. You can also squeeze a little extra lime juice on top. This adds a nice flavor and helps slow browning. I do not recommend freezing this salad. The texture of avocados changes when frozen. You may end up with mushy avocados and watery beans. If you want to save some for later, consider storing the ingredients separately. You can freeze black beans or corn, but mix them fresh with avocado when serving. This salad is best served cold or at room temperature. If you must reheat it, do it gently. Place it in a microwave-safe bowl and heat in short bursts. Stir it often to avoid cooking the avocado. However, reheating is not necessary, as the flavors shine best when fresh. For more details, check the Full Recipe. To keep avocados fresh, use lemon or lime juice. The acid slows browning. Also, store cut avocados in an airtight container. You can cover them with plastic wrap, pressing it against the flesh to limit air exposure. If you leave the pit in the avocado, it helps too. Yes, you can prepare the salad ahead. However, add the avocados and dressing just before serving. This way, they stay fresh. You can chop all the other ingredients earlier. Store them in the fridge to keep them cool. If you want to switch the black beans, try chickpeas or kidney beans. They both add protein and flavor. You could also use grilled chicken or shrimp for a meaty option. If you prefer a vegan choice, lentils are great too. Yes, this salad is gluten-free. All the ingredients are safe for those with gluten issues. If you choose to add any extras, like croutons, check their labels to ensure they are gluten-free. This blog post covered a vibrant salad packed with healthy ingredients. You learned how to prepare fresh avocados, black beans, and various veggies. I shared tips for making the perfect dressing and assembling the salad without mushing the avocados. Remember, customizing the salad allows for everyone’s taste. Keep it fresh, explore new flavors, and enjoy! Healthy eating can be fun and delicious. Take these ideas and make your salad unique.](https://dishtreats.com/wp-content/uploads/2025/06/59c4ae36-0ebd-4eac-932b-d71541cf887d-300x300.webp)

![To make this tasty dip, you need a few key items: - 1 medium head of cauliflower, broken into bite-sized florets - 1 cup plain Greek yogurt (preferably full-fat for creaminess) - 1/2 cup shredded sharp cheddar cheese - 1/4 cup cream cheese, softened at room temperature - 1/4 cup buffalo sauce (adjust based on your heat preference) - 2 cloves garlic, finely minced - 1/2 teaspoon onion powder - 1/2 teaspoon smoked paprika for extra depth - Salt and freshly ground black pepper to taste These ingredients blend together to create a creamy, spicy dip that you will love. While the dip is great on its own, you can add some fun toppings. Here are some ideas: - Chopped green onions (scallions) for a fresh pop of color - Celery sticks for a crunchy contrast - Crispy tortilla chips for dipping These add-ons enhance both the look and taste of your dish. This dip is not just delicious; it's also packed with nutrients. Here’s a quick look at what you get: - Cauliflower: Low in calories, high in fiber - Greek yogurt: Good source of protein and probiotics - Cheese: Adds calcium and flavor Each serving is a great choice for a snack or appetizer. You can enjoy this dish without guilt! First, preheat your oven to 375°F (190°C). This step helps the dip cook well. Take a medium head of cauliflower and break it into bite-sized florets. Next, fill a large pot halfway with water and bring it to a boil. Once boiling, place a steamer basket inside the pot and add the cauliflower florets. Steam them for 8 to 10 minutes. You want them tender enough to pierce easily with a fork. After steaming, remove the florets from heat and let them cool for a few minutes. In a food processor, add the steamed cauliflower, 1 cup of plain Greek yogurt, 1/4 cup of softened cream cheese, and 1/4 cup of buffalo sauce. You can adjust the buffalo sauce to control the heat. Also, include 2 cloves of minced garlic, 1/2 teaspoon of onion powder, 1/2 teaspoon of smoked paprika, salt, and black pepper to taste. Blend until smooth and creamy. Scrape down the sides as needed. Then, gently fold in 1/2 cup of shredded sharp cheddar cheese. This adds great flavor and texture to the dip. Now, transfer the cauliflower mixture to your greased baking dish. Spread it out evenly using a spatula. Place it in the oven and bake for 20 to 25 minutes. You want the dip to be hot and the top to turn a light golden-brown color. When done, carefully take the dish out of the oven and let it cool for about 5 minutes. This rest time allows the flavors to blend. Don’t forget to garnish with chopped green onions before serving! Enjoy your warm dip with crunchy celery sticks and crispy tortilla chips. For the Full Recipe, you can refer back to the ingredients and instructions. To get the best flavor and texture from your dip, use fresh cauliflower. Steam it until it's tender but not mushy. This keeps the dip thick and creamy. Use full-fat Greek yogurt and cream cheese for added richness. They blend well and give a nice mouthfeel. Don't skip the garlic; it adds a punch of flavor. For spice lovers, adjust the buffalo sauce to your taste. You can easily modify this dip for different diets. For a vegan option, swap Greek yogurt and cream cheese for cashew cream or coconut yogurt. Use nutritional yeast for that cheesy flavor without dairy. If you want a low-carb option, serve it with sliced veggies instead of chips. This way, everyone can enjoy it without feeling left out. This dip works for many occasions. For game days, serve it warm with crispy tortilla chips. At parties, set it out with celery sticks and carrot sticks for a colorful platter. If you're hosting a casual dinner, pair it with toasted bread or pita chips. This dip can fit into any setting, making it a versatile choice. You can find the full recipe to make it just right! {{image_4}} To make a vegan version, swap Greek yogurt for cashew cream or vegan yogurt. Use vegan cream cheese instead of regular cream cheese. You can also choose nutritional yeast for a cheesy taste without dairy. Adjust the buffalo sauce based on your heat level. This version keeps the flavor while being plant-based. If you love heat, add extra buffalo sauce or some diced jalapeños. For a cheesier dip, mix in more shredded vegan cheese or cheddar. You can even top it with cheese before baking for a bubbly, golden finish. This variation will delight cheese lovers and spice fans alike. While celery sticks and tortilla chips are classic, try using sliced bell peppers or cucumber sticks. Pita chips or even crispy veggies add a nice crunch. For a fun twist, serve with mini pretzels for a salty kick. These options keep it fresh and exciting! For the full recipe, visit the [Full Recipe] page. To store leftover dip, let it cool first. Place it in an airtight container. This keeps the dip fresh for up to three days. You can also cover it tightly with plastic wrap. Make sure no air gets in, as this can spoil the dip. When you're ready to enjoy it again, scoop out what you need. Reheat in the oven for best results. Preheat your oven to 350°F (175°C). Place the dip in an oven-safe dish and cover it with foil. Heat for about 15-20 minutes, or until it's warm. You can also use the microwave. Heat in short bursts, about 30 seconds, stirring in between until hot. You can freeze Cauliflower Buffalo Dip for up to three months. Use a freezer-safe container. Leave some space at the top, as the dip may expand. To thaw, move it to the fridge overnight. Reheat it as mentioned above. The texture may change slightly, but the taste remains delicious. Enjoy this tasty dip anytime! Yes, you can use various cheeses. Creamy cheeses like goat cheese or ricotta work well. You could also try mozzarella for a milder taste. Each cheese changes the dip's flavor and texture. Mixing cheeses can create a unique taste. Just keep the total amount the same as the recipe calls for. You have many fun options for serving this dip. Here are a few ideas: - Crispy tortilla chips - Fresh celery sticks - Carrot sticks - Pita bread or chips - Crackers These choices add crunch and flavor. You can even make a veggie platter for a colorful spread. The dip's spice level depends on the buffalo sauce you use. Some sauces are very hot, while others are mild. If you like less heat, use less buffalo sauce. You can taste and adjust as you mix. This way, you control the spice to suit your taste. In this blog post, I covered how to make tasty Cauliflower Buffalo Dip. You learned about the key ingredients, how to prepare, and bake the dip. I shared tips for the best flavor and texture, plus easy variations to try. Storage tips ensure your leftovers stay fresh. Cauliflower Buffalo Dip is great for any party. Enjoy experimenting with flavors and tweaks. I hope you make this dish and share it with others. It’s sure to be a hit!](https://dishtreats.com/wp-content/uploads/2025/07/091f7212-5f30-4b51-84f4-e8795fa9d64a-768x768.webp)


![To make Baked Garlic Parmesan Zucchini Fries, you need some simple and fresh ingredients. Here’s what you’ll need: - 2 medium zucchinis (cut into fry-shaped strips) - 1 cup whole wheat breadcrumbs - 1/2 cup grated Parmesan cheese - 2 cloves garlic (finely minced) - 1 teaspoon dried oregano - 1 teaspoon garlic powder - 1/2 teaspoon salt - 1/4 teaspoon freshly ground black pepper - 2 large eggs (beaten) - Cooking spray or light drizzle of olive oil These ingredients come together to create a tasty dish that is both healthy and satisfying. The zucchini offers a great crunch, while the garlic and Parmesan provide bold flavor. Using whole wheat breadcrumbs adds a nice texture and a bit of nuttiness. If you follow the recipe closely, you will get fries that are crispy on the outside and tender on the inside. You can check the Full Recipe for detailed instructions on how to bring this dish to life. - Set the temperature to 425°F (220°C). - Prepare a baking sheet with parchment paper. First, I like to get my oven hot. Preheating to 425°F helps the fries crisp nicely. Lining the baking sheet with parchment paper makes cleanup easy and keeps the fries from sticking. - Mix breadcrumbs, Parmesan cheese, minced garlic, oregano, garlic powder, salt, and pepper. In a shallow bowl, I mix the whole wheat breadcrumbs with grated Parmesan cheese. I add minced garlic for flavor, oregano for aroma, garlic powder, salt, and pepper. Mixing these ingredients well ensures that every fry gets a tasty coating. - Dip zucchini fries in beaten eggs and coat with breadcrumb mixture. I set another bowl with beaten eggs. Taking a zucchini fry, I dip it in the eggs, letting the extra drip off. Then, I coat it in the breadcrumb mixture. I press the crumbs on to make sure they stick well. This step is key for a crispy finish. - Place coated fries on the baking sheet and spray with cooking spray. Once breaded, I lay the fries in a single layer on the baking sheet. I like to spray the tops lightly with cooking spray. This helps them brown and adds crunch. - Bake for 20-25 minutes and turn halfway for even crisping. I slide the baking sheet into the oven and set a timer for 20 minutes. Halfway through, I flip the fries. This ensures they cook evenly and get that golden brown color we love. - Cool slightly before serving and add garnishes. After baking, I let the fries cool for a few minutes. This step helps them crisp even more. I like to serve them hot, sprinkled with extra Parmesan and a small bowl of marinara sauce on the side. You can find the full recipe above for more details. To get the best crispiness, I recommend using cooking spray or a light drizzle of olive oil. This helps the fries brown and stay crunchy. Make sure not to overcrowd the baking sheet. If the fries are too close, they can steam instead of bake. For extra crunch, try broiling them for the last few minutes. Just keep an eye on them to prevent burning. Serve the zucchini fries hot and sprinkle some extra Parmesan on top. This adds flavor and makes them look great. Pair them with marinara sauce for dipping. The rich sauce complements the garlic and cheese perfectly. You could also try ranch or a spicy aioli for a twist. Removing excess moisture from zucchinis is key to crispiness. Too much water makes them soggy. To dry zucchinis, slice them and place them on paper towels. Sprinkle a little salt on top and let them sit for about 10 minutes. The salt draws out moisture. Afterward, pat them dry with more paper towels. This simple step helps you achieve that perfect crunch in your baked garlic Parmesan zucchini fries. For the full recipe, check out the details above. {{image_4}} You can make your zucchini fries even better by adding spices. Try paprika for a smoky taste. Cayenne pepper adds a nice kick, too. Just sprinkle some into the breadcrumb mix before coating the zucchini fries. This small change can make a big difference in flavor. If you want to switch up the cheese, consider using mozzarella. It melts beautifully and adds a creamy texture. You can also try vegan cheese for a plant-based option. Just make sure it melts well to keep that crispy exterior intact. You can mix your zucchini fries with other veggies for more variety. Eggplant slices work well when cut into fry shapes. Sweet potatoes are another great choice. They will add a sweet flavor and vibrant color to your plate. Feel free to experiment with whatever veggies you have on hand. For the complete recipe, check out the [Full Recipe]. To keep your zucchini fries fresh, store them in an airtight container in the refrigerator. This helps prevent them from getting soggy. They will last for about three days. Make sure to let them cool down before sealing the container. The best way to reheat zucchini fries is in the oven. Preheat your oven to 400°F (200°C). Place the fries on a baking sheet. Heat them for about 10 minutes. This method keeps them crispy. You can also use an air fryer if you have one. Set it to 350°F (175°C) and heat for about 5 minutes. If you want to store them longer, you can freeze the zucchini fries. First, let them cool completely. Next, spread them out in a single layer on a baking sheet. Freeze them for about 1-2 hours. Once frozen, transfer them to a freezer bag. This way, they won’t stick together. When ready to eat, bake them straight from the freezer. Add a few extra minutes to the cooking time for best results. Yes, you can use regular breadcrumbs. The texture will be slightly different. Whole wheat breadcrumbs add a nutty flavor and more fiber. If you prefer a lighter taste, go for regular ones. Both will still give you a crispy finish. To make these fries gluten-free, use gluten-free breadcrumbs. You can find these at most stores. Another great option is to use crushed gluten-free crackers. They add a nice crunch. Just make sure to check the labels for gluten-free assurance. Many sauces go well with zucchini fries. Popular choices include marinara, ranch, or garlic aioli. You can also try a spicy sriracha mayo for a kick. For a homemade touch, mix Greek yogurt with herbs for a fresh dip. To make these fries vegan, substitute the eggs with flax eggs. Mix 1 tablespoon of flaxseed meal with 2.5 tablespoons of water. Let it sit for a few minutes until it thickens. For cheese, you can use nutritional yeast or a store-bought vegan cheese. These swaps keep the flavor while making it plant-based. Check out the Full Recipe for detailed steps to make these tasty Baked Garlic Parmesan Zucchini Fries! This blog post has covered the tasty journey of making zucchini fries. We explored key ingredients, step-by-step instructions, and helpful tips. You learned how to get crispy fries and about delicious variations. Now, you can enjoy this snack with great flavors and textures. Try out the ideas and personalize your dish. Whether it’s for a party or a snack, zucchini fries are a fun, healthy choice. Get cooking and taste the difference!](https://dishtreats.com/wp-content/uploads/2025/06/b228a051-b543-4822-a33a-588c5a943e46-768x768.webp)