Crispy Chickpea Tacos Flavorful and Easy Recipe

If you’re searching for a tasty, easy meal, look no further than crispy chickpea tacos! Packed with flavor and loaded with simple ingredients, these tacos are perfect for any occasion. I’ll guide you through each step to create delicious, crunchy tacos that everyone will love. Let’s dive into this fun and satisfying recipe that brings bold flavors to your kitchen without the fuss!
Ingredients
Main Ingredients
- 1 can (15 oz) chickpeas, thoroughly drained and rinsed
- 1 tablespoon extra-virgin olive oil
- Seasonings: smoked paprika, ground cumin, garlic powder, chili powder, salt, and pepper
Taco Components
- 6 small corn tortillas
- 1 cup finely shredded green cabbage
- ½ cup ripe tomatoes, diced
- ¼ cup red onion, finely diced
- ½ ripe avocado, sliced softly
- Fresh cilantro leaves and lime wedges for garnish
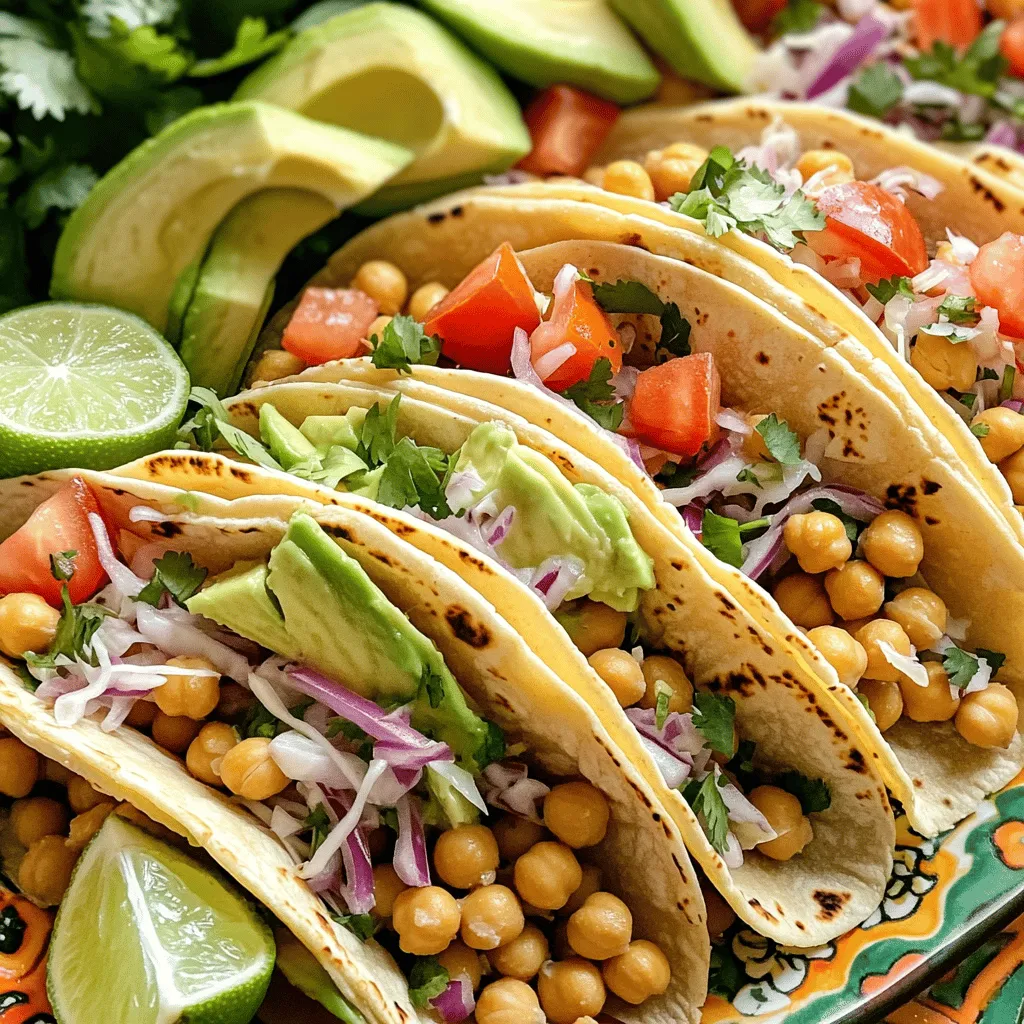
This recipe brings together simple, fresh items. The chickpeas are the star. They become crispy and flavorful after roasting. The olive oil and spices create a tasty coat. You have smoked paprika, cumin, garlic powder, and chili powder. These spices add warmth and depth. Salt and pepper balance everything nicely.
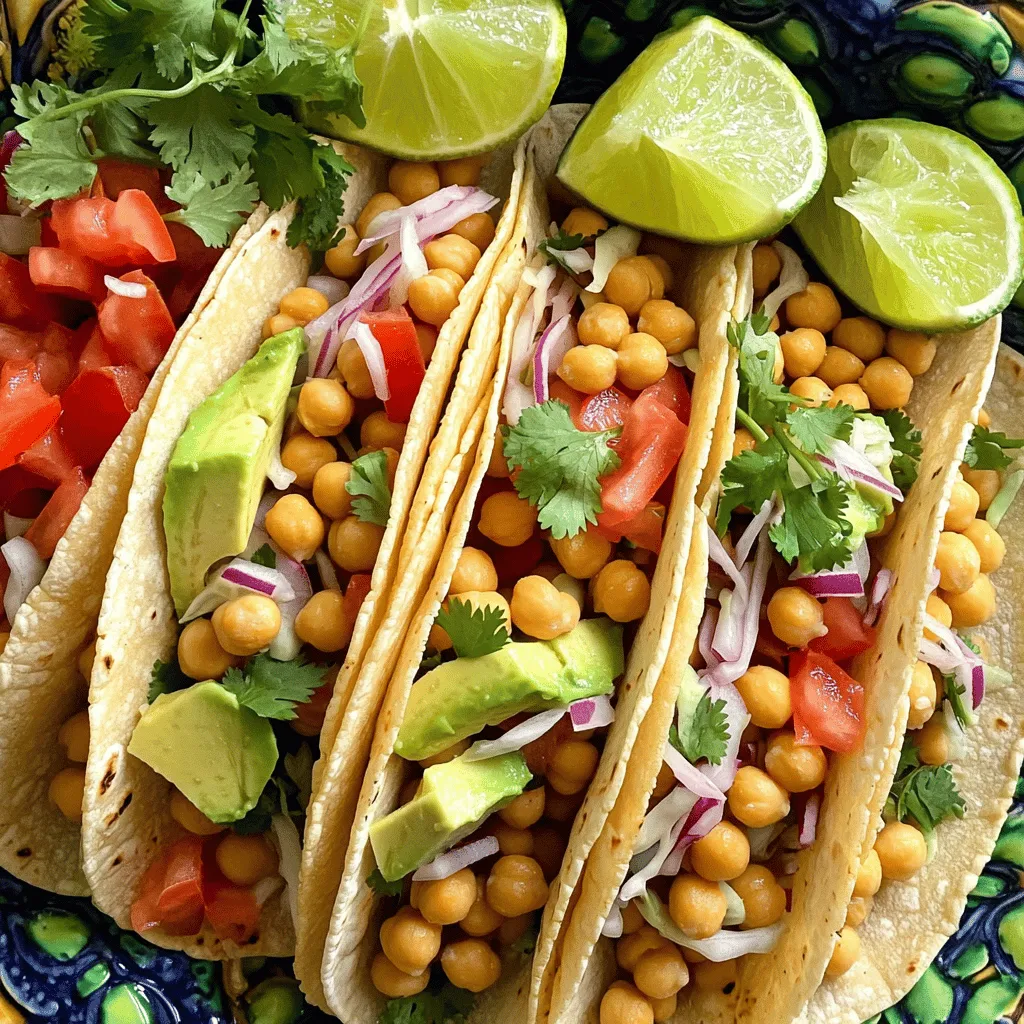
For the tacos, corn tortillas serve as the base. They hold the chickpeas and toppings well. Fresh cabbage adds a nice crunch. The tomatoes and red onions bring brightness. Soft avocado slices add creaminess. Garnish with cilantro and lime for zing. The mix of flavors and textures keeps it interesting.
Step-by-Step Instructions
Preparing the Chickpeas
- Preheat the oven to 400°F (200°C).
- In a bowl, mix chickpeas with olive oil and seasonings.
- Spread the chickpeas on a baking sheet in a single layer.
Roasting the Chickpeas
- Roast for 20-25 minutes, shaking the sheet halfway through.
- Look for a golden brown color and a crunchy texture.
Assembling the Tacos
- Warm the corn tortillas in a skillet over medium heat.
- Fill each tortilla with roasted chickpeas and your favorite toppings.
- Garnish with fresh cilantro and a squeeze of lime juice.Enjoy your crispy chickpea tacos!
Tips & Tricks
Achieving the Perfect Crisp
To get those chickpeas nice and crispy, shake the baking sheet halfway through roasting. This helps them cook evenly. Remember, don’t overcrowd the chickpeas on the baking sheet. If they are too close, they will steam instead of crisp. Give them space to roast.
Flavor Boost
Want to add more flavor? Try new spices like cayenne or onion powder. These spices can change the taste and make your tacos exciting. You can also drizzle your favorite sauce on top before serving. It adds a tasty kick and makes your tacos more fun to eat.

Variations
Different Proteins
You can switch chickpeas for other proteins. Black beans or lentils work well. They add different flavors and textures to your tacos. For a meat option, grilled chicken or shrimp makes a tasty choice. Just cook them until they are nice and golden. You can season these proteins just like chickpeas. Use the same spices for a delicious twist.
Vegetable Additions
Adding vegetables can enhance your tacos. Grilled bell peppers give a sweet taste. Roasted corn adds a nice crunch. You can also mix in jalapeños for some heat. This spice elevates your dish and excites your taste buds. Get creative with your veggie choices! Try different combinations based on what you like. Enjoy the flavors and make each taco unique.
Storage Info
Storing Leftovers
Store leftover crispy chickpeas in an airtight container at room temperature. This keeps them crunchy. For the assembled tacos, put them in the refrigerator. Consume them within a day to enjoy the best texture.
Reheating Instructions
To reheat chickpeas, use the oven at a low temperature. This helps retain crispiness. Warm tortillas briefly in a skillet before serving. This step adds softness and warmth, making your tacos even better.
FAQs
How do I make crispy chickpeas?
Follow the roasting technique outlined in the recipe for maximum crunch. First, preheat your oven to 400°F (200°C). Drain and rinse the chickpeas thoroughly, then mix them with olive oil and spices. Spread them evenly on a baking sheet, making sure not to overcrowd. Bake for 20-25 minutes, shaking the pan halfway through. This ensures every chickpea gets that perfect golden brown crunch.
Can I make these tacos vegan?
Yes, the recipe is naturally vegan as it contains no animal products. Chickpeas, spices, and veggies come together to create a tasty meal without any meat or dairy. The fresh ingredients make it nutritious and satisfying for everyone.
What toppings can I use for more flavor?
Consider adding salsa, sour cream, or hot sauce for extra flavor. You can also try sliced jalapeños for heat or add a dollop of guacamole for creaminess. Fresh herbs like cilantro or parsley can brighten up each bite. Let your taste buds guide your toppings!
How long do crispy chickpea tacos last?
They are best consumed fresh but can last 1-2 days if stored properly. Keep the chickpeas and tortillas separate to maintain crunchiness. Store leftover chickpeas in an airtight container at room temperature. Tacos can be wrapped in foil or placed in a fridge, but they may lose their crisp texture. Enjoy them fresh for the best experience!
This post shows you how to make tasty chickpea tacos. You learned the key ingredients, from chickpeas to toppings. I shared detailed steps for preparing, roasting, and assembling your tacos.
Remember, adding your favorite spices and trying different proteins can boost flavor. Enjoy this simple, healthy meal any night. These easy tacos will please your taste buds. Always store leftovers properly for the best taste. Enjoy your cooking!


![- 1 lb (450g) chicken breast, thinly sliced - 1 cup fresh Thai basil leaves, packed - 3 cloves garlic, minced - 2 red Thai chili peppers, thinly sliced (adjust based on your spice preference) For this dish, I prefer chicken breast. It cooks quickly and stays juicy. Fresh Thai basil gives this meal its unique flavor. Garlic adds a nice aroma, and Thai chili peppers bring heat. You can control the spice by adding more or less chili. - 2 tablespoons soy sauce - 1 tablespoon oyster sauce (or substitute with mushroom sauce for vegetarian) - 1 tablespoon fish sauce (or an extra tablespoon of soy sauce for vegetarian) - 1 teaspoon sugar (to balance flavors) - 1 tablespoon vegetable oil (for frying) These sauces are key to great taste. Soy sauce offers saltiness, while oyster and fish sauces add depth. Sugar balances the salty flavors, making everything taste better. - 1 bell pepper, sliced (your choice of color for visual appeal) - 1 small onion, sliced into thin wedges - Optional: other vegetables for added nutrition I like using bell pepper and onion for color and crunch. You can add other veggies like carrots or snap peas. They bring more nutrition and flavor, making the dish more vibrant. For the full recipe, refer to the [Full Recipe]. To start, you need to combine the chicken with the sauces. In a medium bowl, add the sliced chicken breast, soy sauce, oyster sauce, fish sauce, and sugar. Mix these ingredients well so the chicken gets all the flavor. Let it marinate for 15 minutes. This short time helps the chicken absorb the tasty sauces. Next, heat the vegetable oil in a large skillet or wok over medium-high heat. You want the oil to shimmer before adding anything. Then, add the minced garlic and sliced Thai chili peppers. Stir-fry them for about 30 seconds until they smell amazing. Be careful not to burn the garlic. Now, add the marinated chicken to the pan. Spread it out evenly for even cooking. Stir-fry for about 5 to 7 minutes. Cook until the chicken is no longer pink and has a nice brown color. After that, toss in the sliced bell pepper and onion. Stir-fry for another 3 to 4 minutes. This will make the vegetables tender but still crisp. Once the chicken and veggies are done, take the skillet off the heat. Gently fold in the fresh Thai basil leaves. They will wilt quickly from the heat and add a lovely aroma. Serve the dish hot, over a bed of fluffy jasmine rice. This rice complements the stir-fry well. Enjoy your Thai Basil Chicken Stir-Fry! For the full recipe, check out the details above. Using fresh ingredients makes a big difference. Fresh Thai basil gives a sweet and fragrant flavor to the dish. Always choose bright green basil leaves. They should smell strong and sweet. The chicken should be fresh, too. This keeps your stir-fry tasty and safe to eat. For the best flavor, cook on high heat. A hot pan helps to sear the chicken. This adds a nice caramel color and enhances the taste. When you add garlic and chili, cook them quickly. This brings out their strong flavors without burning them. You can change the heat level easily. If you want it milder, remove the seeds from the chili peppers. You can also use fewer peppers or substitute with sweet bell peppers. If you like a kick but want it less spicy, try adding sugar. It balances the heat. You can also use a bit of honey for sweetness without heat. Pair your Thai basil chicken stir-fry with jasmine rice. The rice absorbs the sauce well. You can also add a side of steamed veggies for extra nutrition. For garnishes, consider adding lime wedges or crushed peanuts. They add color and crunch. Fresh cilantro or extra basil leaves also make it pop. Enjoy your meal with these simple touches! For the full recipe, check out the details above. {{image_4}} For a vegetarian or vegan version, you can swap chicken for tofu or tempeh. These options give a nice texture. Use mushroom sauce instead of oyster sauce. It brings depth and umami flavor. For the fish sauce, simply add an extra tablespoon of soy sauce. This keeps the taste bold. To maintain flavor, marinate the tofu or tempeh just like chicken. Allow it to soak up the sauces. When cooking, make sure to press out excess moisture. This helps achieve that nice, crispy texture we all love. If you want to try something new, switch the chicken for shrimp or beef. Shrimp cooks quickly, so cut down the cooking time to about 3-4 minutes. Beef takes longer. Slice it thin and cook it for about 6-8 minutes. Remember, cooking times change based on what protein you use. Always make sure your protein is fully cooked before adding in the veggies. Want to shake things up? Add sauces like teriyaki or sriracha for an exciting twist. Teriyaki gives a sweet flavor, while sriracha adds heat. You can even mix both for a sweet and spicy kick. Feel free to experiment with herbs and spices too. Adding cilantro or mint can brighten the dish. Try a sprinkle of lime juice for an extra zest. These tiny changes can create a whole new taste experience. For the full recipe, check the section above. Enjoy cooking! To keep your Thai basil chicken stir-fry fresh, store it in an airtight container. Refrigerate the leftovers within two hours of cooking. If you want to save it longer, freeze the stir-fry. Make sure to cool it completely before freezing. This method helps retain flavor and texture. When you reheat your stir-fry, use a skillet for the best results. Heat it over medium warmth and stir often. This keeps the chicken juicy and prevents it from drying out. For rice, add a splash of water and cover it. This helps the rice steam and become fluffy again. In the fridge, your Thai basil chicken stir-fry lasts up to four days. If frozen, it can last for about three months. Always check for off smells or changes in color. If you see these, it's best to discard it for safety. Thai Basil Chicken Stir-Fry has roots in Thai street food. This dish reflects the vibrant flavors of Thai cuisine. It showcases fresh herbs, bold spices, and simple cooking techniques. Thai basil, known for its unique flavor, is key to this dish. It adds a sweet and slightly spicy note that enhances the chicken. This meal represents the balance of sweet, salty, and spicy tastes typical in Thai dishes. Each bite transports you to bustling markets in Thailand. Yes, you can prepare Thai basil chicken stir-fry in advance. Cook and store it in the fridge for up to three days. To keep it fresh, store it in an airtight container. When you are ready to eat, simply reheat it on the stove. This dish tastes even better the next day as flavors meld. Serve it over freshly cooked jasmine rice for a quick meal. If you cannot find Thai basil, you have options. Sweet basil or holy basil works well as a substitute. Sweet basil offers a milder flavor, while holy basil is spicier. You can also mix in a bit of mint for a fresh twist. While these substitutes change the taste slightly, they still create a tasty dish. Just remember, the flavor will differ from the original recipe. The spice level of Thai Basil Chicken Stir-Fry can vary. It depends on the number of Thai chili peppers you use. Typically, this dish has a mild to medium heat. If you prefer a milder dish, use fewer chilis or remove the seeds. For those who love heat, add extra chilis or a dash of hot sauce. Adjusting spice levels allows everyone to enjoy this flavorful meal. Thai Basil Chicken Stir-Fry is a simple yet flavorful dish. You learned about the key ingredients, like fresh basil and chicken. The step-by-step instructions make cooking easy, even for beginners. We explored tips to enhance flavor and adjust spice levels to suit your taste. You can even try fun variations with different proteins or herbs. Enjoy making it your own, and savor the fresh flavors. Every bite will bring joy to your table.](https://dishtreats.com/wp-content/uploads/2025/06/20a2f9de-1755-4b6a-ade1-393123d10e24-768x768.webp)
